Main Page
Difference between revisions of "Materials (NGS)"
Jump to navigation
Jump to search
MoonRunestar (talk | contribs) (Change rarity column text, add additional source for Scales) |
MoonRunestar (talk | contribs) (→Exchange Materials: Add giga) |
||
| (44 intermediate revisions by 2 users not shown) | |||
| Line 26: | Line 26: | ||
|Acquired by leveling a class above the current level cap<br>[[Mission Pass (NGS)|Mission Pass Reward]] | |Acquired by leveling a class above the current level cap<br>[[Mission Pass (NGS)|Mission Pass Reward]] | ||
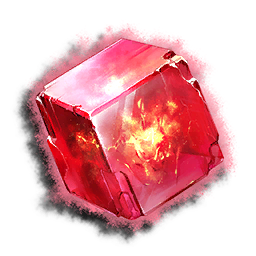
|A special crystal given to those who seek strength. Can be traded for items at specific locations. | |A special crystal given to those who seek strength. Can be traded for items at specific locations. | ||
| + | |- | ||
| + | | align="center" |{{RarityNGS|4}} | ||
| + | | align="center" |{{icons|NGS Tool}} | ||
| + | | align="center" |[[File:NGSUIItemNClassEXCube.png|64px|link=Special:FilePath/NGSUIItemNClassEXCube.png]] | ||
| + | |N-{{#simple-tooltip: Class | Hu / Ra / Fo / Fi / Gu / Te / Br / Bo / Wa }} Excube | ||
| + | |10 are acquired by leveling a class above the current level cap<br>[[Advanced_Trainia_(NGS)|Advanced Trainia Quests]]<br>[[Titles_(NGS)/Player_Titles|Player Title Rewards]] | ||
| + | |A special crystal given to {{#simple-tooltip: classes | Hunters / Rangers / Forces / Fighters / Gunners / Techters / Bravers / Bouncers / Wakers }} who seek strength. Used at Class Counters to create Add-On Skills. | ||
|- | |- | ||
| align="center" |{{RarityNGS|3}} | | align="center" |{{RarityNGS|3}} | ||
| Line 32: | Line 39: | ||
|Stragment A | |Stragment A | ||
|Mt. Magnus (Rank 3)<br>Rarely at Vanford Laboratory Ruins (Rank 3) & Resol Forest (Rank 2)<br>[[Emergency_Quests_(NGS)#Subdue_the_Overseer-type_DOLL_.28.E7.B5.B1.E5.88.B6.E5.9E.8B.E3.83.89.E3.83.BC.E3.83.AB.E3.82.BA.E8.A8.8E.E4.BC.90.E6.88.A6.29|Subdue the Overseer-type DOLL]] | |Mt. Magnus (Rank 3)<br>Rarely at Vanford Laboratory Ruins (Rank 3) & Resol Forest (Rank 2)<br>[[Emergency_Quests_(NGS)#Subdue_the_Overseer-type_DOLL_.28.E7.B5.B1.E5.88.B6.E5.9E.8B.E3.83.89.E3.83.BC.E3.83.AB.E3.82.BA.E8.A8.8E.E4.BC.90.E6.88.A6.29|Subdue the Overseer-type DOLL]] | ||
| − | |A fragment of composite plating found in Combat Areas. | + | |A fragment of composite plating found in Combat Areas. Can be refined into an Arms Refiner. |
|- | |- | ||
| align="center" |{{RarityNGS|3}} | | align="center" |{{RarityNGS|3}} | ||
| Line 39: | Line 46: | ||
|Stragment B | |Stragment B | ||
|Vanford Laboratory Ruins (Rank 3)<br>Rarely at Mt. Magnus (Rank 3) & Resol Forest (Rank 2)<br>[[Emergency_Quests_(NGS)#Nex_Vera_Subjugation|Nex Vera Subjugation]] | |Vanford Laboratory Ruins (Rank 3)<br>Rarely at Mt. Magnus (Rank 3) & Resol Forest (Rank 2)<br>[[Emergency_Quests_(NGS)#Nex_Vera_Subjugation|Nex Vera Subjugation]] | ||
| − | |A fragment of composite plating found in Combat Areas. | + | |A fragment of composite plating found in Combat Areas. Can be refined into an Arms Refiner. |
|- | |- | ||
| align="center" |{{RarityNGS|3}} | | align="center" |{{RarityNGS|3}} | ||
| Line 46: | Line 53: | ||
|Stragment C | |Stragment C | ||
|Resol Forest (Rank 2)<br>Rarely at Mt. Magnus (Rank 3) & Vanford Laboratory Ruins (Rank 3)<br>[[Emergency_Quests_(NGS)#Mining_Rig_Defense:_Aelio|Mining Rig Defense: Aelio]] | |Resol Forest (Rank 2)<br>Rarely at Mt. Magnus (Rank 3) & Vanford Laboratory Ruins (Rank 3)<br>[[Emergency_Quests_(NGS)#Mining_Rig_Defense:_Aelio|Mining Rig Defense: Aelio]] | ||
| − | |A fragment of composite plating found in Combat Areas. | + | |A fragment of composite plating found in Combat Areas. Can be refined into an Arms Refiner. |
|- | |- | ||
| align="center" |{{RarityNGS|4}} | | align="center" |{{RarityNGS|4}} | ||
| Line 52: | Line 59: | ||
| align="center" |[[File:NGSUIItemArmsRefiner.png|64px|link=Special:FilePath/NGSUIItemArmsRefiner.png]] | | align="center" |[[File:NGSUIItemArmsRefiner.png|64px|link=Special:FilePath/NGSUIItemArmsRefiner.png]] | ||
|Arms Refiner | |Arms Refiner | ||
| − | |Rarely from Mt. Magnus (Rank 3), Vanford Laboratory Ruins (Rank 3) | + | |[[Item Lab (NGS)#Other Material Exchange|Other Material Exchange]]<br>Rarely from Mt. Magnus (Rank 3), Vanford Laboratory Ruins (Rank 3), Resol Forest (Rank 2)<br>Rarely from [[Emergency Quests (NGS)#Dark Falz Interception Battle|Dark Falz Interception Battle]] |
| − | |A material | + | |A material created by refining Stragments. Can be used to break item limits at the Item Lab. |
| + | |- | ||
| + | | align="center" |{{RarityNGS|5}} | ||
| + | | align="center" |{{icons|NGS Tool}} | ||
| + | | align="center" |[[File:NGSUIItemArmsRefiner2.png|64px|link=Special:FilePath/NGSUIItemArmsRefiner2.png]] | ||
| + | |Arms Refiner II | ||
| + | |[[Item Lab (NGS)#Other Material Exchange|Other Material Exchange]]<br>Very Rarely from Neusen Plant<br> | ||
| + | |Material obtained in the Combat Sectors & elsewhere. Can be used for advanced limit breaking. | ||
| + | |- | ||
| + | | align="center" |{{RarityNGS|5}} | ||
| + | | align="center" |{{icons|NGS Tool}} | ||
| + | | align="center" |[[File:NGSUIItemAegisIntegra.png|64px|link=Special:FilePath/NGSUIItemAegisIntegra.png]] | ||
| + | |Aegis Integra | ||
| + | |[[Exchange_Shop_(NGS)#Aegis_Integra_Exchange_Shop|Aegis Integra Exchange Shop]]<br>Not Obtainable until 2023-02-01 | ||
| + | |A keystone component of Dark Falz Aegis. Can be used to exchange at the "Aegis Integra Exchange Shop". | ||
|- | |- | ||
|} | |} | ||
=== Battle Triggers === | === Battle Triggers === | ||
| + | ====Battledia==== | ||
{| class="wikitable sortable mw-collapsible table-bordered table-responsive-md" style="text-align:left; width:100%;" | {| class="wikitable sortable mw-collapsible table-bordered table-responsive-md" style="text-align:left; width:100%;" | ||
! align="center" style="width: 30px;"|★ | ! align="center" style="width: 30px;"|★ | ||
| Line 66: | Line 88: | ||
! |Notes | ! |Notes | ||
|- | |- | ||
| − | | align="center" |{{RarityNGS| | + | | align="center" |{{RarityNGS|4}} |
| + | | align="center" |{{icons|NGS Tool}} | ||
| + | | align="center" |[[File:NGSUIItemBTriggerYellow.png|64px|link=]] | ||
| + | |B. Trigger/Common Yellow | ||
| + | |Rare drop from Enemies<br>[[Mission_Pass_(NGS)|Mission Pass Reward]]<br>[[Exchange_Shop_(NGS)|Exchange Shop]] | ||
| + | |A Trigger used in the Battledia. Consumed upon clearing the quest. | ||
| + | |- | ||
| + | | align="center" |{{RarityNGS|4}} | ||
| + | | align="center" |{{icons|NGS Tool}} | ||
| + | | align="center" |[[File:NGSUIItemBTriggerPurple.png|64px|link=]] | ||
| + | |B-Trigger/Common Purple | ||
| + | |Rare drop from Enemies<br>[[Exchange_Shop_(NGS)|Exchange Shop]] | ||
| + | |A Trigger used in the Battledia. Consumed upon clearing the quest. | ||
| + | |- | ||
| + | |} | ||
| + | |||
| + | =====Discontinuted===== | ||
| + | {| class="wikitable sortable mw-collapsible table-bordered table-responsive-md" style="text-align:left; width:100%;" | ||
| + | ! align="center" style="width: 30px;"|★ | ||
| + | ! | Icon | ||
| + | ! | Image | ||
| + | ! |Name | ||
| + | ! |Obtainment | ||
| + | ! |Notes | ||
| + | |- | ||
| + | | align="center" |{{RarityNGS|4}} | ||
| align="center" |{{icons|NGS Tool}} | | align="center" |{{icons|NGS Tool}} | ||
| align="center" |[[File:NGSUIItemBTriggerYellow.png|64px|link=]] | | align="center" |[[File:NGSUIItemBTriggerYellow.png|64px|link=]] | ||
|B. Trigger/Aelio Yellow | |B. Trigger/Aelio Yellow | ||
| − | | | + | |No longer obtainable, used for exchange for B. Trigger/Common Yellow |
|A Trigger used in the Battledia. Consumed upon clearing: "Aelio Troopers". | |A Trigger used in the Battledia. Consumed upon clearing: "Aelio Troopers". | ||
|- | |- | ||
| − | | align="center" |{{RarityNGS| | + | | align="center" |{{RarityNGS|4}} |
| align="center" |{{icons|NGS Tool}} | | align="center" |{{icons|NGS Tool}} | ||
| align="center" |[[File:NGSUIItemBTriggerYellow.png|64px|link=]] | | align="center" |[[File:NGSUIItemBTriggerYellow.png|64px|link=]] | ||
|B. Trigger/Retem Yellow | |B. Trigger/Retem Yellow | ||
| − | | | + | |No longer obtainable, used to exchange for B. Trigger/Common Yellow |
|A Trigger used in the Battledia. Consumed upon clearing: "Retem Troopers". | |A Trigger used in the Battledia. Consumed upon clearing: "Retem Troopers". | ||
|- | |- | ||
| − | | align="center" |{{RarityNGS| | + | | align="center" |{{RarityNGS|4}} |
| align="center" |{{icons|NGS Tool}} | | align="center" |{{icons|NGS Tool}} | ||
| align="center" |[[File:NGSUIItemBTriggerPurple.png|64px|link=]] | | align="center" |[[File:NGSUIItemBTriggerPurple.png|64px|link=]] | ||
|B-Trigger/Aelio Purple | |B-Trigger/Aelio Purple | ||
| − | | | + | |No longer obtainable, used to exchange for B. Trigger/Common Purple |
|A Trigger used in the Battledia. Consumed upon clearing: "Aelio Devastators". | |A Trigger used in the Battledia. Consumed upon clearing: "Aelio Devastators". | ||
|- | |- | ||
| − | | align="center" |{{RarityNGS| | + | | align="center" |{{RarityNGS|4}} |
| align="center" |{{icons|NGS Tool}} | | align="center" |{{icons|NGS Tool}} | ||
| align="center" |[[File:NGSUIItemBTriggerPurple.png|64px|link=]] | | align="center" |[[File:NGSUIItemBTriggerPurple.png|64px|link=]] | ||
|B-Trigger/Retem Purple | |B-Trigger/Retem Purple | ||
| − | | | + | |No longer obtainable, used to exchange for B. Trigger/Common Purple |
| A Trigger used in the Battledia. Consumed upon clearing: "Retem Devastators". | | A Trigger used in the Battledia. Consumed upon clearing: "Retem Devastators". | ||
| + | |- | ||
| + | |} | ||
| + | |||
| + | ==== Variable Battle Triggers ==== | ||
| + | {| class="wikitable sortable mw-collapsible table-bordered table-responsive-md" style="text-align:left; width:100%;" | ||
| + | ! align="center" style="width: 30px;"|★ | ||
| + | ! | Icon | ||
| + | ! | Image | ||
| + | ! |Name | ||
| + | ! |Obtainment | ||
| + | ! |Notes | ||
| + | |- | ||
| + | | align="center" |{{RarityNGS|3}} | ||
| + | | align="center" |{{icons|NGS Tool}} | ||
| + | | align="center" |[[File:NGSUIItemBTriggerBlue.png|64px|link=]] | ||
| + | |B. Trigger/Spring '22 | ||
| + | |Rare drop from Seasonal Enemies (Spring '22 Event)<br>Seasonal Point Exchange Shop (Spring '22 Event) | ||
| + | |? | ||
|- | |- | ||
|} | |} | ||
| Line 104: | Line 169: | ||
! |Obtainment | ! |Obtainment | ||
! |Notes | ! |Notes | ||
| + | |- | ||
| + | | align="center" |{{RarityNGS|4}} | ||
| + | | align="center" |{{icons|NGS Tool}} | ||
| + | | align="center" |[[File:NGSUIItemNRecycleBadge.png|64px|link=Special:FilePath/NGSUIItemNRecycleBadge.png]] | ||
| + | |N-Recycle Badge | ||
| + | |[[Exchange_Shop_(NGS)|Exchange Shop]] | ||
| + | |An item that can be treated as an AC Scratch item when making trades at the Recycle Shop. | ||
| + | |- | ||
| + | | align="center" |{{RarityNGS|4}} | ||
| + | | align="center" |{{icons|NGS Tool}} | ||
| + | | align="center" |[[File:NGSUIItemNSGRecycleBadge.png|64px|link=Special:FilePath/NGSUIItemNSGRecycleBadge.png]] | ||
| + | |N-SG Recycle Badge | ||
| + | |[[Exchange_Shop_(NGS)|Exchange Shop]] | ||
| + | |An item that can be treated as an SG Scratch item when making trades at the Recycle Shop. | ||
| + | |- | ||
| + | | align="center" |{{RarityNGS|4}} | ||
| + | | align="center" |{{icons|NGS Tool}} | ||
| + | | align="center" |[[File:NGSUIItemNMissionBadge.png|64px|link=Special:FilePath/NGSUIItemNMissionBadge.png]] | ||
| + | |N-Mission Badge | ||
| + | |[[Mission_Pass_(NGS)|Mission Pass (NGS)]] | ||
| + | |An Item that can be exchanged in the Recycle Shop. | ||
| + | |- | ||
| + | | align="center" |{{RarityNGS|4}} | ||
| + | | align="center" |{{icons|NGS Tool}} | ||
| + | | align="center" |[[File:NGSUIItemTeamBadge.png|64px|link=Special:FilePath/NGSUIItemTeamBadge.png]] | ||
| + | |Team Badge | ||
| + | |[[Tasks_(NGS)#Team Tasks|Team Tasks]] | ||
| + | |A badge awarded to those who contribute to their Team. Can be exchanged at certain vendors. | ||
| + | |- | ||
| + | | align="center" |{{RarityNGS|4}} | ||
| + | | align="center" |{{icons|NGS Tool}} | ||
| + | | align="center" |[[File:NGSUIItemARKSRecordBadge.png|64px|link=Special:FilePath/NGSUIItemARKSRecordBadge.png]] | ||
| + | |ARKS Record Badge | ||
| + | |[[ARKS Records#At-Random Event Records|At-Random Event Records]] | ||
| + | |Badge given to accomplished ARKS. Exchanged at an Item Trader's "ARKS Record Badge Exchange". | ||
|- | |- | ||
| align="center" |{{RarityNGS|5}} | | align="center" |{{RarityNGS|5}} | ||
| Line 111: | Line 211: | ||
|New Genesis Starter Package | |New Genesis Starter Package | ||
|A badge engraved with the emblem of Aelio. Can be traded for items at specific locations. | |A badge engraved with the emblem of Aelio. Can be traded for items at specific locations. | ||
| + | |} | ||
| + | |||
| + | ===Tickets=== | ||
| + | {| class="wikitable sortable mw-collapsible table-bordered table-responsive-md" style="text-align:left; width:100%;" | ||
| + | ! align="center" style="width: 30px;"|★ | ||
| + | ! align="center" style="width: 30px;"|Icon | ||
| + | ! style="width: 64px;"|Image | ||
| + | ! |Name | ||
| + | ! |Obtainment | ||
| + | ! |Notes | ||
| + | |- | ||
| + | | align="center" |{{RarityNGS|5}} | ||
| + | | align="center" |{{icons|NGS Tool}} | ||
| + | | align="center" |[[File:NGSUIItemExpeditionSpecialTicket.png|64px|link=Special:FilePath/NGSUIItemExpeditionSpecialTicket.png]] | ||
| + | |Kvaris Expedition Special Ticket | ||
| + | |Limited-Time Tasks (April 6th, 2022 to June 7th, 2022) | ||
| + | |Insignia given to accomplished ARKS. Can be exchanged for things like a 6-star weapon at Item Traders. | ||
| + | |- | ||
| + | | align="center" |{{RarityNGS|6}} | ||
| + | | align="center" |{{icons|NGS Tool}} | ||
| + | | align="center" |[[File:NGSUIItemStiaExpeditionSpecialTicket.png|64px|link=Special:FilePath/NGSUIItemStiaExpeditionSpecialTicket.png]] | ||
| + | |Stia Expedition Special Ticket | ||
| + | |Limited-Time Tasks (October 26th, 2022 to December 7th, 2022) | ||
| + | |Insignia given to accomplished ARKS. Can be exchanged for things like 8-star weapons at Item Traders. | ||
| + | |- | ||
| + | | align="center" |{{RarityNGS|6}} | ||
| + | | align="center" |{{icons|NGS Tool}} | ||
| + | | align="center" |[[File:NGSUIItem_Slayer_Preparation_Special_Emblem.png|64px|link=Special:FilePath/NGSUIItem_Slayer_Preparation_Special_Emblem.png]] | ||
| + | |Slayer Preparation Special Emblem | ||
| + | |Limited-Time Tasks (March 1st, 2023 to April 5th, 2023) | ||
| + | |Insignia given to accomplished ARKS.\nCan be traded for ★8 items in a future update. | ||
| + | |- | ||
| + | | align="center" |{{RarityNGS|5}} | ||
| + | | align="center" |{{icons|NGS Tool}} | ||
| + | | align="center" |[[File:NGSUIItemPassTicket.png|64px|link=Special:FilePath/File:NGSUIItemPassTicket.png]] | ||
| + | |[NGS] First Anniv. Exchange Ticket | ||
| + | |First Anniversary Event tasks | ||
| + | |During the corresponding event, this ticket can be given to Xitrae in exchange for various items. | ||
| + | |} | ||
| + | |||
| + | ===Exchange Materials=== | ||
| + | {| class="wikitable sortable mw-collapsible table-bordered table-responsive-md" style="text-align:left; width:100%;" | ||
| + | ! align="center" style="width: 30px;"|★ | ||
| + | ! align="center" style="width: 30px;"|Icon | ||
| + | ! style="width: 64px;"|Image | ||
| + | ! |Name | ||
| + | ! |Obtainment | ||
| + | ! |Notes | ||
| + | |- | ||
| + | | align="center" |{{RarityNGS|4}} | ||
| + | | align="center" |{{icons|NGS Tool}} | ||
| + | | align="center" |[[File:NGSUIItemIcicleCube.png|64px|link=Special:FilePath/NGSUIItemIcicleCube.png]] | ||
| + | |Icicle Cube | ||
| + | |Ancient Enemies<br>[[Emergency_Quests_(NGS)#Mining_Rig_Defense:_Kvaris|Mining Rig Defense: Kvaris]]<br>[[Ronaldine_(NGS)|Successive Training: Kvaris 3-III]] | ||
| + | |A form of condensed energy from Ancient Enemies in Kvaris. Used for trading with Leso at Kvaris Camp. | ||
| + | |- | ||
| + | | align="center" |{{RarityNGS|3}} | ||
| + | | align="center" |{{icons|NGS Tool}} | ||
| + | | align="center" |[[File:NGSUIItemIcicleOrb.png|64px|link=Special:FilePath/NGSUIItemIcicleOrb.png]] | ||
| + | |Icicle Orb | ||
| + | |Trials in Kvaris<br>Frozen Containers<br>[[Emergency_Quests_(NGS)#Mining_Rig_Defense:_Kvaris|Mining Rig Defense: Kvaris]] | ||
| + | |A form of condensed energy found all over the Kvaris region. Used for trading with Leso at Kvaris Camp. | ||
| + | |- | ||
| + | | align="center" |{{RarityNGS|3}} | ||
| + | | align="center" |{{icons|NGS Tool}} | ||
| + | | align="center" |[[File:NGSUIItemGigaStragment.png|64px|link=Special:FilePath/NGSUIItemGigaStragment.png]] | ||
| + | |Giga Stragment | ||
| + | |[[Enemies_(NGS)#Gigantix|Gigantix Enemies]] (Lv. 79+) | ||
| + | |ギガンティクスなどの複合装甲の一部。アイテムトレーダーの“ギガストラグメント交換”でアイテムと交換できる。 | ||
|} | |} | ||
| Line 134: | Line 303: | ||
| align="center" |[[File:NGSUIItemAlphaReactor.png|64px|link=Special:FilePath/NGSUIItemAlphaReactor.png]] | | align="center" |[[File:NGSUIItemAlphaReactor.png|64px|link=Special:FilePath/NGSUIItemAlphaReactor.png]] | ||
|Alpha Reactor | |Alpha Reactor | ||
| − | | | + | |14 are found across Aelio<br>Rare drop from Gold Containers<br>[[Mission Pass (NGS)|Mission Pass Reward]] |
|A power core from some kind of machine. Can be sold for a high price. (3,500 Meseta) | |A power core from some kind of machine. Can be sold for a high price. (3,500 Meseta) | ||
| + | |- | ||
| + | | align="center" |{{RarityNGS|4}} | ||
| + | | align="center" |{{icons|NGS Tool}} | ||
| + | | align="center" |[[File:NGSUIItemBetaReactor.png|64px|link=Special:FilePath/NGSUIItemBetaReactor.png]] | ||
| + | |Beta Reactor | ||
| + | |ARKS Record - Team Task Records | ||
| + | |A power core from some kind of machine. Can be sold for a high price. (100,000 Meseta) | ||
|- | |- | ||
| align="center" |{{RarityNGS|3}} | | align="center" |{{RarityNGS|3}} | ||
| Line 141: | Line 317: | ||
| align="center" |[[File:NGSUIItemStellarSeed.png|64px|link=Special:FilePath/NGSUIItemStellarSeed.png]] | | align="center" |[[File:NGSUIItemStellarSeed.png|64px|link=Special:FilePath/NGSUIItemStellarSeed.png]] | ||
| Stellar Seed | | Stellar Seed | ||
| − | | Western Retem - "Mt. Sagaan Road: East" Ryuker Device | + | | 10 found at Western Retem - "Mt. Sagaan Road: East" Ryuker Device |
|A stone said to have appeared during a meteor shower. Can be sold for a high price. (2,000 Meseta) | |A stone said to have appeared during a meteor shower. Can be sold for a high price. (2,000 Meseta) | ||
| + | |- | ||
| + | | align="center" |{{RarityNGS|3}} | ||
| + | | align="center" |{{icons|NGS Tool}} | ||
| + | | align="center" |[[File:NGSUIItemSnowks.png|64px|link=Special:FilePath/NGSUIItemSnowks.png]] | ||
| + | | Snowks | ||
| + | | 10 found at Central Kvaris - "Mistra Forest: North" Ryuker Device | ||
| + | |A stone that has been polished by ice and snow. Can be sold for a high price at a vendor. (3,500 Meseta) | ||
|- | |- | ||
|} | |} | ||
| − | ====Ores==== | + | ====Minerals/Ores==== |
{| class="wikitable sortable mw-collapsible table-bordered table-responsive-md" style="text-align:left; width:100%;" | {| class="wikitable sortable mw-collapsible table-bordered table-responsive-md" style="text-align:left; width:100%;" | ||
! align="center" style="width: 30px;"|★ | ! align="center" style="width: 30px;"|★ | ||
| Line 159: | Line 342: | ||
| align="center" |[[File:NGSUIItemMonotite.png|64px|link=Special:FilePath/NGSUIItemMonotite.png]] | | align="center" |[[File:NGSUIItemMonotite.png|64px|link=Special:FilePath/NGSUIItemMonotite.png]] | ||
|Monotite | |Monotite | ||
| − | |Found in Central Aelio, Western Retem | + | |Found in Central Aelio, Western Retem, Central Retem, Central Kvaris and Northern Kvaris<br>[[Trials_(NGS)|Stellar Pack Trials]]<br>[[Exchange_Shop_(NGS)|Exchange Shop]]<br>[[Item Lab (NGS)#Other Material Exchange|Other Material Exchange]]<br>[[Mission_Pass_(NGS)|Mission Pass Reward]] |
|Ore found in rocks all over the world. Used to unlock Potentials and Limit Break items at the Item Lab. | |Ore found in rocks all over the world. Used to unlock Potentials and Limit Break items at the Item Lab. | ||
|- | |- | ||
| Line 166: | Line 349: | ||
| align="center" |[[File:NGSUIItemDualomite.png|64px|link=Special:FilePath/NGSUIItemDualomite.png]] | | align="center" |[[File:NGSUIItemDualomite.png|64px|link=Special:FilePath/NGSUIItemDualomite.png]] | ||
|Dualomite | |Dualomite | ||
| − | |Found in Southern Aelio, Western Aelio, Central Retem and | + | |Found in Southern Aelio, Western Aelio, Central Retem, Southern Retemm, Southern Kvaris, Stia: Fringes and Outer Mediola: Sector 2<br>[[Trials_(NGS)|Stellar Pack Trials]]<br>[[Exchange_Shop_(NGS)|Exchange Shop]]<br>[[Item Lab (NGS)#Other Material Exchange|Other Material Exchange]]<br>[[Mission_Pass_(NGS)|Mission Pass Reward]] |
|Ore found in rocks all over the world. Used to unlock Potentials and Limit Break items at the Item Lab. | |Ore found in rocks all over the world. Used to unlock Potentials and Limit Break items at the Item Lab. | ||
|- | |- | ||
| Line 173: | Line 356: | ||
| align="center" |[[File:NGSUIItemTrinite.png|64px|link=Special:FilePath/NGSUIItemTrinite.png]] | | align="center" |[[File:NGSUIItemTrinite.png|64px|link=Special:FilePath/NGSUIItemTrinite.png]] | ||
|Trinite | |Trinite | ||
| − | |Found in North Aelio, Western Aelio, Central Retem | + | |Found in North Aelio, Western Aelio, Central Retem, Southern Retem, Western Kvaris, Northern Kvaris, <br>[[Trials_(NGS)|Stellar Pack Trials]]<br>[[Exchange_Shop_(NGS)|Exchange Shop]]<br>[[Item Lab (NGS)#Other Material Exchange|Other Material Exchange]]<br>[[Mission_Pass_(NGS)|Mission Pass Reward]] |
|Ore found in rocks all over the world. Used to unlock Potentials and Limit Break items at the Item Lab. | |Ore found in rocks all over the world. Used to unlock Potentials and Limit Break items at the Item Lab. | ||
|- | |- | ||
| Line 180: | Line 363: | ||
| align="center" |[[File:NGSUIItemTetracite.png|64px|link=Special:FilePath/NGSUIItemTetracite.png]] | | align="center" |[[File:NGSUIItemTetracite.png|64px|link=Special:FilePath/NGSUIItemTetracite.png]] | ||
|Tetracite | |Tetracite | ||
| − | |Found in Western Retem, Northern Retem, | + | |Found in Western Retem, Northern Retem, Luf Maqaad, Southern Kvaris, Central Kvaris and Outer Mediola: Sector 2<br>[[Trials_(NGS)|Stellar Pack Trials]]<br>[[Exchange_Shop_(NGS)|Exchange Shop]]<br>[[Item Lab (NGS)#Other Material Exchange|Other Material Exchange]] |
|Ore found in rocks all over the world. Used to unlock Potentials at the Item Lab. | |Ore found in rocks all over the world. Used to unlock Potentials at the Item Lab. | ||
| + | |- | ||
| + | | align="center" |{{RarityNGS|3}} | ||
| + | | align="center" |{{icons|NGS Mineral}} | ||
| + | | align="center" |[[File:NGSUIItemPentrite.png|64px|link=Special:FilePath/NGSUIItemPentrite.png]] | ||
| + | |Pentrite | ||
| + | |Found in Western Kvaris and Stia: Fringes<br>[[Trials_(NGS)|Stellar Pack Trials]]<br>[[Exchange_Shop_(NGS)|Exchange Shop]]<br>[[Item Lab (NGS)#Other Material Exchange|Other Material Exchange]] | ||
| + | |Ore found in rocks all over the world. Used to unlock Potentials and Limit Break items at the Item Lab. | ||
| + | |- | ||
| + | | align="center" |{{RarityNGS|3}} | ||
| + | | align="center" |{{icons|NGS Mineral}} | ||
| + | | align="center" |[[File:NGSUIItemHexakite.png|64px|link=Special:FilePath/NGSUIItemHexakite.png]] | ||
| + | |Hexakite | ||
| + | |Found in Outer Mediola: Sector 2 and Outer Mediola: Sector 1<br>[[Trials_(NGS)|Stellar Pack Trials]]<br>[[Exchange_Shop_(NGS)|Exchange Shop]]<br>[[Item Lab (NGS)#Other Material Exchange|Other Material Exchange]] | ||
| + | |Ore found in rocks all over the world. Used to unlock Potentials and Limit Break items at the Item Lab. | ||
| + | |- | ||
| + | | align="center" |{{RarityNGS|3}} | ||
| + | | align="center" |{{icons|NGS Mineral}} | ||
| + | | align="center" |[[File:NGSUIItemBlizzardium.png|64px|link=Special:FilePath/NGSUIItemBlizzardium.png]] | ||
| + | |Blizzardium | ||
| + | |Peak of Mt. Ihana (Western Kvaris) during snowy weather<br>[[Item_Exchange:_Kvaris_(NGS)|Item Exchange: Kvaris]] | ||
| + | |Rare ore found in the rocky regions of Kvaris. Can be traded for materials at the Item Lab. | ||
| + | |- | ||
| + | | align="center" |{{RarityNGS|3}} | ||
| + | | align="center" |{{icons|NGS Mineral}} | ||
| + | | align="center" |[[File:NGSUIItemInferium.png|64px|link=Special:FilePath/NGSUIItemInferium.png]] | ||
| + | |Inferium | ||
| + | |Outer Mediola: Sector 1 during Heat Wave, Hellfire or Pheonix weather weather<br>[[Item_Exchange:_Stia_(NGS)|Item Exchange: Stia]] | ||
| + | |Rare ore found in the rocky regions of Stia. Can be traded for materials at the Item Lab. | ||
|- | |- | ||
| align="center" |{{RarityNGS|2}} | | align="center" |{{RarityNGS|2}} | ||
| Line 194: | Line 405: | ||
| align="center" |[[File:NGSUIItemPhotonQuartz.png|64px|link=Special:FilePath/NGSUIItemPhotonQuartz.png]] | | align="center" |[[File:NGSUIItemPhotonQuartz.png|64px|link=Special:FilePath/NGSUIItemPhotonQuartz.png]] | ||
|Photon Quartz | |Photon Quartz | ||
| − | |Found in Central Aelio, Northern Aelio, Southern Aelio, Western Retem and Luf Maqaad<br>Found in Gold Containers | + | |Found in Central Aelio, Northern Aelio, Southern Aelio, Western Retem and Luf Maqaad<br>Found in Gold Containers<br>[[Mission_Pass_(NGS)|Mission Pass Reward]] |
| − | [[Mission_Pass_(NGS)|Mission Pass Reward]] | ||
|Ore found in rocks all over the world. Used to create Multi-Weapons at the Item Lab. | |Ore found in rocks all over the world. Used to create Multi-Weapons at the Item Lab. | ||
| + | |- | ||
| + | | align="center" |{{RarityNGS|5}} | ||
| + | | align="center" |{{icons|NGS Mineral}} | ||
| + | | align="center" |[[File:NGSUIItemPhotonChunk2A.png|64px|link=Special:FilePath/NGSUIItemPhotonChunk2A.png]] | ||
| + | |Photon Chunk II A | ||
| + | |[[Happy_Rappy_Operation_(NGS)|Happy Rappy Operation]]<br>Pedas Vera (Lv. 61+)<br>Nex Vera (Lv. 61+)<br>Rarely from Snaedal Vera (Lv. 61+)<br>Rarely from Lenus Vera (Lv. 61+) | ||
| + | |Rare ore used to unlock advanced Potential Abilities in Item Lab. Not found in normal rock formations. | ||
| + | |- | ||
| + | | align="center" |{{RarityNGS|5}} | ||
| + | | align="center" |{{icons|NGS Mineral}} | ||
| + | | align="center" |[[File:NGSUIItemPhotonChunk2B.png|64px|link=Special:FilePath/NGSUIItemPhotonChunk2B.png]] | ||
| + | |Photon Chunk II B | ||
| + | |[[Happy_Rappy_Operation_(NGS)|Happy Rappy Operation]]<br>Snaedal Vera (Lv. 61+)<br>Lenus Vera (Lv. 61+)<br>Rarely from Pedas Vera (Lv. 61+)<br>Rarely from Nex Vera (Lv. 61+) | ||
| + | |Rare ore used to unlock advanced Potential Abilities in Item Lab. Not found in normal rock formations. | ||
|- | |- | ||
| align="center" |{{RarityNGS|3}} | | align="center" |{{RarityNGS|3}} | ||
| Line 202: | Line 426: | ||
| align="center" |[[File:NGSUIItemPhotonScale.png|64px|link=Special:FilePath/NGSUIItemPhotonScale.png]] | | align="center" |[[File:NGSUIItemPhotonScale.png|64px|link=Special:FilePath/NGSUIItemPhotonScale.png]] | ||
|Photon Scale | |Photon Scale | ||
| − | |Found in Southern Retem<br>[[Emergency_Quests_(NGS)| | + | |Found in Southern Retem<br>[[Emergency_Quests_(NGS)|Emergency Quests (Rank 2)]] |
|Ore found in rocks all over the world. Used in Capsule exchange at the Item Lab. | |Ore found in rocks all over the world. Used in Capsule exchange at the Item Lab. | ||
| + | |- | ||
| + | | align="center" |{{RarityNGS|3}} | ||
| + | | align="center" |{{icons|NGS Mineral}} | ||
| + | | align="center" |[[File:NGSUIItemGreenillcite.png|64px|link=Special:FilePath/NGSUIItemGreenillcite.png]] | ||
| + | |Greenillcite | ||
| + | |During Autumn Event '22:<br>Exploration Sections<br>Stellar Gift Trials<br>Randomite | ||
| + | |Special ore obtainable by Gathering during a specific seasonal event. Can be traded to Xiemmy for items.<br>'''Can only be Gathered during Autumn Event '22.''' | ||
| + | |- | ||
| + | | align="center" |{{RarityNGS|4}} | ||
| + | | align="center" |{{icons|NGS Mineral}} | ||
| + | | align="center" |[[File:NGSUIItemBluefullcite.png|64px|link=Special:FilePath/NGSUIItemBluefullcite.png]] | ||
| + | |Bluefullcite | ||
| + | |During Autumn Event '22:<br>Stellar Gift Trials<br>Randomite | ||
| + | |Special ore obtainable by Gathering during a specific seasonal event. Can be traded to Xiemmy for items.<br>'''Can only be Gathered during Autumn Event '22.''' | ||
| + | |- | ||
| + | | align="center" |{{RarityNGS|3}} | ||
| + | | align="center" |{{icons|NGS Mineral}} | ||
| + | | align="center" |[[File:NGSUIItemAutumnIris.png|64px|link=Special:FilePath/NGSUIItemAutumnIris.png]] | ||
| + | |Autumn Iris | ||
| + | |During Autumn Event '22:<br>Stellar Gift Trials<br>[[Limited_Time_Quests_(NGS)|Limited Quest: Simulation: Autumn Sun Aelio Battle]]<br>Seasonal Enemies | ||
| + | |Crystal dropped by seasonal enemies during a specific seasonal event. Can be traded to Xiemmy for items.<br>'''Can only drop during Autumn Event '22.''' | ||
| + | |- | ||
| + | | align="center" |{{RarityNGS|4}} | ||
| + | | align="center" |{{icons|NGS Mineral}} | ||
| + | | align="center" |[[File:NGSUIItemAutumnLattice.png|64px|link=Special:FilePath/NGSUIItemAutumnLattice.png]] | ||
| + | |Autumn Lattice | ||
| + | |During Autumn Event '22, rarely:<br>Stellar Gift Trials<br>[[Limited_Time_Quests_(NGS)|Limited Quest: Simulation: Autumn Sun Aelio Battle]]<br>Seasonal Enemies | ||
| + | |Crystal dropped by seasonal enemies during a specific seasonal event. Can be traded to Xiemmy for items.<br>'''Can only drop during Autumn Event '22.''' | ||
|- | |- | ||
|} | |} | ||
| Line 227: | Line 479: | ||
| align="center" |[[File:NGSUIItemRefreshingAelioMushroom.png|64px|link=Special:FilePath/NGSUIItemRefreshingAelioMushroom.png]] | | align="center" |[[File:NGSUIItemRefreshingAelioMushroom.png|64px|link=Special:FilePath/NGSUIItemRefreshingAelioMushroom.png]] | ||
|Refreshing Aelio Mushroom | |Refreshing Aelio Mushroom | ||
| − | |Found in Northern Aelio | + | |Found in Northern Aelio and Luf Maqaad |
|Vegetable Gathered in Aelio. Boosts damage resistance and boosts PP recovery. | |Vegetable Gathered in Aelio. Boosts damage resistance and boosts PP recovery. | ||
|- | |- | ||
| Line 255: | Line 507: | ||
| align="center" |[[File:NGSUIItemRefreshingRetemCranberries.png|64px|link=Special:FilePath/NGSUIItemRefreshingRetemCranberries.png]] | | align="center" |[[File:NGSUIItemRefreshingRetemCranberries.png|64px|link=Special:FilePath/NGSUIItemRefreshingRetemCranberries.png]] | ||
| Refreshing Retem Cranberries | | Refreshing Retem Cranberries | ||
| − | |Found in Central Retem | + | |Found in Central Retem and Southern Retem |
|Vegetable Gathered in Retem. Boosts damage resistance and boosts PP recovery. | |Vegetable Gathered in Retem. Boosts damage resistance and boosts PP recovery. | ||
|- | |- | ||
| Line 271: | Line 523: | ||
|Found in Western Retem | |Found in Western Retem | ||
|Vegetable Gathered in Retem. Boosts damage resistance and boosts HP recovery. | |Vegetable Gathered in Retem. Boosts damage resistance and boosts HP recovery. | ||
| + | |- | ||
| + | | align="center" |{{RarityNGS|1}} | ||
| + | | align="center" |{{icons|NGS Vegetable}} | ||
| + | | align="center" |[[File:NGSUIItemNourishingKvarisCarrot.png|64px|link=Special:FilePath/NGSUIItemNourishingKvarisCarrot.png]] | ||
| + | |Nourishing Kvaris Carrot | ||
| + | |Found in Western Kvaris | ||
| + | |Vegetable Gathered in Kvaris. Boosts damage resistance, cuts PP consumption and boosts cold resist. | ||
| + | |- | ||
| + | | align="center" |{{RarityNGS|1}} | ||
| + | | align="center" |{{icons|NGS Vegetable}} | ||
| + | | align="center" |[[File:NGSUIItemRefreshingKvarisNapa.png|64px|link=Special:FilePath/NGSUIItemRefreshingKvarisNapa.png]] | ||
| + | |Refreshing Kvaris Napa | ||
| + | |Found in Northern Kvaris | ||
| + | |Vegetable Gathered in Kvaris. Boosts damage resistance, PP recovery and cold resistance . | ||
| + | |- | ||
| + | | align="center" |{{RarityNGS|1}} | ||
| + | | align="center" |{{icons|NGS Vegetable}} | ||
| + | | align="center" |[[File:NGSUIItemSharpKvarisMushroom.png|64px|link=Special:FilePath/NGSUIItemSharpKvarisMushroom.png]] | ||
| + | |Sharp Kvaris Mushroom | ||
| + | |Found in Southern Kvaris | ||
| + | |Vegetable Gathered in Kvaris. Boosts damage resistance, weakness damage and cold resistance. | ||
| + | |- | ||
| + | | align="center" |{{RarityNGS|1}} | ||
| + | | align="center" |{{icons|NGS Vegetable}} | ||
| + | | align="center" |[[File:NGSUIItemHealthyKvarisOnion.png|64px|link=Special:FilePath/NGSUIItemHealthyKvarisOnion.png]] | ||
| + | |Healthy Kvaris Onion | ||
| + | |Found in Central Kvaris | ||
| + | |Vegetable Gathered in Kvaris. Boosts damage resistance, HP recovery and cold resistance. | ||
| + | |- | ||
| + | | align="center" |{{RarityNGS|1}} | ||
| + | | align="center" |{{icons|NGS Vegetable}} | ||
| + | | align="center" |[[File:NGSUIItemSharpStiaCauliflower.png|64px|link=Special:FilePath/NGSUIItemSharpStiaCauliflower.png]] | ||
| + | | Sharp Stia Cauliflower | ||
| + | |Found in |Outer Mediola: Sector 2 | ||
| + | |Vegetable Gathered in Stia. Boosts damage resistance and boosts weakness damage. | ||
| + | |- | ||
| + | | align="center" |{{RarityNGS|1}} | ||
| + | | align="center" |{{icons|NGS Vegetable}} | ||
| + | | align="center" |[[File:NGSUIItemRefreshingStiaTomato.png|64px|link=Special:FilePath/NGSUIItemRefreshingStiaTomato.png]] | ||
| + | | Refreshing Stia Tomato | ||
| + | |Found in Outer Mediola: Sector 1 | ||
| + | |Vegetable Gathered in Stia. Boosts damage resistance and boosts PP recovery. | ||
| + | |- | ||
| + | | align="center" |{{RarityNGS|1}} | ||
| + | | align="center" |{{icons|NGS Vegetable}} | ||
| + | | align="center" |[[File:NGSUIItemNourishingStiaHerb.png|64px|link=Special:FilePath/NGSUIItemNourishingStiaHerb.png]] | ||
| + | | Nourishing Stia Herb | ||
| + | |Found in Outer Mediola: Sector 2 | ||
| + | |Vegetable Gathered in Stia. Boosts damage resistance and reduces PP consumption. | ||
| + | |- | ||
| + | | align="center" |{{RarityNGS|1}} | ||
| + | | align="center" |{{icons|NGS Vegetable}} | ||
| + | | align="center" |[[File:NGSUIItemHealthyStiaNapa.png|64px|link=Special:FilePath/NGSUIItemHealthyStiaNapa.png]] | ||
| + | | Healthy Stia Napa | ||
| + | |Found in Stia: Fringes | ||
| + | |Vegetable Gathered in Stia. Boosts damage resistance and boosts HP recovery. | ||
| + | |- | ||
| + | | align="center" |{{RarityNGS|1}} | ||
| + | | align="center" |{{icons|NGS Vegetable}} | ||
| + | | align="center" |[[File:NGSUIItemFamedStiaMushroom.png|64px|link=Special:FilePath/NGSUIItemFamedStiaMushroom.png]] | ||
| + | | Famed Stia Mushroom | ||
| + | |Found in Outer Mediola: Sector 1 (nighttime only) | ||
| + | |Rare Vegetable Gathered in Stia. Can be traded for items.<br>'''When used in Quick Food, has same effect as Sharp Stia Cauliflower''' | ||
|- | |- | ||
| align="center" |{{RarityNGS|1}} | | align="center" |{{RarityNGS|1}} | ||
| Line 278: | Line 593: | ||
|Found in Aelio Gathering Sectors | |Found in Aelio Gathering Sectors | ||
|Vegetable Gathered in Aelio. Boosts damage resistance and boosts weakness damage.<br>'''Can only be Gathered during Halloween events.''' | |Vegetable Gathered in Aelio. Boosts damage resistance and boosts weakness damage.<br>'''Can only be Gathered during Halloween events.''' | ||
| − | |||
|- | |- | ||
| align="center" |{{RarityNGS|1}} | | align="center" |{{RarityNGS|1}} | ||
| Line 285: | Line 599: | ||
|Winter Dandelion | |Winter Dandelion | ||
|Found in Aelio and Retem Gathering Sectors | |Found in Aelio and Retem Gathering Sectors | ||
| − | |Vegetable Gathered in Retem | + | |Vegetable Gathered in Aelio & Retem. Boosts damage resistance and reduces PP consumption.<br>'''Can only be Gathered during Winter events.''' |
| + | |- | ||
| + | | align="center" |{{RarityNGS|1}} | ||
| + | | align="center" |{{icons|NGS Vegetable}} | ||
| + | | align="center" |[[File:NGSUIItemAnnivartichoke.png|64px|link=Special:FilePath/NGSUIItemAnnivartichoke.png]] | ||
| + | |Annivartichoke | ||
| + | |Found in Aelio and Retem Gathering Sectors | ||
| + | |Vegetable Gathered in Aelio & Retem. Boosts damage resistance and boosts HP recovery.<br>'''Can only be Gathered during Anniversary events.''' | ||
|- | |- | ||
|} | |} | ||
| Line 351: | Line 672: | ||
| align="center" |[[File:NGSUIItemHealthyRetemStrawberry.png|64px|link=Special:FilePath/NGSUIItemHealthyRetemStrawberry.png]] | | align="center" |[[File:NGSUIItemHealthyRetemStrawberry.png|64px|link=Special:FilePath/NGSUIItemHealthyRetemStrawberry.png]] | ||
|Healthy Retem Strawberry | |Healthy Retem Strawberry | ||
| − | |Found in Western Retem | + | |Found in Western Retem and Luf Maqaad |
|Fruit Gathered in Retem. Boosts PP and boosts HP recovery. | |Fruit Gathered in Retem. Boosts PP and boosts HP recovery. | ||
| + | |- | ||
| + | | align="center" |{{RarityNGS|1}} | ||
| + | | align="center" |{{icons|NGS Fruit}} | ||
| + | | align="center" |[[File:NGSUIItemNourishingKvarisAckee.png|64px|link=Special:FilePath/NGSUIItemNourishingKvarisAckee.png]] | ||
| + | |Nourishing Kvaris Ackee | ||
| + | |Found in Northern Kvaris | ||
| + | |Fruit Gathered in Kvaris. Boosts PP, cuts PP consumption and boosts cold resistance. | ||
| + | |- | ||
| + | | align="center" |{{RarityNGS|1}} | ||
| + | | align="center" |{{icons|NGS Fruit}} | ||
| + | | align="center" |[[File:NGSUIItemRefreshingKvarisPlum.png|64px|link=Special:FilePath/NGSUIItemRefreshingKvarisPlum.png]] | ||
| + | |Refreshing Kvaris Plum | ||
| + | |Found in Western Kvaris | ||
| + | |Fruit Gathered in Kvaris. Boosts PP, boosts PP recovery and boosts cold resistance. | ||
| + | |- | ||
| + | | align="center" |{{RarityNGS|1}} | ||
| + | | align="center" |{{icons|NGS Fruit}} | ||
| + | | align="center" |[[File:NGSUIItemSharpKvarisGuava.png|64px|link=Special:FilePath/NGSUIItemSharpKvarisGuava.png]] | ||
| + | |Sharp Kvaris Guava | ||
| + | |Found in Central Kvaris | ||
| + | |Fruit Gathered in Kvaris. Boosts PP, boosts weakness damage and boosts cold resistance. | ||
| + | |- | ||
| + | | align="center" |{{RarityNGS|1}} | ||
| + | | align="center" |{{icons|NGS Fruit}} | ||
| + | | align="center" |[[File:NGSUIItemHealthyKvarisAkebia.png|64px|link=Special:FilePath/NGSUIItemHealthyKvarisAkebia.png]] | ||
| + | |Healthy Kvaris Akebia | ||
| + | |Found in Southern Kvaris | ||
| + | |Fruit Gathered in Kvaris. Boosts PP, boosts HP recovery and boosts cold resistance. | ||
| + | |- | ||
| + | | align="center" |{{RarityNGS|1}} | ||
| + | | align="center" |{{icons|NGS Fruit}} | ||
| + | | align="center" |[[File:NGSUIItemNotableKvarisAckee.png|64px|link=Special:FilePath/NGSUIItemNotableKvarisAckee.png]] | ||
| + | |Notable Kvaris Ackee | ||
| + | |Found in Northern Kvaris at daytime only | ||
| + | |Rare Fruit Gathered in Kvaris. Can be traded for items.<br>'''When used in Quick Food, has same effect as Nourishing Kvaris Ackee''' | ||
| + | |- | ||
| + | | align="center" |{{RarityNGS|1}} | ||
| + | | align="center" |{{icons|NGS Fruit}} | ||
| + | | align="center" |[[File:NGSUIItemSharpStiaMango.png|64px|link=Special:FilePath/NGSUIItemSharpStiaMango.png]] | ||
| + | |Sharp Stia Mango | ||
| + | |Found in Stia: Fringes | ||
| + | |Fruit Gathered in Stia. Boosts PP and boosts weakness damage. | ||
| + | |- | ||
| + | | align="center" |{{RarityNGS|1}} | ||
| + | | align="center" |{{icons|NGS Fruit}} | ||
| + | | align="center" |[[File:NGSUIItemRefreshingStiaApple.png|64px|link=Special:FilePath/NGSUIItemRefreshingStiaApple.png]] | ||
| + | |Refreshing Stia Apple | ||
| + | |Found in Outer Mediola: Sector 2 | ||
| + | |Fruit Gathered in Stia. Boosts PP and boosts PP recovery. | ||
| + | |- | ||
| + | | align="center" |{{RarityNGS|1}} | ||
| + | | align="center" |{{icons|NGS Fruit}} | ||
| + | | align="center" |[[File:NGSUIItemNourishingStiaCherri.png|64px|link=Special:FilePath/NGSUIItemNourishingStiaBanana.png]] | ||
| + | |Nourishing Stia Banana | ||
| + | |Found in Outer Mediola: Sector 2 | ||
| + | |Fruit Gathered in Stia. Boosts PP and reduces PP consumption. | ||
| + | |- | ||
| + | | align="center" |{{RarityNGS|1}} | ||
| + | | align="center" |{{icons|NGS Fruit}} | ||
| + | | align="center" |[[File:NGSUIItemHealthyStiaPlum.png|64px|link=Special:FilePath/NGSUIItemHealthyStiaPlum.png]] | ||
| + | |Healthy Stia Plum | ||
| + | |Found in Stia: Fringes | ||
| + | |Fruit Gathered in Stia. Boosts PP and boosts HP recovery. | ||
| + | |- | ||
| + | | align="center" |{{RarityNGS|1}} | ||
| + | | align="center" |{{icons|NGS Fruit}} | ||
| + | | align="center" |[[File:NGSUIItemFamedStiaStarFruit.png|64px|link=Special:FilePath/NGSUIItemFamedStiaStarFruit.png]] | ||
| + | |Famed Stia Star Fruit | ||
| + | |Found in Stia: Fringes (daytime only) | ||
| + | |Rare Fruit Gathered in Stia. Can be traded for items.<br>'''When used in Quick Food, has same effect as Refreshing Stia Apple''' | ||
| + | |- | ||
| + | | align="center" |{{RarityNGS|1}} | ||
| + | | align="center" |{{icons|NGS Fruit}} | ||
| + | | align="center" |[[File:NGSUIItemHealthySprigBallooni.png|64px|link=Special:FilePath/NGSUIItemHealthySprigBallooni.png]] | ||
| + | |Sprig Ballooni | ||
| + | |Found in Aelio and Retem Gathering Sectors | ||
| + | |Fruit Gathered in Aelio & Retem. Boosts PP and boosts PP recovery.<br>'''Can only be Gathered during Spring events.''' | ||
|- | |- | ||
|} | |} | ||
| Line 418: | Line 816: | ||
| align="center" |[[File:NGSUIItemHealthyRetemHermitCrab.png|64px|link=Special:FilePath/NGSUIItemHealthyRetemHermitCrab.png]] | | align="center" |[[File:NGSUIItemHealthyRetemHermitCrab.png|64px|link=Special:FilePath/NGSUIItemHealthyRetemHermitCrab.png]] | ||
|Healthy Retem Hermit Crab | |Healthy Retem Hermit Crab | ||
| − | |Found in Central Retem | + | |Found in Central Retem and Southern Retem |
|Seafood caught in Retem. Boosts HP and boosts HP recovery. | |Seafood caught in Retem. Boosts HP and boosts HP recovery. | ||
|- | |- | ||
| + | | align="center" |{{RarityNGS|1}} | ||
| + | | align="center" |{{icons|NGS Seafood}} | ||
| + | | align="center" |[[File:NGSUIItemNourishingKvarisSeaSnail.png|64px|link=Special:FilePath/NGSUIItemNourishingKvarisSeaSnail.png]] | ||
| + | |Nourishing Kvaris Sea Snail | ||
| + | |Found in Western Kvaris | ||
| + | |Seafood caught in Kvaris. Boosts HP, reduces PP consumption and boosts cold resistance. | ||
| + | |- | ||
| + | | align="center" |{{RarityNGS|1}} | ||
| + | | align="center" |{{icons|NGS Seafood}} | ||
| + | | align="center" |[[File:NGSUIItemRefreshingKvarisOctopus.png|64px|link=Special:FilePath/NGSUIItemRefreshingKvarisOctopus.png]] | ||
| + | |Refreshing Kvaris Octopus | ||
| + | |Found in Northern Kvaris | ||
| + | |Seafood caught in Kvaris. Boosts HP, boosts PP recovery and boosts cold resistance. | ||
| + | |- | ||
| + | | align="center" |{{RarityNGS|1}} | ||
| + | | align="center" |{{icons|NGS Seafood}} | ||
| + | | align="center" |[[File:NGSUIItemSharpKvarisSquid.png|64px|link=Special:FilePath/NGSUIItemSharpKvarisSquid.png]] | ||
| + | |Sharp Kvaris Squid | ||
| + | |Found in Central Kvaris and Rayjord Gorge | ||
| + | |Seafood caught in Kvaris. Boosts HP, boosts weakness damage and boosts cold resistance. | ||
| + | |- | ||
| + | | align="center" |{{RarityNGS|1}} | ||
| + | | align="center" |{{icons|NGS Seafood}} | ||
| + | | align="center" |[[File:NGSUIItemHealthyKvarisLobster.png|64px|link=Special:FilePath/NGSUIItemHealthyKvarisLobster.png]] | ||
| + | |Healthy Kvaris Lobster | ||
| + | |Found in Southern Kvaris | ||
| + | |Seafood caught in Kvaris. Boosts HP, boosts HP recovery and boosts cold resistance. | ||
| + | |- | ||
| + | | align="center" |{{RarityNGS|1}} | ||
| + | | align="center" |{{icons|NGS Seafood}} | ||
| + | | align="center" |[[File:NGSUIItemHealthyNotableKvarisSquid.png|64px|link=Special:FilePath/NGSUIItemHealthyNotableKvarisSquid.png]] | ||
| + | |Notable Kvaris Squid | ||
| + | |Found in Central Kvaris and Rayjord Gorge at nighttime only | ||
| + | |Rare Seafood caught in Kvaris. Can be traded for items.<br>'''When used in Quick Food, has same effect as Sharp Kvaris Squid''' | ||
| + | |- | ||
| + | | align="center" |{{RarityNGS|1}} | ||
| + | | align="center" |{{icons|NGS Seafood}} | ||
| + | | align="center" |[[File:NGSUIItemSharpStiaOctopus.png|64px|link=Special:FilePath/NGSUIItemSharpStiaOctopus.png]] | ||
| + | |Sharp Stia Octopus | ||
| + | |Found in Stia: Fringes | ||
| + | |Seafood caught in Stia. Boosts HP and boosts weakness damage. | ||
| + | |- | ||
| + | | align="center" |{{RarityNGS|1}} | ||
| + | | align="center" |{{icons|NGS Seafood}} | ||
| + | | align="center" |[[File:NGSUIItemRefreshingStiaSeaSlug.png|64px|link=Special:FilePath/NGSUIItemRefreshingStiaSeaSlug.png]] | ||
| + | |Refreshing Stia Sea Slug | ||
| + | |Found in Stia: Fringes | ||
| + | |Seafood caught in Stia. Boosts HP and boosts PP recovery. | ||
| + | |- | ||
| + | | align="center" |{{RarityNGS|1}} | ||
| + | | align="center" |{{icons|NGS Seafood}} | ||
| + | | align="center" |[[File:NGSUIItemNourishingStiaHermitCrab.png|64px|link=Special:FilePath/NGSUIItemNourishingStiaHermitCrab.png]] | ||
| + | |Nourishing Stia Hermit Crab | ||
| + | |Found in Stia: Fringes | ||
| + | |Seafood caught in Stia. Boosts HP and reduces PP consumption. | ||
| + | |- | ||
| + | | align="center" |{{RarityNGS|1}} | ||
| + | | align="center" |{{icons|NGS Seafood}} | ||
| + | | align="center" |[[File:NGSUIItemHealthyStiaSnail.png|64px|link=Special:FilePath/NGSUIItemHealthyStiaSnail.png]] | ||
| + | |Healthy Stia Snail | ||
| + | |Found in Outer Mediola: Sector 2 | ||
| + | |Seafood caught in Stia. Boosts HP and boosts HP recovery. | ||
| + | |- | ||
| + | | align="center" |{{RarityNGS|1}} | ||
| + | | align="center" |{{icons|NGS Seafood}} | ||
| + | | align="center" |[[File:NGSUIItemFamedStiaCrab.png|64px|link=Special:FilePath/NGSUIItemFamedStiaCrab.png]] | ||
| + | |Famed Stia Crab | ||
| + | |Found in Outer Mediola: Sector 2 | ||
| + | |Rare Seafood Gathered in Stia. Can be traded for items.<br>'''When used in Quick Food, has same effect as Nourishing Stia Hermit Crab''' | ||
|} | |} | ||
| Line 487: | Line 954: | ||
|Hippoko | |Hippoko | ||
|Meat obtained in Retem. Boosts damage and boosts HP recovery. | |Meat obtained in Retem. Boosts damage and boosts HP recovery. | ||
| + | |- | ||
| + | | align="center" |{{RarityNGS|1}} | ||
| + | | align="center" |{{icons|NGS Meat}} | ||
| + | | align="center" |[[File:NGSUIItemAelioMeat.png|64px|link=Special:FilePath/NGSUIItemAelioMeat.png]] | ||
| + | |Nourishing Kvaris Meat | ||
| + | |? | ||
| + | |Meat obtained in Kvaris. Boosts damage, cuts PP consumption and boosts cold resistance. | ||
| + | |- | ||
| + | | align="center" |{{RarityNGS|1}} | ||
| + | | align="center" |{{icons|NGS Meat}} | ||
| + | | align="center" |[[File:NGSUIItemAelioMeat.png|64px|link=Special:FilePath/NGSUIItemAelioMeat.png]] | ||
| + | |Refreshing Kvaris Meat | ||
| + | |? | ||
| + | |Meat obtained in Kvaris. Boosts damage, boosts PP recovery and boosts cold resistance. | ||
| + | |- | ||
| + | | align="center" |{{RarityNGS|1}} | ||
| + | | align="center" |{{icons|NGS Meat}} | ||
| + | | align="center" |[[File:NGSUIItemAelioMeat.png|64px|link=Special:FilePath/NGSUIItemAelioMeat.png]] | ||
| + | |Sharp Kvaris Meat | ||
| + | |? | ||
| + | |Meat obtained in Kvaris. Boosts damage, boosts weakness damage and boosts cold resistance. | ||
| + | |- | ||
| + | | align="center" |{{RarityNGS|1}} | ||
| + | | align="center" |{{icons|NGS Meat}} | ||
| + | | align="center" |[[File:NGSUIItemAelioMeat.png|64px|link=Special:FilePath/NGSUIItemAelioMeat.png]] | ||
| + | |Healthy Kvaris Meat | ||
| + | |? | ||
| + | |Meat obtained in Kvaris. Boosts damage, boosts HP recovery and boosts cold resistance. | ||
| + | |- | ||
| + | | align="center" |{{RarityNGS|1}} | ||
| + | | align="center" |{{icons|NGS Meat}} | ||
| + | | align="center" |[[File:NGSUIItemNotableKvarisMeat.png|64px|link=Special:FilePath/NGSUIItemNotableKvarisMeat.png]] | ||
| + | |Notable Kvaris Meat | ||
| + | |Comanta in Rayjord Gorge | ||
| + | |Rare meat obtained in Kvaris. Can be traded for items.<br>'''When used in Qucik Food, has the same effect as Healthy Kvaris Meat''' | ||
| + | |- | ||
| + | | align="center" |{{RarityNGS|1}} | ||
| + | | align="center" |{{icons|NGS Meat}} | ||
| + | | align="center" |[[File:NGSUIItemAelioMeat.png|64px|link=Special:FilePath/NGSUIItemAelioMeat.png]] | ||
| + | |Sharp Stia Meat | ||
| + | |? | ||
| + | |Meat obtained in Stia. Boosts damage and boosts weakness damage. | ||
| + | |- | ||
| + | | align="center" |{{RarityNGS|1}} | ||
| + | | align="center" |{{icons|NGS Meat}} | ||
| + | | align="center" |[[File:NGSUIItemAelioMeat.png|64px|link=Special:FilePath/NGSUIItemAelioMeat.png]] | ||
| + | |Refreshing Stia Meat | ||
| + | |? | ||
| + | |Meat obtained in Stia. Boosts damage and boosts PP recovery. | ||
| + | |- | ||
| + | | align="center" |{{RarityNGS|1}} | ||
| + | | align="center" |{{icons|NGS Meat}} | ||
| + | | align="center" |[[File:NGSUIItemAelioMeat.png|64px|link=Special:FilePath/NGSUIItemAelioMeat.png]] | ||
| + | |Nourishing Stia Meat | ||
| + | |? | ||
| + | |Meat obtained in Stia. Boosts damage and reduces PP consumption. | ||
| + | |- | ||
| + | | align="center" |{{RarityNGS|1}} | ||
| + | | align="center" |{{icons|NGS Meat}} | ||
| + | | align="center" |[[File:NGSUIItemAelioMeat.png|64px|link=Special:FilePath/NGSUIItemAelioMeat.png]] | ||
| + | |Healthy Stia Meat | ||
| + | |? | ||
| + | |Meat obtained in Stia. Boosts damage and boosts HP recovery. | ||
| + | |- | ||
|} | |} | ||
Revision as of 19:59, 18 June 2023
Materials in NGS can be obtained from various sources, such as Gathering, the Login Bonus, and the Mission Pass.
List of Materials
Enhancement Materials
| ★ | Icon | Image | Name | Obtainment | Notes |
|---|---|---|---|---|---|

|
N-Grinder | Drop from Rappies Found in Green Containers Task Rewards Campaign Rewards Mission Pass Reward |
Material used to improve equipment. The performance of equipment can be pushed beyond its limit. | ||
|
N-Excube | Acquired by leveling a class above the current level cap Mission Pass Reward |
A special crystal given to those who seek strength. Can be traded for items at specific locations. | ||

|
N-Class Excube | 10 are acquired by leveling a class above the current level cap Advanced Trainia Quests Player Title Rewards |
A special crystal given to classes who seek strength. Used at Class Counters to create Add-On Skills. | ||

|
Stragment A | Mt. Magnus (Rank 3) Rarely at Vanford Laboratory Ruins (Rank 3) & Resol Forest (Rank 2) Subdue the Overseer-type DOLL |
A fragment of composite plating found in Combat Areas. Can be refined into an Arms Refiner. | ||

|
Stragment B | Vanford Laboratory Ruins (Rank 3) Rarely at Mt. Magnus (Rank 3) & Resol Forest (Rank 2) Nex Vera Subjugation |
A fragment of composite plating found in Combat Areas. Can be refined into an Arms Refiner. | ||

|
Stragment C | Resol Forest (Rank 2) Rarely at Mt. Magnus (Rank 3) & Vanford Laboratory Ruins (Rank 3) Mining Rig Defense: Aelio |
A fragment of composite plating found in Combat Areas. Can be refined into an Arms Refiner. | ||

|
Arms Refiner | Other Material Exchange Rarely from Mt. Magnus (Rank 3), Vanford Laboratory Ruins (Rank 3), Resol Forest (Rank 2) Rarely from Dark Falz Interception Battle |
A material created by refining Stragments. Can be used to break item limits at the Item Lab. | ||

|
Arms Refiner II | Other Material Exchange Very Rarely from Neusen Plant |
Material obtained in the Combat Sectors & elsewhere. Can be used for advanced limit breaking. | ||

|
Aegis Integra | Aegis Integra Exchange Shop Not Obtainable until 2023-02-01 |
A keystone component of Dark Falz Aegis. Can be used to exchange at the "Aegis Integra Exchange Shop". |
Battle Triggers
Battledia
| ★ | Icon | Image | Name | Obtainment | Notes |
|---|---|---|---|---|---|

|
B. Trigger/Common Yellow | Rare drop from Enemies Mission Pass Reward Exchange Shop |
A Trigger used in the Battledia. Consumed upon clearing the quest. | ||

|
B-Trigger/Common Purple | Rare drop from Enemies Exchange Shop |
A Trigger used in the Battledia. Consumed upon clearing the quest. |
Discontinuted
| ★ | Icon | Image | Name | Obtainment | Notes |
|---|---|---|---|---|---|
|
|
B. Trigger/Aelio Yellow | No longer obtainable, used for exchange for B. Trigger/Common Yellow | A Trigger used in the Battledia. Consumed upon clearing: "Aelio Troopers". | ||
|
|
B. Trigger/Retem Yellow | No longer obtainable, used to exchange for B. Trigger/Common Yellow | A Trigger used in the Battledia. Consumed upon clearing: "Retem Troopers". | ||
|
|
B-Trigger/Aelio Purple | No longer obtainable, used to exchange for B. Trigger/Common Purple | A Trigger used in the Battledia. Consumed upon clearing: "Aelio Devastators". | ||
|
|
B-Trigger/Retem Purple | No longer obtainable, used to exchange for B. Trigger/Common Purple | A Trigger used in the Battledia. Consumed upon clearing: "Retem Devastators". |
Variable Battle Triggers
| ★ | Icon | Image | Name | Obtainment | Notes |
|---|---|---|---|---|---|

|
B. Trigger/Spring '22 | Rare drop from Seasonal Enemies (Spring '22 Event) Seasonal Point Exchange Shop (Spring '22 Event) |
? |
Badges
| ★ | Icon | Image | Name | Obtainment | Notes |
|---|---|---|---|---|---|

|
N-Recycle Badge | Exchange Shop | An item that can be treated as an AC Scratch item when making trades at the Recycle Shop. | ||

|
N-SG Recycle Badge | Exchange Shop | An item that can be treated as an SG Scratch item when making trades at the Recycle Shop. | ||

|
N-Mission Badge | Mission Pass (NGS) | An Item that can be exchanged in the Recycle Shop. | ||

|
Team Badge | Team Tasks | A badge awarded to those who contribute to their Team. Can be exchanged at certain vendors. | ||

|
ARKS Record Badge | At-Random Event Records | Badge given to accomplished ARKS. Exchanged at an Item Trader's "ARKS Record Badge Exchange". | ||

|
Aelio Badge | New Genesis Starter Package | A badge engraved with the emblem of Aelio. Can be traded for items at specific locations. |
Tickets
| ★ | Icon | Image | Name | Obtainment | Notes |
|---|---|---|---|---|---|

|
Kvaris Expedition Special Ticket | Limited-Time Tasks (April 6th, 2022 to June 7th, 2022) | Insignia given to accomplished ARKS. Can be exchanged for things like a 6-star weapon at Item Traders. | ||

|
Stia Expedition Special Ticket | Limited-Time Tasks (October 26th, 2022 to December 7th, 2022) | Insignia given to accomplished ARKS. Can be exchanged for things like 8-star weapons at Item Traders. | ||

|
Slayer Preparation Special Emblem | Limited-Time Tasks (March 1st, 2023 to April 5th, 2023) | Insignia given to accomplished ARKS.\nCan be traded for ★8 items in a future update. | ||

|
[NGS] First Anniv. Exchange Ticket | First Anniversary Event tasks | During the corresponding event, this ticket can be given to Xitrae in exchange for various items. |
Exchange Materials
| ★ | Icon | Image | Name | Obtainment | Notes |
|---|---|---|---|---|---|

|
Icicle Cube | Ancient Enemies Mining Rig Defense: Kvaris Successive Training: Kvaris 3-III |
A form of condensed energy from Ancient Enemies in Kvaris. Used for trading with Leso at Kvaris Camp. | ||

|
Icicle Orb | Trials in Kvaris Frozen Containers Mining Rig Defense: Kvaris |
A form of condensed energy found all over the Kvaris region. Used for trading with Leso at Kvaris Camp. | ||

|
Giga Stragment | Gigantix Enemies (Lv. 79+) | ギガンティクスなどの複合装甲の一部。アイテムトレーダーの“ギガストラグメント交換”でアイテムと交換できる。 |
Gathering Materials

In New Genesis, the act of Gathering is acquiring Gathering Materials from the environment, specifically Ores, Vegetables, Fruits, Seafood and Meat. Many of these materials are used as ingredients for Quick Food, while Ores are used at the Item Lab.
Unlike Phantasy Star Online 2 Classic, there is no stamina system in place for gathering; what you see in the field is what you get. Once a material is gathered, it will not reappear until 03:00 JST. Meat is obtained from Tames, so can be gathered freely.
Valuable Items
These items are intended to be sold for a high price from the inventory or at an Item Shop.
| ★ | Icon | Image | Name | Obtainment | Notes |
|---|---|---|---|---|---|

|
Alpha Reactor | 14 are found across Aelio Rare drop from Gold Containers Mission Pass Reward |
A power core from some kind of machine. Can be sold for a high price. (3,500 Meseta) | ||

|
Beta Reactor | ARKS Record - Team Task Records | A power core from some kind of machine. Can be sold for a high price. (100,000 Meseta) | ||
|
Stellar Seed | 10 found at Western Retem - "Mt. Sagaan Road: East" Ryuker Device | A stone said to have appeared during a meteor shower. Can be sold for a high price. (2,000 Meseta) | ||
|
Snowks | 10 found at Central Kvaris - "Mistra Forest: North" Ryuker Device | A stone that has been polished by ice and snow. Can be sold for a high price at a vendor. (3,500 Meseta) |
Minerals/Ores
| ★ | Icon | Image | Name | Obtainment | Notes |
|---|---|---|---|---|---|

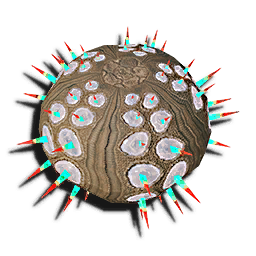
|
Monotite | Found in Central Aelio, Western Retem, Central Retem, Central Kvaris and Northern Kvaris Stellar Pack Trials Exchange Shop Other Material Exchange Mission Pass Reward |
Ore found in rocks all over the world. Used to unlock Potentials and Limit Break items at the Item Lab. | ||

|
Dualomite | Found in Southern Aelio, Western Aelio, Central Retem, Southern Retemm, Southern Kvaris, Stia: Fringes and Outer Mediola: Sector 2 Stellar Pack Trials Exchange Shop Other Material Exchange Mission Pass Reward |
Ore found in rocks all over the world. Used to unlock Potentials and Limit Break items at the Item Lab. | ||

|
Trinite | Found in North Aelio, Western Aelio, Central Retem, Southern Retem, Western Kvaris, Northern Kvaris, Stellar Pack Trials Exchange Shop Other Material Exchange Mission Pass Reward |
Ore found in rocks all over the world. Used to unlock Potentials and Limit Break items at the Item Lab. | ||
|
Tetracite | Found in Western Retem, Northern Retem, Luf Maqaad, Southern Kvaris, Central Kvaris and Outer Mediola: Sector 2 Stellar Pack Trials Exchange Shop Other Material Exchange |
Ore found in rocks all over the world. Used to unlock Potentials at the Item Lab. | ||

|
Pentrite | Found in Western Kvaris and Stia: Fringes Stellar Pack Trials Exchange Shop Other Material Exchange |
Ore found in rocks all over the world. Used to unlock Potentials and Limit Break items at the Item Lab. | ||

|
Hexakite | Found in Outer Mediola: Sector 2 and Outer Mediola: Sector 1 Stellar Pack Trials Exchange Shop Other Material Exchange |
Ore found in rocks all over the world. Used to unlock Potentials and Limit Break items at the Item Lab. | ||
|
Blizzardium | Peak of Mt. Ihana (Western Kvaris) during snowy weather Item Exchange: Kvaris |
Rare ore found in the rocky regions of Kvaris. Can be traded for materials at the Item Lab. | ||
|
Inferium | Outer Mediola: Sector 1 during Heat Wave, Hellfire or Pheonix weather weather Item Exchange: Stia |
Rare ore found in the rocky regions of Stia. Can be traded for materials at the Item Lab. | ||
|
Photon Chunk | Found in Central Aelio, Northern Aelio, Southern Aelio, Central Retem and Northern Retem Found in Gold Containers Mission Pass Reward |
Ore found in rocks all over the world. Used to Limit Break items at the Item Lab. | ||
|
Photon Quartz | Found in Central Aelio, Northern Aelio, Southern Aelio, Western Retem and Luf Maqaad Found in Gold Containers Mission Pass Reward |
Ore found in rocks all over the world. Used to create Multi-Weapons at the Item Lab. | ||

|
Photon Chunk II A | Happy Rappy Operation Pedas Vera (Lv. 61+) Nex Vera (Lv. 61+) Rarely from Snaedal Vera (Lv. 61+) Rarely from Lenus Vera (Lv. 61+) |
Rare ore used to unlock advanced Potential Abilities in Item Lab. Not found in normal rock formations. | ||

|
Photon Chunk II B | Happy Rappy Operation Snaedal Vera (Lv. 61+) Lenus Vera (Lv. 61+) Rarely from Pedas Vera (Lv. 61+) Rarely from Nex Vera (Lv. 61+) |
Rare ore used to unlock advanced Potential Abilities in Item Lab. Not found in normal rock formations. | ||
|
Photon Scale | Found in Southern Retem Emergency Quests (Rank 2) |
Ore found in rocks all over the world. Used in Capsule exchange at the Item Lab. | ||

|
Greenillcite | During Autumn Event '22: Exploration Sections Stellar Gift Trials Randomite |
Special ore obtainable by Gathering during a specific seasonal event. Can be traded to Xiemmy for items. Can only be Gathered during Autumn Event '22. | ||

|
Bluefullcite | During Autumn Event '22: Stellar Gift Trials Randomite |
Special ore obtainable by Gathering during a specific seasonal event. Can be traded to Xiemmy for items. Can only be Gathered during Autumn Event '22. | ||

|
Autumn Iris | During Autumn Event '22: Stellar Gift Trials Limited Quest: Simulation: Autumn Sun Aelio Battle Seasonal Enemies |
Crystal dropped by seasonal enemies during a specific seasonal event. Can be traded to Xiemmy for items. Can only drop during Autumn Event '22. | ||

|
Autumn Lattice | During Autumn Event '22, rarely: Stellar Gift Trials Limited Quest: Simulation: Autumn Sun Aelio Battle Seasonal Enemies |
Crystal dropped by seasonal enemies during a specific seasonal event. Can be traded to Xiemmy for items. Can only drop during Autumn Event '22. |
Vegetables
| ★ | Icon | Image | Name | Obtainment | Notes |
|---|---|---|---|---|---|

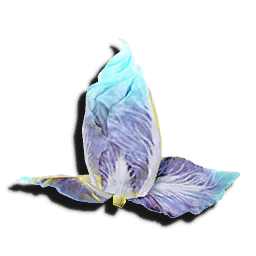
|
Sharp Aelio Tomato | Found in Western Aelio | Vegetable Gathered in Aelio. Boosts damage resistance and boosts weakness damage. | ||
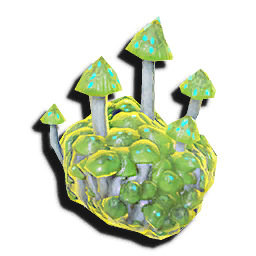
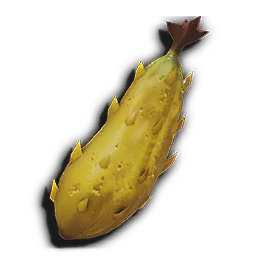
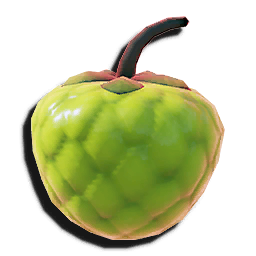
|
Refreshing Aelio Mushroom | Found in Northern Aelio and Luf Maqaad | Vegetable Gathered in Aelio. Boosts damage resistance and boosts PP recovery. | ||

|
Nourishing Aelio Herb | Found in Central Aelio | Vegetable Gathered in Aelio. Boosts damage resistance and reduces PP consumption. | ||

|
Healthy Aelio Turnip | Found in Southern Aelio | Vegetable Gathered in Aelio. Boosts damage resistance and boosts HP recovery. | ||

|
Sharp Retem Mushroom | Found in Southern Retem | Vegetable Gathered in Retem. Boosts damage resistance and boosts weakness damage. | ||

|
Refreshing Retem Cranberries | Found in Central Retem and Southern Retem | Vegetable Gathered in Retem. Boosts damage resistance and boosts PP recovery. | ||

|
Nourishing Retem Eggplant | Found in Northern Retem | Vegetable Gathered in Retem. Boosts damage resistance and reduces PP consumption. | ||
|
Healthy Retem Cauliflower | Found in Western Retem | Vegetable Gathered in Retem. Boosts damage resistance and boosts HP recovery. | ||
|
Nourishing Kvaris Carrot | Found in Western Kvaris | Vegetable Gathered in Kvaris. Boosts damage resistance, cuts PP consumption and boosts cold resist. | ||
|
Refreshing Kvaris Napa | Found in Northern Kvaris | Vegetable Gathered in Kvaris. Boosts damage resistance, PP recovery and cold resistance . | ||
|
Sharp Kvaris Mushroom | Found in Southern Kvaris | Vegetable Gathered in Kvaris. Boosts damage resistance, weakness damage and cold resistance. | ||

|
Healthy Kvaris Onion | Found in Central Kvaris | Vegetable Gathered in Kvaris. Boosts damage resistance, HP recovery and cold resistance. | ||
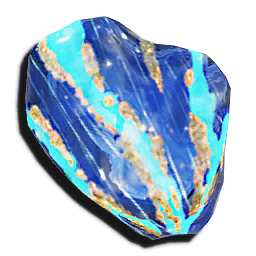
| 64px | Sharp Stia Cauliflower | Outer Mediola: Sector 2 | Vegetable Gathered in Stia. Boosts damage resistance and boosts weakness damage. | ||
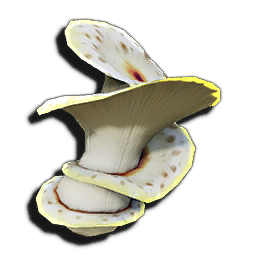
| 64px | Refreshing Stia Tomato | Found in Outer Mediola: Sector 1 | Vegetable Gathered in Stia. Boosts damage resistance and boosts PP recovery. | ||
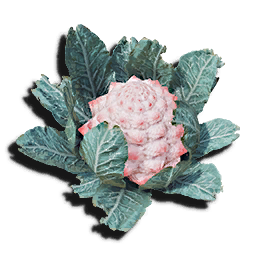
| 64px | Nourishing Stia Herb | Found in Outer Mediola: Sector 2 | Vegetable Gathered in Stia. Boosts damage resistance and reduces PP consumption. | ||
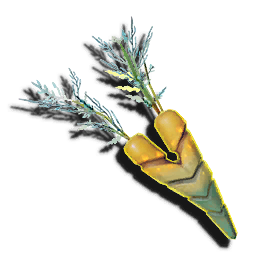
| 64px | Healthy Stia Napa | Found in Stia: Fringes | Vegetable Gathered in Stia. Boosts damage resistance and boosts HP recovery. | ||
| 64px | Famed Stia Mushroom | Found in Outer Mediola: Sector 1 (nighttime only) | Rare Vegetable Gathered in Stia. Can be traded for items. When used in Quick Food, has same effect as Sharp Stia Cauliflower | ||

|
Autumn Vampkin | Found in Aelio Gathering Sectors | Vegetable Gathered in Aelio. Boosts damage resistance and boosts weakness damage. Can only be Gathered during Halloween events. | ||

|
Winter Dandelion | Found in Aelio and Retem Gathering Sectors | Vegetable Gathered in Aelio & Retem. Boosts damage resistance and reduces PP consumption. Can only be Gathered during Winter events. | ||

|
Annivartichoke | Found in Aelio and Retem Gathering Sectors | Vegetable Gathered in Aelio & Retem. Boosts damage resistance and boosts HP recovery. Can only be Gathered during Anniversary events. |
Fruits
| ★ | Icon | Image | Name | Obtainment | Notes |
|---|---|---|---|---|---|
|
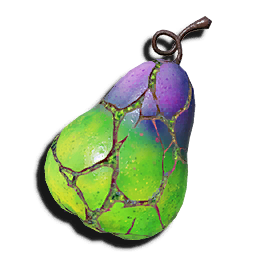
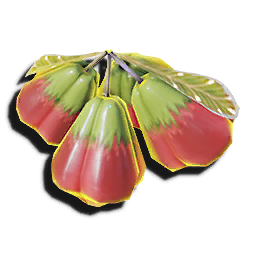
Sharp Aelio Pear | Found in Southern Aelio | Fruit Gathered in Aelio. Boosts PP and boosts weakness damage. | ||

|
Refreshing Aelio Peach | Found in Central Aelio | Fruit Gathered in Aelio. Boosts PP and boosts PP recovery. | ||
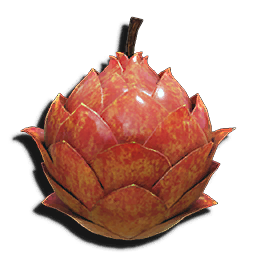
|
Nourishing Aelio Apple | Found in Northern Aelio | Fruit Gathered in Aelio. Boosts PP and reduces PP consumption. | ||
|
Healthy Aelio Banana | Found in Western Aelio | Fruit Gathered in Aelio. Boosts PP and boosts HP recovery. | ||

|
Sharp Retem Star Fruit | Found in Northern Retem | Fruit Gathered in Retem. Boosts PP and boosts weakness damage. | ||

|
Refreshing Retem Mango | Found in Southern Retem | Fruit Gathered in Retem. Boosts PP and boosts PP recovery. | ||
|
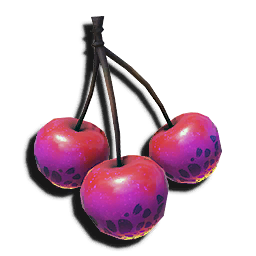
Nourishing Retem Cherries | Found in Central Retem | Fruit Gathered in Retem. Boosts PP and reduces PP consumption. | ||

|
Healthy Retem Strawberry | Found in Western Retem and Luf Maqaad | Fruit Gathered in Retem. Boosts PP and boosts HP recovery. | ||

|
Nourishing Kvaris Ackee | Found in Northern Kvaris | Fruit Gathered in Kvaris. Boosts PP, cuts PP consumption and boosts cold resistance. | ||

|
Refreshing Kvaris Plum | Found in Western Kvaris | Fruit Gathered in Kvaris. Boosts PP, boosts PP recovery and boosts cold resistance. | ||
|
Sharp Kvaris Guava | Found in Central Kvaris | Fruit Gathered in Kvaris. Boosts PP, boosts weakness damage and boosts cold resistance. | ||
|
Healthy Kvaris Akebia | Found in Southern Kvaris | Fruit Gathered in Kvaris. Boosts PP, boosts HP recovery and boosts cold resistance. | ||
|
Notable Kvaris Ackee | Found in Northern Kvaris at daytime only | Rare Fruit Gathered in Kvaris. Can be traded for items. When used in Quick Food, has same effect as Nourishing Kvaris Ackee | ||
| 64px | Sharp Stia Mango | Found in Stia: Fringes | Fruit Gathered in Stia. Boosts PP and boosts weakness damage. | ||
| 64px | Refreshing Stia Apple | Found in Outer Mediola: Sector 2 | Fruit Gathered in Stia. Boosts PP and boosts PP recovery. | ||
| 64px | Nourishing Stia Banana | Found in Outer Mediola: Sector 2 | Fruit Gathered in Stia. Boosts PP and reduces PP consumption. | ||
| 64px | Healthy Stia Plum | Found in Stia: Fringes | Fruit Gathered in Stia. Boosts PP and boosts HP recovery. | ||
| 64px | Famed Stia Star Fruit | Found in Stia: Fringes (daytime only) | Rare Fruit Gathered in Stia. Can be traded for items. When used in Quick Food, has same effect as Refreshing Stia Apple | ||

|
Sprig Ballooni | Found in Aelio and Retem Gathering Sectors | Fruit Gathered in Aelio & Retem. Boosts PP and boosts PP recovery. Can only be Gathered during Spring events. |
Seafood
| ★ | Icon | Image | Name | Obtainment | Notes |
|---|---|---|---|---|---|
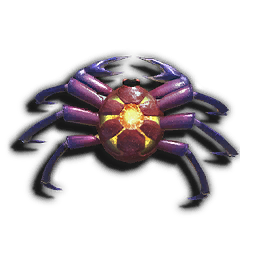
|
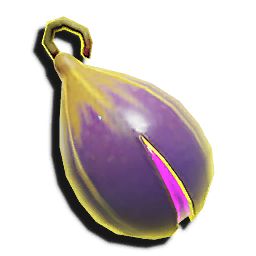
Sharp Aelio Crab | Found in Central Aelio | Seafood caught in Aelio. Boosts HP and boosts weakness damage. | ||

|
Refreshing Aelio Snail | Found in Western Aelio | Seafood caught in Aelio. Boosts HP and boosts PP recovery. | ||

|
Nourishing Aelio Clam | Found in Southern Aelio | Seafood caught in Aelio. Boosts HP and reduces PP consumption. | ||
|
Healthy Aelio Lobster | Found in Northern Aelio | Seafood caught in Aelio. Boosts HP and boosts HP recovery. | ||
|
Sharp Retem Sea Urchin | Found in Luf Maqaad | Seafood caught in Retem. Boosts HP and boosts weakness damage. | ||

|
Refreshing Retem Sea Slug | Found in Northern Retem | Seafood caught in Retem. Boosts HP and boosts PP recovery. | ||

|
Nourishing Retem Scallop | Found in Western Retem | Seafood caught in Retem. Boosts HP and reduces PP consumption. | ||

|
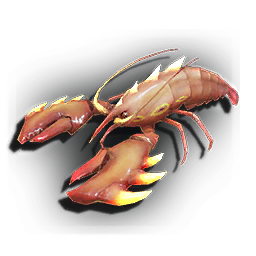
Healthy Retem Hermit Crab | Found in Central Retem and Southern Retem | Seafood caught in Retem. Boosts HP and boosts HP recovery. | ||

|
Nourishing Kvaris Sea Snail | Found in Western Kvaris | Seafood caught in Kvaris. Boosts HP, reduces PP consumption and boosts cold resistance. | ||

|
Refreshing Kvaris Octopus | Found in Northern Kvaris | Seafood caught in Kvaris. Boosts HP, boosts PP recovery and boosts cold resistance. | ||

|
Sharp Kvaris Squid | Found in Central Kvaris and Rayjord Gorge | Seafood caught in Kvaris. Boosts HP, boosts weakness damage and boosts cold resistance. | ||

|
Healthy Kvaris Lobster | Found in Southern Kvaris | Seafood caught in Kvaris. Boosts HP, boosts HP recovery and boosts cold resistance. | ||
|
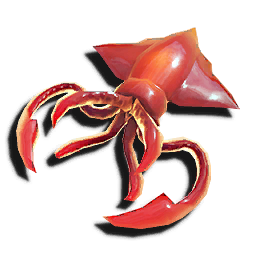
Notable Kvaris Squid | Found in Central Kvaris and Rayjord Gorge at nighttime only | Rare Seafood caught in Kvaris. Can be traded for items. When used in Quick Food, has same effect as Sharp Kvaris Squid | ||
| 64px | Sharp Stia Octopus | Found in Stia: Fringes | Seafood caught in Stia. Boosts HP and boosts weakness damage. | ||
| 64px | Refreshing Stia Sea Slug | Found in Stia: Fringes | Seafood caught in Stia. Boosts HP and boosts PP recovery. | ||
| 64px | Nourishing Stia Hermit Crab | Found in Stia: Fringes | Seafood caught in Stia. Boosts HP and reduces PP consumption. | ||
| 64px | Healthy Stia Snail | Found in Outer Mediola: Sector 2 | Seafood caught in Stia. Boosts HP and boosts HP recovery. | ||
| 64px | Famed Stia Crab | Found in Outer Mediola: Sector 2 | Rare Seafood Gathered in Stia. Can be traded for items. When used in Quick Food, has same effect as Nourishing Stia Hermit Crab |
Meats
| ★ | Icon | Image | Name | Obtainment | Notes |
|---|---|---|---|---|---|

|
Sharp Aelio Meat | Dian (Central/Southern) Otterica (Western/Southern) |
Meat obtained in Aelio. Boosts damage and boosts weakness damage. | ||
|
|
Refreshing Aelio Meat | Patt (Central/Western) Birdie (Northern/Western) Flango (Northern/Western) |
Meat obtained in Aelio. Boosts damage and boosts PP recovery. | ||
|
|
Nourishing Aelio Meat | Sunny (Central) Moony (Central) Voks (Western/Southern) |
Meat obtained in Aelio. Boosts damage and reduces PP consumption. | ||
|
|
Healthy Aelio Meat | Taubel/Moobel (Central/Northern) Noxi (Southern) |
Meat obtained in Aelio. Boosts damage and boosts HP recovery. | ||
|
|
Sharp Retem Meat | Camellia, Ramul Otterica | Meat obtained in Retem. Boosts damage and boosts weakness damage. | ||
|
|
Refreshing Retem Meat | Ramul Patt, Ramul Pattie, Ramul Birdie | Meat obtained in Retem. Boosts damage and boosts PP recovery. | ||
|
|
Nourishing Retem Meat | Ramul Voks | Meat obtained in Retem. Boosts damage and reduces PP consumption. | ||
|
|
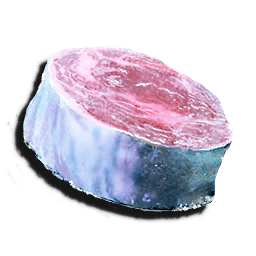
Healthy Retem Meat | Hippoko | Meat obtained in Retem. Boosts damage and boosts HP recovery. | ||
|
|
Nourishing Kvaris Meat | ? | Meat obtained in Kvaris. Boosts damage, cuts PP consumption and boosts cold resistance. | ||
|
|
Refreshing Kvaris Meat | ? | Meat obtained in Kvaris. Boosts damage, boosts PP recovery and boosts cold resistance. | ||
|
|
Sharp Kvaris Meat | ? | Meat obtained in Kvaris. Boosts damage, boosts weakness damage and boosts cold resistance. | ||
|
|
Healthy Kvaris Meat | ? | Meat obtained in Kvaris. Boosts damage, boosts HP recovery and boosts cold resistance. | ||
|
Notable Kvaris Meat | Comanta in Rayjord Gorge | Rare meat obtained in Kvaris. Can be traded for items. When used in Qucik Food, has the same effect as Healthy Kvaris Meat | ||
|
|
Sharp Stia Meat | ? | Meat obtained in Stia. Boosts damage and boosts weakness damage. | ||
|
|
Refreshing Stia Meat | ? | Meat obtained in Stia. Boosts damage and boosts PP recovery. | ||
|
|
Nourishing Stia Meat | ? | Meat obtained in Stia. Boosts damage and reduces PP consumption. | ||
|
|
Healthy Stia Meat | ? | Meat obtained in Stia. Boosts damage and boosts HP recovery. |