Difference between revisions of "Mourning of Demise"
Beepboop8-3 (talk | contribs) |
Beepboop8-3 (talk | contribs) (→Others) |
||
| (3 intermediate revisions by the same user not shown) | |||
| Line 169: | Line 169: | ||
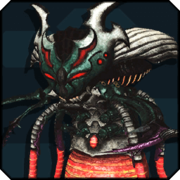
File:UIEnemyBomberVareda.png|link=Bomber Vareda|[[Bomber Vareda]] | File:UIEnemyBomberVareda.png|link=Bomber Vareda|[[Bomber Vareda]] | ||
File:BontaBearadda.png|link=Bonta Bearadda|[[Bonta Bearadda]] | File:BontaBearadda.png|link=Bonta Bearadda|[[Bonta Bearadda]] | ||
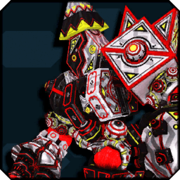
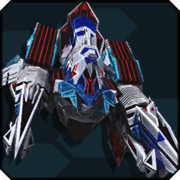
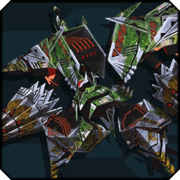
| + | File:AISExoda.PNG|link=A.I.S. Exoda|[[A.I.S. Exoda]] | ||
</gallery> | </gallery> | ||
<gallery mode="packed" caption="Darker Bosses"> | <gallery mode="packed" caption="Darker Bosses"> | ||
| Line 178: | Line 179: | ||
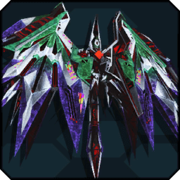
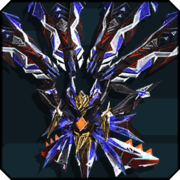
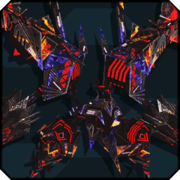
File:UIEnemyGolshrayda.png|link=Golshrayda|[[Golshrayda]] | File:UIEnemyGolshrayda.png|link=Golshrayda|[[Golshrayda]] | ||
</gallery> | </gallery> | ||
| + | |||
===Luminmechs=== | ===Luminmechs=== | ||
<gallery mode="packed" caption="Luminmechs"> | <gallery mode="packed" caption="Luminmechs"> | ||
| Line 205: | Line 207: | ||
File:BolOgakibaruIcon.png|link=Bol Ogaki-baru|[[Bol Ogaki-baru]] | File:BolOgakibaruIcon.png|link=Bol Ogaki-baru|[[Bol Ogaki-baru]] | ||
File:GauOgakibaruIcon.png|link=Gau Ogaki-baru|[[Gau Ogaki-baru]] | File:GauOgakibaruIcon.png|link=Gau Ogaki-baru|[[Gau Ogaki-baru]] | ||
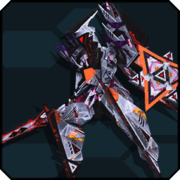
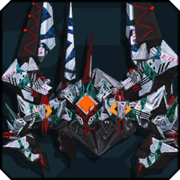
| + | File:SniperNeonIcon.png|link=Sniper Neon|[[Sniper Neon]] | ||
File:UIEnemyOrcBomber.png|link=Orc Bomber|[[Orc Bomber]] | File:UIEnemyOrcBomber.png|link=Orc Bomber|[[Orc Bomber]] | ||
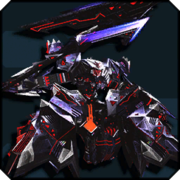
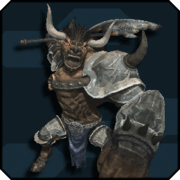
File:UIEnemyMinotaurgus.png|link=Minotaurgus|[[Minotaurgus]] | File:UIEnemyMinotaurgus.png|link=Minotaurgus|[[Minotaurgus]] | ||
| Line 259: | Line 262: | ||
** 2,5,8,11 will be sent to the right to face [[Shiva (Mitra Ver.)]] | ** 2,5,8,11 will be sent to the right to face [[Shiva (Mitra Ver.)]] | ||
** 3,6,9,12 will be sent to the center to face [[Goddess of Demise: Shiva]] | ** 3,6,9,12 will be sent to the center to face [[Goddess of Demise: Shiva]] | ||
| − | *When one of the bosses is defeated, jump pads will appear to allow assisting with the other bosses. | + | *When one of the bosses is defeated, jump pads will appear to allow assisting with the other bosses.\ |
| + | *When all three are defeated, the loot crystal will appear in center of the room where you fight [[Goddess of Demise: Shiva]]. | ||
| − | == | + | ==Drops== |
| + | {| class=" wikitable" | ||
| + | ! Type !! Item Name !! Notes | ||
| + | |- | ||
| + | ! rowspan=9 | Weapons | ||
| + | | {{rarity|15}}{{icons|Swords}}{{icons|Twin Machine Guns}}{{icons|Talis}} Adel Series <br> | ||
| + | {{rarity|15}}{{icons|Katana}}{{icons|Assault Rifle}}{{icons|Rod}} Serios Series <br> | ||
| + | {{rarity|15}}{{icons|Double Saber}}{{icons|Dual Blades}}{{icons|Wand}} Fimbul Series | ||
| + | | Hr/Ph/Et 15* Collection File Weapons | ||
| + | |- | ||
| + | | {{rarity|15}}{{icons|Gunslash}} [[Talon Schneider]] | ||
| + | {{rarity|15}}{{icons|Swords}}{{icons|Launcher}}{{icons|Talis}} Oblisana Series <br> | ||
| + | {{rarity|15}} Novel Series <br> | ||
| + | {{rarity|15}} Orb Series <br> | ||
| + | {{rarity|15}} Million Series <br> | ||
| + | {{rarity|15}} Kirsa Series <br> | ||
| + | {{rarity|14}}{{icons|Wired Lance}}{{icons|Twin Machine Guns}}{{icons|Wand}} Lamia Series <br> | ||
| + | {{rarity|13}} {{icons|Twin Daggers}} [[Twin Tonfa]] <br> | ||
| + | {{rarity|13}} {{icons|Talis}} [[Lumiholy]] <br> | ||
| + | | Area Drops | ||
| + | |- | ||
| + | |{{rarity|14}} Dim Series <br> | ||
| + | {{rarity|13}} Basilis Series <br> | ||
| + | {{rarity|13}} Jutus Series | ||
| + | | Misc. Enemy Drops | ||
| + | |- | ||
| + | |{{rarity|15}}{{icons|Katana}}{{icons|Gunslash}}{{icons|Assault Rifle}}{{icons|Twin Machine Guns}} Vortex Series | ||
| + | | UH<br>[[Shiva (Mitra Ver.)]] and <br> [[Goddess of Demise: Shiva]] Drops | ||
| + | |- | ||
| + | | {{rarity|15}}{{icons|Swords}} [[Bonds Hachette]] | ||
| + | | UH<br>[[Varuna]] Drops | ||
| + | |- | ||
| + | | {{rarity|15}}{{icons|Swords}} [[Dyne Hespera]]<br> | ||
| + | {{rarity|15}}{{icons|Talis}} [[Dyne Affectus]]<br> | ||
| + | {{rarity|15}}{{icons|Wired Lance}} [[Acure Charis]]<br> | ||
| + | {{rarity|15}}{{icons|Wired Lance}} [[Atus Charis]] | ||
| + | | UH<br>[[Heud Azure]]<br>[[Elscoude]]<br>[[Dral Veluge]] and<br>[[Dral Gurudy]] Drops | ||
| + | |- | ||
| + | |{{rarity|15}}{{icons|Bullet Bow}} [[Hard Cross Bullet]] <br> | ||
| + | {{rarity|15}}{{icons|Wand}} [[Clarte Dolce]] | ||
| + | | UH<br>[[Veiled Fordruss]] Drops | ||
| + | |- | ||
| + | |{{rarity|15}}{{icons|Partizan}} [[Megalis Glaive]] <br> | ||
| + | {{rarity|15}}{{icons|Rod}} [[Megalis Rod]] | ||
| + | | UH<br>[[Grav Execour]] Drops | ||
| + | |- | ||
| + | |{{rarity|15}}{{icons|Katana}} [[Ridder Order]]<br> | ||
| + | {{rarity|15}}{{icons|Katana}} [[Resonant Talmey]]<br> | ||
| + | {{rarity|15}}{{icons|Launcher}} [[Combat Cannon]]<br> | ||
| + | {{rarity|15}}{{icons|Rod}} [[Resonant Tephira]] | ||
| + | | UH<br>Ultralized Bosses Drops | ||
| + | |- | ||
| + | ! Units | ||
| + | | {{rarity|13}}{{icons|Rear}} Rear/Equidic Grudge <br> | ||
| + | {{rarity|13}}{{icons|Rear}} Rear/Avion Dusk<br> | ||
| + | <br> | ||
| + | {{rarity|13}}{{icons|Leg}} Leg/Mirage Cell <br> | ||
| + | {{rarity|13}}{{icons|Leg}} Leg/Nova Cell <br> | ||
| + | <br> | ||
| + | {{rarity|13}}{{icons|Rear}} Rear/Novel Full<br> | ||
| + | {{rarity|13}}{{icons|Arm}} Arm/Novel One<br> | ||
| + | {{rarity|13}}{{icons|Leg}} Leg/Novel Mass<br> | ||
| + | <br> | ||
| + | {{rarity|13}}{{icons|Rear}} Rear/Liberate Full<br> | ||
| + | {{rarity|13}}{{icons|Arm}} Arm/Liberate One<br> | ||
| + | {{rarity|13}}{{icons|Leg}} Leg/Liberate Mass<br> | ||
| + | <br> | ||
| + | {{rarity|13}}{{icons|Rear}} Rear/Schvelle Kibbs<br> | ||
| + | {{rarity|13}}{{icons|Arm}} Arm/Schvelle Ret<br> | ||
| + | {{rarity|13}}{{icons|Leg}} Leg/Schvelle Serb<br> | ||
| + | <br> | ||
| + | {{rarity|11}}{{icons|Sub}} Sub/Solid Barrier | ||
| + | | | ||
| + | |- | ||
| + | ! Eggs | ||
| + | |{{rarity|14}}{{icons|Egg}} Vulcan Egg | ||
| + | |XH+ | ||
| + | |- | ||
| + | ! Special Abilities | ||
| + | | | ||
| + | {{Props|Veluge Glare}}<br> | ||
| + | {{Props|Fordruss Glare}}<br> | ||
| + | {{Props|Execour Glare}}<br> | ||
| + | {{Props|Varuna Glare}}<br> | ||
| + | {{Props|Mitra Glare}}<br> | ||
| + | {{Props|Shiva Glare}} | ||
| + | | From the respective bosses | ||
| + | |- | ||
| + | ! rowspan=5 | S-class Special Ability (Weapons) | ||
| + | | {{icons|Pass}}S1 Add:Powering Intent<br> | ||
| + | {{icons|Pass}}S1 Add:Augment Intent | ||
| + | | rowspan=5 | UH<br>S-class Ability Capsule Drops | ||
| + | |- | ||
| + | |{{icons|Pass}}S2 Add:Flowing Grace <br> | ||
| + | {{icons|Pass}}S2 Add:Skilled Intent 2 | ||
| + | |- | ||
| + | |{{icons|Pass}}S3 Add:Cursed Radiance | ||
| + | |- | ||
| + | |{{icons|Pass}}S4 Add:Calming Intent <br> | ||
| + | {{icons|Pass}}S4 Add:Skilled Balance <br> | ||
| + | {{icons|Pass}}S4 Add:Pursuing Skill<br> | ||
| + | {{icons|Pass}}S4 Add:Raising Pursuit <br> | ||
| + | {{icons|Pass}}S4 Add:Shared Ruin | ||
| + | |- | ||
| + | |{{icons|Pass}}S5 Add:Aegis Balance <br> | ||
| + | {{icons|Pass}}S5 Add:Anthesis Cultivation | ||
| + | |- | ||
| + | ! rowspan=6 | S-class Special Ability (Units) | ||
| + | | {{icons|Pass}}S6 Add: Long Night Star <br> | ||
| + | {{icons|Pass}}S6 Add: Overlimit | ||
| + | | rowspan=3 | UH<br>S-class Ability Capsule Drops | ||
| + | |- | ||
| + | | {{icons|Pass}}S7 Add: Mind Merge <br> | ||
| + | {{icons|Pass}}S7 Add: Glowing Grace <br> | ||
| + | {{icons|Pass}}S7 Add: Zenith Impact <br> | ||
| + | {{icons|Pass}}S7 Add: Increased Efficiency <br> | ||
| + | {{icons|Pass}}S7 Add: Sentinel's Gift | ||
| + | |- | ||
| + | | {{icons|Pass}}S8 Add: Strong Potency<br> | ||
| + | {{icons|Pass}}S8 Add: Sky Dance's Boon | ||
| + | |- | ||
| + | |{{icons|SSA 6}} S6: Guardian Armor<br> | ||
| + | {{icons|SSA 6}} S6: Brilliant Ruin <br> | ||
| + | {{icons|SSA 6}} S6: Angelic Wings <br> | ||
| + | {{icons|SSA 6}} S6: Ironclad Illness <br> | ||
| + | {{icons|SSA 6}} S6: Wise Skill <br> | ||
| + | {{icons|SSA 6}} S6: Battle Readiness <br> | ||
| + | {{icons|SSA 6}} S6: HP Up <br> | ||
| + | {{icons|SSA 6}} S6: PP Up | ||
| + | | On {{rarity|13}}{{icons|Rear}} Rear Units | ||
| + | |- | ||
| + | | | ||
| + | {{icons|SSA 7}} S7: PP Up <br> | ||
| + | {{icons|SSA 7}} S7: Attack Up <br> | ||
| + | {{icons|SSA 7}} S7: Attack Up 2 <br> | ||
| + | {{icons|SSA 7}} S7: R-ATK Up 2 | ||
| + | | On {{rarity|13}}{{icons|Arm}} Arm Units | ||
| + | |- | ||
| + | | | ||
| + | {{icons|SSA 8}} S8: High Minded <br> | ||
| + | {{icons|SSA 8}} S8: S-ATK Up <br> | ||
| + | {{icons|SSA 8}} S8: R-ATK Up <br> | ||
| + | {{icons|SSA 8}} S8: T-ATK Up | ||
| + | | On {{rarity|13}}{{icons|Leg}} Leg | ||
| + | |- | ||
| + | ! |Others | ||
| + | | {{rarity|13}}{{icons|Order}} Module/Execour <br> | ||
| + | {{rarity|13}}{{icons|Order}} Module/Varuna <br> | ||
| + | {{rarity|13}}{{icons|Order}} Module/Mitra <br> | ||
| + | {{rarity|13}}{{icons|Order}} Module/Shiva | ||
| + | | From the respective bosses<br>UH always drops 3x {{rarity|13}}{{icons|Order}} Module/Shiva | ||
| + | |} | ||
Latest revision as of 23:08, 19 October 2020
Mourning of Demise is an Emergency Quest.
Quest
| Quest Type | Emergency Quest |
|---|---|
| Quest Goal | Head for the Final Area! |
| Single/Multi Party | Multi |
| Clearing Conditions | Defeat the enemy in the Final Area! |
| Failing Conditions | N/A |
| Quest Time Limit | N/A |
Ranking & Quest Points
- This Quest has special ranking requirements.
| Defeat Enemies | 400 pts |
|---|---|
| Clear Time | 100 pts |
| Quest Points | 9500 pts (see below) |
| Max Score | 10000 pts |
- 9500 total points or more is required for S-rank. This means accumulating a total of 9000 or more Quest Points on the counter within the quest.
- Quest Points are awarded for defeating bosses and for destroying enemy fighter craft and turrets, according to the following tables:
| Area 1 | Area 2 | Area 1 | ||||||
|---|---|---|---|---|---|---|---|---|
| Target | Points | Number | Target | Points | Number | Target | Points | Number |
| Cassadol I | 22pt | 51 | Fractal Cannon | 50pt | 12 | Varuna | 500pt | 1 |
| Cassadol II | 22pt | Cassadol IV | 93pt | 3 | Shiva (Mitra Ver.) | 500pt | 1 | |
| Minimal Laser | 23pt | 53 | Demi-Variable | 50pt | 6 | Goddess of Demise: Shiva | 700pt | 1 |
| Fractal Cannon | 23pt | Evolion Dragon | 350pt | 1 | E-Trial Clear | 450pt | - | |
| Variable Laser | 23pt | Dark Ragne | 250pt | 1 | Area 3 Total | 2150pt | ||
| Luster Cannon | 0pt | 4 | Oduna Zoldatta | 250pt | 1 | Area 1+2 Total | 7350pt | |
| Bridge Mechanism | 120pt | 4 | Grana Gwanahda | 350pt | 1 | |||
| Dark Vibrace Yuga | 200pt | 1 | Rafaga Ringahda or Golshrayda | 350pt | 1 | |||
| Dral Veluge | 200pt | 1 | Veiled Fordruss | 350pt | 1 | |||
| Dral Gurudy | 200pt | 1 | Grav Execour | 400pt | 1 | |||
| E-Trial Completion | 100pt | - | E-Trial Completion | 350pt | - | |||
| Area 1 Total | 3521pt | Area 2 Total | 3829pt | |||||
Enemies
Darkers
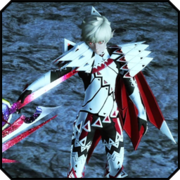
- Darkers
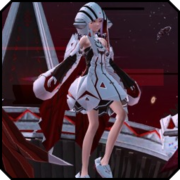
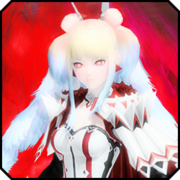
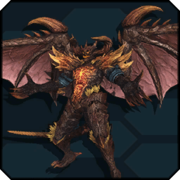
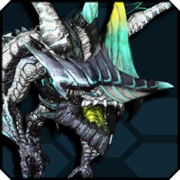
- Darker Bosses
Luminmechs
- Luminmechs
- Luminmech Bosses
Others
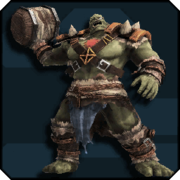
- Other
- Other Bosses
Strategy
Area 1: Friendly Battleship Deck
- Turrets will appear on either side of the battleship deck.
- Enemy Fighters (Cassadol I and II) will fly overhead like in Sector 1 of Armada of Demise. Destroy them to accumulate Quest Points.
- Enemy Battleships will appear on either side of the friendly battleship. Use the turrets to destroy turrets and bridge of the enemy battleship to accumulate Quest Points.
- The first battleship will appear on the left (port) side.
- The second battleship will appear on the right (starboard) side.
- Finally, two battleships will appear, one on either side.
- Mobs will spawn on the battleship deck. Defeat the mobs to cause additional turrets to appear.
- After the final pair of enemy battleships are destroyed (or warp out), Dral Veluge and Dral Gurudy will spawn along with mobs.
- The Emergency Trial is to defeat all 21 enemies within 1 minute and 30 seconds.
Area 2: Enemy Flagship Interior
- Defeat the mobs to open the first gate
First Room (Square)
- There are three routes in the first room - central, right, and left.
- Central Route:
- Defeat the Evolion Dragon.
- Take the jump pad up to the towers with the Fractal Cannons on them to accumulate Quest Points.
- Right Route:
- Defeat the mobs while avoiding the moving laser walls.
- Defeat Oduna Zoldatta.
- Left Route:
- Stay under the static laser wall to avoid damage.
- Defeat Dark Ragne.
- Defeat the mobs, including a Flame Diamos.
Second Room (B-shaped room)
- There are two routes in the second room: straight, and the route to the side.
- Straight Route:
- Defeat the mobs (Goldrahdas)
- Defeat the Grana Gwanahda and the large ultralized Darker boss (either Rafaga Ringahda or Golshrayda)
- Side Route:
- Activate the switches while avoiding the static laser walls to avoid damage.
- Defeat the mobs and shoot down the Cassadol IV (Gold Fighter Planes) for Quest Points.
- Avoid the rotating laser walls and deactivate the 3 devices.
Final Room
- Destroy the turrets for Quest Points
- The Emergency Trial is to defeat the Veiled Fordruss and Grav Execour within 1 minute and 20 seconds.
Area 3: Enemy Flagship Center
- After a short countdown, the MPA will divided to fight the 3 bosses: Varuna, Shiva (Mitra Ver.) and Goddess of Demise: Shiva.
- How the MPA is split depends on the order of entering into Area 3:
- 1,4,7,10 will be sent to the left to face Varuna
- 2,5,8,11 will be sent to the right to face Shiva (Mitra Ver.)
- 3,6,9,12 will be sent to the center to face Goddess of Demise: Shiva
- When one of the bosses is defeated, jump pads will appear to allow assisting with the other bosses.\
- When all three are defeated, the loot crystal will appear in center of the room where you fight Goddess of Demise: Shiva.
Drops
| Type | Item Name | Notes |
|---|---|---|
| Weapons |
|
Hr/Ph/Et 15* Collection File Weapons |
|
Area Drops | |
|
Misc. Enemy Drops | |
| UH Shiva (Mitra Ver.) and Goddess of Demise: Shiva Drops | ||
| UH Varuna Drops | ||
| UH Heud Azure Elscoude Dral Veluge and Dral Gurudy Drops | ||
| UH Veiled Fordruss Drops | ||
| UH Grav Execour Drops | ||
| UH Ultralized Bosses Drops | ||
| Units |
|
|
| Eggs | XH+ | |
| Special Abilities |
|
From the respective bosses |
| S-class Special Ability (Weapons) |
|
UH S-class Ability Capsule Drops |
| ||
| ||
| ||
| S-class Special Ability (Units) |
|
UH S-class Ability Capsule Drops |
| ||
| ||
|
On | |
|
|
On | |
|
|
On | |
| Others |
|
From the respective bosses UH always drops 3x |
