Warning!
This wiki is only for the Japanese servers with the translation patch created by Arks-Layer. If you're on Global, please use [Instead].
Aberrations
| Aberrations | Darkers | Dragonkin | Mechs | Natives | Oceanids | Phantoms | Special Enemies | Titans | Demons | Luminmechs |
(DA) Aberrations
| Enemy | Area | Drop List | Breakpoints | Weakness | Notes |
|---|---|---|---|---|---|
 Dagan Yuga ダガン・ユガ |
|
Lv. 76+ | Weak to:
Weakspots:
|
Recieved Damage | |
 Yugarl Dagan ユガール・ダガン |
|
Weak to:
Weakspots:
|
This enemy is a rare version of Dagan Yuga, and counts as one for enemy extermination orders. Also drops items from the Dagan Yuga drop list. Recieved Damage | ||
 Yugadicahda ユーガディカーダ |
|
Lv. 76+ | Arm Blades | Weak to:
Weakspots:
|
Recieved Damage |
 Nergadicahda ネルガディカーダ |
|
Arm Blades | Weak to:
Weakspots:
|
This enemy is a rare version of Yugadicahda, and counts as one for enemy extermination orders. Also drops items from the Yugadicahda drop list. Recieved Damage | |
 Yuguldrahda ユグルドラーダ |
|
Lv. 76+ | Back Core | Weak to:
Weakspots:
|
Recieved Damage |
 Yurisgadrahda ユリスガドラーダ |
|
Back Core | Weak to:
Weakspots:
|
This enemy is a rare version of Yuguldrahda, and counts as one for enemy extermination orders. Also drops items from the Yuguldrahda drop list. Recieved Damage | |
 Ga Wonda Yuga ガウォンダ・ユガ |
|
Weak to:
Weakspots:
|
Recieved Damage | ||
 Gu Wonda Yuga グウォンダ・ユガ |
|
Weak to:
Weakspots:
|
Recieved Damage | ||
 Kuklonahda Yuga キュクロナーダ・ユガ |
|
Crotch Armor | Weak to:
Weakspots:
|
Recieved Damage | |
 Cyclonehda Yuga サイクロネーダ・ユガ |
|
Crotch Armor | Weak to:
Weakspots:
|
Recieved Damage | |
 Yugada Sorcerer ユグダソーサラー |
|
Weak to:
Weakspots: |
|||
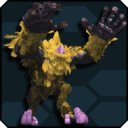
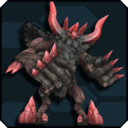
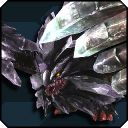
 Anga Fundarge アンガ・ファンダージ |
|
Floating Bits | Weak to:
Weakspots:
|
Recieved Damage Gains resistances to sources that deal the most damage to it. Destroying all floating bits will briefly immobilize and permanently reveal the core weakpoint. Will revive once, shortly after it is defeated for the first time. Immobilized by Panic | |
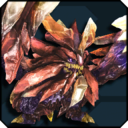
Anga Fundarge アンガ・ファンダージ |
|
Floating Bits | Weak to:
Weakspots:
|
Has a quadrupedal appearance and different attack patterns. Gains resistances to sources that deal the most damage to it. Destroying all floating bits will briefly immobilize and permanently reveal the core weakpoint. Will revive once, shortly after it is defeated for the first time. Immobilized by Panic | |
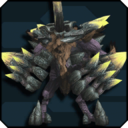
 Viel Hunar ヴィエル・ヒューナル |
|
Arm Cores | Weak to:
Weakspots:
|
Body is initially shielded. Break both arm cores to expose body weakpoint. | |
 Dio Hunar ディーオ・ヒューナル |
|
Arm Cores | Weak to:
Weakspots:
|
Body is initially shielded. Break both arm cores to expose body weakpoint. | |
 Omega Hunar オメガ・ヒューナル |
|
|
Sword | Weak to:
Weakspots:
|
Utilizes variations of Falz Hunar's attacks and Dark Blast Photon Arts. Breaking Elder Pain Omega lowers the damage of Omega Hunar's sword-based attacks. The core is on Omega Hunar's chest, and is easy to hit.
During Buster Quests only:
|
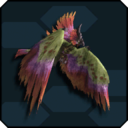
 Omega Angel オメガ・アンゲル |
|
|
Wings | Weak to:
Weakspots:
|
Omega variation of Falz Angel. Qualifies as a DA-Aberration. Starts with powered-up attacks from Falz Angel. At low health, becomes enraged, gaining new attacks and utilizing Compound Techniques. |
 Omega Appregina オメガ・アプレジナ |
|
Lv. 76+:
|
Insects | Weak to:
Weakspots:
|
Omega variation of Falz Appregina (from PHANTASY STAR ONLINE 2 EPISODE 0). Qualifies as a DA-Aberration. |
 Dourumble Clone ダランブル・クローネ |
|
Arms | Weak to:
Weakspots:
|
Smaller and weaker version of Omega Dourumble. Often appears in place of Falz Douran and Falz Dourill when Omega Dourumble appears in the place of Falz Dourumble, such as in Seasonal EQs. Qualifies as a DA-Aberration. | |
 Omega Dourumble オメガ・ダランブル |
|
Lv. 76+:
|
Arms | Weak to:
Weakspots:
|
Omega variation of Falz Dourumble. Qualifies as a DA-Aberration. |
 Elga Masquerade エルガ・マスカレーダ |
|
None | None | Weak to:
Weakspots:
|
Elmir at the height of his power. |
Omega Masquerade オメガ・マスカレーダ |
|
Lv. 91+ : | None | Weak to:
Weakspots:
|
Ultimate Quest variation of Elga Masquerade. Becomes stronger every time it's defeated. See Area Survey: Remnants of Other Worlds for more information. Gains immunity to attacks that are used repeatedly. |
 Profound Darkness 【深遠なる闇】 |
|
Face Core Chest Core Floating Bits Body Petals |
Weak to:
Weakspots:
|
Flower Form: On SH and below, break Body Petals to temporarily expose the Base Core. On XH, break Body Petals to release Floating Bits. Destroy all Floating Bits to expose the Base Core. At 60% HP, background will change, and PD will gain weakness to a weapon type on SH and below. At 40% HP, will transition into humanoid form.
| |
 Omega Falz Loser オメガファルス・ルーサー |
|
|
Bracers Shoulders Clock Beak Headdress Gems |
Weak to:
Weakspots:
|
Omega variant of Dark Falz Loser. Qualifies as a DA-Aberration. Battle strategy is identical to XH Dark Falz Loser on all difficulties. Stunned by the Poison status effect. Will sometimes switch phases mid-attack. Uses two knife time stop during first HP threshold. At second HP threshold, summons three sets of knives; second set will rotate around the stage before dropping knives. |
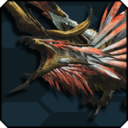
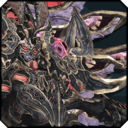 Omega Falz Apprentice OF・アプレンティス |
|
Wings Pink Orbs Arm Cores |
Weak to:
Weakspots:
|
Omega variant of Dark Falz Apprentice (from PHANTASY STAR ONLINE 2 THE ANIMATION). Qualifies as a DA-Aberration. During the aerial battle, breaking all 6 wings or both pink orbs on either side of her head will immobilize her momentarily. Doing sufficient damage to her main core will cause her to keep it open during the rest of the aerial phase. Avoid the spinning laser trap by dodging towards the center, and again when giant laser asterisk is launched forward. After she falls to the ground, simply break all her arm cores then hit her main core to finish her off before she finishes charging the final laser attack. | |
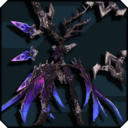
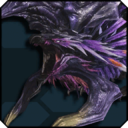
 Dark Falz Persona ダークファルス・ペルソナ |
|
Cores Mask |
Weak to:
Weakspots:
|
An abomination created by Shiva using Elmir's grudge, invoking a mocking image of Persona and the four initial Dark Falz. Wears different masks that change with every fight; two random masks would be selected from a pool of four different masks, each with a fighting style based on a previous Dark Falz. Each mask has two-stage breaking phases, similar to Dark Ragne's legs.
There's no gimmick to this additional phase, the raid party is to whittle the last of Persona's HP until it's completely depleted. | |
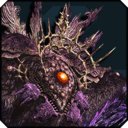 Primordial Darkness Gomorroth 【原初の闇】ゴモルス |
|
Cores | Weak to:
Weakspots:
|
The physical manifestation of the ultimate darkness. Gomorroth's main body is immune to all damage - the only places where it can be damaged are the eyeball-like cores on its tentacles, the large central eye on its face, and its hands.
When Gommorroth's HP is lowered sufficiently, it will destroy the 3 centermost platforms with its tentacles and expose two additional cores like the ones in Phase 1 placed on the far left and far right platforms. Breaking both these cores to proceed.
| |
 Primordial Darkness Sodam 【原初の闇】ソダム |
|
Weak to:
Weakspots:
|
The true form of the ultimate darkness. Has no elemental weakness other than on its final form and gains random weapon weaknesses throughout the battle in Primordial Glare from the Void.
During this phase, breaking the "rings" on Sodam's hands will cause it to flinch for a bit. Additionally, it will also trigger one of the three Heroine Buffs (see below) depending on the heroine that gets talked to the most during the Phase 2 preparations. The multi-party also needs to be cautious when Sodam does one of these attacks:
|
(NA) Aberrations
| Enemy | Area | Drop List | Breakpoints | Weakness | Notes |
|---|---|---|---|---|---|
 Folginis フォルギニス |
|
Weak to:
Weakspots:
|
Recieved Damage | ||
 Geragodan ジェラゴダン |
|
Weak to:
Weakspots:
|
Recieved Damage | ||
 Gibbloodan ギブルーダン |
|
Weak to:
Weakspots:
|
Recieved Damage | ||
 Zugruff ズグラフ |
|
Weak to:
Weakspots:
|
Recieved Damage | ||
 Zugruff Gue ズグラフ・グー |
|
Weak to:
Weakspots:
|
Recieved Damage | ||
 Bargruff バルグラフ |
|
Weak to:
Weakspots:
|
Recieved Damage | ||
 Bargruff Gue バルグラフ・グー |
|
Weak to:
Weakspots: |
Recieved Damage | ||
 Grandilga グランディルガ |
|
Weak to:
Weakspots:
|
Recieved Damage | ||
 Fuehgo フォエーゴ |
|
Weak to:
Weakspots:
|
Recieved Damage | ||
 Kaisefuehgo カイズフォエーゴ |
|
Weak to:
Weakspots:
|
Recieved Damage | ||
 Jarmagles ジャーマグルス |
|
Weak to:
Weakspots:
|
Recieved Damage | ||
 Plosiorgles プロジオーグルス |
|
Humps | Weak to:
Weakspots:
|
Recieved Damage | |
 Ignitiogles イグニジオグルス |
|
Humps | Weak to:
Weakspots:
|
Recieved Damage | |
 Bayaribbles ベーアリブルス |
|
Weak to:
Weakspots:
|
Recieved Damage | ||
 Bergaribruisa ベルガリブルーサ |
|
Weak to:
Weakspots:
|
|||
 Diabo Igrithys ディアボイグリシス |
|
Horn Wings Tail |
Weak to:
Weakspots:
|
Recieved Damage | |
 Vomos Brodothys ヴォモスブロドシス |
|
Horn Wings Tail |
Weak to:
Weakspots:
|
Recieved Damage |
(LI) Aberrations
| Enemy | Area | Drop List | Breakpoints | Weakness | Notes |
|---|---|---|---|---|---|
 Jagd Spardan ヤクトスパルダン |
|
Weak to:
Weakspots:
|
Recieved Damage | ||
 Gunkaiser ガンカイザー |
|
Weak to:
Weakspots:
|
Recieved Damage | ||
 Sinow Rapidus シノワラピドゥス |
|
Weak to:
Weakspots:
|
Recieved Damage | ||
 Sinow Rozzo シノワロッゾ |
|
Weak to:
Weakspots:
|
Recieved Damage | ||
 Kaiser Vargr カイザーバルガー |
|
Weak to:
Weakspots:
|
Recieved Damage | ||
 Rapid Gilnas ラピドギルナス |
|
Weak to:
Weakspots:
|
Recieved Damage | ||
 Blade Dingell ブレードディンゲール |
|
Weak to:
Weakspots:
|
Recieved Damage | ||
 Dingabruze ディンガブルーゼ |
|
Weak to:
Weakspots:
|
Recieved Damage | ||
 Zeta Guranz ゼータ・グランゾ |
|
Knee Guns Shileds Missle Pods |
Weak to:
Weakspots:
|
Recieved Damage Necky's Challenge Immobilized by burn for a brief second | |
 Epsilon Guranz イプシロン・グランゾ |
|
Knee Guns Shileds Missle Pods |
Weak to:
Weakspots:
|
Recieved Damage Necky's Challenge Immobilized by burn for a brief second | |
 Falke Leone ファルケ・レオーネ |
|
Legs Wings Head |
Weak to:
Weakspots:
|
Recieved Damage | |
 Leone Falozzo レオーネ・ファロッゾ |
|
Legs Wings Head |
Weak to:
Weakspots:
|
Recieved Damage | |
 Vlima Leopard ヴリマ・レオパード |
|
Legs Wings Head |
Weak to:
Weakspots:
|
Recieved Damage | |
 Leopard Vlozzo レオパード・ヴロッゾ |
|
Legs Wings Head |
Weak to:
Weakspots:
|
Recieved Damage |
(AM) Aberrations
| Enemy | Area | Drop List | Breakpoints | Weakness | Notes |
|---|---|---|---|---|---|
 Varugalla ヴァルガーラ |
|
Weak to:
Weakspots: |
|||
 Globgalla グロブガーラ |
|
Weak to:
Weakspots: |
|||
 Zi Shubarizan ジ・シュバリザン |
|
Weak to:
Weakspots: |
|||
 Zo Shubarizan ゾ・シュバリザン |
|
Weak to:
Weakspots: |
|||
 Shubarizan シュバリザン |
|
Weak to:
Weakspots: |
|||
 Gurdran グルドラン |
|
Tail | Weak to:
Weakspots:
|
||
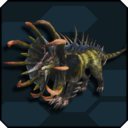
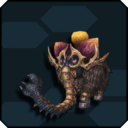
 Ventazaur ヴェンタザウル |
|
Horn Tail |
Weak to:
Weakspots: |
||
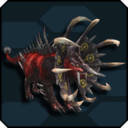
 Defanzaur デファンザウル |
|
Weak to:
Weakspots: |
|||
 Zo Shubarzas ゾ・シュバルザス |
|
Weak to:
Weakspots:
|
|||
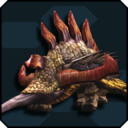
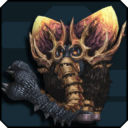
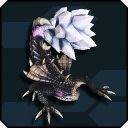
 Box Duvals ボクス・ドゥバルス |
|
Back | Weak to:
Weakspots:
|
Break back crystals to immobilize and briefly reveal mouth weakpoint Back crystals will regrow after it gets back up. | |
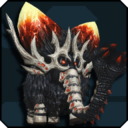
 Bugil Duvals ブギル・ドゥバルス |
|
Back | Weak to:
Weakspots:
|
||
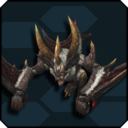
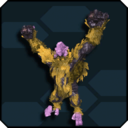
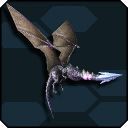
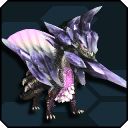
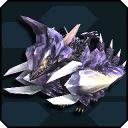
 Greuzoras Drago グリュゾラス・ドラゴ |
|
Both Wings Both Hands Face |
Weak to:
Weakspots:
|
||
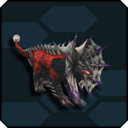
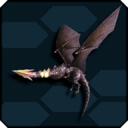
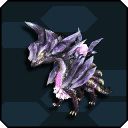
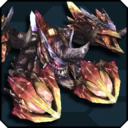
 Nirvalieze Drago ニルバリーズ・ドラゴ |
|
Both Wings Both Hands Face |
Weak to:
Weakspots:
|
||
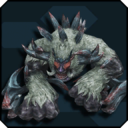
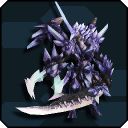
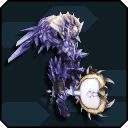
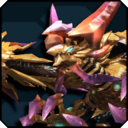
 Drago Deadleon ドラゴ・デッドリオン |
|
Spear Shield Face |
Weak to:
Weakspots:
|
||
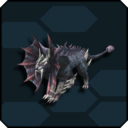
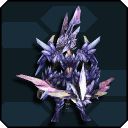
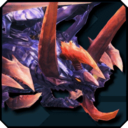
 Vareon Draal ヴァレオン・ドラール |
|
Spear Shield Face |
Weak to:
Weakspots:
|