Difference between revisions of "Phantoms"
(Updated Tokyo to EnemyHeader + added drop info to Yamato) |
|||
| (31 intermediate revisions by 10 users not shown) | |||
| Line 1: | Line 1: | ||
| + | {| class="wikitable table-bordered" style="text-align:center; margin-left:auto; margin-right:auto;" | ||
| + | |- style="background-color:"" | ||
| + | | [[Aberrations]]|| [[Darkers]]|| [[Dragonkin]]|| [[Mechs]]|| [[Natives]]|| [[Oceanids]]|| [[Phantoms]]|| [[Special Enemies]]|| [[Titans]] || [[Demons]] || [[Luminmechs]] | ||
| + | |} | ||
| + | |||
__TOC__ | __TOC__ | ||
==Tokyo== | ==Tokyo== | ||
{{EnemyHeader}} | {{EnemyHeader}} | ||
| − | + | ||
| − | + | {{EnemyRow|ratphamut|[[File:RatPhamut.png|128px]]|Rat Phamut|ラットファムト|Tokyo<br>[[Riding Quest]]||{{icons|Wind}}|Head|???|Attacks by spinning itself then throwing itself at the player.}} | |
| − | + | ||
| − | + | {{EnemyRow|mousephamut|[[File:MousePhamut.png|128px]]|Mouse Phamut|マウスファムト|Tokyo<br>[[Riding Quest]]||{{icons|Wind}}|Head|???|Rare Version of Rat Phamut does more damage and has more health.}} | |
| − | + | ||
| − | + | {{EnemyRow|crowphamut|[[File:CrowPhamut.png|128px]]|Crow Phamut|クロウファムト|Tokyo<br>[[Riding Quest]]||{{icons|Wind}}|Head||Flies around throwing phantom crows at the players.}} | |
| − | + | ||
| − | + | {{EnemyRow|dosuzombie|[[File:DosuZombie.png|128px]]|Dosu Zombie|ドスゾンビ|Tokyo<br>[[Riding Quest]]||{{icons|Wind}}|Head||Melee attacks the player, has swords pop up from the center of the body then charges and tries to jump on the player. Falls onto the ground after use.}} | |
| − | + | ||
| − | + | {{EnemyRow|chakazombie|[[File:ChakaZombie.png|128px]]|Chaka Zombie|チャカゾンビ|Tokyo<br>[[Riding Quest]]||{{icons|Wind}}|Head||Attacks the player from a distance by shooting at them, can do a charge shot, has a minigun appear from the center of the body and shoots wildly at the player. Falls over after use.}} | |
| − | + | ||
| − | + | {{EnemyRow|brownbear|[[File:BrownBear.png|128px]]|Brown Bear|ブラウンベア|Tokyo<br>[[Riding Quest]]||{{icons|Wind}}|Blue Sigil<br>Head||Melee attacks the player and does a special attack that make a bear head pop up and charges at the player. If the player does enough damage to the head during the use the skill stop and the bear fall over making the weakpoint appear.}} | |
| − | + | ||
| − | + | {{EnemyRow|polarbear|[[File:PolarBear.png|128px]]|Polar Bear|ポーラーベア|Tokyo<br>[[Riding Quest]]||{{icons|Wind}}|Blue Sigil||Melee attacks the player and does a special attack that makes bear arms pop up and shoots a ball of energy at the player. If the player does enough damage to the head during the use the skill stop and the bear fall over making the weakpoint appear.}} | |
| − | + | ||
| − | + | {{EnemyRow|trex|[[File:T.Rex.png|128px]]|T. Rex|T・レックス|Tokyo<br>[[Riding Quest]]||{{icons|Wind}}|Blue Sigil<br>Head|Tail|Attacks the player with melee attacks and has a skill that makes a T. Rex skull pop out of its chest that shoots a laser beam, during this its weakpoint is exposed. If the player break the Tail it lose a melee attack}} | |
| − | + | ||
| − | + | {{EnemyRow|rexnoir|[[File:RexNoir.png|128px]]|Rex Noir|レックスノワール|Tokyo<br>[[Riding Quest]]||{{icons|Wind}}|Blue Sigil<br>Head|Tail|Rare version of T. Rex does more damage and has more health.}} | |
| − | + | ||
| − | + | {{EnemyRow|roadroller|[[File:RoadRoller.png|128px]]|Road Roller|ロードローラー|Tokyo<br>[[Riding Quest]]||{{icons|Wind}}|Blue Sigil||It attacks the player by charging at them. It also can spin its wheel causing gravel to appear hurting anyone near it. It can also flip a big slab of concrete at the player.}} | |
| − | + | ||
| − | + | {{EnemyRow|redroller|[[File:RedRoller.png|128px]]|Red Roller|レッドローラー|Tokyo<br>[[Riding Quest]]||{{icons|Wind}}|Blue Sigil||Rare version of Road Roller does more damage and has more health.}} | |
| − | + | ||
| − | + | {{EnemyRow|snakeheli|[[File:SnakeHelicopter.png|128px]]|Snake Helicopter|スネークヘリ|Tokyo<br>[[Riding Quest]]||{{icons|Wind}}|Blue Sigil|Tail Rotor|Attacks the player by shooting its guns at the player, Firing rockets at the player, using its Rotor as a weapon and charging at the player. After the Rotor charge it take a few seconds to recover from it. Breaking the Tail Rotor will force the helicopter to land which is when it's blue sigil is revealed.}} | |
| − | + | ||
| − | + | {{EnemyRow|blacksnake|[[File:BlackSnakeIcon.png|128px]]|Black Snake|ブラックスネーク|Tokyo<br>[[Riding Quest]]||{{icons|Wind}}|Blue Sigil||Rare version of Snake Helicopter does more damage and has more health.}} | |
| − | + | ||
| − | + | {{EnemyRow|type15tank|[[File:Type-15Tank.png|128px]]|Type-15 Tank|15式戦車|Tokyo<br>[[Riding Quest]]||{{icons|Ice}}{{icons|Wind}}|Blue Sigil|Wheels<br>Gun(not the normal one)|Attack by using the main gun to attack the player. The gun can be one of four things. The normal gun that it used for range, The flame thrower that is used to keep melees away, the Missile launcher that tries to bombard the player, then the missile that if not stopped nukes the area. Besides the first one the other three guns can be broken. If they are stuns the tank. Breaking the road wheels temporarily stuns the enemy.<br><br>if frozen effect happens the top gun is stuck where it was aiming.}} | |
| − | + | ||
| − | + | {{EnemyRow|armoredtype15|[[File:ArmoredType-15.png|128px]]|Armored Type-15|アーマード15式|Tokyo<br>[[Riding Quest]]||{{icons|Ice}}{{icons|Wind}}|Blue Sigil|Wheels<br>Gun(not the normal one)|Rare version of Type-15 Tank does more damage and has more health.}} | |
| − | + | ||
| − | + | {{EnemyRow|trainghidoran|[[File:TrainGhidoran.png|128px]]|Train Ghidoran|トレイン・ギドラン|[[Train Ghidoran Suppression]]<br>[[Free Exploration: Tokyo]]<br>[[Riding Quest]]| | |
| − | + | *{{Rarity|13}}{{Icons|Eggs}}[[Wanda]]|{{icons|Wind}}|Blue Sigil|Doors on heads<br>Door on Tail|This boss fights in two phases. | |
| − | + | Phase one the bosses attacks are quick and the stop between attacks are short. The attacks it can do are slam the ground (blue car) attack at a distance (yellow car) suck the player in (red car) and slam the ground and shocking it (tail).<br> | |
| − | + | When it's low on health it goes into Phase Two where it roars and charges up. | |
| − | | | + | All attacks now do more damage and last longer, but the wait time between them increases as well.<br> |
| − | + | When enough damage is done to the feet the enemy becomes stunned temporarily, but the feet have a higher defense than the body. Also stunned by mirage.}} | |
| − | + | ||
| − | + | {{EnemyRow|doctorghidoran|[[File:DoctorGhidoran.png|128px]]|Doctor Ghidoran|ドクトル・ギドラス|[[Train Ghidoran Suppression]]<br>[[Free Exploration: Tokyo]]<br>[[Riding Quest]]| | |
| − | + | *{{Rarity|13}}{{Icons|Eggs}}[[Wanda]]|{{icons|Wind}}|Blue Sigil|Doors on heads<br>Door on Tail|Rare version of Train Ghidoran does more damage and has more health. Stunned by mirage.}} | |
| − | + | ||
| − | + | {{EnemyRow|yamato|[[File:Yamato.png|128px]]|Phantasmal Battleship Yamato|幻創戦艦・大和|[[Unleashed Prestige]]<br>[[Magisterial Onslaught]]<br>[[Quintessence of Steel]]|Lv. 1+ | |
| − | + | *{{Props|Toh'oh Soul}} | |
| − | + | *{{Props|Yamato Factor}} | |
| − | + | Lv. 76+ | |
| − | + | *{{Rarity|13}}{{icons|Swords}} [[D-A.I.S Saber]] | |
| − | + | *{{Rarity|13}}{{icons|Wired Lance}} [[Seiga Shield]] | |
| − | + | *{{Rarity|13}}{{icons|Partizan}} [[Seiga Javelin]] | |
| − | + | *{{Rarity|13}}{{icons|Double Saber}} [[Seiga Blade]] | |
| − | + | *{{Rarity|13}}{{icons|Knuckles}} [[Quotz Vidya]] | |
| − | + | *{{Rarity|13}}{{icons|Knuckles}} [[Phantom Ship Artillery]] | |
| − | + | *{{Rarity|13}}{{icons|Gunslash}} [[Mercenary Schwarz]] | |
| − | + | *{{Rarity|13}}{{icons|Dual Blades}} [[S.CN Mantis]] | |
| − | + | *{{Rarity|13}}{{icons|Assault Rifle}} [[Valkyrie A30]] | |
| − | + | *{{Rarity|13}}{{icons|Assault Rifle}} [[D-A.I.S. Vulcan]] | |
| − | + | *{{Rarity|13}}{{icons|Launcher}} [[D-A.I.S. Blaster]] | |
| − | + | *{{Rarity|13}}{{icons|Twin Machineguns}} [[Phantom Triple Cannon]] | |
| − | + | *{{Rarity|13}}{{icons|Bullet Bow}} [[Seiga Archer]] | |
| − | + | *{{Rarity|13}}{{icons|Rods}} [[Phantom Radar]] | |
| − | + | *{{Rarity|13}}{{icons|Rods}} [[Quotz Laura]] | |
| − | < | + | *{{Rarity|13}}{{Icons|Eggs}} [[Viola]]<br><br> |
| − | < | + | Magisterial Onslaught<br> |
| − | | | + | Lv. 76+ |
| − | + | *{{Rarity|7}}{{Icons|Material}} Ether Fuse<br><br> | |
| − | + | Holy Echo: Phantasmal Battleship Yamato<br> | |
| − | + | Lv. 76+ | |
| − | + | *{{Rarity|7}}{{Icons|Material}} Ether Fuse | |
| − | + | *{{Rarity|13}}{{icons|Swords}} [[Seikaiser Sword]] | |
| − | + | *{{Rarity|13}}{{icons|Wired Lance}} [[Seikaiser Shield]] | |
| − | + | *{{Rarity|13}}{{icons|Partizan}} [[Seikaiser Javelin]] | |
| − | + | *{{Rarity|13}}{{icons|Twin Daggers}} [[S.CN Arbor Stag]] | |
| − | | | + | *{{Rarity|13}}{{icons|Double Saber}} [[Seikaiser Blade]] |
| − | + | *{{Rarity|13}}{{icons|Knuckles}} [[Glycina Vidya]] | |
| − | + | *{{Rarity|13}}{{icons|Gunslash}} [[Mercenary Starlord]] | |
| − | + | *{{Rarity|13}}{{icons|Katana}} [[HFB Kamaitachi Letz]] | |
| − | + | *{{Rarity|13}}{{icons|Dual Blades}} [[S.CN Arbor Mantis]] | |
| − | + | *{{Rarity|13}}{{icons|Assault Rifle}} [[Valkyrie A30S]] | |
| − | + | *{{Rarity|13}}{{icons|Launcher}} [[Seikaiser Launcher]] | |
| − | + | *{{Rarity|13}}{{icons|Twin Machineguns}} [[Valkyrie R25S]] | |
| − | + | *{{Rarity|13}}{{icons|Bullet Bow}} [[Seikaiser Archer]] | |
| − | + | *{{Rarity|13}}{{icons|Rods}} [[Glycina Laura]] | |
| − | + | *{{Rarity|13}}{{icons|Talis}} [[Glycina Lithos]] | |
| − | + | *{{Rarity|13}}{{icons|Wand}} [[Glycina Cane]] | |
| − | + | *{{Rarity|13}}{{icons|Jet Boots}} [[Glycina Keyless]]|{{icons|Wind}}|Blue Sigil<br>Blue Beacons<br>Bridge Tower|Large Turrets<br>Medium Turrets<br>Small Turrets<br>Blue Sigils<br>Blue Beacons|Fought in an AIS. <br><br> Main deck is protected by a barrier until the Blue Sigils on the hull sides are destroyed. After they are destroyed, the deck will be accessible and the Blue Beacons will appear.<br> | |
| − | + | Once both Blue Beacons are destroyed Yamato will summon a ring of large missiles - the barrier will be restored at this point.<br> | |
| − | + | Destroying the missiles will stun Yamato, failing to do so will unleash a large AoE (but you can just respawn after 5 seconds). | |
| − | |||
| − | |||
| − | |||
| − | | | ||
| − | |||
| − | |||
| − | |||
| − | |||
| − | |||
| − | |||
| − | |||
| − | |||
| − | |||
| − | |||
| − | |||
| − | |||
| − | |||
| − | |||
| − | |||
| − | |||
| − | < | ||
| − | | | ||
| − | |||
| − | |||
| − | |||
| − | |||
| − | |||
| − | |||
| − | |||
| − | |||
| − | |||
| − | < | ||
| − | |||
| − | |||
| − | |||
| − | |||
| − | < | ||
| − | |||
| − | |||
| − | | | ||
| − | |||
| − | |||
| − | |||
| − | |||
| − | |||
| − | |||
| − | |||
| − | |||
| − | | | ||
| − | |||
| − | |||
| − | |||
| − | |||
| − | |||
| − | |||
| − | |||
| − | |||
| − | |||
| − | |||
| − | |||
| − | |||
| − | |||
| − | |||
| − | |||
| − | |||
| − | |||
| − | |||
| − | |||
| − | | | ||
| − | |||
| − | |||
| − | |||
| − | |||
| − | |||
| − | |||
| − | |||
| − | |||
| − | | | ||
| − | |||
| − | |||
| − | |||
| − | |||
| − | * {{ | ||
| − | |||
| − | |||
| − | |||
| − | * {{Rarity|13}}{{icons| | ||
| − | * {{Rarity|13}}{{icons| | ||
| − | * {{Rarity|13}}{{icons| | ||
| − | * {{Rarity|13}}{{icons| | ||
| − | * {{Rarity|13}}{{icons| | ||
| − | * {{Rarity|13}}{{icons| | ||
| − | |||
| − | |||
| − | |||
| − | |||
| − | |||
| − | |||
| − | |||
| − | |||
| − | |||
| − | |||
| − | |||
| − | |||
| − | |||
| − | the hull sides are destroyed. After they are destroyed, | ||
| − | the deck will be accessible and the Blue Beacons will appear.<br> | ||
| − | Once both Blue Beacons are destroyed Yamato will summon | ||
| − | a ring of large missiles - the barrier will be restored at this point.<br> | ||
| − | Destroying the missiles will stun Yamato, failing to do so will unleash a | ||
| − | large AoE (but you can just respawn after 5 seconds). | ||
Either way, the Bridge Tower will be vulnerable afterwards. | Either way, the Bridge Tower will be vulnerable afterwards. | ||
| − | <br><br> Large turrets (46cm triple main battery guns) are vulnerable to Freeze - prevents them from traversing/elevating and firing. | + | <br><br> Large turrets (46cm triple main battery guns) are vulnerable to Freeze - prevents them from traversing/elevating and firing.}} |
| − | + | ||
| − | + | {{EnemyRow|gurenzombie|[[File:UIEnemyGurenZombie.png|128px]]|Guren Zombie|グレンゾンビ|[[Unleashed Prestige]]<br>[[Magisterial Onslaught]]<br>[[Solo Training: Bounds of Corruption]]||{{icons|Wind}}|Head||Has higher HP and attack than other Zombie enemies.<br>Attacks have high rate of causing Shock.}} | |
| − | + | ||
| − | + | {{EnemyRow|hagithphemut|[[File:UIEnemyHagithPhemut.png|128px]]|Hagith Phemut|ハギト・フェムト|[[Unleashed Prestige]]<br>[[Magisterial Onslaught]]<br>[[Solo Training: Bounds of Corruption]]||{{icons|Wind}}{{icons|Light}}|||In [[Unleashed Prestige]] or [[Magisterial Onslaught]], Hagith Phemut will appear in three set intervals. He is impervious to damage during the third appearance.<br>Fights primarily with projectiles. Capable of a swift spread shot aimed at players that is repeated twice in succession, as well as firing a triad of slow-moving orbs that inflict Stun when they strike players.<br>May occasionally teleport and enter a pose where he holds his head in his hands, which is followed by him spawning missiles that fly outwards in all directions twice. Hagith Phemut is left vulnerable for a short period after using this attack.}} | |
| − | + | ||
| − | |||
| − | |||
| − | |||
| − | |||
| − | |||
| − | |||
| − | |||
| − | |||
| − | |||
| − | |||
| − | |||
| − | |||
| − | |||
| − | |||
|} | |} | ||
| Line 235: | Line 115: | ||
|- | |- | ||
<!--Image-->| <span id="boxerphantom">[[File:BoxerPhantomIcon.png|128px]]</span> | <!--Image-->| <span id="boxerphantom">[[File:BoxerPhantomIcon.png|128px]]</span> | ||
| − | <!--Name-->| ボクサーファムト<br>Boxer | + | <!--Name-->| ボクサーファムト<br>Boxer Phamut |
<!--Area-->| Las Vegas | <!--Area-->| Las Vegas | ||
<!--Drop List-->| | <!--Drop List-->| | ||
| − | <!--Weakness-->| | + | <!--Weakness-->|{{icons|Wind}} |
<!--Breakpoints-->| | <!--Breakpoints-->| | ||
<!--Weakpoints-->| | <!--Weakpoints-->| | ||
| − | <!--Notes-->| melee attacks the player | + | <!--Notes-->| melee attacks the player. |
|- | |- | ||
<!--Image-->| <span id="vulturephantom">[[File:VulturePhantomIcon.png|128px]]</span> | <!--Image-->| <span id="vulturephantom">[[File:VulturePhantomIcon.png|128px]]</span> | ||
| − | <!--Name-->| バルチャファムト<br>Vulture | + | <!--Name-->| バルチャファムト<br>Vulture Phamut |
<!--Area-->| Las Vegas | <!--Area-->| Las Vegas | ||
<!--Drop List-->| | <!--Drop List-->| | ||
| − | <!--Weakness-->| | + | <!--Weakness-->|{{icons|Wind}} |
<!--Breakpoints-->| | <!--Breakpoints-->| | ||
<!--Weakpoints-->|Head | <!--Weakpoints-->|Head | ||
| Line 256: | Line 136: | ||
<!--Area-->| Las Vegas | <!--Area-->| Las Vegas | ||
<!--Drop List-->| | <!--Drop List-->| | ||
| − | <!--Weakness-->| | + | <!--Weakness-->|{{icons|Wind}} |
<!--Breakpoints-->| | <!--Breakpoints-->| | ||
<!--Weakpoints-->|Head | <!--Weakpoints-->|Head | ||
| Line 265: | Line 145: | ||
<!--Area-->| Las Vegas | <!--Area-->| Las Vegas | ||
<!--Drop List-->| | <!--Drop List-->| | ||
| − | <!--Weakness-->| | + | <!--Weakness-->|{{icons|Wind}} |
<!--Breakpoints-->| | <!--Breakpoints-->| | ||
<!--Weakpoints-->| Head | <!--Weakpoints-->| Head | ||
| Line 274: | Line 154: | ||
<!--Area-->| Las Vegas | <!--Area-->| Las Vegas | ||
<!--Drop List-->| | <!--Drop List-->| | ||
| − | <!--Weakness-->| | + | <!--Weakness-->|{{icons|Wind}} |
<!--Breakpoints-->| | <!--Breakpoints-->| | ||
<!--Weakpoints-->| Driver | <!--Weakpoints-->| Driver | ||
| Line 283: | Line 163: | ||
<!--Area-->| Las Vegas | <!--Area-->| Las Vegas | ||
<!--Drop List-->| | <!--Drop List-->| | ||
| − | <!--Weakness-->| | + | <!--Weakness-->|{{icons|Wind}} |
<!--Breakpoints-->| | <!--Breakpoints-->| | ||
<!--Weakpoints-->| | <!--Weakpoints-->| | ||
| Line 292: | Line 172: | ||
<!--Area-->| Las Vegas | <!--Area-->| Las Vegas | ||
<!--Drop List-->| | <!--Drop List-->| | ||
| − | <!--Weakness-->| | + | <!--Weakness-->|{{icons|Wind}} |
<!--Breakpoints-->| | <!--Breakpoints-->| | ||
<!--Weakpoints-->| | <!--Weakpoints-->| | ||
| Line 301: | Line 181: | ||
<!--Area-->| Las Vegas | <!--Area-->| Las Vegas | ||
<!--Drop List-->| | <!--Drop List-->| | ||
| − | <!--Weakness-->| | + | <!--Weakness-->|{{icons|Wind}} |
<!--Breakpoints-->| | <!--Breakpoints-->| | ||
<!--Weakpoints-->|none(that I could find) | <!--Weakpoints-->|none(that I could find) | ||
| Line 310: | Line 190: | ||
<!--Area-->| Las Vegas | <!--Area-->| Las Vegas | ||
<!--Drop List-->| | <!--Drop List-->| | ||
| − | <!--Weakness-->| | + | <!--Weakness-->|{{icons|Wind}} |
<!--Breakpoints-->| | <!--Breakpoints-->| | ||
<!--Weakpoints-->| none(that I could find) | <!--Weakpoints-->| none(that I could find) | ||
| Line 319: | Line 199: | ||
<!--Area-->| Las Vegas | <!--Area-->| Las Vegas | ||
<!--Drop List-->| | <!--Drop List-->| | ||
| − | <!--Weakness-->| | + | <!--Weakness-->|{{icons|Wind}} |
<!--Breakpoints-->|Side car. | <!--Breakpoints-->|Side car. | ||
<!--Weakpoints-->|none(couldn't find any) | <!--Weakpoints-->|none(couldn't find any) | ||
| Line 328: | Line 208: | ||
<!--Area-->| Las Vegas | <!--Area-->| Las Vegas | ||
<!--Drop List-->| | <!--Drop List-->| | ||
| − | <!--Weakness-->| | + | <!--Weakness-->|{{icons|Wind}} |
<!--Breakpoints-->| Side car | <!--Breakpoints-->| Side car | ||
<!--Weakpoints-->|none(couldn't find any) | <!--Weakpoints-->|none(couldn't find any) | ||
| Line 337: | Line 217: | ||
<!--Area-->| Las Vegas | <!--Area-->| Las Vegas | ||
<!--Drop List-->| | <!--Drop List-->| | ||
| − | <!--Weakness-->| | + | <!--Weakness-->|{{icons|Wind}} |
<!--Breakpoints-->| | <!--Breakpoints-->| | ||
<!--Weakpoints-->| Blue sig | <!--Weakpoints-->| Blue sig | ||
| Line 346: | Line 226: | ||
<!--Area-->| Las Vegas | <!--Area-->| Las Vegas | ||
<!--Drop List-->| | <!--Drop List-->| | ||
| − | <!--Weakness-->| | + | <!--Weakness-->|{{icons|Wind}} |
<!--Breakpoints-->|Wheels | <!--Breakpoints-->|Wheels | ||
<!--Weakpoints-->| Blue Sigil | <!--Weakpoints-->| Blue Sigil | ||
| Line 355: | Line 235: | ||
<!--Area-->| Las Vegas | <!--Area-->| Las Vegas | ||
<!--Drop List-->| | <!--Drop List-->| | ||
| − | <!--Weakness-->| | + | <!--Weakness-->|{{icons|Wind}} |
<!--Breakpoints-->| Wheels | <!--Breakpoints-->| Wheels | ||
<!--Weakpoints-->| Blue Sigil | <!--Weakpoints-->| Blue Sigil | ||
| Line 364: | Line 244: | ||
<!--Area-->| Las Vegas | <!--Area-->| Las Vegas | ||
<!--Drop List-->| | <!--Drop List-->| | ||
| − | <!--Weakness-->| | + | <!--Weakness-->|{{icons|Wind}}{{icons|Lightning}} |
<!--Breakpoints-->|Legs<br>Tail | <!--Breakpoints-->|Legs<br>Tail | ||
<!--Weakpoints-->|Blue sig<br>broken legs | <!--Weakpoints-->|Blue sig<br>broken legs | ||
| Line 373: | Line 253: | ||
<!--Area-->| Las Vegas | <!--Area-->| Las Vegas | ||
<!--Drop List-->| | <!--Drop List-->| | ||
| − | <!--Weakness-->| | + | <!--Weakness-->|{{icons|Wind}}{{icons|Lightning}} |
<!--Breakpoints-->| Legs<br>Tail | <!--Breakpoints-->| Legs<br>Tail | ||
<!--Weakpoints-->|Blue sig<br>broken legs | <!--Weakpoints-->|Blue sig<br>broken legs | ||
| Line 382: | Line 262: | ||
<!--Area-->| {{#simple-tooltip: Tokyo*|Only after you've completed EP4 CH5 Part 2}}<br>Las Vegas | <!--Area-->| {{#simple-tooltip: Tokyo*|Only after you've completed EP4 CH5 Part 2}}<br>Las Vegas | ||
<!--Drop List-->| | <!--Drop List-->| | ||
| − | <!--Weakness-->| | + | <!--Weakness-->|{{icons|Wind}} |
<!--Breakpoints-->| | <!--Breakpoints-->| | ||
<!--Weakpoints-->| | <!--Weakpoints-->| | ||
| Line 391: | Line 271: | ||
<!--Area-->| {{#simple-tooltip: Tokyo*|Only after you've completed EP4 CH5 Part 2}}<br>Las Vegas | <!--Area-->| {{#simple-tooltip: Tokyo*|Only after you've completed EP4 CH5 Part 2}}<br>Las Vegas | ||
<!--Drop List-->| | <!--Drop List-->| | ||
| − | <!--Weakness-->| | + | <!--Weakness-->|{{icons|Wind}} |
<!--Breakpoints-->| | <!--Breakpoints-->| | ||
<!--Weakpoints-->|Head | <!--Weakpoints-->|Head | ||
| Line 413: | Line 293: | ||
<!--Area-->| Tokyo<br>Vegas | <!--Area-->| Tokyo<br>Vegas | ||
<!--Drop List-->| | <!--Drop List-->| | ||
| − | <!--Weakness-->| | + | <!--Weakness-->|{{icons|Wind}}{{icons|Light}} |
<!--Breakpoints-->| | <!--Breakpoints-->| | ||
<!--Weakpoints-->| | <!--Weakpoints-->| | ||
| − | <!--Notes-->| | + | <!--Notes-->| ESC-A Darker version of [[Dagacha]]. |
|- | |- | ||
<!--Image-->| <span id="paraspicos">[[File:ParasPicosIcon.png|128px]]</span> | <!--Image-->| <span id="paraspicos">[[File:ParasPicosIcon.png|128px]]</span> | ||
| Line 422: | Line 302: | ||
<!--Area-->| Tokyo<br>Vegas | <!--Area-->| Tokyo<br>Vegas | ||
<!--Drop List-->| | <!--Drop List-->| | ||
| − | <!--Weakness-->| | + | <!--Weakness-->|{{icons|Wind}}{{icons|Light}} |
<!--Breakpoints-->| | <!--Breakpoints-->| | ||
<!--Weakpoints-->| | <!--Weakpoints-->| | ||
| − | <!--Notes-->| | + | <!--Notes-->| ESC-A Darker version of [[Parata Picoda]]. |
|- | |- | ||
<!--Image-->| <span id="rancavareze">[[File:RancaVarezeIcon.png|128px]]</span> | <!--Image-->| <span id="rancavareze">[[File:RancaVarezeIcon.png|128px]]</span> | ||
| Line 431: | Line 311: | ||
<!--Area-->| Tokyo<br>Vegas | <!--Area-->| Tokyo<br>Vegas | ||
<!--Drop List-->| | <!--Drop List-->| | ||
| − | <!--Weakness-->|[[ | + | <!--Weakness-->|{{icons|Wind}}{{icons|Light}} |
| + | <!--Breakpoints-->| | ||
| + | <!--Weakpoints-->| | ||
| + | <!--Notes-->| ESC-A Darker version of [[Lanz Vareda]]. | ||
| + | |- | ||
| + | <!--Image-->| <span id="varecerancas">[[File:UIEnemyVareceRancas.png |128px]]</span> | ||
| + | <!--Name-->| ヴァレス・ランカース<br>Varece Rancas | ||
| + | <!--Area-->| Tokyo<br>Vegas | ||
| + | <!--Drop List-->| | ||
| + | <!--Weakness-->|{{icons|Wind}}{{icons|Light}} | ||
<!--Breakpoints-->| | <!--Breakpoints-->| | ||
<!--Weakpoints-->| | <!--Weakpoints-->| | ||
| − | <!--Notes-->| | + | <!--Notes-->| Rare version of Ranca Vareze. |
|- | |- | ||
<!--Image-->| <span id="bontabearatus">[[File:BontaBearatusIcon.png|128px]]</span> | <!--Image-->| <span id="bontabearatus">[[File:BontaBearatusIcon.png|128px]]</span> | ||
| Line 440: | Line 329: | ||
<!--Area-->| Tokyo<br>Vegas | <!--Area-->| Tokyo<br>Vegas | ||
<!--Drop List-->| | <!--Drop List-->| | ||
| − | <!--Weakness-->| | + | <!--Weakness-->|{{icons|Wind}}{{icons|Light}} |
<!--Breakpoints-->| | <!--Breakpoints-->| | ||
<!--Weakpoints-->| | <!--Weakpoints-->| | ||
| − | <!--Notes-->| | + | <!--Notes-->| ESC-A Darker version of [[Bonta Bearadda]]. Has shockwaves from its claw attacks. Can deploy miniature versions of itself which explode. |
|- | |- | ||
<!--Image-->| <span id="platidorus">[[File:PlatidorusIcon.png|128px]]</span> | <!--Image-->| <span id="platidorus">[[File:PlatidorusIcon.png|128px]]</span> | ||
| Line 449: | Line 338: | ||
<!--Area-->| Tokyo<br>Vegas | <!--Area-->| Tokyo<br>Vegas | ||
<!--Drop List-->| | <!--Drop List-->| | ||
| − | <!--Weakness-->| | + | <!--Weakness-->|{{icons|Wind}}{{icons|Light}} |
<!--Breakpoints-->| | <!--Breakpoints-->| | ||
<!--Weakpoints-->| | <!--Weakpoints-->| | ||
| − | <!--Notes-->| | + | <!--Notes-->| ESC-A Darker version of [[Darkers|Goldrahda]]. Causes freeze explosion effect if the back is not destroyed before it death. In addition to the Sword, Launcher and Wand forms of the standard Goldrahda, can also equip itself with Jet Boots for a powerful forward rush attack, and fire photon blades like a Dual Blades bouncer. |
| + | |- | ||
| + | <!--Image-->| <span id="granidorus">[[File:UIEnemyGranidorus.png|128px]]</span> | ||
| + | <!--Name-->| グラニドーラス<br>Granidorus | ||
| + | <!--Area-->| Tokyo<br>Vegas | ||
| + | <!--Drop List-->| | ||
| + | <!--Weakness-->|{{icons|Wind}}{{icons|Light}} | ||
| + | <!--Breakpoints-->| | ||
| + | <!--Weakpoints-->| | ||
| + | <!--Notes-->| Rare version of Platidorus. | ||
|- | |- | ||
<!--Image-->| <span id="vidoluze">[[File:VidoLuzeIcon.png|128px]]</span> | <!--Image-->| <span id="vidoluze">[[File:VidoLuzeIcon.png|128px]]</span> | ||
| Line 458: | Line 356: | ||
<!--Area-->| Tokyo<br>Vegas | <!--Area-->| Tokyo<br>Vegas | ||
<!--Drop List-->| | <!--Drop List-->| | ||
| − | <!--Weakness-->| | + | <!--Weakness-->|{{icons|Wind}}{{icons|Light}} |
<!--Breakpoints-->| | <!--Breakpoints-->| | ||
<!--Weakpoints-->| | <!--Weakpoints-->| | ||
| − | <!--Notes-->| | + | <!--Notes-->| ESC-A Darker version of [[Vidoluda]]. |
|- | |- | ||
<!--Image-->| <span id="decolmalluze">[[File:DecolMalluzeIcon.png|128px]]</span> | <!--Image-->| <span id="decolmalluze">[[File:DecolMalluzeIcon.png|128px]]</span> | ||
<!--Name-->| デコル・マリューズ<br>Decol Malluze | <!--Name-->| デコル・マリューズ<br>Decol Malluze | ||
<!--Area-->| Tokyo<br>Vegas | <!--Area-->| Tokyo<br>Vegas | ||
| − | <!--Drop List-->|Lv.1+ | + | <!--Drop List-->|Lv. 1+ |
* {{Props|Escarde Soul}} | * {{Props|Escarde Soul}} | ||
| − | Lv.76+ | + | Lv. 76+ |
* {{Rarity|13}}{{icons|Launcher}}[[Welk Nacell]] | * {{Rarity|13}}{{icons|Launcher}}[[Welk Nacell]] | ||
* {{Rarity|13}}{{icons|Wand}}[[Welk Rudder]] | * {{Rarity|13}}{{icons|Wand}}[[Welk Rudder]] | ||
| − | <!--Weakness-->| | + | <!--Weakness-->|{{icons|Wind}}{{icons|Light}} |
<!--Breakpoints-->| | <!--Breakpoints-->| | ||
<!--Weakpoints-->| | <!--Weakpoints-->| | ||
| − | <!--Notes-->| | + | <!--Notes-->| ESC-A Darker version of [[Decol Malluda]]. |
|- | |- | ||
<!--Image-->| <span id="escaragnus">[[File:EscaRagnusIcon.png|128px]]</span> | <!--Image-->| <span id="escaragnus">[[File:EscaRagnusIcon.png|128px]]</span> | ||
<!--Name-->| エスカ・ラグナス<br>ESC-A Ragnus | <!--Name-->| エスカ・ラグナス<br>ESC-A Ragnus | ||
<!--Area-->| Tokyo<br>Vegas | <!--Area-->| Tokyo<br>Vegas | ||
| − | <!--Drop List-->|Lv.1+ | + | <!--Drop List-->|Lv. 1+ |
* {{Props|Escarde Soul}} | * {{Props|Escarde Soul}} | ||
| − | Lv.76+ | + | Lv. 76+ |
* {{Rarity|10}}{{icons|Launcher}}[[Cannon Legacy]] | * {{Rarity|10}}{{icons|Launcher}}[[Cannon Legacy]] | ||
* {{Rarity|13}}{{icons|Sword}}[[Welk Radome]] | * {{Rarity|13}}{{icons|Sword}}[[Welk Radome]] | ||
* {{Rarity|13}}{{icons|Jet Boots}}[[Welk Airelon]] | * {{Rarity|13}}{{icons|Jet Boots}}[[Welk Airelon]] | ||
| − | <!--Weakness-->| | + | <!--Weakness-->|{{icons|Wind}}{{icons|Light}} |
<!--Breakpoints-->| | <!--Breakpoints-->| | ||
<!--Weakpoints-->| | <!--Weakpoints-->| | ||
| − | <!--Notes-->| Ragnus will not be down if one leg is broken, all legs must be broken. | + | <!--Notes-->| ESC-A Darker version of [[Dark Ragne]]. ESC-A Ragnus will not be down if one leg is broken, all legs must be broken. Jumps backwards and deploys a wall of webbing before using its disc projectile attack. |
|- | |- | ||
<!--Image-->| <span id="escafalzmother">[[File:EscaFalzMotherIcon.png|128px]]</span> | <!--Image-->| <span id="escafalzmother">[[File:EscaFalzMotherIcon.png|128px]]</span> | ||
| Line 494: | Line 392: | ||
<!--Area-->| Earth's Moon | <!--Area-->| Earth's Moon | ||
<!--Drop List-->|[[ESC-A_Falz_Mother#Drops| Drop List]] | <!--Drop List-->|[[ESC-A_Falz_Mother#Drops| Drop List]] | ||
| − | <!--Weakness-->| | + | <!--Weakness-->|{{icons|Wind}}{{icons|Light}} |
<!--Breakpoints-->| | <!--Breakpoints-->| | ||
<!--Weakpoints-->| | <!--Weakpoints-->| | ||
| Line 501: | Line 399: | ||
|} | |} | ||
| − | ==Yggdrasil== | + | ==Anges== |
| + | {{EnemyHeader}} | ||
| + | |||
| + | {{EnemyRow|esanges|[[File:EnemyEsAngesIcon.png|128px|link=]]|Es Anges|エス・アンジェス|Yggdrasil | ||
| + | *Story Quest 4-8|<!--Drop List-->|{{icons|Dark}}|<!--Weakpoints-->|<!--Breakpoints-->|<!--Notes-->}} | ||
| + | |||
| + | {{EnemyRow|esopsis|[[File:EnemyEsOpsisIcon.png|128px|link=]]|Es Opsis|エス・オプシス|Yggdrasil | ||
| + | *Story Quest 4-8|<!--Drop List-->|{{icons|Dark}}|<!--Weakpoints-->|<!--Breakpoints-->|<!--Notes-->}} | ||
| + | |||
| + | {{EnemyRow|essantorus|[[File:EnemyEsSantorusIcon.png|128px|link=]]|Es Santorus|エス・サントルス|Yggdrasil | ||
| + | *Story Quest 4-8|<!--Drop List-->|{{icons|Dark}}|<!--Weakpoints-->|<!--Breakpoints-->|<!--Notes-->}} | ||
| + | |||
| + | {{EnemyRow|deushunas|[[File:EnemyDeusHunasIcon.png|128px|link=]]|Deus Hunas|デウス・ヒューナス|Yggdrasil | ||
| + | *Story Quest 4-8|<!--Drop List-->|{{icons|Dark}}|<!--Weakpoints-->|<!--Breakpoints-->|<!--Notes-->}} | ||
| + | |||
| + | {{EnemyRow|deusanges|[[File:EnemyDeusAngesIcon.png|128px|link=]]|Deus Anges|デウス・アンジェス|Yggdrasil|<!--Drop List-->|{{icons|Dark}}|<!--Weakpoints-->|<!--Breakpoints-->|<!--Notes-->}} | ||
| + | |||
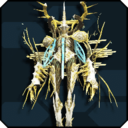
| + | {{EnemyRow|deusescazephyros|[[File:EnemyDeusESC-AZephyrosIcon.png|128px|link=]]|Deus ESC-A Zephyros|デウスエスカ・ゼフィロス|Yggdrasil|<!--Drop List-->|{{icons|Light}}{{icons|Dark}}|<!--Weakpoints-->|<!--Breakpoints-->|<!--Notes-->}} | ||
| + | |||
| + | {{EnemyRow|deusescagracia|[[File:EnemyDeusESC-AGraciaIcon.png|128px|link=]]|Deus ESC-A Gracia|デウスエスカ・グラーシア|Yggdrasil|<!--Drop List-->|{{icons|Light}}{{icons|Dark}}|<!--Weakpoints-->|<!--Breakpoints-->|<!--Notes-->}} | ||
| + | |||
| + | |} | ||
| + | |||
| + | ==Mother Cluster== | ||
{{EnemyHeader}} | {{EnemyHeader}} | ||
| − | | | + | |
| − | + | {{EnemyRow|aratronphemut|[[File:AratronPhemutIcon.png|128px]]|Aratron Phemut|アラトロン・フェムト|Emergency Quests|<!--Drop List-->|{{icons|Wind}}|Chest Core|Hammer<br>Chest|This enemy is guarded by an impenetrable barrier.<br>The barrier can be dispelled permanently by breaking the hammer.}} | |
| − | + | ||
| − | + | |} | |
| − | | | + | |
| − | |- | + | ==Angel== |
| − | | | + | {{EnemyHeader}} |
| − | | | + | |
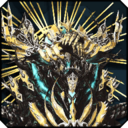
| − | | | + | {{EnemyRow|sixthangel|[[File:UIEnemyTheSixthAngel.png|128px]]|The Sixth Angel|第6使徒|The Sixth Angel|Lv. 1+ |
| − | | | + | * {{rarity|10}} Dio-NT Series |
| − | | | + | * {{rarity|12}} Nox-NT Series |
| − | + | * {{rarity|8}} {{icons|Tool}} Cobalt Medal | |
| − | | | + | Lv. 70+ |
| + | * {{rarity|13}} Alta Series | ||
| + | * {{rarity|13}} AIS Series | ||
| + | * {{rarity|13}} {{icons|Egg}} All Pets | ||
| + | * {{rarity|11}} {{icons|Sub}} Solid Barrier | ||
| + | Lv. 85+ | ||
| + | * {{rarity|14}} Awake Series | ||
| + | * {{rarity|15}} Orb Series | ||
| + | * {{rarity|13}} {{icons|Rear}} Avion Orb | ||
| + | * {{rarity|14}} {{icons|Egg}} All Pets | ||
| + | * {{rarity|13}} {{icons|Candy}} Super Doki Doki Parfait | ||
| + | Lv. 96+ | ||
| + | * {{rarity|15}} Dusk Series | ||
| + | * {{rarity|13}} {{icons|Rear}} Avion Dusk | ||
| + | * {{rarity|13}} {{icons|Weapon Camo}} *Iltheon Dusk Megis | ||
| + | * {{rarity|13}} {{icons|Ticket}} Avion Dusk Thruster | ||
| + | * {{rarity|13}} {{icons|Ticket}} Avion Dusk Wing|N/A|Core|A.T. Field|A massive Phantom in the image of the 6th Angel, Ramiel. Destroy its A.T. Fields to reveal its core.<br>Ramiel targets ARKS missile bases and EVA Unit 01 with various attacks. If EVA Unit 01 is destroyed, the quest fails.}} | ||
| + | |||
| + | |} | ||
| + | |||
| + | ==Ultralized== | ||
| + | {{EnemyHeader}} | ||
| + | |||
| + | {{EnemyRow|lizethghidour|[[File:UIEnemyLizethGhidour.png|128px]]|Lizeth Ghidour|リーゼス・ギドール|Piper of Disharmony|Lv. 91+ | ||
| + | *{{rarity|15}}{{icons|Takt}} [[Aqua Ripple]] |{{icons|Wind}}|Blue Sigil|Doors|Ultra Variant of Train Ghidoran. Attacks have additional vertical reach.}} | ||
|} | |} | ||
| + | |||
[[Category:Enemies]] | [[Category:Enemies]] | ||
[[Category:Incomplete]] | [[Category:Incomplete]] | ||
Latest revision as of 17:17, 18 May 2021
| Aberrations | Darkers | Dragonkin | Mechs | Natives | Oceanids | Phantoms | Special Enemies | Titans | Demons | Luminmechs |
Tokyo
| Enemy | Area | Drop List | Breakpoints | Weakness | Notes |
|---|---|---|---|---|---|
 Rat Phamut ラットファムト |
|
??? | Weak to:
Weakspots:
|
Attacks by spinning itself then throwing itself at the player. | |
 Mouse Phamut マウスファムト |
|
??? | Weak to:
Weakspots:
|
Rare Version of Rat Phamut does more damage and has more health. | |
 Crow Phamut クロウファムト |
|
Weak to:
Weakspots:
|
Flies around throwing phantom crows at the players. | ||
 Dosu Zombie ドスゾンビ |
|
Weak to:
Weakspots:
|
Melee attacks the player, has swords pop up from the center of the body then charges and tries to jump on the player. Falls onto the ground after use. | ||
 Chaka Zombie チャカゾンビ |
|
Weak to:
Weakspots:
|
Attacks the player from a distance by shooting at them, can do a charge shot, has a minigun appear from the center of the body and shoots wildly at the player. Falls over after use. | ||
 Brown Bear ブラウンベア |
|
Weak to:
Weakspots:
|
Melee attacks the player and does a special attack that make a bear head pop up and charges at the player. If the player does enough damage to the head during the use the skill stop and the bear fall over making the weakpoint appear. | ||
 Polar Bear ポーラーベア |
|
Weak to:
Weakspots:
|
Melee attacks the player and does a special attack that makes bear arms pop up and shoots a ball of energy at the player. If the player does enough damage to the head during the use the skill stop and the bear fall over making the weakpoint appear. | ||
 T. Rex T・レックス |
|
Tail | Weak to:
Weakspots:
|
Attacks the player with melee attacks and has a skill that makes a T. Rex skull pop out of its chest that shoots a laser beam, during this its weakpoint is exposed. If the player break the Tail it lose a melee attack | |
 Rex Noir レックスノワール |
|
Tail | Weak to:
Weakspots:
|
Rare version of T. Rex does more damage and has more health. | |
 Road Roller ロードローラー |
|
Weak to:
Weakspots:
|
It attacks the player by charging at them. It also can spin its wheel causing gravel to appear hurting anyone near it. It can also flip a big slab of concrete at the player. | ||
 Red Roller レッドローラー |
|
Weak to:
Weakspots:
|
Rare version of Road Roller does more damage and has more health. | ||
 Snake Helicopter スネークヘリ |
|
Tail Rotor | Weak to:
Weakspots:
|
Attacks the player by shooting its guns at the player, Firing rockets at the player, using its Rotor as a weapon and charging at the player. After the Rotor charge it take a few seconds to recover from it. Breaking the Tail Rotor will force the helicopter to land which is when it's blue sigil is revealed. | |
 Black Snake ブラックスネーク |
|
Weak to:
Weakspots:
|
Rare version of Snake Helicopter does more damage and has more health. | ||
 Type-15 Tank 15式戦車 |
|
Wheels Gun(not the normal one) |
Weak to:
Weakspots:
|
Attack by using the main gun to attack the player. The gun can be one of four things. The normal gun that it used for range, The flame thrower that is used to keep melees away, the Missile launcher that tries to bombard the player, then the missile that if not stopped nukes the area. Besides the first one the other three guns can be broken. If they are stuns the tank. Breaking the road wheels temporarily stuns the enemy. if frozen effect happens the top gun is stuck where it was aiming. | |
 Armored Type-15 アーマード15式 |
|
Wheels Gun(not the normal one) |
Weak to:
Weakspots:
|
Rare version of Type-15 Tank does more damage and has more health. | |
 Train Ghidoran トレイン・ギドラン |
Doors on heads Door on Tail |
Weak to:
Weakspots:
|
This boss fights in two phases.
Phase one the bosses attacks are quick and the stop between attacks are short. The attacks it can do are slam the ground (blue car) attack at a distance (yellow car) suck the player in (red car) and slam the ground and shocking it (tail). | ||
 Doctor Ghidoran ドクトル・ギドラス |
Doors on heads Door on Tail |
Weak to:
Weakspots:
|
Rare version of Train Ghidoran does more damage and has more health. Stunned by mirage. | ||
 Phantasmal Battleship Yamato 幻創戦艦・大和 |
Lv. 1+
Lv. 76+
Magisterial Onslaught
Holy Echo: Phantasmal Battleship Yamato |
Large Turrets Medium Turrets Small Turrets Blue Sigils Blue Beacons |
Weak to:
Weakspots:
|
Fought in an AIS. Main deck is protected by a barrier until the Blue Sigils on the hull sides are destroyed. After they are destroyed, the deck will be accessible and the Blue Beacons will appear. Once both Blue Beacons are destroyed Yamato will summon a ring of large missiles - the barrier will be restored at this point. | |
 Guren Zombie グレンゾンビ |
Weak to:
Weakspots:
|
Has higher HP and attack than other Zombie enemies. Attacks have high rate of causing Shock. | |||
 Hagith Phemut ハギト・フェムト |
Weak to:
Weakspots: |
In Unleashed Prestige or Magisterial Onslaught, Hagith Phemut will appear in three set intervals. He is impervious to damage during the third appearance. Fights primarily with projectiles. Capable of a swift spread shot aimed at players that is repeated twice in succession, as well as firing a triad of slow-moving orbs that inflict Stun when they strike players. May occasionally teleport and enter a pose where he holds his head in his hands, which is followed by him spawning missiles that fly outwards in all directions twice. Hagith Phemut is left vulnerable for a short period after using this attack. |
Las Vegas
| Image | Name | Area | Drop List | Weakness | Breakpoints | Weakpoints | Notes |
|---|---|---|---|---|---|---|---|

|
ボクサーファムト Boxer Phamut |
Las Vegas | melee attacks the player. | ||||

|
バルチャファムト Vulture Phamut |
Las Vegas | Head | Tries to grab the player if caught every Vulture Phantom will attack the player. | |||

|
ジャグラーピエロ Juggler Pierrot |
Las Vegas | Head | Tosses swords at player,gets on a ball and tries to run over the player. | |||

|
チェーンソーピエロ Chainsaw Pierrot |
Las Vegas | Head | Attacks with melee and makes and let go ballons. | |||

|
サーカスキャリッジ Circus Carriage |
Las Vegas | Driver | Attack by charging at the player,shooting fire balls in the air, throw rings of fire at the player, sucking the player in so they can be shot far away. | |||

|
スナイパーネオン Sniper Neon |
Las Vegas | Attacks from a distance tries to jump on the player if they get to close. | ||||

|
ランチャーネオン Launcher Neon |
Las Vegas | Shots rockets from a distance tries to jump on the player if they get to close. | ||||

|
スカルバファロー Skull Buffalo |
Las Vegas | none(that I could find) | If melee they try to jump on the player and chomp on them. If they are at a range they transform into a bull and rush towards the player while stomping. | |||

|
バファローヘッド Buffalo Head |
Las Vegas | none(that I could find) | Rare version of Skull Buffalo does more damage and has more health. | |||

|
デュラハンライダー Dullahan Rider |
Las Vegas | Side car. | none(couldn't find any) | Attack the player with a melee attack, attacks by using the side car, revving up its engine to cause an aoe that damages any near the creature. If side car is destory it can't use the the attack using the side car. | ||

|
レッドデュライダー Red Durider |
Las Vegas | Side car | none(couldn't find any) | Rare Version of Dullahan Rider does more damage has more health. | ||

|
U.F.O U.F.O |
Las Vegas | Blue sig | Attacks by summoning an explosion, sucking the player in so it can grab them, summon aliens that attack around it and slowly descends a bit after each shot. If enough damage is dealt during the alien attack cause the ufo to fall to the ground with the blue sig showing | |||

|
デビルズトレーラー Devil’s Trailer |
Las Vegas | Wheels | Blue Sigil | Boss attacks by Ramming the player,throwing cars at the player while running away,make a trailer that opens up and spawns clowns,makes a trailer that spews ice all over the area and breaks it causing the freeze effect if hit. | ||

|
マーダートレーラー Murder Trailer |
Las Vegas | Wheels | Blue Sigil | Rare version of Devil’s Trailer does more damage and has more health. | ||

|
ベガス・イリュージア Vegas Illusia |
Las Vegas | Legs Tail |
Blue sig broken legs |
Boss attacks by jumping into the air and slamming into the ground at the player position.,charging at the player, shooting up into the air and many strikes coming down. | ||

|
ナイトメア・ベガス Nightmare Vegas |
Las Vegas | Legs Tail |
Blue sig broken legs |
Rare version of Vegas Illusia does more damage and has more health. | ||

|
マクスウェルの悪魔 Maxwell's Demon |
Tokyo* Las Vegas |
Shoots balls of energy at the player. When killed will wait a couple of seconds and go to where the player is at and blow up. | ||||

|
ラプラスの悪魔 Laplace's Demon |
Tokyo* Las Vegas |
Head | This boss has two phases. Both phases has a shield that can only be broken by using one of the Maxwell' Demon suicidal bomb skill. It attack by punching and a laser eye When low on health its eyes glow red and it attack quicker and does more damage. |
ESC-A Darkers
| Image | Name | Area | Drop List | Weakness | Breakpoints | Weakpoints | Notes |
|---|---|---|---|---|---|---|---|

|
ガッチャス Gachas |
Tokyo Vegas |
ESC-A Darker version of Dagacha. | ||||

|
パラス・ピコス Paras Picos |
Tokyo Vegas |
ESC-A Darker version of Parata Picoda. | ||||

|
ランカ・ヴァレース Ranca Vareze |
Tokyo Vegas |
ESC-A Darker version of Lanz Vareda. | ||||

|
ヴァレス・ランカース Varece Rancas |
Tokyo Vegas |
Rare version of Ranca Vareze. | ||||

|
ボンタ・ベアタス Bonta Bearatus |
Tokyo Vegas |
ESC-A Darker version of Bonta Bearadda. Has shockwaves from its claw attacks. Can deploy miniature versions of itself which explode. | ||||

|
プラチドーラス Platidorus |
Tokyo Vegas |
ESC-A Darker version of Goldrahda. Causes freeze explosion effect if the back is not destroyed before it death. In addition to the Sword, Launcher and Wand forms of the standard Goldrahda, can also equip itself with Jet Boots for a powerful forward rush attack, and fire photon blades like a Dual Blades bouncer. | ||||

|
グラニドーラス Granidorus |
Tokyo Vegas |
Rare version of Platidorus. | ||||

|
ヴィドルース Vido Luze |
Tokyo Vegas |
ESC-A Darker version of Vidoluda. | ||||

|
デコル・マリューズ Decol Malluze |
Tokyo Vegas |
Lv. 1+
Lv. 76+ |
ESC-A Darker version of Decol Malluda. | |||

|
エスカ・ラグナス ESC-A Ragnus |
Tokyo Vegas |
Lv. 1+
Lv. 76+ |
ESC-A Darker version of Dark Ragne. ESC-A Ragnus will not be down if one leg is broken, all legs must be broken. Jumps backwards and deploys a wall of webbing before using its disc projectile attack. | |||

|
エスカファルス・マザー ESC-A Falz Mother |
Earth's Moon | Drop List | Combines all previous Dark Falz fights into one. |
Anges
| Enemy | Area | Drop List | Breakpoints | Weakness | Notes |
|---|---|---|---|---|---|
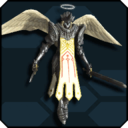 Es Anges エス・アンジェス |
|
Weak to:
Weakspots: |
|||
 Es Opsis エス・オプシス |
|
Weak to:
Weakspots: |
|||
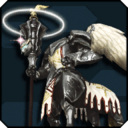 Es Santorus エス・サントルス |
|
Weak to:
Weakspots: |
|||
 Deus Hunas デウス・ヒューナス |
|
Weak to:
Weakspots: |
|||
 Deus Anges デウス・アンジェス |
|
Weak to:
Weakspots: |
|||
 Deus ESC-A Zephyros デウスエスカ・ゼフィロス |
|
Weak to:
Weakspots: |
|||
 Deus ESC-A Gracia デウスエスカ・グラーシア |
|
Weak to:
Weakspots: |
Mother Cluster
| Enemy | Area | Drop List | Breakpoints | Weakness | Notes |
|---|---|---|---|---|---|
 Aratron Phemut アラトロン・フェムト |
|
Hammer Chest |
Weak to:
Weakspots:
|
This enemy is guarded by an impenetrable barrier. The barrier can be dispelled permanently by breaking the hammer. |
Angel
| Enemy | Area | Drop List | Breakpoints | Weakness | Notes |
|---|---|---|---|---|---|
| 128px The Sixth Angel 第6使徒 |
|
Lv. 1+
Lv. 70+
Lv. 85+
Lv. 96+
|
A.T. Field | Weak to:
Weakspots:
|
A massive Phantom in the image of the 6th Angel, Ramiel. Destroy its A.T. Fields to reveal its core. Ramiel targets ARKS missile bases and EVA Unit 01 with various attacks. If EVA Unit 01 is destroyed, the quest fails. |
Ultralized
| Enemy | Area | Drop List | Breakpoints | Weakness | Notes |
|---|---|---|---|---|---|
 Lizeth Ghidour リーゼス・ギドール |
|
Lv. 91+ | Doors | Weak to:
Weakspots:
|
Ultra Variant of Train Ghidoran. Attacks have additional vertical reach. |