Main Page
Difference between revisions of "Free Field"
Jump to navigation
Jump to search
m (Text replacement - "(Phantoms|Special Enemies|Aberrations|Demons)\#[a-z]+\|" to "") |
|||
| (2 intermediate revisions by 2 users not shown) | |||
| Line 12: | Line 12: | ||
===Non-Quest Point=== | ===Non-Quest Point=== | ||
| − | {| class="wikitable" style="text-align:center;" | + | {| class="wikitable table-bordered" style="text-align:center;" |
! | Area | ! | Area | ||
! | Name | ! | Name | ||
| Line 23: | Line 23: | ||
| Complete [[Koffie_Client_Orders#freeexplorationforest|Free Exploration: Forest]] | | Complete [[Koffie_Client_Orders#freeexplorationforest|Free Exploration: Forest]] | ||
| Head to the final area! | | Head to the final area! | ||
| − | | [[ | + | | [[Rockbear]] |
|- | |- | ||
| | | | ||
| Line 31: | Line 31: | ||
| Complete [[Koffie_Client_Orders#freeexplorationvcave|Free Exploration: V. Cave]] | | Complete [[Koffie_Client_Orders#freeexplorationvcave|Free Exploration: V. Cave]] | ||
| Head to the final area! | | Head to the final area! | ||
| − | | [[ | + | | [[Vol Dragon]] |
|- | |- | ||
| | | | ||
| Line 39: | Line 39: | ||
| Complete [[Koffie_Client_Orders#freeexplorationdesert|Free Exploration: Desert]] | | Complete [[Koffie_Client_Orders#freeexplorationdesert|Free Exploration: Desert]] | ||
| Head to the final area! | | Head to the final area! | ||
| − | | [[ | + | | [[Gwanahda]] |
|- | |- | ||
| | | | ||
| Line 47: | Line 47: | ||
| Complete [[Koffie_Client_Orders#freeexplorationtundra|Free Exploration: Tundra]] | | Complete [[Koffie_Client_Orders#freeexplorationtundra|Free Exploration: Tundra]] | ||
| Head to the final area! | | Head to the final area! | ||
| − | | [[ | + | | [[Snow Banshee]]<br>[[Snow Banther]] |
|- | |- | ||
| | | | ||
| Line 55: | Line 55: | ||
| Complete [[Koffie_Client_Orders#freeexplorationsubtunnels|Free Exploration: Sub. Tunnels]] | | Complete [[Koffie_Client_Orders#freeexplorationsubtunnels|Free Exploration: Sub. Tunnels]] | ||
| Head to the final area! | | Head to the final area! | ||
| − | | [[ | + | | [[Big Vardha]] |
|- | |- | ||
| | | | ||
| Line 63: | Line 63: | ||
| Complete [[Koffie_Client_Orders#freeexplorationskyscape|Free Exploration: Skyscape]] | | Complete [[Koffie_Client_Orders#freeexplorationskyscape|Free Exploration: Skyscape]] | ||
| Head to the final area! | | Head to the final area! | ||
| − | | [[ | + | | [[Quartz Dragon]] |
|- | |- | ||
| | | | ||
| Line 71: | Line 71: | ||
| Complete [[Koffie_Client_Orders#freeexplorationruins|Free Exploration: Ruins]] | | Complete [[Koffie_Client_Orders#freeexplorationruins|Free Exploration: Ruins]] | ||
| Head to the final area! | | Head to the final area! | ||
| − | | [[ | + | | [[Zeshrydha]] |
|- | |- | ||
| | | | ||
| Line 79: | Line 79: | ||
| Complete [[Koffie_Client_Orders#freeexplorationsanctum|Free Exploration: Sanctum]] | | Complete [[Koffie_Client_Orders#freeexplorationsanctum|Free Exploration: Sanctum]] | ||
| Head to the final area! | | Head to the final area! | ||
| − | | [[ | + | | [[Dragon Ex]] |
|- | |- | ||
| | | | ||
| Line 87: | Line 87: | ||
| Complete [[Koffie_Client_Orders#freeexplorationcoast|Free Exploration: Coast]] | | Complete [[Koffie_Client_Orders#freeexplorationcoast|Free Exploration: Coast]] | ||
| Head to the final area! | | Head to the final area! | ||
| − | | [[ | + | | [[Bal Rodos]] |
|- | |- | ||
| | | | ||
| Line 95: | Line 95: | ||
| Complete [[Koffie_Client_Orders#freeexplorationquarry|Free Exploration: Quarry]] | | Complete [[Koffie_Client_Orders#freeexplorationquarry|Free Exploration: Quarry]] | ||
| Head to the final area! | | Head to the final area! | ||
| − | | [[ | + | | [[Blu Ringahda]] |
|- | |- | ||
| | | | ||
| Line 103: | Line 103: | ||
| Complete [[Koffie_Client_Orders#freeexplorationseabed|Free Exploration: Seabed]] | | Complete [[Koffie_Client_Orders#freeexplorationseabed|Free Exploration: Seabed]] | ||
| Head to the final area! | | Head to the final area! | ||
| − | | [[ | + | | [[Biol Meduna]] |
|- | |- | ||
| | | | ||
| Line 111: | Line 111: | ||
| Complete [[Koffie_Client_Orders#freeexplorationshironia|Free Exploration: Shironia]] | | Complete [[Koffie_Client_Orders#freeexplorationshironia|Free Exploration: Shironia]] | ||
| Head to the final area! | | Head to the final area! | ||
| − | | [[ | + | | [[Gigur Gunne-gam]] |
|- | |- | ||
| | | | ||
| Line 119: | Line 119: | ||
| Complete [[Koffie_Client_Orders#freeexplorationfacility|Free Exploration: Facility]] | | Complete [[Koffie_Client_Orders#freeexplorationfacility|Free Exploration: Facility]] | ||
| Head to the final area! | | Head to the final area! | ||
| − | | [[ | + | | [[Rheo Madullard]]<br>[[Nepto Cassadora]] |
|- | |- | ||
| | | | ||
| Line 127: | Line 127: | ||
===Quest Points=== | ===Quest Points=== | ||
====Kuron==== | ====Kuron==== | ||
| − | {| class="wikitable" style="text-align:center;" | + | {| class="wikitable table-bordered" style="text-align:center;" |
! | Area | ! | Area | ||
! | Name | ! | Name | ||
| Line 138: | Line 138: | ||
| Complete [[Koffie_Client_Orders#freeexplorationkuron|Free Exploration: Kuron]] | | Complete [[Koffie_Client_Orders#freeexplorationkuron|Free Exploration: Kuron]] | ||
| Collect Quest Points! | | Collect Quest Points! | ||
| − | | [[ | + | | [[Guar Zigmorde]] |
|- | |- | ||
|} | |} | ||
| Line 149: | Line 149: | ||
====Earth==== | ====Earth==== | ||
| − | {| class="wikitable" style="text-align:center;" | + | {| class="wikitable table-bordered" style="text-align:center;" |
! | Area | ! | Area | ||
! | Name | ! | Name | ||
| Line 170: | Line 170: | ||
* Tokyo has a Quest Point requirement of 500 Points. Las Vegas has a Quest Point requirement of 700 Points. These may be accumulated by defeating enemies and clearing Emergency Trials. | * Tokyo has a Quest Point requirement of 500 Points. Las Vegas has a Quest Point requirement of 700 Points. These may be accumulated by defeating enemies and clearing Emergency Trials. | ||
| − | * These Free Fields do not have an Area boss. However, there is a low chance for a boss specific to that field to spawn randomly; a [[ | + | * These Free Fields do not have an Area boss. However, there is a low chance for a boss specific to that field to spawn randomly; a [[Train Ghidoran]] will appear in Tokyo, while a [[Vegas Illusia]] will appear in Las Vegas. |
Latest revision as of 01:38, 4 May 2018
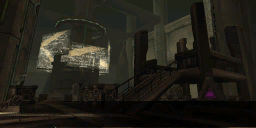
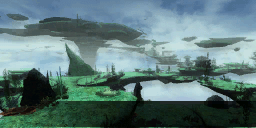
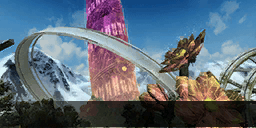
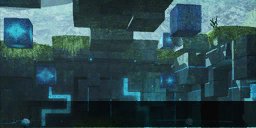
Free Field is a Quest type. In this mode, players can freely explore areas and defeat enemies. Free Fields typically culminate in a battle with the Area boss, which must be defeated to clear the Quest.
Overview
- With the exception of Las Vegas Exploration, the area's ARKS Quests must be cleared to unlock the corresponding Free Field.
- Quests that do not use the Quest Points function are divided into three areas. Area 1 and 2 are randomly-generated maps, while Area 3 usually contains the Area boss. If you are incapacitated by the area boss, the Quest will fail and you will have to retry.
- If playing the Matterboard, Event Panels do not spawn randomly in Free Field. If the Matter Guide for an Event Node is active, defeating the area boss will always cause the target Event Panel to spawn.
- One Free Field is selected at random to be a daily Featured Quest. When this occurs, you may take the Quest even if you have not properly unlocked it.
Quests
Non-Quest Point
Quest Points
Kuron
| Area | Name | Requirement | Objective | Area Boss |
|---|---|---|---|---|
|
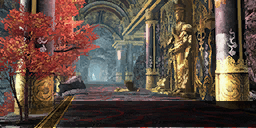
Kuron Exploration 黒ノ領域探索 |
Complete Free Exploration: Kuron | Collect Quest Points! | Guar Zigmorde |
- This Quest requires 1000 Quest Points. You may gain Points by defeating enemies and clearing Emergency Trials.
- When a threshold of 500 Quest Points is reached, a Telepipe appears that takes you to Area 2. This leads to the Area boss.
- The Area boss is worth 500 Quest Points.
- Being defeated by the Area boss will not qualify as a Quest failure.
Earth
| Area | Name | Requirement | Objective |
|---|---|---|---|
|
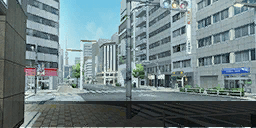
Tokyo Exploration 東京探索 |
Complete Free Exploration: Tokyo | Collect Quest Points! |
|
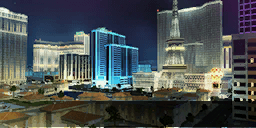
Las Vegas Exploration ラスベガス探索 |
Complete Free Exploration: Las Vegas | Collect Quest Points! |
- Tokyo has a Quest Point requirement of 500 Points. Las Vegas has a Quest Point requirement of 700 Points. These may be accumulated by defeating enemies and clearing Emergency Trials.
- These Free Fields do not have an Area boss. However, there is a low chance for a boss specific to that field to spawn randomly; a Train Ghidoran will appear in Tokyo, while a Vegas Illusia will appear in Las Vegas.
