Warning!
This wiki is only for the Japanese servers with the translation patch created by Arks-Layer. If you're on Global, please use [Instead].
MISSION: Cataclysm: Difference between revisions
No edit summary |
No edit summary |
||
| Line 52: | Line 52: | ||
* '''Start with a preset loadout.''' At the start of the Quest, you are able to choose from one of twelve loadouts. Unlike other Challenge Quests, you do not pick up equipment or Disks randomly dropped on the field. Enemies do not drop anything. | * '''Start with a preset loadout.''' At the start of the Quest, you are able to choose from one of twelve loadouts. Unlike other Challenge Quests, you do not pick up equipment or Disks randomly dropped on the field. Enemies do not drop anything. | ||
* '''Enemy spawns change on current VR Energy.''' The enemies that spawn in a given room are determined by how much VR Energy the party has upon entering. | * '''Enemy spawns change on current VR Energy.''' The enemies that spawn in a given room are determined by how much VR Energy the party has upon entering. | ||
=====Bonus Enemies===== | |||
In the first four stages, '''a Rappy will spawn somewhere on the map.''' Defeating it unlocks the yellow fence at the end of each map, granting bonus rewards such as Grinders and Challenge Dolls. However, '''Rappies despawn if left alone too long''', so they must be defeated at the first possible opportunity. | |||
=====Unlock Switches===== | |||
In the first four stages, '''an Unlock Switch will be present somewhere on the map. ''' Like the Bonus Enemy, Unlock Switches deactivate one of the fences at the end of the stage and grant additional rewards. Unlike the Bonus Enemy, Unlock Switches do not go away, but are more out of the way, are not indicated on the map, and may require higher-than-usual jump power to reach. Unlock Switches are also typically located in close vicinity to the Bonus Enemy. | |||
====Class Set==== | ====Class Set==== | ||
Revision as of 13:33, 26 December 2020
| MISSION: Cataclysm MISSION:激震 | |
|---|---|
| |
| Quest Type | Challenge Quests |
| Difficulty | |
| Normal | Level 80+ |
| Quest Details | |
| Location | VR Space |
| Single/Multi-Party | Multi-Party |
| Party Invitation | Allowed |
| Ally Assistance | Not Allowed |
| Conditions For Acceptance | |
| Normal | None |
| Restrictions | |
| Time Limit | None |
| Damage Limit | None |
| Ability Adjust | None |
MISSION: Cataclysm is a Challenge Quest.
Overview
MISSION: Cataclysm is a Challenge Quest with a total of five stages and two Interval Areas. Compared to other Challenge Quests, the rules are slightly different:
- VR Energy does not deplete over time. VR Energy only depletes on death, but there is much less VR Energy to be found compared to other Challenge Quests.
- Start with a preset loadout. At the start of the Quest, you are able to choose from one of twelve loadouts. Unlike other Challenge Quests, you do not pick up equipment or Disks randomly dropped on the field. Enemies do not drop anything.
- Enemy spawns change on current VR Energy. The enemies that spawn in a given room are determined by how much VR Energy the party has upon entering.
Bonus Enemies
In the first four stages, a Rappy will spawn somewhere on the map. Defeating it unlocks the yellow fence at the end of each map, granting bonus rewards such as Grinders and Challenge Dolls. However, Rappies despawn if left alone too long, so they must be defeated at the first possible opportunity.
Unlock Switches
In the first four stages, an Unlock Switch will be present somewhere on the map. Like the Bonus Enemy, Unlock Switches deactivate one of the fences at the end of the stage and grant additional rewards. Unlike the Bonus Enemy, Unlock Switches do not go away, but are more out of the way, are not indicated on the map, and may require higher-than-usual jump power to reach. Unlock Switches are also typically located in close vicinity to the Bonus Enemy.
Class Set
At the start of the Quest, you may choose from one of twelve Class Sets, split into four roles. A player's current role is denoted by the ring surrounding the character. The four roles are as follows:
Attack sets focus on dishing out high amounts of damage in a short period of time, making them valuable for pushing through waves of enemies. Their defense and range is somewhat lacking, however.
Rush sets have the ability to double jump and use Complex Photon Arts, giving them a unique jack-of-all-trades role that is useful for managing field gimmicks and carrying the team.
Support sets use Techniques and have the ability to buff and heal allies, making them invaluable assets in a Quest where healing is otherwise rare. Access to Compound Techniques additionally allows them to push massive burst damage in a pinch.
Unique sets are Successor Classes with high power, mobility, and coverage that allow them to fulfill multiple roles at once. Unlike other sets, Unique sets start at Level 55 and cannot use non-Main Class weapons like the Challenger Class.
Class Set Skill
Attack
| ExpandFighter |
|---|
| ExpandGunner |
|---|
| ExpandBraver |
|---|
Rush
| ExpandBouncer |
|---|
| ExpandRanger |
|---|
| ExpandHunter |
|---|
Support
| ExpandForce |
|---|
| ExpandTecher |
|---|
Unique
| ExpandHero |
|---|
| ExpandPhantom |
|---|
| ExpandEtoile |
|---|
| ExpandLuster |
|---|
Interval Areas
Walkthrough
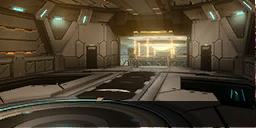
MISSION 1
| Area | Map |
|---|
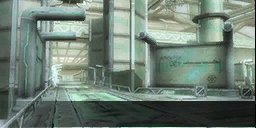
MISSION 2
| Area | Map |
|---|---|
 |
MISSION 3
| Area | Map |
|---|---|
 |
MISSION 4
| Area | Map |
|---|---|
 |
MISSION 5
| Area | Map |
|---|---|
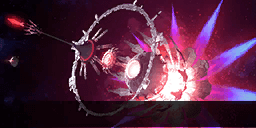 |
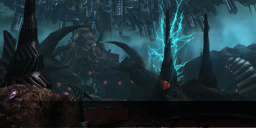
Based on the Primordial Darkness Sodam arena in Primordial Glare from the Void. Like previous stages, the boss/bosses that can spawn here are based on the player's remaining VR Energy. However, special bosses can also appear under certain conditions.
Possible Bosses
| Enemy | Appearance Condition | Notes |
|---|---|---|
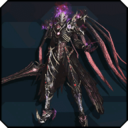
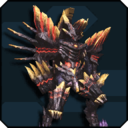  Frenzied: Omega Hunar Frenzied: Falz Hunar |
High VR Energy | Field: Ice. |
 Maximum Drive: Primordial Darkness Sodam Normal Ver. |
Medium VR Energy | Field: Variable. Identical behavior to its Divide Quest counterpart. Uses elemental weaknesses and the modified stun mechanic. |
Maximum Drive: Primordial Darkness Sodam True Ver. |
Unknown Time-based Condition (?) | Field: Variable. Identical behavior to its Emergency Quest counterpart. Uses weapon weaknesses. Transforms into its fused form when low on health. |
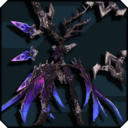
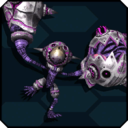
 Frenzied: Anga Fundarge |
Low VR Energy | Field: Standard. Does not use its weapon resistance barrier mechanic. |
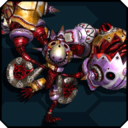  Frenzied: Omega Dourumble Frenzied: Dourumble Clone |
Very Low VR Energy | Field: ? Does not bestow a Title upon defeat. |
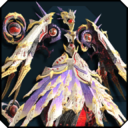
 Frenzied: Omega Masquerade |
Solo Only, High VR Energy | Field: Fire/Ice. |
Titles
| Title Name | Requirement | Reward |
|---|---|---|
| 『激震』ビギナー | Clear MISSION: Cataclysm one time. | |
| 『激震』マスター | Clear MISSION: Cataclysm ten times. | |
| 激震の踏破者 | Clear MISSION 5 in MISSION: Cataclysm. | |
| 激震の闇を制し者 | Defeat the Primordial Darkness in MISSION: Cataclysm. | |
| 激震の冥眼を制し者 | Defeat Primordial Darkness Sodam in MISSION: Cataclysm. | |
| 激震の虚影を制し者 | Defeat Omega Masquerade in MISSION: Cataclysm. | |
| 激震の魔帝を制し者 | Defeat Omega Hunar in MISSION: Cataclysm. | |
| 激震の歪精を制し者 | Defeat Anga Fundarge in MISSION: Cataclysm. |