Warning!
This wiki is only for the Japanese servers with the translation patch created by Arks-Layer. If you're on Global, please use [Instead].
Aberrations: Difference between revisions
m (Text replacement - "File:Lightning.png" to "{{icons|Lightning}}") |
m (Text replacement - "File:Light.png" to "{{icons|Light}}") |
||
| Line 1: | Line 1: | ||
==(DA) Aberrations== | ==(DA) Aberrations== | ||
{{EnemyHeader}} | {{EnemyHeader}} | ||
{{EnemyRow|daganyuga|[[File:DaganYugaIcon.png|128px]]|Dagan Yuga|ダガン・ユガ|Ultimate Naberius|<!--Drop List-->|[[File:Fire.png]] | {{EnemyRow|daganyuga|[[File:DaganYugaIcon.png|128px]]|Dagan Yuga|ダガン・ユガ|Ultimate Naberius|<!--Drop List-->|[[File:Fire.png]]{{icons|Light}}|Darker Core|<!--Breakpoints-->|Recieved Damage<br>[[File:small_s-atk.png]]100% [[File:small_r-atk.png]]85% [[File:small_t-atk.png]]85%}} | ||
{{EnemyRow|yugarldagan|[[File:YugarlDaganIcon.png|128px]]|Yugarl Dagan|ユガール・ダガン | {{EnemyRow|yugarldagan|[[File:YugarlDaganIcon.png|128px]]|Yugarl Dagan|ユガール・ダガン | ||
|Ultimate Naberius|<!--Drop List-->|[[File:Fire.png]] | |Ultimate Naberius|<!--Drop List-->|[[File:Fire.png]]{{icons|Light}}|Darker Core|<!--Breakpoints-->|Recieved Damage<br>[[File:small_s-atk.png]]100% [[File:small_r-atk.png]]85% [[File:small_t-atk.png]]85%}} | ||
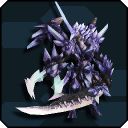
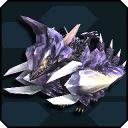
{{EnemyRow|yugadicahda|[[File:YugadicahdaIcon.png|128px]]|Yugadicahda|ユーガディカーダ|Ultimate Naberius | {{EnemyRow|yugadicahda|[[File:YugadicahdaIcon.png|128px]]|Yugadicahda|ユーガディカーダ|Ultimate Naberius | ||
*Ultimate Amdsucia|<!--Drop List-->|[[File:Fire.png]] | *Ultimate Amdsucia|<!--Drop List-->|[[File:Fire.png]]{{icons|Light}}|Darker Core|Arm Blades|Recieved Damage<br>[[File:small_s-atk.png]]100% [[File:small_r-atk.png]]85% [[File:small_t-atk.png]]80%}} | ||
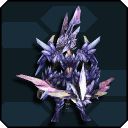
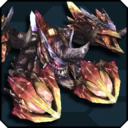
{{EnemyRow|nergadicahda|[[File:NergadicahdaIcon.png|128px]]|Nergadicahda|ネルガディカーダ | {{EnemyRow|nergadicahda|[[File:NergadicahdaIcon.png|128px]]|Nergadicahda|ネルガディカーダ | ||
|Ultimate Naberius | |Ultimate Naberius | ||
*Ultimate Amduscia|<!--Drop List-->|[[File:Fire.png]] | *Ultimate Amduscia|<!--Drop List-->|[[File:Fire.png]]{{icons|Light}}|Darker Core|Arm Blades|Recieved Damage<br>[[File:small_s-atk.png]]100% [[File:small_r-atk.png]]85% [[File:small_t-atk.png]]80%}} | ||
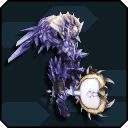
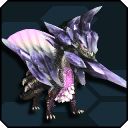
{{EnemyRow|yuguldrahda|[[File:YuguldrahdaIcon.png|128px]]|Yuguldrahda|ユグルドラーダ|Ultimate Naberius | {{EnemyRow|yuguldrahda|[[File:YuguldrahdaIcon.png|128px]]|Yuguldrahda|ユグルドラーダ|Ultimate Naberius | ||
*Ultimate Amduscia | *Ultimate Amduscia | ||
*Mining Base|<!--Drop List-->|[[File:Fire.png]] | *Mining Base|<!--Drop List-->|[[File:Fire.png]]{{icons|Light}}|Core|Back Core|Recieved Damage<br>[[File:small_s-atk.png]]100% [[File:small_r-atk.png]]80% [[File:small_t-atk.png]]80%}} | ||
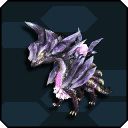
{{EnemyRow|yurisgadrahda|[[File:YurisgadrahdaIcon.png|128px]]|Yurisgadrahda|ユリスガドラーダ|Ultimate Naberius | {{EnemyRow|yurisgadrahda|[[File:YurisgadrahdaIcon.png|128px]]|Yurisgadrahda|ユリスガドラーダ|Ultimate Naberius | ||
*Ultimate Amduscia | *Ultimate Amduscia | ||
*Mining Base|<!--Drop List-->|[[File:Fire.png]] | *Mining Base|<!--Drop List-->|[[File:Fire.png]]{{icons|Light}}|Core|Back Core|Recieved Damage<br>[[File:small_s-atk.png]]100% [[File:small_r-atk.png]]80% [[File:small_t-atk.png]]80%}} | ||
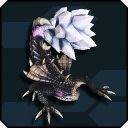
{{EnemyRow|gawondayuga|[[File:GaWondaYugaIcon.png|128px]]|Ga Wonda Yuga|ガウォンダ・ユガ|Ultimate Lillipa | {{EnemyRow|gawondayuga|[[File:GaWondaYugaIcon.png|128px]]|Ga Wonda Yuga|ガウォンダ・ユガ|Ultimate Lillipa | ||
*Ultimate Amduscia|<!--Drop List-->|{{icons|Lightning}} | *Ultimate Amduscia|<!--Drop List-->|{{icons|Lightning}}{{icons|Light}}|Back|<!--Breakpoints-->|Recieved Damage<br>[[File:small_s-atk.png]]100% [[File:small_r-atk.png]]85% [[File:small_t-atk.png]]85%}} | ||
{{EnemyRow|guwondayuga|[[File:GuWondaYugaIcon.png|128px]]|Gu Wonda Yuga|グウォンダ・ユガ|Ultimate Lillipa | {{EnemyRow|guwondayuga|[[File:GuWondaYugaIcon.png|128px]]|Gu Wonda Yuga|グウォンダ・ユガ|Ultimate Lillipa | ||
*Ultimate Amduscia|<!--Drop List-->|{{icons|Lightning}} | *Ultimate Amduscia|<!--Drop List-->|{{icons|Lightning}}{{icons|Light}}|Back|<!--Breakpoints-->|Recieved Damage<br>[[File:small_s-atk.png]]100% [[File:small_r-atk.png]]85% [[File:small_t-atk.png]]85%}} | ||
{{EnemyRow|kuklonahdayuga|[[File:KuklonahdaYugaIcon.png|128px]]|Kuklonahda Yuga|キュクロナーダ・ユガ|Ultimate Lillipa<br>Ultimate Amduscia|<!--Drop List-->|{{icons|Lightning}} | {{EnemyRow|kuklonahdayuga|[[File:KuklonahdaYugaIcon.png|128px]]|Kuklonahda Yuga|キュクロナーダ・ユガ|Ultimate Lillipa<br>Ultimate Amduscia|<!--Drop List-->|{{icons|Lightning}}{{icons|Light}}|Exposed Crotch | ||
*Eye|Crotch Armor|Recieved Damage<br>[[File:small_s-atk.png]]100% [[File:small_r-atk.png]]85% [[File:small_t-atk.png]]85%}} | *Eye|Crotch Armor|Recieved Damage<br>[[File:small_s-atk.png]]100% [[File:small_r-atk.png]]85% [[File:small_t-atk.png]]85%}} | ||
{{EnemyRow|cyclonehdayuga|[[File:CyclonehdaYugaIcon.png|128px]]|Cyclonehda Yuga|サイクロネーダ・ユガ|Ultimate Lillipa | {{EnemyRow|cyclonehdayuga|[[File:CyclonehdaYugaIcon.png|128px]]|Cyclonehda Yuga|サイクロネーダ・ユガ|Ultimate Lillipa | ||
*Ultimate Amduscia|<!--Drop List-->|{{icons|Lightning}} | *Ultimate Amduscia|<!--Drop List-->|{{icons|Lightning}}{{icons|Light}}|Exposed Crotch | ||
*Eye|Crotch Armor|Recieved Damage<br>[[File:small_s-atk.png]]100% [[File:small_r-atk.png]]85% [[File:small_t-atk.png]]85%}} | *Eye|Crotch Armor|Recieved Damage<br>[[File:small_s-atk.png]]100% [[File:small_r-atk.png]]85% [[File:small_t-atk.png]]85%}} | ||
{{EnemyRow|yugadasorcerer|[[File:YugadaSorcererIcon.jpg|128px]]|Yugada Sorcerer|ユグダソーサラー|Ultimate Amduscia|<!--Drop List-->|[[File:Wind.png]] | {{EnemyRow|yugadasorcerer|[[File:YugadaSorcererIcon.jpg|128px]]|Yugada Sorcerer|ユグダソーサラー|Ultimate Amduscia|<!--Drop List-->|[[File:Wind.png]]{{icons|Light}}|<!--Breakpoints-->|<!--Notes-->|}} | ||
{{EnemyRow|angafundarge|[[File:AngaFundargeIcon.png|128px]]|Anga Fundarge|アンガ・ファンダージ|Ultimate Naberius | {{EnemyRow|angafundarge|[[File:AngaFundargeIcon.png|128px]]|Anga Fundarge|アンガ・ファンダージ|Ultimate Naberius | ||
*Ultimate Lillipa | *Ultimate Lillipa | ||
*Extreme Quest: Heaven and Hell Stage 10|<!--Drop List-->| | *Extreme Quest: Heaven and Hell Stage 10|<!--Drop List-->|{{icons|Light}}|Core|Floating Bits|Recieved Damage<br>[[File:small_s-atk.png]]110%% [[File:small_r-atk.png]]85% [[File:small_t-atk.png]]85%<br><br>Gains resistances to sources that deal the most damage to it. Destroying all floating bits will briefly immobilize and permanently reveal the core weakpoint.<br><br>Will revive once, shortly after it is defeated for the first time.<br><br>Immobilized by Panic}} | ||
{{EnemyRow|angafundarge||Anga Fundarge|アンガ・ファンダージ|Ultimate Naberius | {{EnemyRow|angafundarge||Anga Fundarge|アンガ・ファンダージ|Ultimate Naberius | ||
*Ultimate Lillipa | *Ultimate Lillipa | ||
*Ultimate Amduscia|<!--Drop List-->| | *Ultimate Amduscia|<!--Drop List-->|{{icons|Light}}|Core|Floating Bits|Has a quadrupedal appearance and different attack patterns.<br><br>Gains resistances to sources that deal the most damage to it. Destroying all floating bits will briefly immobilize and permanently reveal the core weakpoint.<br><br>Will revive once, shortly after it is defeated for the first time.<br><br>Immobilized by Panic}} | ||
{{EnemyRow|vielhunar|[[File:VielHunarIcon.png|128px]]|Viel Hunar|ヴィエル・ヒューナル|Story Quest EP3 CH7|<!--Drop List-->| | {{EnemyRow|vielhunar|[[File:VielHunarIcon.png|128px]]|Viel Hunar|ヴィエル・ヒューナル|Story Quest EP3 CH7|<!--Drop List-->|{{icons|Light}}|Body|Arm Cores|Body is initially shielded. Break both arm cores to expose body weakpoint.}} | ||
{{EnemyRow|diohunar|[[File:DioHunarIcon.png|128px]]|Dio Hunar|ディーオ・ヒューナル|Extreme Quest: Heaven and Hell Stage 10|<!--Drop List-->| | {{EnemyRow|diohunar|[[File:DioHunarIcon.png|128px]]|Dio Hunar|ディーオ・ヒューナル|Extreme Quest: Heaven and Hell Stage 10|<!--Drop List-->|{{icons|Light}}|Body|Arm Cores|Body is initially shielded. Break both arm cores to expose body weakpoint.}} | ||
{{EnemyRow|profounddarkness|[[File:ProfoundDarknessIcon.png|128px]]|【Profound Darkness】|【深遠なる闇】|Emergency Quest: A Perennial Apocalypse | {{EnemyRow|profounddarkness|[[File:ProfoundDarknessIcon.png|128px]]|【Profound Darkness】|【深遠なる闇】|Emergency Quest: A Perennial Apocalypse | ||
*Solo Extreme Quest Stage 10 (1v1 form only)|<!--Drop List-->| | *Solo Extreme Quest Stage 10 (1v1 form only)|<!--Drop List-->|{{icons|Light}}|Face Core | ||
*Base Core|Face Core<br>Chest Core<br>Floating Bits<br>Body Petals|'''Flower Form:''' <br> On SH and below, break Body Petals to temporarily expose the Base Core.<br>On XH, break Body Petals to release Floating Bits. Destroy all Floating Bits to expose the Base Core.<br><br>At 60% HP, background will change, and PD will gain weakness to a weapon type on SH and below. At 40% HP, will transition into humanoid form. | *Base Core|Face Core<br>Chest Core<br>Floating Bits<br>Body Petals|'''Flower Form:''' <br> On SH and below, break Body Petals to temporarily expose the Base Core.<br>On XH, break Body Petals to release Floating Bits. Destroy all Floating Bits to expose the Base Core.<br><br>At 60% HP, background will change, and PD will gain weakness to a weapon type on SH and below. At 40% HP, will transition into humanoid form. | ||
<br><br> '''Humanoid Form:''' <br> On SH and below, destroy all Floating Bits to temporarily immobilize PD.<br>On XH, destroy all Floating Bits to reveal the Chest core. Destroy the chest core to temporarily immobilize PD.<br><br>At low HP, will back off and teleport you into 1v1. If you fail to kill the 1v1 form in time the party will wipe. <br>On SH and below, PD will be immobilized permanently afterwards. <br>On XH, the Face Core will be revealed. Destroying the Face Core will immobilize PD permanently.}} | <br><br> '''Humanoid Form:''' <br> On SH and below, destroy all Floating Bits to temporarily immobilize PD.<br>On XH, destroy all Floating Bits to reveal the Chest core. Destroy the chest core to temporarily immobilize PD.<br><br>At low HP, will back off and teleport you into 1v1. If you fail to kill the 1v1 form in time the party will wipe. <br>On SH and below, PD will be immobilized permanently afterwards. <br>On XH, the Face Core will be revealed. Destroying the Face Core will immobilize PD permanently.}} | ||
Revision as of 07:30, 31 May 2017
(DA) Aberrations
| Enemy | Area | Drop List | Breakpoints | Weakness | Notes |
|---|---|---|---|---|---|
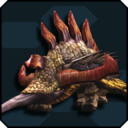
 Dagan Yuga ダガン・ユガ |
|
Weak to:
Weakspots:
|
Recieved Damage | ||
 Yugarl Dagan ユガール・ダガン |
|
Weak to:
Weakspots:
|
Recieved Damage | ||
 Yugadicahda ユーガディカーダ |
|
Arm Blades | Weak to:
Weakspots:
|
Recieved Damage | |
 Nergadicahda ネルガディカーダ |
|
Arm Blades | Weak to:
Weakspots:
|
Recieved Damage | |
 Yuguldrahda ユグルドラーダ |
|
Back Core | Weak to:
Weakspots:
|
Recieved Damage | |
 Yurisgadrahda ユリスガドラーダ |
|
Back Core | Weak to:
Weakspots:
|
Recieved Damage | |
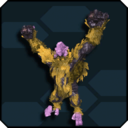
 Ga Wonda Yuga ガウォンダ・ユガ |
|
Weak to:
Weakspots:
|
Recieved Damage | ||
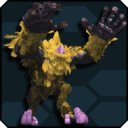
 Gu Wonda Yuga グウォンダ・ユガ |
|
Weak to:
Weakspots:
|
Recieved Damage | ||
 Kuklonahda Yuga キュクロナーダ・ユガ |
|
Crotch Armor | Weak to:
Weakspots:
|
Recieved Damage | |
 Cyclonehda Yuga サイクロネーダ・ユガ |
|
Crotch Armor | Weak to:
Weakspots:
|
Recieved Damage | |
 Yugada Sorcerer ユグダソーサラー |
|
Weak to:
Weakspots: |
|||
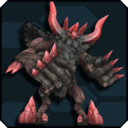
 Anga Fundarge アンガ・ファンダージ |
|
Floating Bits | Weak to:
Weakspots:
|
Recieved Damage Gains resistances to sources that deal the most damage to it. Destroying all floating bits will briefly immobilize and permanently reveal the core weakpoint. Will revive once, shortly after it is defeated for the first time. Immobilized by Panic | |
Anga Fundarge アンガ・ファンダージ |
|
Floating Bits | Weak to:
Weakspots:
|
Has a quadrupedal appearance and different attack patterns. Gains resistances to sources that deal the most damage to it. Destroying all floating bits will briefly immobilize and permanently reveal the core weakpoint. Will revive once, shortly after it is defeated for the first time. Immobilized by Panic | |
 Viel Hunar ヴィエル・ヒューナル |
|
Arm Cores | Weak to:
Weakspots:
|
Body is initially shielded. Break both arm cores to expose body weakpoint. | |
 Dio Hunar ディーオ・ヒューナル |
|
Arm Cores | Weak to:
Weakspots:
|
Body is initially shielded. Break both arm cores to expose body weakpoint. | |
 【Profound Darkness】 【深遠なる闇】 |
|
Face Core Chest Core Floating Bits Body Petals |
Weak to:
Weakspots:
|
Flower Form: On SH and below, break Body Petals to temporarily expose the Base Core. On XH, break Body Petals to release Floating Bits. Destroy all Floating Bits to expose the Base Core. At 60% HP, background will change, and PD will gain weakness to a weapon type on SH and below. At 40% HP, will transition into humanoid form.
|
(NA) Aberrations
| Enemy | Area | Drop List | Breakpoints | Weakness | Notes |
|---|---|---|---|---|---|
 Folginis フォルギニス |
|
Weak to:
Weakspots:
|
Recieved Damage | ||
 Geragodan ジェラゴダン |
|
Weak to:
Weakspots:
|
Recieved Damage | ||
 Gibbloodan ギブルーダン |
|
Weak to:
Weakspots:
|
Recieved Damage | ||
 Zugruff ズグラフ |
|
Weak to:
Weakspots:
|
Recieved Damage | ||
 Zugruff Gue ズグラフ・グー |
|
Weak to:
Weakspots:
|
Recieved Damage | ||
 Bargruff バルグラフ |
|
Weak to:
Weakspots:
|
Recieved Damage | ||
 Bargruff Gue バルグラフ・グー |
|
Weak to:
Weakspots: |
Recieved Damage | ||
 Grandilga グランディルガ |
|
Weak to:
Weakspots:
|
Recieved Damage | ||
 Fuehgo フォエーゴ |
|
Weak to:
Weakspots:
|
Recieved Damage | ||
 Kaisefuehgo カイズフォエーゴ |
|
Weak to:
Weakspots:
|
Recieved Damage | ||
 Jarmagles ジャーマグルス |
|
Weak to:
Weakspots:
|
Recieved Damage | ||
 Plosiorgles プロジオーグルス |
|
Humps | Weak to:
Weakspots:
|
Recieved Damage | |
 Ignitiogles イグニジオグルス |
|
Humps | Weak to:
Weakspots:
|
Recieved Damage | |
 Bayaribbles ベーアリブルス |
|
Weak to:
Weakspots:
|
Recieved Damage | ||
 Bergaribruisa ベルガリブルーサ |
|
Weak to:
Weakspots:
|
|||
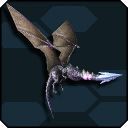
 Diabo Igrithys ディアボイグリシス |
|
Horn Wings Tail |
Weak to:
Weakspots:
|
Recieved Damage | |
 Vomos Brodothys ヴォモスブロドシス |
|
Horn Wings Tail |
Weak to:
Weakspots:
|
Recieved Damage |
(LI) Aberrations
| Enemy | Area | Drop List | Breakpoints | Weakness | Notes |
|---|---|---|---|---|---|
 Jagd Spardan ヤクトスパルダン |
|
Weak to:
Weakspots:
|
Recieved Damage | ||
 Gunkaiser ガンカイザー |
|
Weak to:
Weakspots:
|
Recieved Damage | ||
 Sinow Rapidus シノワラピドゥス |
|
Weak to:
Weakspots:
|
Recieved Damage | ||
 Sinow Rozzo シノワロッゾ |
|
Weak to:
Weakspots:
|
Recieved Damage | ||
 Kaiser Vargr カイザーバルガー |
|
Weak to:
Weakspots:
|
Recieved Damage | ||
 Rapid Gilnas ラピドギルナス |
|
Weak to:
Weakspots:
|
Recieved Damage | ||
 Blade Dingell ブレードディンゲール |
|
Weak to:
Weakspots:
|
Recieved Damage | ||
 Dingabruze ディンガブルーゼ |
|
Weak to:
Weakspots:
|
Recieved Damage | ||
 Zeta Guranz ゼータ・グランゾ |
|
Knee Guns Shileds Missle Pods |
Weak to:
Weakspots:
|
Recieved Damage Necky's Challenge Immobilized by burn for a brief second | |
 Epsilon Guranz イプシロン・グランゾ |
|
Knee Guns Shileds Missle Pods |
Weak to:
Weakspots:
|
Recieved Damage Necky's Challenge Immobilized by burn for a brief second | |
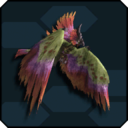
 Falke Leone ファルケ・レオーネ |
|
Legs Wings Head |
Weak to:
Weakspots:
|
Recieved Damage | |
 Leone Falozzo レオーネ・ファロッゾ |
|
Legs Wings Head |
Weak to:
Weakspots:
|
Recieved Damage | |
 Vlima Leopard ヴリマ・レオパード |
|
Legs Wings Head |
Weak to:
Weakspots:
|
Recieved Damage | |
 Leopard Vlozzo レオパード・ヴロッゾ |
|
Legs Wings Head |
Weak to:
Weakspots:
|
Recieved Damage |
(AM) Aberrations
| Enemy | Area | Drop List | Breakpoints | Weakness | Notes |
|---|---|---|---|---|---|
 Varugalla ヴァルガーラ |
|
Weak to:
Weakspots: |
|||
| File:NoPic.png Globgalla グロブガーラ |
|
Weak to:
Weakspots: |
|||
 Zi Shubarizan ジ・シュバリザン |
|
Weak to:
Weakspots: |
|||
 Zo Shubarizan ゾ・シュバリザン |
|
Weak to:
Weakspots: |
|||
 Shubarizan シュバリザン |
|
Weak to:
Weakspots: |
|||
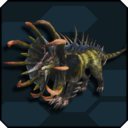
 Gurdran グルドラン |
|
Tail | Weak to:
Weakspots:
|
||
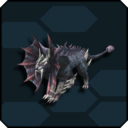
 Ventazaur ヴェンタザウル |
|
Horn Tail |
Weak to:
Weakspots: |
||
 Defanzaur デファンザウル |
|
Weak to:
Weakspots: |
|||
 Zo Shubarzas ゾ・シュバルザス |
|
Weak to:
Weakspots:
|
|||
 Box Duvals ボクス・ドゥバルス |
|
Back | Weak to:
Weakspots:
|
Break back crystals to immobilize and briefly reveal mouth weakpoint Back crystals will regrow after it gets back up. | |
 Bugil Duvals ブギル・ドゥバルス |
|
Back | Weak to:
Weakspots:
|
||
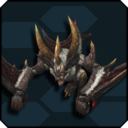
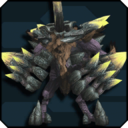
| File:GreuzorasDragoIcon.jpg Greuzoras Drago グリュゾラス・ドラゴ |
|
Both Wings Both Hands Face |
Weak to:
Weakspots:
|
||
| File:NoPic.png Nirvalieze Drago ニルバリーズ・ドラゴ |
|
Both Wings Both Hands Face |
Weak to:
Weakspots:
|
||
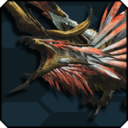
 Drago Deadleon ドラゴ・デッドリオン |
|
Spear Shield Face |
Weak to:
Weakspots:
|
||
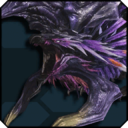
 Vareon Draal ヴァレオン・ドラール |
|
Spear Shield Face |
Weak to:
Weakspots:
|