|
|
| (98 intermediate revisions by 13 users not shown) |
| Line 1: |
Line 1: |
| − | == General Ring Information == | + | __NOTOC__ |
| | + | ==About Skill Rings== |
| | + | Skill Rings are equip items that augment the player's abilities in unique ways, much in the way of Skills do, hence the name. There are two types of Rings: Left Rings and Right Rings. Left Rings produce unique effects that allow players to manipulate their playstyle, while Right Rings typically emulate the effects of pre-existing Skills, with some exceptions. |
| | | | |
| − | To upgrade rings, you grind them at dudu or monica. A ring costs the base materials per grind as well as 30k meseta and has 80% chance of success. The first 5 levels require only Rocks of base materials (e.g. [[Naberius Rock]]) to be grinded. After level 5, Gems of the base materials (e.g. [[Forest Emerald]]) start being required. After level 10, {{icons|Tool}} [[Lambda Grinder|Lambda Grinders]] are also required for grinding. Left rings have the option of raising one stat of your choice by +1 every level (available stats depend on the stats present on the ring). Right rings do not have this option. | + | To create a Skill Ring, you must acquire the requisite items by Mining them in Free Fields via the Gathering system. Once you have acquired the items, you may either take them to the Gathering console in the Campship or the Ring Shop in Franka's Cafe to create the Ring. Almost all Rings are also tradeable and may be purchased off the Player Shop. |
| | | | |
| − | ==Left Skill Rings==
| + | Once you have a Skill Ring, you may equip it from the Armor Equip menu. You may equip one Left Ring and one Right Ring each. While they may typically only be changed via this menu, you may use chat commands to switch equipped Rings on the fly. |
| | | | |
| − | Left rings are generally used to upgrade or modify existing abilities of classes or weapons. While there are no class restrictions, it is usually required to have a specific weapon or skill for the rings to actually do anything.
| + | While a Skill Ring is being worn, 5% of any accrued EXP is added to the Ring. This increases an EXP gauge on the Ring, and when it reaches 100%, the Ring "levels up". Upon a successful level up, the Grind Cap of the Ring increases, enabling you to advance its Grind Level. To Grind a Ring, the Ring must be taken to Dudu or Monica, who will also request a set of Gathering Materials in addition to Grinders. Left Rings can also add +1 to an available stat to upgrade alongside the Grind Level. Grinding Rings typically has an 80% success rate with the exception of the R/Effort Symbol Ring. Many Rings will gain boosted effectiveness when Grinded. |
| | | | |
| − | ===L/JG Sonic Arrow=== | + | The Grind Requirements for most Rings are as follows: |
| − | {| class="wikitable" | + | * 30,000 Meseta Per Attempt |
| − | |- | + | * + 1 ~ 5: Grinders and Rocks |
| − | !
| + | * + 6 ~ 10: Grinders, Gems, and Rocks |
| − | ! colspan="4" | JP Name
| + | * + 11 ~ 20: Lambda Grinders, Grinders, Gems, and Rocks |
| − | ! colspan="12" | Description
| + | |
| − | ! colspan="4" | Materials
| + | <div id="collapse-global">Show</div> |
| − | |- | + | ==L Rings== |
| − | |[[File:JGSonicArrowRingIcon.png|120px]] | + | ===Class Rings=== |
| − | | colspan="4" | L/JGソニックアロウ | + | {{NRing|Head|{{NUI|UIClassHu}} Hunter}} |
| − | | colspan="12" | [[Photon_Arts_List#sonicarrow|Sonic Arrow]] activates after a Just Guard when using Sword type weapons. | + | {{NRing|Body|L|4|HunterGearSave|L/Hunter Gear Save|L/ハンターギアセイブ|Hunter Gear Save |
| − | | colspan="4" | [[Naberius Rock]] x3<br>[[Ruins Amethyst]] x1 | + | While Hunter Gear Boost is active, decrease the Rate of Gear Drain and Consumption.|3|SATK|RATK|DEX||Emerald}} |
| − | |- | + | {{NRing|Stat|Gear Consumption Rate}} || 75% || 74% || 73% || 72% || 71% || 70% || 69% || 68% || 67% || 66% || 65%|| 64% || 63% || 62% || 61% || 60% || 59% || 58% || 55% || 50% |
| − | ! Ring Level !! width="50px" | 1 !! width="50px" | 2 !! width="50px" | 3 !! width="50px" | 4 !! width="50px" | 5 !! width="50px" | 6 !! width="50px" | 7 !! width="50px" | 8 !! width="50px" | 9 !! width="50px" | 10 !! width="50px" | 11 !! width="50px" | 12 !! width="50px" | 13 !! width="50px" | 14 !! width="50px" | 15 !! width="50px" | 16 !! width="50px" | 17 !! width="50px" | 18 !! width="50px" | 19 !! width="50px" | 20
| + | {{NRing|Stat|Gear Drain Rate}} || 75% || 74% || 73% || 72% || 71% || 70% || 69% || 68% || 67% || 66% || 65%|| 64% || 63% || 62% || 61% || 60% || 59% || 58% || 55% || 50% |
| − | |- align="center" | + | {{NRing|Null}} |
| − | | PP Consumed on use || 20 || 19 || 18 || 17 || 16 || 15 || 14 || 13 || 12 || 11 || 10 || 9 || 8 || 7 || 6 || 5 || 4 || 3 || 2 || 0 | + | {{NRing|Body|L|4|JGSonicArrow|L/JG Sonic Arrow|L/JGソニックアロウ|Just Guard Sonic Arrow |
| − | |- align="center" | + | Sword Just Guards will execute Sonic Arrow.|3|SATK|RATK|DEX||Amethyst}} |
| − | | Power || 175% || 176% || 177% || 178% || 180% || 182% || 184% || 186% || 188% || 190% || 192% || 194% || 196% || 198% || 200% || 204% || 208% || 212% || 216% || 220% | + | {{NRing|Stat|Power}} || 175% || 176% || 177% || 178% || 180% || 182% || 184% || 186% || 188% || 190% || 192% || 194% || 196% || 198% || 200% || 204% || 208% || 212% || 216% || 220% |
| | + | {{NRing|Stat|PP Consumption}} || 20 || 19 || 18 || 17 || 16 || 15 || 14 || 13 || 12 || 11 || 10 || 9 || 8 || 7 || 6 || 5 || 4 || 3 || 2 || 0 |
| | + | {{NRing|Null}} |
| | + | {{NRing|Body|L|4|JGHeavenlyF|L/JG Heavenly F|L/JGヘブンリーF|Just Guard Heavenly Fall |
| | + | Wired Lance Just Guards will execute Heavenly Fall.|3|SATK|RATK|DEX||Sapphire}} |
| | + | {{NRing|Stat|Power}} || 175% || 176% || 177% || 178% || 180% || 182% || 184% || 186% || 188% || 190% || 192% || 194% || 196% || 198% || 200% || 204% || 208% || 212% || 216% || 220% |
| | + | {{NRing|Stat|PP Consumption}} || 20 || 19 || 18 || 17 || 16 || 15 || 14 || 13 || 12 || 11 || 10 || 9 || 8 || 7 || 6 || 5 || 4 || 3 || 2 || 0 |
| | + | {{NRing|Null}} |
| | + | {{NRing|Body|L|4|JGRisingF|L/JG Rising F|L/JGライシングF|Just Guard Rising Flag |
| | + | Partizan Just Guards will execute Rising Flag.|3|SATK|RATK|DEX||Opal}} |
| | + | {{NRing|Stat|Power}} || 175% || 176% || 177% || 178% || 180% || 182% || 184% || 186% || 188% || 190% || 192% || 194% || 196% || 198% || 200% || 204% || 208% || 212% || 216% || 220% |
| | + | {{NRing|Stat|PP Consumption}} || 20 || 19 || 18 || 17 || 16 || 15 || 14 || 13 || 12 || 11 || 10 || 9 || 8 || 7 || 6 || 5 || 4 || 3 || 2 || 0 |
| | + | {{NRing|Null}} |
| | + | {{NRing|Body|L|3|AWireMode|L/A Wire Mode|L/Aワイヤーモード|Another Wire Mode |
| | + | Wired Lance Grapple PAs will not grab the enemy.|3|SATK|DEX|SDEF||Garnet}} |
| | + | {{NRing|Stat|N/A}} || colspan="20" | N/A |
| | + | |} |
| | + | |} |
| | + | {{NRing|Head|{{NUI|UIClassFi}} Fighter}} |
| | + | {{NRing|Body|L|3|SlowFiAction|L/Slow Fi Action|L/スローFiアクション|Slow Fighter Action |
| | + | Decrease the Speed of Weapon Actions executed with Fighter Weapons.|2|SATK|SDEF|||Moonstone}} |
| | + | {{NRing|Stat|N/A}} || colspan="20" | N/A |
| | + | {{NRing|Null}} |
| | + | {{NRing|Body|L|3|TDAirChase|L/TD Air Chase|L/TDエアチェイス|Twin Dagger Air Chase |
| | + | Twin Dagger Normal Attacks and Photon Arts executed in the air will Chase a Locked-On Target. |
| | + | <BR><BR>INCLUDED Photon Arts: Facet Folia, Fall Nocturne, Scar Fugue|3|SATK|TATK|DEX||Emerald}} |
| | + | {{NRing|Stat|N/A}} || colspan="20" | N/A |
| | + | {{NRing|Null}} |
| | + | {{NRing|Body|L|4|DSKamaitachi|L/DS Kamaitachi|L/DSカマイタチ|Double Saber Kamaitachi |
| | + | Double Saber Photon Arts can activate Kamaitachi without Gear Consumption. |
| | + | <BR><BR>EXCLUDED Photon Arts: Chaos Riser, Hurricane Sender|3|SATK|TATK|DEX||Opal}} |
| | + | {{NRing|Stat|Power}} || colspan="20" | 100% |
| | + | {{NRing|Stat|Activation Rate}} || 5% || 10% || 15% || 20% || 25% || 30% || 35% || 40% || 45% || 50% || 55% || 60% || 65% || 70% || 75% || 80% || 85% || 90% || 95% || 100% |
| | + | {{NRing|Null}} |
| | + | {{NRing|Body|L|3|KnuckleChase|L/Knuckle Chase|L/ナックルチェイス|Knuckle Chase |
| | + | Knuckle Normal Attacks and Photon Arts executed on the ground will Chase a Locked-On Target. |
| | + | <BR><BR>EXCLUDED Photon Arts: Heartless Impact, Meteor Fist, Straight Charge (+ Type-0) |
| | + | <BR>SPECIAL Cases: Step Attack (+ in air), Quake Howling (only in air)|3|SATK|TATK|DEX||Amethyst}} |
| | + | {{NRing|Stat|N/A}} || colspan="20" | N/A |
| | + | |} |
| | |} | | |} |
| − | | + | {{NRing|Head|{{NUI|UIClassBo}} Bouncer}} |
| − | ===L/JG Heavenly Fall===
| + | {{NRing|Body|L|3|DBSnatch|L/DB Snatch|L/DBスナッチ|Dual Blade Snatch |
| − | {| class="wikitable" | + | Inflicts striking damage to enemies when moving using the Dual Blade weapon action.|3|SATK|DEX|SDEF||Sapphire}} |
| − | |- | + | {{NRing|Stat|Power}} || 400% || 500% || 600% || 700% || 800% || 900% || 1000% || 1100% || 1200% || 1300% || 1350% || 1400% || 1450% || 1500% || 1550% || 1600% || 1650% || 1700% || 1750% || 1800% |
| − | !
| + | {{NRing|Null}} |
| − | ! colspan="4" | JP Name
| + | {{NRing|Body|L|5|PBHoming|L/PB Homing|L/PBホーミング|Photon Blade Homing |
| − | ! colspan="12" | Description
| + | Adds a Homing Property to a Dual Blade's Photon Blade on Weapon Action.|2|SATK|SDEF|||Peridot}} |
| − | ! colspan="4" | Materials
| + | {{NRing|Stat|Power}} || colspan="3" | 101% || colspan="3" | 102% || colspan="3" | 103% || colspan="3" | 104% || colspan="3" | 105% || colspan="2" | 106% || colspan="2" | 107% || 108% |
| − | |- | + | {{NRing|Stat|Turn Rate}} || 30° || 35° || 40° || 45° || 50° || 55° || 60° || 65° || 70° || 75° || 80° || 85° || 90° || 95° || 100° || 110° || 120° || 130° || 140° || 150° |
| − | |[[File:JGHeavenlyFallRingIcon.png|120px]] | + | {{NRing|Stat|Turn Period}} || colspan="5" | 2s || colspan="5" | 3s || colspan="5" | 4s || colspan="5"| 5s |
| − | | colspan="4" | L/JGヘブンリーF | + | {{NRing|Null}} |
| − | | colspan="12" | [[Photon_Arts_List#heavenlyfall|Heavenly Fall]] activates after a Just Guard when using Wired Lance type weapons. | + | {{NRing|Body|L|3|JBElementalKeep|L/JB Elemental Keep|L/JBエレメンタルキープ|Jet Boots Elemental Keep |
| − | | colspan="4" | [[Vopar Rock]] x3<br>[[Coast Sapphire]] x1 | + | Element is kept upon performing a weapon action. Elemental Burst is no longer activated.|3|SATK|TATK|TDEF||Diamond}} |
| − | |- | + | {{NRing|Stat|N/A}} || colspan="20" | N/A |
| − | ! Ring Level !! width="50px" | 1 !! width="50px" | 2 !! width="50px" | 3 !! width="50px" | 4 !! width="50px" | 5 !! width="50px" | 6 !! width="50px" | 7 !! width="50px" | 8 !! width="50px" | 9 !! width="50px" | 10 !! width="50px" | 11 !! width="50px" | 12 !! width="50px" | 13 !! width="50px" | 14 !! width="50px" | 15 !! width="50px" | 16 !! width="50px" | 17 !! width="50px" | 18 !! width="50px" | 19 !! width="50px" | 20
| + | {{NRing|Null}} |
| − | |- align="center" | + | {{NRing|Body|L|3|JBTechArtsSC|L/JB Tech Arts SC|L/JBテックアーツSC|Jet Boots Tech Arts Short Charge |
| − | | PP Consumed on use || 20 || 19 || 18 || 17 || 16 || 15 || 14 || 13 || 12 || 11 || 10 || 9 || 8 || 7 || 6 || 5 || 4 || 3 || 2 || 0 | + | Technique charge time is shortened when following a Jet Boots PA.|3|TATK|SATK|TDEF||Amber}} |
| − | |- align="center" | + | {{NRing|Stat|Charge Time}} || 90% || 88% || 86% || 84% || 82% || 80% || 78% || 76% || 74% || 72% || 70% || 68% || 66% || 64% || 62% || 60% || 58% || 56% || 54% || 50% |
| − | | Power || 175% || 176% || 177% || 178% || 180% || 182% || 184% || 186% || 188% || 190% || 192% || 194% || 196% || 198% || 200% || 204% || 208% || 212% || 216% || 220% | |
| | |} | | |} |
| − | ===L/JG Rising Flag===
| |
| − | {| class="wikitable"
| |
| − | |-
| |
| − | !
| |
| − | ! colspan="4" | JP Name
| |
| − | ! colspan="12" | Description
| |
| − | ! colspan="4" | Materials
| |
| − | |-
| |
| − | |[[File:JGRisingFlagRingIcon.png|120px]]
| |
| − | | colspan="4" |L/JGライジングF
| |
| − | | colspan="12" | [[Photon_Arts_List#risingflag|Rising Flag]] activates after a Just Guard when using Partizan type weapons.
| |
| − | | colspan="4" | [[Earth Rock]] x3<br>[[Tokyo Opal]] x1
| |
| − | |-
| |
| − | ! Ring Level !! width="50px" | 1 !! width="50px" | 2 !! width="50px" | 3 !! width="50px" | 4 !! width="50px" | 5 !! width="50px" | 6 !! width="50px" | 7 !! width="50px" | 8 !! width="50px" | 9 !! width="50px" | 10 !! width="50px" | 11 !! width="50px" | 12 !! width="50px" | 13 !! width="50px" | 14 !! width="50px" | 15 !! width="50px" | 16 !! width="50px" | 17 !! width="50px" | 18 !! width="50px" | 19 !! width="50px" | 20
| |
| − | |- align="center"
| |
| − | | PP Consumed on use || 20 || 19 || 18 || 17 || 16 || 15 || 14 || 13 || 12 || 11 || 10 || 9 || 8 || 7 || 6 || 5 || 4 || 3 || 2 || 0
| |
| − | |- align="center"
| |
| − | | Power || 175% || 176% || 177% || 178% || 180% || 182% || 184% || 186% || 188% || 190% || 192% || 194% || 196% || 198% || 200% || 204% || 208% || 212% || 216% || 220%
| |
| | |} | | |} |
| − | ===L/Hunter Gear Save===
| + | {{NRing|Head|{{NUI|UIClassRa}} Ranger}} |
| − | {| class="wikitable" | + | {{NRing|Body|L|3|StandingSign|L/Standing Sign|L/スタンディングサイン|Standing Sign |
| − | |- | + | A symbol appears when Standing Snipe is active.|3|TATK|TDEF|DEX||Tourmaline}} |
| − | !
| + | {{NRing|Stat|N/A}} || colspan="20" | N/A |
| − | ! colspan="4" | JP Name
| + | {{NRing|Null}} |
| − | ! colspan="12" | Description
| + | {{NRing|Body|L|3|PWeakBullet|L/P Weak Bullet|L/Pウィークバレット|Point Weak Bullet |
| − | ! colspan="4" | Materials
| + | Weak Bullet hits through walls.|3|RATK|RDEF|DEX||Hematite}} |
| − | |- | + | {{NRing|Stat|N/A}} || colspan="20" | N/A |
| − | |[[File:JGRisingFlagRingIcon.png|120px]] | + | {{NRing|Null}} |
| − | | colspan="4" |L/ハンターギアセイブ | + | {{NRing|Body|L|4|ALauncherMode|L/A Launcher Mode|L/Aランチャーモード|Alternate Launcher Mode |
| − | | colspan="12" | When [[Hunter#huntergearboost|Hunter Gear Boost]] is in effect, reduces the Gear consumption or drain values for Hunter Weapons | + | Causes Launcher normal attacks to fire in a parabola. Increases damage and blast radius of normal attacks.|4|RATK|SDEF|RDEF|TDEF|Diamond}} |
| − | | colspan="4" |[[Naberius Rock]] x3<br>[[Forest Emerald]] x1 | + | {{NRing|Stat|Power}} || 101% || 101% || 102% || 102% || 103% || 103% || 104% || 104% || 105% || 105% || 106% || 106% || 107% || 107% || 108% || 108% || 109% || 109% || 110% || 110% |
| − | |- | + | {{NRing|Stat|Explosion Range}} || 102.5% || 105% || 107.5% || 110% || 112.5% || 115% || 117.5% || 120% || 122.5% || 125% || 127.5% || 130% || 132.5% || 135% || 137.5% || 140% || 142.5% || 145% || 147.5% || 150% |
| − | ! Ring Level !! width="50px" | 1 !! width="50px" | 2 !! width="50px" | 3 !! width="50px" | 4 !! width="50px" | 5 !! width="50px" | 6 !! width="50px" | 7 !! width="50px" | 8 !! width="50px" | 9 !! width="50px" | 10 !! width="50px" | 11 !! width="50px" | 12 !! width="50px" | 13 !! width="50px" | 14 !! width="50px" | 15 !! width="50px" | 16 !! width="50px" | 17 !! width="50px" | 18 !! width="50px" | 19 !! width="50px" | 20
| + | {{NRing|Null}} |
| − | |- align="center" | + | {{NRing|Body|L|3|LNonWeakBonus|L/L Non Weak Bonus|L/Lノンウィークボーナス|Launcher Non Weak Bonus |
| − | | Gear Loss || 75% || 74% || 73% || 72% || 71% || 70% || 69% || 68% || 67% ||66% || 65% || 64% || 63% || 62% || 61% || 60% || 59% || 58% || 55% || 50% | + | The effect of the Skill "Weak Hit Advance" is applied to all Launcher damage.|3|SDEF|RDEF|TDEF||Amber}} |
| | + | {{NRing|Stat|Power}} || 50% || 51% || 52% || 53% || 54% || 55% || 56% || 57% || 58% || 60% || 64% || 68% || 72% || 76% || 80% || 84% || 88% || 92% || 96% || 100% |
| | |} | | |} |
| − | ===L/DS Whirlwind===
| |
| − | {| class="wikitable"
| |
| − | |-
| |
| − | !
| |
| − | ! colspan="4" | JP Name
| |
| − | ! colspan="12" | Description
| |
| − | ! colspan="4" | Materials
| |
| − | |-
| |
| − | |[[File:DoubleSaberWhirlwindRingIcon.png|120px]]
| |
| − | | colspan="4" | L/DSカマイタチ
| |
| − | | colspan="12" | Double sabers have a chance to activate [[Fighter#dsgear|whirlwinds]] with no Gear cost when using specific PAs while using Double Saber type weapons. Stacks potency.
| |
| − | | colspan="4" | [[Earth Rock]] x3<br>[[Tokyo Opal]] x1
| |
| − | |-
| |
| − | ! Ring Level !! width="50px" | 1 !! width="50px" | 2 !! width="50px" | 3 !! width="50px" | 4 !! width="50px" | 5 !! width="50px" | 6 !! width="50px" | 7 !! width="50px" | 8 !! width="50px" | 9 !! width="50px" | 10 !! width="50px" | 11 !! width="50px" | 12 !! width="50px" | 13 !! width="50px" | 14 !! width="50px" | 15 !! width="50px" | 16 !! width="50px" | 17 !! width="50px" | 18 !! width="50px" | 19 !! width="50px" | 20
| |
| − | |- align="center"
| |
| − | | Proc Chance || 5% || 10% || 15% || 20% || 25% || 30% || 35% || 40% || 45% || 50% || 55% || 60% || 65% || 70% || 75% || 80% || 85% || 90% || 95% || 100%
| |
| | |} | | |} |
| − | ===L/TD Air Chase===
| + | {{NRing|Head|{{NUI|UIClassGu}} Gunner}} |
| − | {| class="wikitable" | + | {{NRing|Body|L|3|FrontSRoll|L/Front S Roll|L/フロントSロール|Front Stylish Roll |
| − | |- | + | Enables performing a Stylish Roll in a forwards direction.|2|RATK|RDEF|||Emerald}} |
| − | ! width="120px" |
| + | {{NRing|Stat|Power}} || 101% || 102% || 103% || 104% || 105% || 106% || 107% || 108% || 109% || 110% || 111% || 112% || 113% || 114% || 115% || 116% || 117% || 118% || 119% || 120% |
| − | ! JP Name
| + | {{NRing|Null}} |
| − | ! Description
| + | {{NRing|Body|L|3|HighTimeKeep|L/High Time Keep|L/ハイタイムキープ|High Time Keep |
| − | ! Materials
| + | Increases the damage you can take during Showtime before High Time resets.|2|RATK|RDEF|||Amethyst}} |
| − | |- | + | {{NRing|Stat|Damage Threshold}} || 1% || 2% || 3% || 4% || 5% || 6% || 7% || 8% || 9% || 10% || 11% || 12% || 13% || 14% || 15% || 16% || 17% || 18% || 19% || 20% |
| − | |[[File:TwinDaggerAirChaseRingIcon.png|120px]] | + | {{NRing|Null}} |
| − | | L/TDエアチェイス | + | {{NRing|Body|L|4|TMachineGunSUp|L/T Machine Gun S Up|L/TマシンガンSアップ|Twin Machine Gun Stance Up |
| − | | Normal attacks and certain PAs in the air will pursue a locked-on enemy when using Twin Dagger type weapons.
| + | Increases Striking and Ranged damage if a Stance is active while Twin Machineguns are equipped.|3|RATK|RDEF|TDEF||Zircon}} |
| − | | [[Naberius Rock]] x3<br>[[Forest Emerald]] x6<br>{{icons|Tool}} [[Lambda Grinder]] x15
| + | {{NRing|Stat|Power (Strike Type)}} || colspan="10" | 100% || 101% || 102% || 103% || 104% || 105% || 106% || 107% || 108% || 109% || 110% |
| − | |- | + | {{NRing|Stat|Power (Shoot Type)}} || 101% || 102% || 103% || 104% || 105% || 106% || 107% || 108% || 109% || colspan="11" | 110% |
| − | ! Ring Level !! colspan="3" |1-20
| |
| − | |- align="center" | |
| − | | No effect || colspan="3" |N/A | |
| | |} | | |} |
| − |
| |
| − | ===L/Knuckle Chase===
| |
| − | {| class="wikitable"
| |
| − | |-
| |
| − | ! width="120px" |
| |
| − | ! JP Name
| |
| − | ! Description
| |
| − | ! Materials
| |
| − | |-
| |
| − | |[[File:KnuckleChaseRingIcon.png|120px]] ||L/ナックルチェイス|| Normal attacks and certain PAs on the ground will pursue a locked-on enemy when using Knuckle type weapons.||[[Naberius Rock]] x3<br>[[Ruins Amethyst]] x6<br>{{icons|Tool}} [[Lambda Grinder]] x15
| |
| − | |-
| |
| − | ! Ring Level !! colspan="3" |1-20
| |
| − | |- align="center"
| |
| − | | No effect || colspan="3" |N/A
| |
| | |} | | |} |
| − | ===L/Front S-Roll===
| + | {{NRing|Head|{{NUI|UIClassBr}} Braver}} |
| − | {| class="wikitable" | + | {{NRing|Body|L|4|KatanaGearGuardR|L/Katana Gear Guard R|L/カタナギアガードR|Katana Gear Guard Release |
| − | |- | + | If the Gear Gauge is maxed, hold the Guard button for three seconds to forcefully activate Katana Gear.|2|RDEF|TDEF|||Sapphire|}} |
| − | ! width="120px" |
| + | {{NRing|Stat|Gear Gain Rate}} || 10% || 20% || 30% || 40% || 50% || 60% || 70% || 80% || 90% || 100% || 101% || 102% || 103% || 104% || 105% || 106% || 107% || 108% || 109% || 110% |
| − | ! colspan="4" | JP Name
| + | {{NRing|Stat|Gear Guard Release}} || colspan="20" | 3s |
| − | ! colspan="12" | Description
| + | {{NRing|Null}} |
| − | ! colspan="4" | Materials
| + | {{NRing|Body|L|3|ShortCombat|L/Short Combat|L/ショートコンバット|Short Combat |
| − | |- | + | Normal attacks in Katana Combat will not chase targets.|3|SDEF|RDEF|TDEF||Amethyst}} |
| − | |[[File:FrontSRollRingIcon.png|120px]] | + | {{NRing|Stat|N/A}} || colspan="20" | N/A |
| − | | colspan="4" | L/フロントSロール | + | {{NRing|Null}} |
| − | | colspan="12" | Allows twin machine guns to perform Stylish Roll forwards. Damage increase is applied to shooting during a Forward S-Roll. | + | {{NRing|Body|L|3|KatanaCCountUp|L/Katana C Count Up|L/カタナCカウントアップ|Katana Combat Count Up |
| − | | colspan="4" | [[Naberius Rock]] x3<br>[[Forest Emerald]] x1 | + | Increases the number of hits each hit inflicted counts for in Katana Combat.|2|SATK|DEX|||Zircon}} |
| − | |- | + | {{NRing|Stat|Hit Count Rate}} || 105% || 110% || 115% || 120% || 125% || 130% || 135% || 140% || 145% || 150% || 155% || 160% || 165% || 170% || 175% || 180% || 185% || 190% || 195% || 200% |
| − | ! Ring Level !! width="50px" | 1 !! width="50px" | 2 !! width="50px" | 3 !! width="50px" | 4 !! width="50px" | 5 !! width="50px" | 6 !! width="50px" | 7 !! width="50px" | 8 !! width="50px" | 9 !! width="50px" | 10 !! width="50px" | 11 !! width="50px" | 12 !! width="50px" | 13 !! width="50px" | 14 !! width="50px" | 15 !! width="50px" | 16 !! width="50px" | 17 !! width="50px" | 18 !! width="50px" | 19 !! width="50px" | 20
| + | {{NRing|Null}} |
| − | |- align="center" | + | {{NRing|Body|L|4|BulletBowHoming|L/Bullet Bow Homing|L/バレットボウホーミング|Bullet Bow Homing |
| − | | Damage increase || 1% || 2% || 3% || 4% || 5% || 6% || 7% || 8% || 9% || 10% || 11% || 12% || 13% || 14% || 15% || 16% || 17% || 18% || 19% || 20% | + | Adds a Homing Property to a Bullet Bow's Charged Normal Attack.|3|RATK|TATK|DEX||Tourmaline}} |
| | + | {{NRing|Stat|Turn Rate}} || 30° || 35° || 40° || 45° || 50° || 55° || 60° || 65° || 70° || 75° || 80° || 85° || 90° || 95° || 100° || 110° || 120° || 130° || 140° || 150° |
| | + | {{NRing|Stat|Turn Period}} || 0.10s || 0.20s || 0.30s || 0.40s || 0.50s || 0.60s || 0.70s || 0.80s || 0.90s || colspan="11" | 1.00s |
| | |} | | |} |
| − | ===L/Katana Guard R===
| |
| − | {| class="wikitable"
| |
| − | |-
| |
| − | ! width="120px" |
| |
| − | ! colspan="4" | JP Name
| |
| − | ! colspan="12" | Description
| |
| − | ! colspan="4" | Materials
| |
| − | |-
| |
| − | |[[File:KatanaGearGaurdRingIcon.png|120px]]
| |
| − | | colspan="4" | L/カタナギアガードR
| |
| − | | colspan="12" | Forcibly activates [[Braver#katanagear|Katana Gear]] when guarding for 3 seconds. Gear loss rate is increased if activated this way. Gear gain rate is massively reduced if activated this way.
| |
| − | | colspan="4" | [[Vopar Rock]] x3<br>[[Coast Sapphire]] x1
| |
| − | |-
| |
| − | ! Ring Level !! width="50px" | 1 !! width="50px" | 2 !! width="50px" | 3 !! width="50px" | 4 !! width="50px" | 5 !! width="50px" | 6 !! width="50px" | 7 !! width="50px" | 8 !! width="50px" | 9 !! width="50px" | 10 !! width="50px" | 11 !! width="50px" | 12 !! width="50px" | 13 !! width="50px" | 14 !! width="50px" | 15 !! width="50px" | 16 !! width="50px" | 17 !! width="50px" | 18 !! width="50px" | 19 !! width="50px" | 20
| |
| − | |- align="center"
| |
| − | | Gear loss rate || 290% || 280% || 270% || 260% || 240% || 220% || 200% || 180% || 160% || 150% || 150% || 150% || 150% || 150% || 150% || 150% || 150% || 150% || 150% || 150%
| |
| − | |- align="center"
| |
| − | | Gear gain rate || 0% || 0% || 0% || 0% || 0% || 0% || 0% || 0% || 0% || 0% || 1% || 2% || 3% || 4% || 5% || 6% || 7% || 8% || 9% || 10%
| |
| | |} | | |} |
| − | | + | {{NRing|Head|{{NUI|UIClassFo}} Force}} |
| − | ===L/DB Snatch===
| + | {{NRing|Body|L|4|ARodShootMode|L/A Rod Shoot Mode|L/Aロッドシュートモード|Alternate Rod Shoot Mode |
| − | {| class="wikitable" | + | Rod Shoot projectiles explode on contact.|3|TATK|TDEF|DEX||Fluorite}} |
| − | |- | + | {{NRing|Stat|Power}} || 50% || 55% || 60% || 65% || 70% || 75% || 80% || 85% || 90% || 95% || 100% || 101% || 102% || 103% || 104% || 105% || 106% || 107% || 108% || 110% |
| − | ! width="120px" |
| + | {{NRing|Stat|Explosion Range}} || 100% || 102%|| 104% || 106% || 108% || 110% || 112% || 114% || 116% || 118% || 120% || 122% || 124% || 126% || 128% || 132% || 136% || 140% || 144% || 150% |
| − | ! colspan="4" | JP Name
| |
| − | ! colspan="12" | Description
| |
| − | ! colspan="4" | Materials
| |
| − | |- | |
| − | |[[File:DaulBladeSnatchRingIcon.png|120px]] | |
| − | | colspan="4" | L/DBスナッチ | |
| − | | colspan="12" | Appends striking damage when the player moves with the Dual Blade's Weapon Action. | |
| − | | colspan="4" | [[Vopar Rock]] x3<br>[[Coast Sapphire]] x1 | |
| − | |- | |
| − | ! Ring Level !! width="50px" | 1 !! width="50px" | 2 !! width="50px" | 3 !! width="50px" | 4 !! width="50px" | 5 !! width="50px" | 6 !! width="50px" | 7 !! width="50px" | 8 !! width="50px" | 9 !! width="50px" | 10 !! width="50px" | 11 !! width="50px" | 12 !! width="50px" | 13 !! width="50px" | 14 !! width="50px" | 15 !! width="50px" | 16 !! width="50px" | 17 !! width="50px" | 18 !! width="50px" | 19 !! width="50px" | 20
| |
| − | |- align="center" | |
| − | | Power || 400% || 500% || 600% || 700% || 800% || 900% || 1000% || 1100% || 1200% || 1300% || 1350% || 1400% || 1450% || 1500% || 1550% || 1600% || 1650% || 1700% || 1750% || 1800% | |
| | |} | | |} |
| − | ===L/Tech C Parrying===
| |
| − | {| class="wikitable"
| |
| − | |-
| |
| − | ! width="120px" |
| |
| − | ! colspan="4" | JP Name
| |
| − | ! colspan="12" | Description
| |
| − | ! colspan="4" | Materials
| |
| − | |-
| |
| − | |[[File:TechChargeParryingRingIcon.png|120px]]
| |
| − | | colspan="4" | L/テックCパリング
| |
| − | | colspan="12" | Just Guards can occur when you begin charging Technics with Tech weapons.
| |
| − | | colspan="4" | [[Naberius Rock]] x3<br>[[Forest Emerald]] x1
| |
| − | |-
| |
| − | ! Ring Level !! width="50px" | 1 !! width="50px" | 2 !! width="50px" | 3 !! width="50px" | 4 !! width="50px" | 5 !! width="50px" | 6 !! width="50px" | 7 !! width="50px" | 8 !! width="50px" | 9 !! width="50px" | 10 !! width="50px" | 11 !! width="50px" | 12 !! width="50px" | 13 !! width="50px" | 14 !! width="50px" | 15 !! width="50px" | 16 !! width="50px" | 17 !! width="50px" | 18 !! width="50px" | 19 !! width="50px" | 20
| |
| − | |- align="center"
| |
| − | | Duration || 0.03s || 0.06s || 0.09s || 0.12s || 0.15s || 0.18s || 0.21s || 0.24s || 0.27s || 0.30s || 0.33s || 0.36s || 0.39s || 0.42s || 0.45s || 0.48s || 0.51s || 0.54s || 0.57s || 0.60s
| |
| | |} | | |} |
| − | ===L/RR Field===
| + | {{NRing|Head|{{NUI|UIClassTe}} Techer}} |
| − | {| class="wikitable" | + | {{NRing|Body|L|3|WandEChange|L/Wand E Change|L/ウォンドEチェンジ|Wand Element Change |
| − | |- | + | While wielding a Wand, charge a Technique to change the active Element of your weapon and Tech Explosions.|2|SATK|TATK|||Lapis Lazuli}} |
| − | ! width="120px" |
| + | {{NRing|Stat|Element Conversion Rate}} || 80% || 81% || 82% || 83% || 84% || 85% || 86% || 87% || 88% || 89% || 90% || 91% || 92% || 93% || 94% || 95% || 96% || 97% || 98% || 100% |
| − | ! colspan="4" | JP Name
| + | {{NRing|Null}} |
| − | ! colspan="12" | Description
| + | {{NRing|Body|L|3|AWandEChange|L/A. Wand E. Change|L/AウォンドEチェンジ|Another Wand Element Change |
| − | ! colspan="4" | Materials
| + | While wielding a Wand, charge a Technique to change the active Element of your weapon and Tech Explosions.<br>Excludes Zanverse, Megiverse, and Zondeel.|3|TATK|DEX|TDEF||Tanzanite}} |
| − | |- | + | {{NRing|Stat|Element Conversion Rate}} || colspan="20" | 100% |
| − | |[[File:RecastReverserFieldRingIcon.png|120px]] | + | {{NRing|Null}} |
| − | | colspan="4" | L/RRフィールド | + | {{NRing|Body|L|3|RRField|L/R R Field|L/RRフィールド|Recast Reverser Field |
| − | | colspan="12" | Reduces the Recast time for [[Techer#reverserfield|Reverser Field]]. | + | Reduce the recast time of Reverser Field.|4|SATK|RATK|TATK|DEX|Opal}} |
| − | | colspan="4" | [[Earth Rock]] x3<br>[[Tokyo Opal]] x1 | + | {{NRing|Stat|Cooldown Time}} || 70% || 69% || 68% || 67% || 66% || 65% || 64% || 63% || 62% || 61% || 60% || 59% || 58% || 57% || 56% || 55% || 54% || 53% || 52% || 50% |
| − | |- | |
| − | ! Ring Level !! width="50px" | 1 !! width="50px" | 2 !! width="50px" | 3 !! width="50px" | 4 !! width="50px" | 5 !! width="50px" | 6 !! width="50px" | 7 !! width="50px" | 8 !! width="50px" | 9 !! width="50px" | 10 !! width="50px" | 11 !! width="50px" | 12 !! width="50px" | 13 !! width="50px" | 14 !! width="50px" | 15 !! width="50px" | 16 !! width="50px" | 17 !! width="50px" | 18 !! width="50px" | 19 !! width="50px" | 20
| |
| − | |- align="center" | |
| − | | Recast reduction || 70% || 69% || 68% || 67% || 66% || 65% || 64% || 63% || 62% || 61% || 60% || 59% || 58% || 57% || 56% || 55% || 54% || 53% || 52% || 50% | |
| | |} | | |} |
| − | ===L/High Time Keep===
| |
| − | {| class="wikitable"
| |
| − | |-
| |
| − | ! width="120px" |
| |
| − | ! colspan="4" | JP Name
| |
| − | ! colspan="12" | Description
| |
| − | ! colspan="4" | Materials
| |
| − | |-
| |
| − | |[[File:HighTimeKeepRingIcon.png|120px]]
| |
| − | | colspan="4" | L/ハイタイムキープ
| |
| − | | colspan="12" | Has a one-time chance to preserve High Time even if you get hit during [[Gunner#showtime|Showtime]].
| |
| − | | colspan="4" | [[Naberius Rock]] x3<br>[[Ruins Amethyst]] x1
| |
| − | |-
| |
| − | ! Ring Level !! width="50px" | 1 !! width="50px" | 2 !! width="50px" | 3 !! width="50px" | 4 !! width="50px" | 5 !! width="50px" | 6 !! width="50px" | 7 !! width="50px" | 8 !! width="50px" | 9 !! width="50px" | 10 !! width="50px" | 11 !! width="50px" | 12 !! width="50px" | 13 !! width="50px" | 14 !! width="50px" | 15 !! width="50px" | 16 !! width="50px" | 17 !! width="50px" | 18 !! width="50px" | 19 !! width="50px" | 20
| |
| − | |- align="center"
| |
| − | | Activation chance || 5% || 10% || 15% || 20% || 25% || 30% || 35% || 40% || 45% || 50% || 55% || 60% || 65% || 70% || 75% || 80% || 85% || 90% || 95% || 100%
| |
| | |} | | |} |
| − | ===L/Short Combat===
| + | {{NRing|Head|{{NUI|UIClassSu}} Summoner}} |
| − | {| class="wikitable" | + | {{NRing|Body|L|3|NearAutoTarget|L/Near Auto Target|L/ニアオートターゲット|Near Auto Target |
| − | |- | + | Pets will automatically attack nearby enemies.|3|SATK|RATK|TATK||Peridot}} |
| − | ! width="120px" |
| + | {{NRing|Stat|N/A}} || colspan="20" | N/A |
| − | ! JP Name
| |
| − | ! Description
| |
| − | ! Materials
| |
| − | |- | |
| − | |[[File:ShortCombatRingIcon.png|120px]] || L/ショートコンバット || Stops normal attacks from pursuing the enemy when [[Braver#katanacombat|Katana Combat]] is activated. || [[Naberius Rock]] x3<br>[[Ruins Amethyst]] x6<br>{{icons|Tool}} [[Lambda Grinder]] x15 | |
| − | |- | |
| − | ! Ring Level !! colspan="3" |1-20
| |
| − | |- align="center" | |
| − | | No effect || colspan="3" |N/A
| |
| | |} | | |} |
| − | ===L/Wide Area Heal===
| |
| − | {| class="wikitable"
| |
| − | |-
| |
| − | ! width="120px" |
| |
| − | ! JP Name
| |
| − | ! Description
| |
| − | ! Materials
| |
| − | |-
| |
| − | |[[File:WideAreaHealRingIcon.png|120px]] ||L/ワイドエリアヒール || Enlarges the area of effect of the AIS heal.||[[Lilipa Rock]] x3<br>[[Desert Topaz]] x1
| |
| − | |-
| |
| − | ! Ring Level !! colspan="3" |1-20
| |
| − | |- align="center"
| |
| − | | Heal Area || colspan="3" |300%
| |
| | |} | | |} |
| − | ===L/Quick Blaster===
| + | {{NRing|Head|{{NUI|UIClassPh}} Phantom}} |
| − | {| class="wikitable" | + | {{NRing|Body|L|3|PhStepShift|L/Ph Step Shift|L/Phステップシフト|Phantom Step Shift |
| − | |- | + | If a Photon Arts is used during Phantom Step, it becomes a Shift PA.|3|SATK|RATK|TATK||Diamond}} |
| − | ! width="120px" |
| + | {{NRing|Stat|N/A}} || colspan="20" | N/A |
| − | ! JP Name
| + | {{NRing|Null}} |
| − | ! Description
| + | {{NRing|Body|L|3|PhMarkerBomb|L/Ph Marker Bomb|L/Phマーカーボム|Phantom Marker Bomb |
| − | ! Materials
| + | Marker detonation occurs at the location where the Phantom Marker was placed.|3|SATK|RATK|TATK||Hematite}} |
| − | |- | + | {{NRing|Stat|N/A}} || colspan="20" | N/A |
| − | |[[File:QuickBlasterRingIcon.png|120px]] || L/クイックブラスター || Sacrifices turning speed for firing speed for the AIS Photon Blaster. ||[[Lilipa Rock]] x3<br>[[Quarry Lapis Lazuli]] x1<br> | + | {{NRing|Null}} |
| − | |- | + | {{NRing|Body|L|3|PhLockOnBomb|L/Ph Lock-On Bomb|L/Phロックオンボム|Phantom Lock-On Bomb |
| − | ! Ring Level !! colspan="3" |1-20
| + | Marker detonation occurs on the locked-on location.|3|SATK|RATK|TATK||Amber}} |
| − | |- align="center" | + | {{NRing|Stat|N/A}} || colspan="20" | N/A |
| − | | Firing Speed || colspan="3" |200% | |
| − | |- align="center" | |
| − | | Turning Speed || colspan="3" |-40% | |
| | |} | | |} |
| − | ===L/Early Rise===
| |
| − | {| class="wikitable"
| |
| − | |-
| |
| − | ! width="120px" |
| |
| − | ! JP Name
| |
| − | ! Description
| |
| − | ! Materials
| |
| − | |-
| |
| − | |[[File:EarlyRiseRingIcon.png|120px]] ||L/アーリィライズ || Reduces respawn time for AIS in quests that are AIS only. || [[Lilipa Rock]] x3<br>[[Desert Topaz]] x1<br>
| |
| − | |-
| |
| − | ! Ring Level !! colspan="3" |1-20
| |
| − | |- align="center"
| |
| − | | Respawn Time || colspan="3" |1 Second
| |
| | |} | | |} |
| − | ===L/Light Armor===
| + | {{NRing|Head|{{NUI|UIClassEt}} Etoile}} |
| − | {| class="wikitable" | + | {{NRing|Body|L|3|EasyFullConnect|L/Easy Full Connect|L/イージーフルコネクト|Easy Full Connect |
| − | |- | + | After using Step Edge, Full Connects require half-gear gauge.|4|DEX|SDEF|RDEF|TDEF|Peridot}} |
| − | ! width="120px" |
| + | {{NRing|Stat|N/A}} || colspan="20" | N/A |
| − | ! JP Name
| |
| − | ! Description
| |
| − | ! Materials
| |
| − | |- | |
| − | |[[File:DoubleSaberWhirlwindRingIcon.png|120px]] ||L/ライトアーマー || Sacrifice defense in an AIS to lower PP cost of dodging. || [[Lilipa Rock]] x3<br>[[Desert Topaz]] x1 | |
| − | |-
| |
| − | ! Ring Level !! colspan="3" |1-20
| |
| − | |- align="center" | |
| − | | PP Use || colspan="3" |10 | |
| − | |- align="center" | |
| − | | Damage taken || colspan="3" |110% | |
| | |} | | |} |
| − | ===L/Bullet Bow Homing===
| |
| − | {| class="wikitable"
| |
| − | |-
| |
| − | ! width="120px" |
| |
| − | ! colspan="4" | JP Name
| |
| − | ! colspan="12" | Description
| |
| − | ! colspan="4" | Materials
| |
| − | |-
| |
| − | |[[File:KatanaGearGaurdRingIcon.png|120px]]
| |
| − | | colspan="4" | L/バレットボウホーミング
| |
| − | | colspan="12" | Adds a homing ability to charged normal attacks for Bullet Bows.
| |
| − | | colspan="4" | [[Vopar Rock]] x3<br>[[Facility Tourmaline]] x1
| |
| − | |-
| |
| − | ! Ring Level !! width="50px" | 1 !! width="50px" | 2 !! width="50px" | 3 !! width="50px" | 4 !! width="50px" | 5 !! width="50px" | 6 !! width="50px" | 7 !! width="50px" | 8 !! width="50px" | 9 !! width="50px" | 10 !! width="50px" | 11 !! width="50px" | 12 !! width="50px" | 13 !! width="50px" | 14 !! width="50px" | 15 !! width="50px" | 16 !! width="50px" | 17 !! width="50px" | 18 !! width="50px" | 19 !! width="50px" | 20
| |
| − | |- align="center"
| |
| − | | ??? || 30 || 35 || 40 || 45 || 50 || 55 || 60 || 65 || 70 || 75 || 80 || 85 || 90 || 95 || 100 || 110 || 120 || 130 || 140 || 150
| |
| − | |- align="center"
| |
| − | | Homing Time || 0.10s || 0.20s || 0.30s || 0.40s || 0.50s || 0.60s || 0.70s || 0.80s || 0.90s || colspan="11" align="center" |1.00s
| |
| | |} | | |} |
| − | ===L/JB Elemental Keep=== | + | |
| − | {| class="wikitable" | + | ===Utility Rings=== |
| − | |- | + | {{NRing|Head|Movement}} |
| − | ! width="120px" |
| + | {{NRing|Body|L|3|SlowDiveRoll|L/Slow Dive Roll|L/スローダイブロール|Slow Dive Roll |
| − | ! JP Name
| + | Slows down the animation of Dive Roll and increases its invulnerability.|3|RATK|RDEF|DEX||Garnet}} |
| − | ! Description
| + | {{NRing|Stat|Duration}} || 0.30s || 0.32s || 0.34s || 0.36s || 0.38s || 0.40s || 0.42s || 0.44s || 0.46s || 0.48s || 0.50s || 0.52s || 0.54s || 0.56s || 0.58s || 0.62s || 0.66s || 0.70s || 0.74s || 0.80s |
| − | ! Materials
| + | {{NRing|Null}} |
| − | |- | + | {{NRing|Body|L|3|ShortMirage|L/Short Mirage|L/ショートミラージュ|Short Mirage |
| − | |[[File:JBElementalKeepIcon.png|120px]] ||L/JBエレメンタルキープ|| Weapon Actions with Jet Boots while standing still will no longer reset the current element, but [[Bouncer#eleburst|Elemental Burst]] can no longer be used.||[[Earth Rock]] x3<br>[[Vegas Diamond]] x6<br>{{icons|Tool}} [[Lambda Grinder]] x15 | + | Reduces the travel distance and animation of Mirage Escape.|2|TATK|TDEF|||Tourmaline}} |
| − | |- | + | {{NRing|Stat|N/A}} || colspan="20" | N/A |
| − | ! Ring Level !! colspan="3" |1-20
| + | {{NRing|Null}} |
| − | |- align="center"
| + | {{NRing|Body|L|4|JustReversalB|L/Just Reversal B|L/ジャストリバーサルB|Just Reversal Blast |
| − | | No effect || colspan="3" |N/A | + | Performing a Just Reversal creates a blast that damages and inflicts the Stun status on nearby enemies.|3|SDEF|RDEF|TDEF||Fluorite}} |
| | + | {{NRing|Stat|Power}} || 100% || 120% || 140% || 160% || 180% || 200% || 220% || 240% || 260% || 300% || 350% || 400% || 450% || 500% || 550% || 600% || 650% || 700% || 750% || 800% |
| | + | {{NRing|Stat|Stun Range}} || 100% || 105% || 110% || 115% || 120% || 125% || 130% || 135% || 140% || 145% || 150% || 155% || 160% || 165% || 170% || 175% || 180% || 185% || 190% || 200% |
| | + | {{NRing|Null}} |
| | + | {{NRing|Body|L|3|JumpingDodge|L/Jumping Dodge|L/ジャンピングドッジ|Jumping Dodge |
| | + | Enables use of the Active Skill "Jumping Dodge".<br>Instantaneously gain altitude while evading attacks.|3|SDEF|RDEF|TDEF||Moonstone}} |
| | + | {{NRing|Stat|Cooldown Time}} || 100s || 95s || 90s || 85s || 80s || 75s || 70s || 65s || 60s || 55s || 50s || 45s || 40s || 35s || 30s || 25s || 20s || 15s || 10s || 5s |
| | |} | | |} |
| − | ===L/Standing Sign===
| |
| − | {| class="wikitable"
| |
| − | |-
| |
| − | ! width="120px" |
| |
| − | ! JP Name
| |
| − | ! Description
| |
| − | ! Materials
| |
| − | |-
| |
| − | |[[File:QuickBlasterRingIcon.png|120px]] ||L/スタンディングサイン|| Displays a visual effect when your character is standing still.||[[Vopar Rock]] x3<br>[[Facility Tourmaline]] x1<br>{{icons|Tool}} [[Lambda Grinder]] x15
| |
| − | |-
| |
| − | ! Ring Level !! colspan="3" |1-20
| |
| − | |- align="center"
| |
| − | | No effect || colspan="3" |N/A
| |
| | |} | | |} |
| − | ===L/A Launcher Mode===
| + | {{NRing|Head|Technique}} |
| − | {| class="wikitable" | + | {{NRing|Body|L|3|TechCParrying|L/Tech C Parrying|L/テックCパリング|Tech Charge Parrying |
| − | |- | + | Charging a Technique creates Just Guard frames on startup.|3|SATK|TATK|DEX||Emerald}} |
| − | ! width="120px" |
| + | {{NRing|Stat|Duration}} || 0.03s || 0.06s || 0.09s || 0.12s || 0.15s || 0.18s || 0.21s || 0.24s || 0.27s || 0.30s || 0.33s || 0.36s || 0.39s || 0.42s || 0.45s || 0.48s || 0.51s || 0.54s || 0.57s || 0.60s |
| − | ! colspan="4" | JP Name
| + | {{NRing|Null}} |
| − | ! colspan="12" | Description
| + | {{NRing|Body|L|3|PeaceZondeel|L/Peace Zondeel|L/ピースゾンディール|Peace Zondeel |
| − | ! colspan="4" | Materials
| + | Your Zondeel will not detonate when struck by a Lightning Technique.|2|TATK|TDEF|||Moonstone}} |
| − | |- | + | {{NRing|Stat|N/A}} || colspan="20" | N/A |
| − | |[[File:ALauncherModeIcon.png|120px]]
| + | {{NRing|Null}} |
| − | | colspan="4" | L/Aランチャーモード
| + | {{NRing|Body|L|3|TalisKeepLong|L/Talis Keep Long|L/タリスキープロング|Talis Keep Long |
| − | | colspan="12" | Makes the launcher's projectile for normal attacks follow a parabola curve, and increases the area of effect. | + | Extends the duration of a thrown Talis before it disappears.|3|TATK|DEX|TDEF||Lapis Lazuli}} |
| − | | colspan="4" | [[Earth Rock]] x3<br>[[Vegas Diamond]] x1 | + | {{NRing|Stat|Duration}} || 3.50s || 3.80s || 4.10s || 4.40s || 4.70s || 5.00s || 5.30s || 5.60s || 5.90s || 6.20s || 6.50s || 6.80s || 7.10s || 7.40s || 7.70s || 8.00s || 8.50s || 9.00s || 9.50s || 10.00s |
| − | |- | |
| − | ! Ring Level !! width="50px" | 1 !! width="50px" | 2 !! width="50px" | 3 !! width="50px" | 4 !! width="50px" | 5 !! width="50px" | 6 !! width="50px" | 7 !! width="50px" | 8 !! width="50px" | 9 !! width="50px" | 10 !! width="50px" | 11 !! width="50px" | 12 !! width="50px" | 13 !! width="50px" | 14 !! width="50px" | 15 !! width="50px" | 16 !! width="50px" | 17 !! width="50px" | 18 !! width="50px" | 19 !! width="50px" | 20
| |
| − | |- align="center" | |
| − | | Power || 101% || 101% || 102% || 102% || 103% || 103% || 104% || 104% || 105% || 105% || 106% || 106% || 107% || 107% || 108% || 108% || 109% || 109% || 110% || 110% | |
| − | |- align="center" | |
| − | | Explosion range || 102.5% || 105% || 107.5% || 110% || 112.5% || 115% || 117.5% || 120% || 122.5% || 125% || 127.5% || 130% || 132.5% || 135% || 137.5% || 140% || 142.5% || 145% || 147.5% || 150% | |
| | |} | | |} |
| − | ===L/Short Mirage===
| |
| − | {| class="wikitable"
| |
| − | |-
| |
| − | ! width="120px" |
| |
| − | ! JP Name
| |
| − | ! Description
| |
| − | ! Materials
| |
| − | |-
| |
| − | |[[File:ShortMirageRingIcon.png|120px]] ||L/ショートミラージュ|| Shortens the duration of Mirage Escape.||[[Vopar Rock]] x3<br>[[Facility Tourmaline]] x6<br>{{icons|Tool}} [[Lambda Grinder]] x15
| |
| − | |-
| |
| − | ! Ring Level !! colspan="3" |1-20
| |
| − | |- align="center"
| |
| − | | No effect || colspan="3" |N/A
| |
| | |} | | |} |
| − | ===L/Wand E Change===
| + | {{NRing|Head|Item}} |
| − | {| class="wikitable" | + | {{NRing|Body|L|4|MateLovers|L/Mate Lovers|L/メイトラバーズ|Mate Lovers |
| − | |- | + | Speeds up the consumption animation of Mates and increases their recovery rate.|3|SDEF|RDEF|TDEF||Topaz}} |
| − | ! width="120px" |
| + | {{NRing|Stat|Recovery Rate}} || colspan="11" | 100% || 102% || 104% || 106% || 108% || 110% || 112% || 114% || 116% || 120% |
| − | ! colspan="4" | JP Name
| + | {{NRing|Stat|Action Speed}} || 110% || 115% || 120% || 125% || 130% || 135% || 140% || 145% || 150% || 155% || colspan="10" | 160% |
| − | ! colspan="12" | Description
| + | {{NRing|Null}} |
| − | ! colspan="4" | Materials
| + | {{NRing|Body|L|4|AtomizerLovers|L/Atomizer Lovers|L/アトマイザーラバーズ|Atomizer Lovers |
| − | |- | + | Speeds up the consumption animation of Atomizers and increases their recovery rate.|3|SDEF|RDEF|TDEF||Hematite}} |
| − | |[[File:WandEChangeRingIcon.png|120px]] | + | {{NRing|Stat|Recovery Rate}} || 101% || 102% || 103% || 104% || 105% || 106% || 107% || 108% || 109% || 110% || 115% || 120% || 125% || 130% || 135% || 140% || 145% || 150% || 155% || 160% |
| − | | colspan="4" | L/ウォンドEチェンジ | + | {{NRing|Stat|Action Speed}} || colspan="20" | 200% |
| − | | colspan="12" | Using charged techs while having a Wand type weapon equipped will change the Wand's element to that of the tech charged. Similarly to [[Bouncer#jbgear|Jet Boots Gear]], it will not work with [[Fire_Techniques#Shifta|Shifta]], [[Ice_Techniques#Deband|Deband]], [[Light_Techniques#Resta|Resta]] or [[Light_Techniques#Anti|Anti]], but '''will''' work with [[Lightning_Techniques#Zondeel|Zondeel]], [[Wind_Techniques#Zanverse|Zanverse]], and [[Dark_Techniques#Megiverse|Megiverse]]. | |
| − | | colspan="4" | [[Lillipa Rock]] x3<br>[[Quarry Lapis Lazuli]] x1 | |
| − | |- | |
| − | ! Ring Level !! width="50px" | 1 !! width="50px" | 2 !! width="50px" | 3 !! width="50px" | 4 !! width="50px" | 5 !! width="50px" | 6 !! width="50px" | 7 !! width="50px" | 8 !! width="50px" | 9 !! width="50px" | 10 !! width="50px" | 11 !! width="50px" | 12 !! width="50px" | 13 !! width="50px" | 14 !! width="50px" | 15 !! width="50px" | 16 !! width="50px" | 17 !! width="50px" | 18 !! width="50px" | 19 !! width="50px" | 20
| |
| − | |- align="center" | |
| − | | Effect || 80% || 81% || 82% || 83% || 84% || 85% || 86% || 87% || 88% || 89% || 90% || 91% || 92% || 93% || 94% || 95% || 96% || 97% || 98% || 100% | |
| | |} | | |} |
| − | ===L/Mate Lovers===
| |
| − | {| class="wikitable"
| |
| − | |-
| |
| − | ! width="120px" |
| |
| − | ! colspan="4" | JP Name
| |
| − | ! colspan="12" | Description
| |
| − | ! colspan="4" | Materials
| |
| − | |-
| |
| − | |[[File:MateLoversRingIcon.png|120px]]
| |
| − | | colspan="4" | L/メイトラバーズ
| |
| − | | colspan="12" | Increases the HP recovery amount and usage speed of mate items ([[Monomate]], [[Dimate]] and [[Trimate]]).
| |
| − | | colspan="4" | [[Lillipa Rock]] x3<br>[[Desert Topaz]] x1
| |
| − | |-
| |
| − | ! Ring Level !! width="50px" | 1 !! width="50px" | 2 !! width="50px" | 3 !! width="50px" | 4 !! width="50px" | 5 !! width="50px" | 6 !! width="50px" | 7 !! width="50px" | 8 !! width="50px" | 9 !! width="50px" | 10 !! width="50px" | 11 !! width="50px" | 12 !! width="50px" | 13 !! width="50px" | 14 !! width="50px" | 15 !! width="50px" | 16 !! width="50px" | 17 !! width="50px" | 18 !! width="50px" | 19 !! width="50px" | 20
| |
| − | |- align="center"
| |
| − | | Recovery amount || 100% || 100% || 100% || 100% || 100% || 100% || 100% || 100% || 100% || 100% || 100% || 102% || 104% || 106% || 108% || 110% || 112% || 114% || 116% || 120%
| |
| − | |- align="center"
| |
| − | | Mate use speed || 110% || 115% || 120% || 125% || 130% || 135% || 140% || 145% || 150% || 155% || 160% || 160% || 160% || 160% || 160% || 160% || 160% || 160% || 160% || 160%
| |
| | |} | | |} |
| − | ===L/Jet Boots Tech Arts Short Charge===
| + | {{NRing|Head|Mag}} |
| − | {| class="wikitable" | + | {{NRing|Body|L|4|MagExcite|L/Mag Excite|L/マグエキサイト|Mag Excite |
| − | |- | + | Increases the power of your MAG's Auto Action and reduces its cooldown.|3|SATK|RATK|TATK||Tanzanite}} |
| − | ! width="120px" |
| + | {{NRing|Stat|Power}} || 150% || 155% || 160% || 165% || 170% || 175% || 180% || 185% || 190% || 200% || 210% || 220% || 230% || 240% || 250% || 260% || 270% || 280% || 290% || 300% |
| − | ! colspan="4" | JP Name
| + | {{NRing|Stat|Attack Interval}} || 80% || 78% || 76% || 74% || 72% || 70% || 68% || 66% || 64% || 62% || 60% || 58% || 56% || 54% || 52% || 50% || 48% || 46% || 44% || 40% |
| − | ! colspan="12" | Description
| |
| − | ! colspan="4" | Materials
| |
| − | |- | |
| − | | [[File:JetBootsTechArtsShortChargeRingIcon.png|120px]] | |
| − | | colspan="4" | L/JBテックアーツSC | |
| − | | colspan="12" | Reduces charging times when you combo from a Jet Boots PA to a Technique. | |
| − | | colspan="4" | [[Naberius Rock]] x3<br>[[Tundra Amber]] x1 | |
| − | |- | |
| − | ! Ring Level !! width="50px" | 1 !! width="50px" | 2 !! width="50px" | 3 !! width="50px" | 4 !! width="50px" | 5 !! width="50px" | 6 !! width="50px" | 7 !! width="50px" | 8 !! width="50px" | 9 !! width="50px" | 10 !! width="50px" | 11 !! width="50px" | 12 !! width="50px" | 13 !! width="50px" | 14 !! width="50px" | 15 !! width="50px" | 16 !! width="50px" | 17 !! width="50px" | 18 !! width="50px" | 19 !! width="50px" | 20
| |
| − | |- align="center" | |
| − | | Charge Time || 90% || 88% || 86% || 84% || 82% || 80% || 78% || 76% || 74% || 72% || 70% || 68% || 66% || 64% || 62% || 60% || 58% || 56% || 54% || 50% | |
| | |} | | |} |
| − |
| |
| − | ===L/Slow Dive Roll===
| |
| − | {| class="wikitable"
| |
| − | |-
| |
| − | ! width="120px" |
| |
| − | ! colspan="4" | JP Name
| |
| − | ! colspan="12" | Description
| |
| − | ! colspan="4" | Materials
| |
| − | |-
| |
| − | | [[File:SlowDiveRollRingIcon.png|120px]]
| |
| − | | colspan="4" | L/スローダイブロール
| |
| − | | colspan="12" | Extends the duration of Dive Roll by slowing down its speed.
| |
| − | | colspan="4" | [[Amduscia Rock]] x3<br>[[V.Caverns Garnet]] x1
| |
| − | |-
| |
| − | ! Ring Level !! width="50px" | 1 !! width="50px" | 2 !! width="50px" | 3 !! width="50px" | 4 !! width="50px" | 5 !! width="50px" | 6 !! width="50px" | 7 !! width="50px" | 8 !! width="50px" | 9 !! width="50px" | 10 !! width="50px" | 11 !! width="50px" | 12 !! width="50px" | 13 !! width="50px" | 14 !! width="50px" | 15 !! width="50px" | 16 !! width="50px" | 17 !! width="50px" | 18 !! width="50px" | 19 !! width="50px" | 20
| |
| − | |- align="center"
| |
| − | | Invincible Frames || 0.3s || 0.32s || 0.34s || 0.36s || 0.38s || 0.4s || 0.42s || 0.44s || 0.46s || 0.48s || 0.5s || 0.52s || 0.54s || 0.56s || 0.58s || 0.62s || 0.66s || 0.7s || 0.74s || 0.8s
| |
| | |} | | |} |
| − | ===L/L Non Weak Bonus===
| + | {{NRing|Head|A.I.S}} |
| − | {| class="wikitable" | + | {{NRing|Body|L|4|QuickBlaster|L/Quick Blaster|L/クイックブラスター|Quick Blaster |
| − | |- | + | Speeds up firing animation of the Photon Blaster, but reduces turn speed while firing.|3|SDEF|RDEF|TDEF||Lapis Lazuli}} |
| − | ! width="120px" |
| + | {{NRing|Stat|Fire Rate}} || colspan="20" | 200% |
| − | ! colspan="4" | JP Name
| + | {{NRing|Stat|Turn Rate}} || colspan="20" | 60% |
| − | ! colspan="12" | Description
| + | {{NRing|Null}} |
| − | ! colspan="4" | Materials
| + | {{NRing|Body|L|3|WideAreaHeal|L/Wide Area Heal|L/ワイドエリアヒール|Wide Area Heal |
| − | |- | + | Increases the area of effect of Area Heal.|4|SATK|RATK|TATK|DEX|Topaz}} |
| − | <!--Icon--> | [[File:NonWeakBonusRingIcon.png|120px]]
| + | {{NRing|Stat|Heal Range}} || colspan="20" | 300% |
| − | <!--JP Name--> | colspan="4" | L/Lノンウィークボーナス
| + | {{NRing|Null}} |
| − | <!--Description--> | colspan="12" | Makes the skill [[Ranger#weakhitadvance|Weak Hit Advance]] also apply to non-weak areas when using Launcher type weapons.
| + | {{NRing|Body|L|4|LighArmor|L/Light Armor|L/ライトアーマー|Light Armor |
| − | <!--Materials--> | colspan="4" | [[Naberius Rock]] x3<br>[[Tundra Amber]] x1
| + | Reduces the PP cost of Dash, but increases damage taken.|4|SATK|RATK|TATK|DEX|Lapis Lazuli}} |
| − | |- | + | {{NRing|Stat|PP Consumption}} || colspan="20" | 10 |
| − | ! Ring Level !! width="50px" | 1 !! width="50px" | 2 !! width="50px" | 3 !! width="50px" | 4 !! width="50px" | 5 !! width="50px" | 6 !! width="50px" | 7 !! width="50px" | 8 !! width="50px" | 9 !! width="50px" | 10 !! width="50px" | 11 !! width="50px" | 12 !! width="50px" | 13 !! width="50px" | 14 !! width="50px" | 15 !! width="50px" | 16 !! width="50px" | 17 !! width="50px" | 18 !! width="50px" | 19 !! width="50px" | 20
| + | {{NRing|Stat|Damage Received}} || colspan="20" | 110% |
| − | |- align="center" | + | {{NRing|Null}} |
| − | | Power of Weak Hit Advance || 50% || 51% || 52% || 53% || 54% || 55% || 56% || 57% || 58% || 60% || 64% || 68% || 72% || 76% || 80% || 84% || 88% || 92% || 96% || 100% | + | {{NRing|Body|L|3|EarlyRise|L/Early Rise|L/アーリィライズ|Early Rise |
| | + | In Quests with infinite A.I.S. usage, reduce the respawn period of the A.I.S.|3|SDEF|RDEF|TDEF||Topaz}} |
| | + | {{NRing|Stat|Respawn Time}} || colspan="20" | 1s |
| | |} | | |} |
| − |
| |
| − | ===L/Step Jump===
| |
| − | {| class="wikitable"
| |
| − | |-
| |
| − | ! width="120px" |
| |
| − | ! JP Name !! Description !! Materials
| |
| − | |-
| |
| − | <!--Icon--> | [[File:StepJumpRingIcon.png|120px]]
| |
| − | <!--JP Name--> | L/ステップジャンプ
| |
| − | <!--Description--> | Increases movement speed when you perform a jump during a Step action.
| |
| − | <!--Materials--> | [[Amduscia Rock]] x3<br>[[V. Caverns Garnet]] x6<br>{{icons|Tool}} [[Lambda Grinder]] x15
| |
| − | |-
| |
| − | ! Ring Level !! colspan="3" |1-20
| |
| − | |- align="center"
| |
| − | | No effect || colspan="3" |N/A
| |
| | |} | | |} |
| − | | + | {{NRing|Head|Other}} |
| − | ===L/Just Reversal Just Attack Combo===
| + | {{NRing|Body|L|5|PartyOfToughness|L/Party of Toughness|L/パーティーオブタフネス|Party of Toughness |
| − | {| class="wikitable" | + | Reduces damage taken based on the number of players in your Party.|4|SATK|RATK|TATK|DEX|Topaz}} |
| − | |- | + | {{NRing|Stat|Damage Received (Party of 2)}} || 99.00% || 98.90% || 98.80% || 98.70% || 98.60% || 98.50% || 98.40% || 98.30% || 98.20% || 98.10% || 98.00% || 97.90% || 97.80% || 97.70% || 97.60% || 97.50% || 97.40% || 97.30% || 97.20% || 97.00% |
| − | ! width="120px" |
| + | {{NRing|Stat|Damage Received (Party of 3)}} || 98.00% || 97.90% || 97.80% || 97.70% || 97.60% || 97.50% || 97.40% || 97.30% || 97.20% || 97.10% || 96.00% || 96.90% || 96.80% || 96.70% || 96.60% || 96.50% || 96.40% || 96.30% || 96.20% || 96.00% |
| − | ! JP Name !! Description !! Materials
| + | {{NRing|Stat|Damage Received (Party of 4)}} || 97.00% || 96.90% || 96.80% || 96.70% || 96.60% || 96.50% || 96.40% || 96.30% || 96.20% || 96.10% || 95.00% || 95.90% || 95.80% || 95.70% || 95.60% || 95.50% || 95.40% || 95.30% || 95.20% || 95.00% |
| − | |- | + | {{NRing|Null}} |
| − | <!--Icon-->| [[File:JustReversalJustAttackComboRingIcon.png|120px]]
| + | {{NRing|Body|L|5|StealthAttack|L/Stealth Attack|L/ステルスアタック|Stealth Attack |
| − | <!--JP Name-->| L/JリバーサルJAコンボ
| + | Reduce the amount of Hate generated by attacks.|4|SDEF|RDEF|TDEF|DEX|Zircon}} |
| − | <!--Description-->| Gives you the opportunity to perform a Just Attack after a Just Reversal.
| + | {{NRing|Stat|Hate Generation}} || 90% || 87% || 84% || 81% || 78% || 75% || 72% || 69% || 66% || 63% || 60% || 57% || 54% || 51% || 48% || 45% || 42% || 39% || 36% || 33% |
| − | <!--Materials--> | [[Naberius Rock]] x3<br>[[Tundra Amber]] x6<br>{{icons|Tool}} [[Lambda Grinder]] x15
| |
| − | |- | |
| − | ! Ring Level !! colspan="3" |1-20
| |
| − | |- align="center" | |
| − | | No effect || colspan="3" |N/A | |
| | |} | | |} |
| − |
| |
| − | ===L/Air Reversal===
| |
| − | {| class="wikitable"
| |
| − | |-
| |
| − | ! width="120px" |
| |
| − | ! JP Name !! Description !! Materials
| |
| − | |-
| |
| − | <!--Icon-->| [[File:AirReversalRingIcon.png|120px]]
| |
| − | <!--JP Name-->| L/エアリバーサル
| |
| − | <!--Description-->| Enables the use of Just Reversal while still in the air.
| |
| − | <!--Materials--> | [[Amduscia Rock]] x3 <br> [[V. Caverns Garnet]] x6 <br> {{icons|Tool}} [[Lambda Grinder]] x15
| |
| − | |-
| |
| − | ! Ring Level !! colspan="3" |1-20
| |
| − | |- align="center"
| |
| − | | No effect || colspan="3" |N/A
| |
| | |} | | |} |
| | | | |
| − | ===L/Slow Fi Action=== | + | ===Combined Skill Rings=== |
| − | {| class="wikitable" | + | {{NRing|Head|Combination}} |
| − | |- | + | {{NRing|Body|L|3|JGCounter|L/JG Counter|L/JGカウンター|Just Guard Counter |
| − | ! width="120px" |
| + | Bestows the effects of "JG Sonic Arrow", "JG Rising Flag",<br>and "JG Heavenly Fall" at Lv. 20.|3|SATK|RATK|TATK||}} |
| − | ! JP Name !! Description !! Materials
| + | {{NRing|Stat|N/A}} || colspan="20" | N/A |
| − | |- | + | {{NRing|Null}} |
| − | <!--Icon-->| [[File:SlowFiActionRing.png|120px]] | + | {{NRing|Body|L|3|ChaseWSupport|L/Chase W Support|L/チェイスWサポート|Chase Wide Support |
| − | <!--JP Name-->| L/スローFiアクション
| + | Bestows the effects of "DS Kamaitachi", "TD Air Chase",<br>and "Knuckle Chase" at Lv. 20.|3|SATK|RATK|TATK||}} |
| − | <!--Description-->| Slows down the weapon action of {{icons|Fighter}}Fighter weapons.
| + | {{NRing|Stat|N/A}} || colspan="20" | N/A |
| − | <!--Materials--> | [[Harkotan Rock]] x3<br>[[Shironian Moonstone]] x6<br>{{icons|Tool}} [[Lambda Grinder]] x15
| + | {{NRing|Null}} |
| − | |- | + | {{NRing|Body|L|3|TimeAndRoll|L/Time & Roll|L/タイムエンロール|Time & Roll |
| − | ! Ring Level !! colspan="3" |1-20
| + | Bestows the effects of "High Time Keep" and "Front Dive Roll" at Lv. 20.|3|SATK|RATK|TATK||}} |
| − | |- align="center" | + | {{NRing|Stat|N/A}} || colspan="20" | N/A |
| − | | No effect || colspan="3" |N/A | + | {{NRing|Null}} |
| | + | {{NRing|Body|L|3|DefenseTech|L/Defense Tech|L/デフェンステック|Defense Tech |
| | + | Bestows the effects of "Tech C Parrying" and "Short Mirage" at Lv. 20.|3|SATK|RATK|TATK||}} |
| | + | {{NRing|Stat|N/A}} || colspan="20" | N/A |
| | + | {{NRing|Null}} |
| | + | {{NRing|Body|L|3|BravePower|L/Brave Power|L/ブレイブパワー|Brave Power |
| | + | Bestows the effects of "Katana C Count Up" and "Bullet Bow Homing" at Lv. 20.|3|SATK|RATK|TATK||}} |
| | + | {{NRing|Stat|N/A}} || colspan="20" | N/A |
| | + | {{NRing|Null}} |
| | + | {{NRing|Body|L|3|KickAndSnatch|L/Kick & Snatch|L/キックエンスナッチ|Kick & Snatch |
| | + | Bestows the effects of "DB Snatch" and "JB Tech Arts SC" at Lv. 20.|3|SATK|RATK|TATK||}} |
| | + | {{NRing|Stat|N/A}} || colspan="20" | N/A |
| | |} | | |} |
| − | ===L/PB Homing===
| |
| − | {| class="wikitable"
| |
| − | |-
| |
| − | ! width="120px" |
| |
| − | ! colspan="4" | JP Name
| |
| − | ! colspan="12" | Description
| |
| − | ! colspan="4" | Materials
| |
| − | |-
| |
| − | <!--Icon--> | [[File:PBHomingRingIcon.png|120px]]
| |
| − | <!--JP Name--> | colspan="4" align="center" | L/PBホーミング
| |
| − | <!--Description--> | colspan="12" align="center" | Modifies Photon Blades to home onto targets.
| |
| − | <!--Materials--> | colspan="4" | [[Lilipa Rock]] x3<br>[[Tunnels Peridot]] x1
| |
| − | |-
| |
| − | ! Ring Level !! width="50px" | 1 !! width="50px" | 2 !! width="50px" | 3 !! width="50px" | 4 !! width="50px" | 5 !! width="50px" | 6 !! width="50px" | 7 !! width="50px" | 8 !! width="50px" | 9 !! width="50px" | 10 !! width="50px" | 11 !! width="50px" | 12 !! width="50px" | 13 !! width="50px" | 14 !! width="50px" | 15 !! width="50px" | 16 !! width="50px" | 17 !! width="50px" | 18 !! width="50px" | 19 !! width="50px" | 20
| |
| − | |- align="center"
| |
| − | | Degree of Turn || 30 || 35 || 40 || 45 || 50 || 55 || 60 || 65 || 70 || 75 || 80 || 85 || 90 || 95 || 100 || 110 || 120 || 130 || 140 || 150
| |
| − | |- align="center"
| |
| − | | Turning Period || 2s || 2s || 2s || 2s || 2s || 3s || 3s || 3s || 3s || 3s || 3s || 4s || 4s || 4s || 4s || 5s || 5s || 5s || 5s || 5s
| |
| − | |- align="center"
| |
| − | | Photon Blade Power || 101% || 101% || 101% || 102% || 102% || 102% || 103% || 103% || 103% || 104% || 104% || 104% || 105% || 105% || 105% || 106% || 106% || 107% || 107% || 108%
| |
| | |} | | |} |
| | | | |
| − | Notes:
| + | ===Removed=== |
| − | | + | The following Rings were removed from the game and replaced by Class Skills. |
| − | *The ring modifies the Photon Blade animations; adding a "lag" time to the blades while it is mid-air before launching to the target
| + | {{NRing|Head|Removed}} |
| − | *The change in speed or feel of the Photon Blade is due to the change in animation. The ring doesn't change the Photon Blade Speed.
| + | {{NRing|Body|L|3|StepJump|L/Step Jump|L/ステップジャンプ|Step Jump |
| − | *The Turning Period is how long the Photon Blade can home onto the target. Taking more time than the Turning would make the Photon Blade travel in a straight line, ignoring the specified target.
| + | Press the Jump button right after a Step to reach running speed instantly. |
| − | | + | <br><br>-October 8, 2018 Update-<br> Skill can be learned at Lv.10.|3|SATK|RATK|TATK||Garnet}} |
| − | ===L/Peace Zondeel=== | + | {{NRing|Stat|N/A}} || colspan="20" | N/A |
| − | {| class="wikitable" | + | {{NRing|Null}} |
| − | |- | + | {{NRing|Body|L|3|StepJACombo|L/Step JA Combo|L/ステップJAコンボ|Step Just Attack Combo |
| − | ! width="120px" |
| + | Step creates a Just Attack circle.|3|SATK|SDEF|DEX||Tanzanite}} |
| − | ! JP Name !! Description !! Materials
| + | {{NRing|Stat|N/A}} || colspan="20" | N/A |
| − | |- | + | {{NRing|Null}} |
| − | <!--Icon-->| [[File:PeaceZondeelRingIcon.png|120px]]
| + | {{NRing|Body|L|3|AirReversal|L/Air Reversal|L/エアリバーサル|Air Reversal |
| − | <!--JP Name-->| L/ピースゾンディール
| + | Enables performing a Just Reversal while in midair. |
| − | <!--Description-->| Prevents [[Lightning_Techniques#Zondeel|Zondeel]] from igniting when hit with other [[Lightning Techniques]]
| + | <br><br>-October 8, 2018 Update-<br> Skill can be learned at Lv.30|2|SATK|DEX|||Garnet}} |
| − | <!--Materials--> | [[Harkotan Rock]] x3 <br> [[Shironian Moonstone]] x6 <br> {{icons|Tool}} [[Lambda Grinder]] x15 | + | {{NRing|Stat|N/A}} || colspan="20" | N/A |
| − | |- | + | {{NRing|Null}} |
| − | ! Ring Level !! colspan="3" |1-20
| + | {{NRing|Body|L|3|JReversalJACombo|L/J Reversal JA Combo|L/JリバーサルJAコンボ|Just Reversal Just Attack Combo |
| − | |- align="center" | + | Just Reversal creates a Just Attack circle. |
| − | | No effect || colspan="3" |N/A | + | <br><br>-October 8, 2018 Update-<br> Skill can be learned at Lv.30|4|SDEF|RDEF|TDEF|DEX|Amber}} |
| | + | {{NRing|Stat|N/A}} || colspan="20" | N/A |
| | + | |} |
| | |} | | |} |
| | | | |
| − | ===L/Near Auto Target=== | + | ==R Rings== |
| − | {| class="wikitable" | + | ===Class Rings=== |
| − | |- | + | {{NRing|Head|{{NUI|UIClassHu}} Hunter}} |
| − | ! width="120px" |
| + | {{NRing|Body|R|5|MassiveHunter|R/Massive Hunter|R/マッシブハンター|Massive Hunter |
| − | ! JP Name !! Description !! Materials
| + | Enables use of the Active Skill "Massive Hunter".<br>For a period of time, nullify knockback and reduce damage taken.|Hu|||||Sapphire}} |
| − | |- | + | {{NRing|Stat|Damage Received}} || colspan="10" | 99% || 95% || 94% || 93% || 92% || 91% || colspan="5" | 90% |
| − | <!--Icon-->| [[File:NearAutoTargetRingIcon.png|120px]]
| + | {{NRing|Stat|Duration}} || colspan="5" | 15s || 16s || 17s || 18s || 19s || colspan="6" | 20s || 21s || 22s || 23s || 24s || 25s |
| − | <!--JP Name-->| L/ニアオートターゲット
| + | {{NRing|Stat|Cooldown Time}} || 120s || 118s || 116s || 114s || 112s || colspan="10" | 100s || 95s || 94s || 93s || 92s || 90s |
| − | <!--Description-->| Pets automatically attacks enemies in its vicinity.
| + | {{NRing|Null}} |
| − | <!--Materials--> | [[Lilipa Rock]] x3<br>[[Tunnels Peridot]] x6 <br> {{icons|Tool}} [[Lambda Grinder]] x15
| + | {{NRing|Body|R|3|HealingGuard|R/Healing Guard|R/ヒーリングガード|Healing Guard |
| − | |- | + | Blocking an attack restores HP.|Hu|||||Amber}} |
| − | ! Ring Level !! colspan="3" |1-20
| + | {{NRing|Stat|HP Recovered}} || 1.00% || 1.20% || 1.40% || 1.60% || 1.80% || 2.20% || 2.40% || 2.60% || 2.80% || 3.00% || 3.20% || 3.40% || 3.60% || 3.80% || 4.00% || 4.20% || 4.40% || 4.60% || 4.80% || 5.00% |
| − | |- align="center" | |
| − | | No effect || colspan="3" |N/A | |
| | |} | | |} |
| − |
| |
| − | ===L/Jumping Dodge===
| |
| − |
| |
| − | {| class="wikitable"
| |
| − | |-
| |
| − | ! width="120px" |
| |
| − | ! colspan="4" | JP Name
| |
| − | ! colspan="12" | Description
| |
| − | ! colspan="4" | Materials
| |
| − | |-
| |
| − | <!--Icon--> | [[File:JumpingDodgeRingIcon.png|120px]]
| |
| − | <!--JP Name--> | colspan="4" align="center" | L/ジャンピングドッジ
| |
| − | <!--Description--> | colspan="12" align="center" | Enables the use of the Jumping Dodge skill.
| |
| − | <!--Materials--> | colspan="4" | [[Harkotan Rock]] x3<br>[[Shironian Moonstone]] x1
| |
| − | |-
| |
| − | ! Ring Level !! width="50px" | 1 !! width="50px" | 2 !! width="50px" | 3 !! width="50px" | 4 !! width="50px" | 5 !! width="50px" | 6 !! width="50px" | 7 !! width="50px" | 8 !! width="50px" | 9 !! width="50px" | 10 !! width="50px" | 11 !! width="50px" | 12 !! width="50px" | 13 !! width="50px" | 14 !! width="50px" | 15 !! width="50px" | 16 !! width="50px" | 17 !! width="50px" | 18 !! width="50px" | 19 !! width="50px" | 20
| |
| − | |- align="center"
| |
| − | | Skill Cool-down || 100s || 95s || 90s || 85s || 80s || 75s || 70s || 65s || 60s || 55s || 50s || 45s || 40s || 35s || 30s || 25s || 20s || 15s || 10s || 5s
| |
| | |} | | |} |
| − | | + | {{NRing|Head|{{NUI|UIClassFi}} Fighter}} |
| − | == Right Skill Rings ==
| + | {{NRing|Body|R|4|CStrikeStrike|R/C Strike Strike|R/Cストライク打撃|Critical Strike (Strike Type) |
| − | | + | Increases the Critical Hit Rate of Striking attacks and increases the damage of Critical Hits.|Fi|||||Opal}} |
| − | Right skill rings are generally used to emulate skills of classes. As such, these rings can't be equipped by the classes that possess the skills they emulate. For example, the [[Force#Photon_Flare|Photon Flare]] skill belongs to the {{icons|Force}} [[Force]] class, so Forces (both main and sub) can't equip the ''R/Photon Flare'' ring.
| + | {{NRing|Stat|Critical Power}} || colspan="5" | 100% || colspan="5" | 101% || colspan="9" | 102% || 103% |
| − | | + | {{NRing|Stat|Critical Rate Increase}} || 1% || 2% || 3% || 4% || 5% || 6% || 7% || 8% || 9% || 10% || 11% || 12% || 13% || 14% || 15% || 16% || 17% || 18% || 19% || 20% |
| − | ===R/Massive Hunter===
| + | {{NRing|Null}} |
| − | {| class="wikitable" | + | {{NRing|Body|R|4|CStrikeShoot|R/C Strike Shoot|R/Cストライク射撃|Critical Strike (Shoot Type) |
| − | |- | + | Increases the Critical Hit Rate of Ranged attacks and increases the damage of Critical Hits.|Fi|||||Sapphire}} |
| − | ! width="120px" |
| + | {{NRing|Stat|Critical Power}} || colspan="5" | 100% || colspan="5" | 101% || colspan="9" | 102% || 103% |
| − | ! colspan="4" | JP Name
| + | {{NRing|Stat|Critical Rate Increase}} || 1% || 2% || 3% || 4% || 5% || 6% || 7% || 8% || 9% || 10% || 11% || 12% || 13% || 14% || 15% || 16% || 17% || 18% || 19% || 20% |
| − | ! colspan="10" | Description
| + | {{NRing|Null}} |
| − | ! colspan="4" | Materials
| + | {{NRing|Body|R|4|CStrikeTech|R/C Strike Tech|R/Cストライク法撃|Critical Strike (Tech Type) |
| − | ! colspan="2" | Class Restriction
| + | Increases the Critical Hit Rate of Technique attacks and increases the damage of Critical Hits.|Fi|||||Amethyst}} |
| − | |- | + | {{NRing|Stat|Critical Power}} || colspan="5" | 100% || colspan="5" | 101% || colspan="9" | 102% || 103% |
| − | |[[File:MassiveHunterRingIcon.png|120px]] | + | {{NRing|Stat|Critical Rate Increase}} || 1% || 2% || 3% || 4% || 5% || 6% || 7% || 8% || 9% || 10% || 11% || 12% || 13% || 14% || 15% || 16% || 17% || 18% || 19% || 20% |
| − | | colspan="4" | R/マッシブハンター | + | {{NRing|Null}} |
| − | | colspan="10" | Decreases damage and prevents the character from being launched or blown-away. | + | {{NRing|Body|R|3|TechArtsJAPPS|R/Tech Arts JAPPS|R/テックアーツJAPPS|Tech Arts Just Attack PP Save |
| − | | colspan="4" | [[Vopar Rock]] x3<br>[[Coast Sapphire]] x1 | + | When chaining different Photon Arts or Techniques, reduce the PP cost of the next Photon Art/Technique.|Fi|||||Peridot}} |
| − | | colspan="2" | {{icons|Hunter}} [[Hunter]] | + | {{NRing|Stat|PP Consumption}} || 95% || colspan="3" |94% || 93% || colspan="3" |92% || 91% || colspan="3" |90% || 89% || colspan="3" |88% || 87% || colspan="2" |86% || 85% |
| − | |- | + | {{NRing|Null}} |
| − | ! Ring Level !! width="50px" | 1 !! width="50px" | 2 !! width="50px" | 3 !! width="50px" | 4 !! width="50px" | 5 !! width="50px" | 6 !! width="50px" | 7 !! width="50px" | 8 !! width="50px" | 9 !! width="50px" | 10 !! width="50px" | 11 !! width="50px" | 12 !! width="50px" | 13 !! width="50px" | 14 !! width="50px" | 15 !! width="50px" | 16 !! width="50px" | 17 !! width="50px" | 18 !! width="50px" | 19 !! width="50px" | 20
| + | {{NRing|Body|R|3|Adrenaline|R/Adrenaline|R/アドレナリン|Adrenaline |
| − | |- align="center" | + | Increase the duration granted by each tick of Shifta and Deband.|Fi|||||Tourmaline}} |
| − | | Duration || colspan="5" | 15s || 16s || 17s || 18s || 19s || colspan="6" | 20s || 21s || 22s || 23s || 24s || 25s | + | {{NRing|Stat|Duration}} || +10s || +11s || +12s || +13s || +14s || +15s || +16s || +17s || +18s || +19s || +20s || +21s || +22s || +23s || +24s || +25s || +26s || +27s || +28s || +30s |
| − | |- align="center" | |
| − | | Recast || 120s || 118s || 116s || 114s || 112s || colspan="10" | 100s || 95s || 94s || 93s || 92s || 90s | |
| − | |- align="center" | |
| − | |Incoming damage || colspan="10" | 99% || 95% || 94% || 93% || 92% || 91% || colspan="5" | 90% | |
| | |} | | |} |
| − | ===R/C Strike Striking===
| |
| − | {| class="wikitable"
| |
| − | |-
| |
| − | ! width="120px" |
| |
| − | ! colspan="4" | JP Name
| |
| − | ! colspan="10" | Description
| |
| − | ! colspan="4" | Materials
| |
| − | ! colspan="2" | Class Restriction
| |
| − | |-
| |
| − | |[[File:CriticalStrikeSRingIcon.png|120px]]
| |
| − | | colspan="4" | R/Cストライク打撃
| |
| − | | colspan="10" | Increases Striking Attacks' critical rate and critical damage.
| |
| − | | colspan="4" | [[Earth Rock]] x3<br>[[Tokyo Opal]] x1
| |
| − | | colspan="2" | {{icons|Fighter}} [[Fighter]]
| |
| − | |-
| |
| − | ! Ring Level !! width="50px" | 1 !! width="50px" | 2 !! width="50px" | 3 !! width="50px" | 4 !! width="50px" | 5 !! width="50px" | 6 !! width="50px" | 7 !! width="50px" | 8 !! width="50px" | 9 !! width="50px" | 10 !! width="50px" | 11 !! width="50px" | 12 !! width="50px" | 13 !! width="50px" | 14 !! width="50px" | 15 !! width="50px" | 16 !! width="50px" | 17 !! width="50px" | 18 !! width="50px" | 19 !! width="50px" | 20
| |
| − | |- align="center"
| |
| − | | Critical hit damage increase || colspan="5" | 0% || colspan="5" | 1% || colspan="9" | 2% || 3%
| |
| − | |- align="center"
| |
| − | | Critical chance increase || 1% || 2% || 3% || 4% || 5% || 6% || 7% || 8% || 9% || 10% || 11% || 12% || 13% || 14% || 15% || 16% || 17% || 18% || 19% || 20%
| |
| | |} | | |} |
| − | ===R/C Strike Ranged===
| + | {{NRing|Head|{{NUI|UIClassBo}} Bouncer}} |
| − | {| class="wikitable"
| + | {{NRing|Body|R|5|CriticalField|R/Critical Field|R/クリティカルフィールド|Critical Field |
| − | |- | + | Enables use of the Active Skill "Critical Field".<br>For a period of time, generate a field that increases the Critical Hit Rate of all nearby players.|Bo|||||Tanzanite}} |
| − | ! width="120px" |
| + | {{NRing|Stat|Critical Rate Increase}} || 10% || 11% || 12% || 13% || 14% || 15% || 16% || 17% || 18% || 19% || 20% || 21% || 22% || 23% || 24% || 25% || 26% || 27% || 28% || 30% |
| − | ! colspan="4" | JP Name
| + | {{NRing|Stat|Duration}} || colspan="5" | 20s || 25s || 26s || 27s || 28s || 29s || colspan="5" | 30s || 35s || 36s || 37s || 38s || 40s |
| − | ! colspan="10" | Description
| + | {{NRing|Stat|Cooldown Time}} || 120s || 118s || 116s || 114s || 112s || colspan="10" | 100s || 90s || 88s || 86s || 84s || 80s |
| − | ! colspan="4" | Materials
| + | {{NRing|Null}} |
| − | ! colspan="2" | Class Restriction
| + | {{NRing|Body|R|5|EPPRField|R/EPPR Field|R/EPPRフィルド|Elemental PP Recovery Field |
| − | |- | + | Enables use of the Active Skill "Elemental PP Restorate Field".<br>For a period of time, generate a field that increases PP recovery on hit when striking an enemy's elemental weakness.<br>'''No effect on Hero.'''|Bo|||||Opal}} |
| − | |[[File:CriticalStrikeRRingIcon.png|120px]] | + | {{NRing|Stat|Active PP Recovery}} || colspan="10" | +1.00 || +1.20 || +1.40 || +1.60 || +1.80 || +2.00 || +2.20 || +2.40 || +2.60 || +2.80 || +3.00 |
| − | | colspan="4" | R/Cストライク射撃 | + | {{NRing|Stat|Duration}} || colspan="5" | 20s || 25s || 26s || 27s || 28s || 29s || colspan="5" | 30s || 35s || 36s || 37s || 38s || 40s |
| − | | colspan="10" | Increases ranged Attacks' critical rate and critical damage. | + | {{NRing|Stat|Cooldown Time}} || 120s || 118s || 116s || 114s || 112s || colspan="10" | 100s || 90s || 88s || 86s || 84s || 80s |
| − | | colspan="4" | [[Vopar Rock]] x3<br>[[Coast Sapphire]] x1 | + | {{NRing|Null}} |
| − | | colspan="2" | {{icons|Fighter}} [[Fighter]] | + | {{NRing|Body|R|3|HealShare|R/Heal Share|R/ヒールシェア|Heal Share |
| − | |- | + | When healing, distribute a percentage of the amount healed to nearby players.|Bo|||||Diamond}} |
| − | ! Ring Level !! width="50px" | 1 !! width="50px" | 2 !! width="50px" | 3 !! width="50px" | 4 !! width="50px" | 5 !! width="50px" | 6 !! width="50px" | 7 !! width="50px" | 8 !! width="50px" | 9 !! width="50px" | 10 !! width="50px" | 11 !! width="50px" | 12 !! width="50px" | 13 !! width="50px" | 14 !! width="50px" | 15 !! width="50px" | 16 !! width="50px" | 17 !! width="50px" | 18 !! width="50px" | 19 !! width="50px" | 20
| + | {{NRing|Stat|HP Recovered Shared}} || 1% || 2% || 3% || 4% || 5% || 6% || 7% || 8% || 9% || 10% || 11% || 12% || 13% || 14% || 15% || 16% || 17% || 18% || 19% || 20% |
| − | |- align="center" | + | {{NRing|Null}} |
| − | | Critical hit damage increase || colspan="5" | 0% || colspan="5" | 1% || colspan="9" | 2% || 3% | + | {{NRing|Body|R|3|JReversalPPGain|R/J Reversal PP Gain|R/JリバーサルPPゲイン|Just Reversal PP Gain |
| − | |- align="center" | + | Just Reversal restores a percentage of your maximum PP.|Bo|||||Garnet}} |
| − | | Critical chance increase || 1% || 2% || 3% || 4% || 5% || 6% || 7% || 8% || 9% || 10% || 11% || 12% || 13% || 14% || 15% || 16% || 17% || 18% || 19% || 20% | + | {{NRing|Stat|PP Recovered}} || 1% || 2% || 3% || 4% || 5% || 6% || 7% || 8% || 9% || 10% || 11% || 12% || 13% || 14% || 15% || 16% || 17% || 18% || 19% || 20% |
| | |} | | |} |
| − | ===R/C Strike Tech===
| |
| − | {| class="wikitable"
| |
| − | |-
| |
| − | ! width="120px" |
| |
| − | ! colspan="4" | JP Name
| |
| − | ! colspan="10" | Description
| |
| − | ! colspan="4" | Materials
| |
| − | ! colspan="2" | Class Restriction
| |
| − | |-
| |
| − | |[[File:CriticalStrikeTRingIcon.png|120px]]
| |
| − | | colspan="4" | R/Cストライク法撃
| |
| − | | colspan="10" | Increases techs Attacks' critical rate and critical damage.
| |
| − | | colspan="4" | [[Naberius Rock]] x3<br>[[Ruins Amethyst]] x1
| |
| − | | colspan="2" | {{icons|Fighter}} [[Fighter]]
| |
| − | |-
| |
| − | ! Ring Level !! width="50px" | 1 !! width="50px" | 2 !! width="50px" | 3 !! width="50px" | 4 !! width="50px" | 5 !! width="50px" | 6 !! width="50px" | 7 !! width="50px" | 8 !! width="50px" | 9 !! width="50px" | 10 !! width="50px" | 11 !! width="50px" | 12 !! width="50px" | 13 !! width="50px" | 14 !! width="50px" | 15 !! width="50px" | 16 !! width="50px" | 17 !! width="50px" | 18 !! width="50px" | 19 !! width="50px" | 20
| |
| − | |- align="center"
| |
| − | | Critical hit damage increase || colspan="5" | 0% || colspan="5" | 1% || colspan="9" | 2% || 3%
| |
| − | |- align="center"
| |
| − | | Critical chance increase || 1% || 2% || 3% || 4% || 5% || 6% || 7% || 8% || 9% || 10% || 11% || 12% || 13% || 14% || 15% || 16% || 17% || 18% || 19% || 20%
| |
| | |} | | |} |
| − | ===R/Killing Bonus===
| + | {{NRing|Head|{{NUI|UIClassRa}} Ranger}} |
| − | {| class="wikitable" | + | {{NRing|Body|R|3|KillingBonus|R/Killing Bonus|R/キリングボーナス|Killing Bonus |
| − | |- | + | Restores PP when enemies are defeated close to you.|Ra|||||Opal}} |
| − | ! width="120px" |
| + | {{NRing|Stat|PP Recovered}} || 1.00 || 1.20 || 1.40 || 1.60 || 1.80 || 2.00 || 2.20 || 2.40 || 2.60 || 2.80 || 3.00 || 3.20 || 3.40 || 3.60 || 3.80 || 4.00 || 4.20 || 4.40 || 4.60 || 5.00 |
| − | ! colspan="4" | JP Name
| |
| − | ! colspan="10" | Description
| |
| − | ! colspan="4" | Materials
| |
| − | ! colspan="2" | Class Restriction
| |
| − | |-
| |
| − | |[[File:KillingBonusRingIcon.png|120px]]
| |
| − | | colspan="4" | R/キリングボーナス | |
| − | | colspan="10" | Recovers PP when enemies die within close range. | |
| − | | colspan="4" | [[Earth Rock]] x3<br>[[Tokyo Opal]] x1 | |
| − | | colspan="2" | {{icons|Ranger}} [[Ranger]] | |
| − | |- | |
| − | ! Ring Level !! width="50px" | 1 !! width="50px" | 2 !! width="50px" | 3 !! width="50px" | 4 !! width="50px" | 5 !! width="50px" | 6 !! width="50px" | 7 !! width="50px" | 8 !! width="50px" | 9 !! width="50px" | 10 !! width="50px" | 11 !! width="50px" | 12 !! width="50px" | 13 !! width="50px" | 14 !! width="50px" | 15 !! width="50px" | 16 !! width="50px" | 17 !! width="50px" | 18 !! width="50px" | 19 !! width="50px" | 20
| |
| − | |- align="center"
| |
| − | | PP gained || 1.00 || 1.20 || 1.40 || 1.60 || 1.80 || 2.00 || 2.20 || 2.40 || 2.60 || 2.80 || 3.00 || 3.20 || 3.40 || 3.60 || 3.80 || 4.00 || 4.20 || 4.40 || 4.60 || 5.00 | |
| | |} | | |} |
| − | ===R/P Keeper Striking===
| |
| − | {| class="wikitable"
| |
| − | |-
| |
| − | ! width="120px" |
| |
| − | ! colspan="4" | JP Name
| |
| − | ! colspan="10" | Description
| |
| − | ! colspan="4" | Materials
| |
| − | ! colspan="2" | Class Restriction
| |
| − | |-
| |
| − | |[[File:PerfectKeeperSRingIcon.png|120px]]
| |
| − | | colspan="4" | R/Pキーパー打撃
| |
| − | | colspan="10" | Increases striking attack damage when HP is above a certain value.
| |
| − | | colspan="4" | [[Naberius Rock]] x3<br>[[Ruins Amethyst]] x1
| |
| − | | colspan="2" | {{icons|Gunner}} [[Gunner]]
| |
| − | |-
| |
| − | ! Ring Level !! width="50px" | 1 !! width="50px" | 2 !! width="50px" | 3 !! width="50px" | 4 !! width="50px" | 5 !! width="50px" | 6 !! width="50px" | 7 !! width="50px" | 8 !! width="50px" | 9 !! width="50px" | 10 !! width="50px" | 11 !! width="50px" | 12 !! width="50px" | 13 !! width="50px" | 14 !! width="50px" | 15 !! width="50px" | 16 !! width="50px" | 17 !! width="50px" | 18 !! width="50px" | 19 !! width="50px" | 20
| |
| − | |- align="center"
| |
| − | | Damage increase || colspan="5" | 101% || colspan="5" | 102% || colspan="10" | 103%
| |
| − | |- align="center"
| |
| − | | HP activiation || 100% || 99% || 98% || 97% || colspan="2" | 96% || 95% || 94% || 93% || colspan="2" | 92% || 90% || 88% || 86% || 84% || 82% || 80% || 78% || 76% || 75%
| |
| | |} | | |} |
| − | ===R/P Keeper Ranged===
| + | {{NRing|Head|{{NUI|UIClassGu}} Gunner}} |
| − | {| class="wikitable" | + | {{NRing|Body|R|4|PKeeperStrike|R/P Keeper Strike|R/Pキーパー打撃|Perfect Keeper (Strike Type) |
| − | |- | + | Increases the damage of Striking attacks when your HP is above a certain percentage.|Gu|||||Amethyst}} |
| − | ! width="120px" |
| + | {{NRing|Stat|Power}} || colspan="5" | 100% || colspan="5" | 101% || colspan="9" | 102% || 103% |
| − | ! colspan="4" | JP Name
| + | {{NRing|Stat|Minimum Activation HP}} || 100% || 99% || 98% || 97% || colspan="2" | 96% || 95% || 94% || 93% || colspan="2" | 92% || 90% || 88% || 86% || 84% || 82% || 80% || 78% || 76% || 75% |
| − | ! colspan="10" | Description
| + | {{NRing|Null}} |
| − | ! colspan="4" | Materials
| + | {{NRing|Body|R|4|PKeeperShoot|R/P Keeper Shoot|R/Pキーパー射撃|Perfect Keeper (Shoot Type) |
| − | ! colspan="2" | Class Restriction
| + | Increases the damage of Ranged attacks when your HP is above a certain percentage.|Gu|||||Opal}} |
| − | |- | + | {{NRing|Stat|Power}} || colspan="5" | 100% || colspan="5" | 101% || colspan="9" | 102% || 103% |
| − | |[[File:PerfectKeeperRRingIcon.png|120px]] | + | {{NRing|Stat|Minimum Activation HP}} || 100% || 99% || 98% || 97% || colspan="2" | 96% || 95% || 94% || 93% || colspan="2" | 92% || 90% || 88% || 86% || 84% || 82% || 80% || 78% || 76% || 75% |
| − | | colspan="4" | R/Pキーパー射撃 | + | {{NRing|Null}} |
| − | | colspan="10" | Increases Ranged Attack damage when HP is above a certain value. | + | {{NRing|Body|R|4|PKeeperTech|R/P Keeper Tech|R/Pキーパー法撃|Perfect Keeper (Tech Type) |
| − | | colspan="4" | [[Earth Rock]] x3<br>[[Tokyo Opal]] x1 | + | Increases the damage of Technique attacks when your HP is above a certain percentage.|Gu|||||Emerald}} |
| − | | colspan="2" | {{icons|Gunner}} [[Gunner]] | + | {{NRing|Stat|Power}} || colspan="5" | 100% || colspan="5" | 101% || colspan="9" | 102% || 103% |
| − | |- | + | {{NRing|Stat|Minimum Activation HP}} || 100% || 99% || 98% || 97% || colspan="2" | 96% || 95% || 94% || 93% || colspan="2" | 92% || 90% || 88% || 86% || 84% || 82% || 80% || 78% || 76% || 75% |
| − | ! Ring Level !! width="50px" | 1 !! width="50px" | 2 !! width="50px" | 3 !! width="50px" | 4 !! width="50px" | 5 !! width="50px" | 6 !! width="50px" | 7 !! width="50px" | 8 !! width="50px" | 9 !! width="50px" | 10 !! width="50px" | 11 !! width="50px" | 12 !! width="50px" | 13 !! width="50px" | 14 !! width="50px" | 15 !! width="50px" | 16 !! width="50px" | 17 !! width="50px" | 18 !! width="50px" | 19 !! width="50px" | 20
| |
| − | |- align="center" | |
| − | | Damage increase || colspan="5" | 101% || colspan="5" | 102% || colspan="10" | 103% | |
| − | |- align="center" | |
| − | | HP activiation || 100% || 99% || 98% || 97% || colspan="2" | 96% || 95% || 94% || 93% || colspan="2" | 92% || 90% || 88% || 86% || 84% || 82% || 80% || 78% || 76% || 75% | |
| | |} | | |} |
| − | ===R/P Keeper Tech===
| |
| − | {| class="wikitable"
| |
| − | |-
| |
| − | ! width="120px" |
| |
| − | ! colspan="4" | JP Name
| |
| − | ! colspan="10" | Description
| |
| − | ! colspan="4" | Materials
| |
| − | ! colspan="2" | Class Restriction
| |
| − | |-
| |
| − | |[[File:PerfectKeeperTRingIcon.png|120px]]
| |
| − | | colspan="4" | R/Pキーパー法撃
| |
| − | | colspan="10" | Increases Tech Attack damage when HP is above a certain value.
| |
| − | | colspan="4" | [[Naberius Rock]] x3<br>[[Forest Emerald]] x1
| |
| − | | colspan="2" | {{icons|Gunner}} [[Gunner]]
| |
| − | |-
| |
| − | ! Ring Level !! width="50px" | 1 !! width="50px" | 2 !! width="50px" | 3 !! width="50px" | 4 !! width="50px" | 5 !! width="50px" | 6 !! width="50px" | 7 !! width="50px" | 8 !! width="50px" | 9 !! width="50px" | 10 !! width="50px" | 11 !! width="50px" | 12 !! width="50px" | 13 !! width="50px" | 14 !! width="50px" | 15 !! width="50px" | 16 !! width="50px" | 17 !! width="50px" | 18 !! width="50px" | 19 !! width="50px" | 20
| |
| − | |- align="center"
| |
| − | | Damage increase || colspan="5" | 101% || colspan="5" | 102% || colspan="10" | 103%
| |
| − | |- align="center"
| |
| − | | HP activiation || 100% || 99% || 98% || 97% || colspan="2" | 96% || 95% || 94% || 93% || colspan="2" | 92% || 90% || 88% || 86% || 84% || 82% || 80% || 78% || 76% || 75%
| |
| | |} | | |} |
| − | ===R/Photon Flare===
| + | {{NRing|Head|{{NUI|UIClassBr}} Braver}} |
| − | {| class="wikitable" | + | {{NRing|Body|R|3|AttackAdvance|R/Attack Advance|R/アタックアドバンス|Attack Advance |
| − | |- | + | Increases the damage of normal attacks.<br>'''No effect on Hero.'''|Br|||||Emerald}} |
| − | ! width="120px" |
| + | {{NRing|Stat|Power}} || 100.4% || 100.8% || 101.2% || 101.6% || 102% || 102.4% || 102.8% || 103.2% || 103.6% || 104% || 104.4% || 104.8% || 105.2% || 105.6% || 106% || 106.4% || 106.8% || 107.2% || 107.6% || 108% |
| − | ! colspan="4" | JP Name
| + | {{NRing|Null}} |
| − | ! colspan="10" | Description
| + | {{NRing|Body|R|4|QuickMate|R/Quick Mate|R/クイックメイト|Quick Mate |
| − | ! colspan="4" | Materials
| + | Increases the consumption speed of Mates.|Br|||||Diamond}} |
| − | ! colspan="2" | Class Restriction
| + | {{NRing|Stat|Action Speed}} || 102% || 104% || 106% || 108% || 110% || 112% || 114% || 116% || 118% || 120% || 124% || 128% || 132% || 136% || 140% || 144% || 148% || 152% || 156% || 160% |
| − | |- | + | {{NRing|Null}} |
| − | |[[File:PhotonFlareRingIcon.png|120px]] | + | {{NRing|Body|R|3|JReversalCover|R/J Reversal Cover|R/Jリバーサルカバー|Just Reversal Cover |
| − | | colspan="4" | R/フォトンフレア | + | Just Reversal restores a percentage of your maximum HP.|Br|||||Diamond}} |
| − | | colspan="10" | Temporarily increases T-ATK. | + | {{NRing|Stat|HP Recovered}} || 5.00% || 5.50% || 6.00% || 6.50% || 7.00% || 7.50% || 8.00% || 8.50% || 9.00% || 9.50% || 10.00% || 10.50% || 11.00% || 11.50% || 12.00% || 12.50% || 13.00% || 13.50% || 14.00% || 15.00% |
| − | | colspan="4" | [[Vopar Rock]] x3<br>[[Coast Sapphire]] x1 | |
| − | | colspan="2" | {{icons|Force}} [[Force]] | |
| − | |- | |
| − | ! Ring Level !! width="50px" | 1 !! width="50px" | 2 !! width="50px" | 3 !! width="50px" | 4 !! width="50px" | 5 !! width="50px" | 6 !! width="50px" | 7 !! width="50px" | 8 !! width="50px" | 9 !! width="50px" | 10 !! width="50px" | 11 !! width="50px" | 12 !! width="50px" | 13 !! width="50px" | 14 !! width="50px" | 15 !! width="50px" | 16 !! width="50px" | 17 !! width="50px" | 18 !! width="50px" | 19 !! width="50px" | 20
| |
| − | |- align="center" | |
| − | | T-ATK Boost || colspan="10" | 150 || 155 || 160 || 165 || 170 || 175 || 180 || 185 || 190 || 195 || 200 | |
| − | |- | |
| − | | Recast || 100s || 95s || 90s || 85s || colspan="11" | 80s || 74s || 73s || 72s || 71s || 70s | |
| − | |- | |
| − | | Duration || colspan="5" | 20s || 21s || 22s || 23s || 24s || colspan="6" | 25s || 26s || 27s || 28s || 29s || 30s | |
| | |} | | |} |
| − | ===R/PP Convert===
| |
| − | {| class="wikitable"
| |
| − | |-
| |
| − | ! width="120px" |
| |
| − | ! colspan="4" | JP Name
| |
| − | ! colspan="10" | Description
| |
| − | ! colspan="4" | Materials
| |
| − | ! colspan="2" | Class Restriction
| |
| − | |-
| |
| − | |[[File:PPConverRingIcon.png|120px]]
| |
| − | | colspan="4" | R/PPコンバート
| |
| − | | colspan="10" | Temporarily increases PP Auto-recovery while decreasing max HP.
| |
| − | | colspan="4" | [[Vopar Rock]] x3<br>[[Coast Sapphire]] x1
| |
| − | | colspan="2" | {{icons|Techer}} [[Techer]]
| |
| − | |-
| |
| − | ! Ring Level !! width="50px" | 1 !! width="50px" | 2 !! width="50px" | 3 !! width="50px" | 4 !! width="50px" | 5 !! width="50px" | 6 !! width="50px" | 7 !! width="50px" | 8 !! width="50px" | 9 !! width="50px" | 10 !! width="50px" | 11 !! width="50px" | 12 !! width="50px" | 13 !! width="50px" | 14 !! width="50px" | 15 !! width="50px" | 16 !! width="50px" | 17 !! width="50px" | 18 !! width="50px" | 19 !! width="50px" | 20
| |
| − | |- align="center"
| |
| − | | PP gain per sec|| colspan="10" | 1.00 || 1.10 || 1.20 || 1.30 || 1.40 || 1.50 || 1.60 || 1.70 || 1.80 || 1.90 || 2.00
| |
| − | |- align="center"
| |
| − | | Max HP|| colspan="10" | 75% || 74% || 73% || 72% || 71% || colspan="6" | 70%
| |
| − | |- align="center"
| |
| − | | Duration || colspan="5" | 10s || 11s || 12s || 13s || 14s || colspan="6" | 15s || 16s || 17s || 18s || 19s || 20s
| |
| − | |- align="center"
| |
| − | |Recast || 130s || 128s || 126s || 124s || 122s || 120s || colspan="9" | 120s || 118s || 116s || 114s || 112s || 110s
| |
| | |} | | |} |
| − | ===R/Attack Advance===
| + | {{NRing|Head|{{NUI|UIClassFo}} Force}} |
| − | {| class="wikitable"
| + | {{NRing|Body|R|5|PhotonFlare|R/Photon Flare|R/フォトンフレア|Photon Flare |
| − | |- | + | Enables use of the Active Skill "Photon Flare".<br>For a period of time, increase your base T-ATK.|Fo|||||Sapphire}} |
| − | ! width="120px" |
| + | {{NRing|Stat|T-ATK}} || colspan="10" | +150 || +155 || +160 || +165 || +170 || +175 || +180 || +185 || +190 || +195 || +200 |
| − | ! colspan="4" | JP Name
| + | {{NRing|Stat|Duration}} || colspan="5" | 20s || 21s || 22s || 23s || 24s || colspan="6" | 25s || 26s || 27s || 28s || 29s || 30s |
| − | ! colspan="10" | Description
| + | {{NRing|Stat|Cooldown Time}} || 100s || 95s || 90s || 85s || colspan="11" | 80s || 74s || 73s || 72s || 71s || 70s |
| − | ! colspan="4" | Materials
| + | {{NRing|Null}} |
| − | ! colspan="2" | Class Restriction
| + | {{NRing|Body|R|3|FlameTSCharge|R/Flame T S Charge|R/フレイムTSチャージ|Flame Technique Short Charge |
| − | |- | + | Reduces the charge duration of Fire-type Techniques.|Fo|||||Zircon}} |
| − | |[[File:AttackAdvanceRingIcon.png|120px]] | + | {{NRing|Stat|Charge Time}} || 90% || 88% || 86% || 84% || 82% || 80% || 78% || 76% || 74% || 72% || 70% || 68% || 66% || 64% || 62% || 60% || 58% || 56% || 54% || 50% |
| − | | colspan="4" | R/アタックアドバンス | |
| − | | colspan="10" | Increases normal attack power. | |
| − | | colspan="4" | [[Naberius Rock]] x3<br>[[Forest Emerald]] x1 | |
| − | | colspan="2" | {{icons|Braver}} [[Braver]] | |
| − | |- | |
| − | ! Ring Level !! width="50px" | 1 !! width="50px" | 2 !! width="50px" | 3 !! width="50px" | 4 !! width="50px" | 5 !! width="50px" | 6 !! width="50px" | 7 !! width="50px" | 8 !! width="50px" | 9 !! width="50px" | 10 !! width="50px" | 11 !! width="50px" | 12 !! width="50px" | 13 !! width="50px" | 14 !! width="50px" | 15 !! width="50px" | 16 !! width="50px" | 17 !! width="50px" | 18 !! width="50px" | 19 !! width="50px" | 20
| |
| − | |- align="center" | |
| − | | Auto-attack damage increase || 1% || 2% || 3% || 4% || 5% || 6% || 7% || 8% || 9% || 10% || 11% || 12% || 13% || 14% || 15% || 16% || 17% || 18% || 19% || 20% | |
| | |} | | |} |
| − | ===R/EPPR Field===
| |
| − | {| class="wikitable"
| |
| − | |-
| |
| − | ! width="120px" |
| |
| − | ! colspan="4" | JP Name
| |
| − | ! colspan="10" | Description
| |
| − | ! colspan="4" | Materials
| |
| − | ! colspan="2" | Class Restriction
| |
| − | |-
| |
| − | |[[File:EPPRRingIcon.png|120px]]
| |
| − | | colspan="4" | R/EPPRフィールド
| |
| − | | colspan="10" | Creates a field that increases PP recovery when you attack with the enemy's elemental weakness.
| |
| − | | colspan="4" | [[Earth Rock]] x3<br>[[Tokyo Opal]] x1
| |
| − | | colspan="2" | {{icons|Bouncer}} [[Bouncer]]
| |
| − | |-
| |
| − | ! Ring Level !! width="50px" | 1 !! width="50px" | 2 !! width="50px" | 3 !! width="50px" | 4 !! width="50px" | 5 !! width="50px" | 6 !! width="50px" | 7 !! width="50px" | 8 !! width="50px" | 9 !! width="50px" | 10 !! width="50px" | 11 !! width="50px" | 12 !! width="50px" | 13 !! width="50px" | 14 !! width="50px" | 15 !! width="50px" | 16 !! width="50px" | 17 !! width="50px" | 18 !! width="50px" | 19 !! width="50px" | 20
| |
| − | |- align="center"
| |
| − | | PP gain per hit|| colspan="10" | 1.00 || 1.20 || 1.40 || 1.60 || 1.80 || 2.00 || 2.20 || 2.40 || 2.60 || 2.80 || 3.00
| |
| − | |- align="center"
| |
| − | | Duration || colspan="5" | 20s || 25s || 26s || 27s || 28s || 29s || colspan="5" | 30s || 35s || 36s || 37s || 38s || 40s
| |
| − | |-
| |
| − | | Recast || 120s || 118s || 116s || 114s || 112s || colspan="10" | 100s || 90s || 88s || 86s || 84s || 80s
| |
| | |} | | |} |
| − | ===R/Boost Slayer===
| + | {{NRing|Head|{{NUI|UIClassTe}} Techer}} |
| − | {| class="wikitable"
| + | {{NRing|Body|R|6|PPConvert|R/PP Convert|R/コンバート|PP Convert |
| − | |- | + | Enables use of the Active Skill "PP Convert".<br>For a period of time, reduce your maximum HP to increase natural PP regeneration rate.|Te|||||Sapphire}} |
| − | ! width="120px" |
| + | {{NRing|Stat|Passive PP Recovery}} || colspan="10" | +1.00 || +1.10 || +1.20 || +1.30 || +1.40 || +1.50 || +1.60 || +1.70 || +1.80 || 1.90 || +2.00 |
| − | ! colspan="4" | JP Name
| + | {{NRing|Stat|Maximum HP}} || colspan="10" | 75% || 74% || 73% || 72% || 71% || colspan="6" | 70% |
| − | ! colspan="10" | Description
| + | {{NRing|Stat|Duration}} || colspan="5" | 10s || 11s || 12s || 13s || 14s || colspan="6" | 15s || 16s || 17s || 18s || 19s || 20s |
| − | ! colspan="4" | Materials
| + | {{NRing|Stat|Cooldown Time}} || 130s || 128s || 126s || 124s || 122s || 120s || colspan="9" | 120s || 118s || 116s || 114s || 112s || 110s |
| − | ! colspan="2" | Class Restriction
| + | {{NRing|Null}} |
| − | |- | + | {{NRing|Body|R|3|WideSupport|R/Wide Support|R/ワイドサポート|Wide Support |
| − | |[[File:BoostSlayer.png|120px]] | + | Increases the range of Support Techniques.|Te|||||Amber}} |
| − | | colspan="4" | R/ブーストスレイヤー | + | {{NRing|Stat|PP Consumption Rate}} || 120% || 119% || 118% || 117% || 116% || 115% || 114% || 113% || 112% || 111% || 110% || 109% || 108% || 107% || 106% || 105% || 104% || 103% || 102% || 100% |
| − | | colspan="10" | Increases damage towards boosted enemies, and decreases damage from them. | |
| − | | colspan="4" | [[Earth Rock]] x3 | |
| − | | colspan="2" | N/A | |
| − | |- | |
| − | ! Ring Level !! width="50px" | 1 !! width="50px" | 2 !! width="50px" | 3 !! width="50px" | 4 !! width="50px" | 5 !! width="50px" | 6 !! width="50px" | 7 !! width="50px" | 8 !! width="50px" | 9 !! width="50px" | 10 !! width="50px" | 11 !! width="50px" | 12 !! width="50px" | 13 !! width="50px" | 14 !! width="50px" | 15 !! width="50px" | 16 !! width="50px" | 17 !! width="50px" | 18 !! width="50px" | 19 !! width="50px" | 20
| |
| − | |- align="center" | |
| − | | Damage increase || colspan="5" | 1% || colspan="5" | 2% || colspan="10" | 3% | |
| − | |- align="center" | |
| − | | Damage reduction || 1% || 2% || 3% || 4% || 5% || 6% || 7% || 8% || 9% || 10% || 11% || 12% || 13% || 14% || 15% || 16% || 17% || 18% || 19% || 20% | |
| | |} | | |} |
| − | ===R/Burn Guard===
| |
| − | {| class="wikitable"
| |
| − | |-
| |
| − | ! width="120px" |
| |
| − | ! colspan="4" | JP Name
| |
| − | ! colspan="10" | Description
| |
| − | ! colspan="4" | Materials
| |
| − | ! colspan="2" | Class Restriction
| |
| − | |-
| |
| − | |[[File:BurnGaurdRingIcon.png|120px]]
| |
| − | | colspan="4" | R/バーンガード
| |
| − | | colspan="10" | Grants resistance to the Burn status ailment.
| |
| − | | colspan="4" | [[Naberius Rock]] x3<br>[[Pure Photon]] x15
| |
| − | | colspan="2" | N/A
| |
| − | |-
| |
| − | ! Ring Level !! width="50px" | 1 !! width="50px" | 2 !! width="50px" | 3 !! width="50px" | 4 !! width="50px" | 5 !! width="50px" | 6 !! width="50px" | 7 !! width="50px" | 8 !! width="50px" | 9 !! width="50px" | 10 !! width="50px" | 11 !! width="50px" | 12 !! width="50px" | 13 !! width="50px" | 14 !! width="50px" | 15 !! width="50px" | 16 !! width="50px" | 17 !! width="50px" | 18 !! width="50px" | 19 !! width="50px" | 20
| |
| − | |- align="center"
| |
| − | | Resist || 50% || 51% || 52% || 53% || 54% || 56% || 58% || 60% || 62% || 64% || 66% || 68% || 70% || 74% || 78% || 82% || 86% || 90% || 94% || 100%
| |
| | |} | | |} |
| − | ===R/Freeze Guard===
| + | {{NRing|Head|{{NUI|UIClassSu}} Summoner}} |
| − | {| class="wikitable" | + | {{NRing|Body|R|5|HPRestorate|R/HP Restorate|R/HPリストレイト|HP Restorate |
| − | |- | + | Restores HP over time when your HP falls below a certain percentage.|Su|||||Hematite}} |
| − | ! width="120px" |
| + | {{NRing|Stat|Recovery Rate}} || colspan="15" | 5.00% || 5.50% || 6.00% || 6.50% || 7.00% || 7.50% |
| − | ! colspan="4" | JP Name
| + | {{NRing|Stat|Recovery Interval}} || colspan="11" | 10s || 9s || 8s || 7s || 6s || colspan="5" | 5s |
| − | ! colspan="10" | Description
| + | {{NRing|Stat|Maximum Activation HP}} || 50% || 55% || 60% || 65% || 70% || 75% || 80% || 85% || 90% || 95% || colspan="10" | 100% |
| − | ! colspan="4" | Materials
| |
| − | ! colspan="2" | Class Restriction!
| |
| − | |- | |
| − | |[[File:FreezeGuardRingIcon.png|120px]] | |
| − | | colspan="4" | R/フリーズガード | |
| − | | colspan="10" | Grants resistance to the Freeze status ailment. | |
| − | | colspan="4" | [[Vopar Rock]] x3<br>[[Pure Photon]] x15 | |
| − | | colspan="2" | N/A | |
| − | |- | |
| − | ! Ring Level !! width="50px" | 1 !! width="50px" | 2 !! width="50px" | 3 !! width="50px" | 4 !! width="50px" | 5 !! width="50px" | 6 !! width="50px" | 7 !! width="50px" | 8 !! width="50px" | 9 !! width="50px" | 10 !! width="50px" | 11 !! width="50px" | 12 !! width="50px" | 13 !! width="50px" | 14 !! width="50px" | 15 !! width="50px" | 16 !! width="50px" | 17 !! width="50px" | 18 !! width="50px" | 19 !! width="50px" | 20
| |
| − | |- align="center" | |
| − | | Resist || 50% || 51% || 52% || 53% || 54% || 56% || 58% || 60% || 62% || 64% || 66% || 68% || 70% || 74% || 78% || 82% || 86% || 90% || 94% || 100% | |
| | |} | | |} |
| − | ===R/J-Reversal Cover===
| |
| − | {| class="wikitable"
| |
| − | |-
| |
| − | ! width="120px" |
| |
| − | ! colspan="4" | JP Name
| |
| − | ! colspan="10" | Description
| |
| − | ! colspan="4" | Materials
| |
| − | ! colspan="2" | Class Restriction
| |
| − | |-
| |
| − | |[[File:J-ReversalCoverRingIcon.png|120px]]
| |
| − | | colspan="4" | R/ Jリバーサルカバー
| |
| − | | colspan="10" | Just Reversals recover a percentage of your max HP.
| |
| − | | colspan="4" | [[Earth Rock]] x3<br>[[Vegas Diamond]] x1
| |
| − | | colspan="2" | {{icons|Braver}} [[Braver]]
| |
| − | |-
| |
| − | ! Ring Level !! width="50px" | 1 !! width="50px" | 2 !! width="50px" | 3 !! width="50px" | 4 !! width="50px" | 5 !! width="50px" | 6 !! width="50px" | 7 !! width="50px" | 8 !! width="50px" | 9 !! width="50px" | 10 !! width="50px" | 11 !! width="50px" | 12 !! width="50px" | 13 !! width="50px" | 14 !! width="50px" | 15 !! width="50px" | 16 !! width="50px" | 17 !! width="50px" | 18 !! width="50px" | 19 !! width="50px" | 20
| |
| − | |- align="center"
| |
| − | | Recovery Amount || 5% || 5.5% || 6% || 6.5% || 7% || 7.5% || 8% || 8.5% || 9% || 9.5% || 10% || 10.5% || 11% || 11.5% || 12% || 12.5% || 13% || 13.5% || 14% || 15%
| |
| | |} | | |} |
| − | ===R/Heal Share=== | + | |
| − | {| class="wikitable" | + | ===Utility Rings=== |
| − | |- | + | {{NRing|Head|Effort Symbol}} |
| − | ! width="120px" |
| + | {{NRing|Body|R|5|[[File:UIItemEffortSymbolHu.png|42px|link=]][[File:UIItemEffortSymbolFi.png|42px|link=]][[File:UIItemEffortSymbolBo.png|42px|link=]]<BR>[[File:UIItemEffortSymbolRa.png|42px|link=]][[File:UIItemEffortSymbolGu.png|42px|link=]][[File:UIItemEffortSymbolBr.png|42px|link=]]<BR>[[File:UIItemEffortSymbolFo.png|42px|link=]][[File:UIItemEffortSymbolTe.png|42px|link=]][[File:UIItemEffortSymbolSu.png|42px|link=]]<BR>[[File:UIItemEffortSymbolHr.png|42px|link=]][[File:UIItemEffortSymbolPh.png|42px|link=]][[File:UIItemEffortSymbolEt.png|42px|link=]]|R/Effort Symbol|R/エフォートシンボル|Effort Symbol |
| − | ! colspan="4" | JP Name
| + | Increases damage and Critical Hit Rate while reducing damage taken.<br>Displays a visual effect in Quests.<br>'''Cannot be traded.'''||||||Effort}} |
| − | ! colspan="10" | Description
| + | {{NRing|Stat|Power}} || colspan="3" | 100.10% || colspan="2" | 100.20% || colspan="2" | 100.30% || colspan="2" | 100.40% || colspan="2" | 100.5% || colspan="2" | 100.60% || colspan="2" | 100.70% || colspan="2" | 100.80% || colspan="2" | 100.90% || 101.00% |
| − | ! colspan="4" | Materials
| + | {{NRing|Stat|Critical Rate Increase}} || 0.50% || 1.00% || 1.50% || 2.00% || 2.50% || 3.00% || 3.50% || 4.00% || 4.50% || 5.00% || 5.50% || 6.00% || 6.50% || 7.00% || 7.50% || 8.00% || 8.50% || 9.00% || 9.50% || 10.00% |
| − | ! colspan="2" | Class Restriction
| + | {{NRing|Stat|Damage Received}} || colspan="10" | 99% || colspan="5" | 98% || colspan="5" | 97% |
| − | |- | |
| − | |[[File:HealShareRingIcon.png|120px]] | |
| − | | colspan="4" | R/ ヒールシェア | |
| − | | colspan="10" | A portion of your HP recovered heals characters nearby. | |
| − | | colspan="4" | [[Earth Rock]] x3<br>[[Vegas Diamond]] x1 | |
| − | | colspan="2" | {{icons|Bouncer}} [[Bouncer]] | |
| − | |- | |
| − | ! Ring Level !! width="50px" | 1 !! width="50px" | 2 !! width="50px" | 3 !! width="50px" | 4 !! width="50px" | 5 !! width="50px" | 6 !! width="50px" | 7 !! width="50px" | 8 !! width="50px" | 9 !! width="50px" | 10 !! width="50px" | 11 !! width="50px" | 12 !! width="50px" | 13 !! width="50px" | 14 !! width="50px" | 15 !! width="50px" | 16 !! width="50px" | 17 !! width="50px" | 18 !! width="50px" | 19 !! width="50px" | 20
| |
| − | |- align="center" | |
| − | | Heal rate || 1% || 2% || 3% || 4% || 5% || 6% || 7% || 8% || 9% || 10% || 11% || 12% || 13% || 14% || 15% || 16% || 17% || 18% || 19% || 20% | |
| | |} | | |} |
| − | ===R/Adrenaline===
| |
| − | {| class="wikitable"
| |
| − | |-
| |
| − | ! width="120px" |
| |
| − | ! colspan="4" | JP Name
| |
| − | ! colspan="10" | Description
| |
| − | ! colspan="4" | Materials
| |
| − | ! colspan="2" | Class Restriction
| |
| − | |-
| |
| − | |[[File:FreezeGuardRingIcon.png|120px]]
| |
| − | | colspan="4" | R/ アドレナリン
| |
| − | | colspan="10" | Extends the duration of Shifta and Deband on yourself. ''Note: This does not increase the maximum duration, only the duration gained per tick''
| |
| − | | colspan="4" | [[Vopar Rock]] x3<br>[[Facility Tourmaline]] x1
| |
| − | | colspan="2" | {{icons|Fighter}} [[Fighter]]
| |
| − | |-
| |
| − | ! Ring Level !! width="50px" | 1 !! width="50px" | 2 !! width="50px" | 3 !! width="50px" | 4 !! width="50px" | 5 !! width="50px" | 6 !! width="50px" | 7 !! width="50px" | 8 !! width="50px" | 9 !! width="50px" | 10 !! width="50px" | 11 !! width="50px" | 12 !! width="50px" | 13 !! width="50px" | 14 !! width="50px" | 15 !! width="50px" | 16 !! width="50px" | 17 !! width="50px" | 18 !! width="50px" | 19 !! width="50px" | 20
| |
| − | |- align="center"
| |
| − | | Effect duration || +10s || +11s || +12s || +13s || +14s || +15s || +16s || +17s || +18s || +19s || +20s || +21s || +22s || +23s || +24s || +25s || +26s || +27s || +28s || +30s
| |
| | |} | | |} |
| − | ===R/Wide Support===
| + | {{NRing|Head|Guard}} |
| − | {| class="wikitable"
| + | {{NRing|Body|R|3|BurnGuard|R/Burn Guard|R/バーンガード|Burn Guard |
| − | |- | + | Grants resistance to the "Burn" Status.||||||Naberius}} |
| − | ! width="120px" |
| + | {{NRing|Stat|Resistance}} || 50% || 51% || 52% || 53% || 54% || 56% || 58% || 60% || 62% || 64% || 66% || 68% || 70% || 74% || 78% || 82% || 86% || 90% || 94% || 100% |
| − | ! colspan="4" | JP Name
| + | {{NRing|Null}} |
| − | ! colspan="10" | Description
| + | {{NRing|Body|R|3|FreezeGuard|R/Freeze Guard|R/フリーズガード|Freeze Guard |
| − | ! colspan="4" | Materials
| + | Grants resistance to the "Freeze" Status.||||||Wopal}} |
| − | ! colspan="2" | Class Restriction
| + | {{NRing|Stat|Resistance}} || 50% || 51% || 52% || 53% || 54% || 56% || 58% || 60% || 62% || 64% || 66% || 68% || 70% || 74% || 78% || 82% || 86% || 90% || 94% || 100% |
| − | |- | + | {{NRing|Null}} |
| − | | | + | {{NRing|Body|R|3|ShockGuard|R/Shock Guard|R/ショックガード|Shock Guard |
| − | | colspan="4" | R/ワイドサポート | + | Grants resistance to the "Shock" Status.||||||Lillipa}} |
| − | | colspan="10" | Increases the area of effect of Resta, Anti, Shifta, and Deband.
| + | {{NRing|Stat|Resistance}} || 50% || 51% || 52% || 53% || 54% || 56% || 58% || 60% || 62% || 64% || 66% || 68% || 70% || 74% || 78% || 82% || 86% || 90% || 94% || 100% |
| − | | colspan="4" | [[Naberius Rock]] x3<br>[[Tundra Amber]] x1 | + | {{NRing|Null}} |
| − | | colspan="2" | {{icons|Techer}} [[Techer]] | + | {{NRing|Body|R|3|MirageGuard|R/Mirage Guard|R/ミラージュガード|Mirage Guard |
| − | |- | + | Grants resistance to the "Mirage" Status.||||||Earth}} |
| − | ! Ring Level !! width="50px" | 1 !! width="50px" | 2 !! width="50px" | 3 !! width="50px" | 4 !! width="50px" | 5 !! width="50px" | 6 !! width="50px" | 7 !! width="50px" | 8 !! width="50px" | 9 !! width="50px" | 10 !! width="50px" | 11 !! width="50px" | 12 !! width="50px" | 13 !! width="50px" | 14 !! width="50px" | 15 !! width="50px" | 16 !! width="50px" | 17 !! width="50px" | 18 !! width="50px" | 19 !! width="50px" | 20
| + | {{NRing|Stat|Resistance}} || 50% || 51% || 52% || 53% || 54% || 56% || 58% || 60% || 62% || 64% || 66% || 68% || 70% || 74% || 78% || 82% || 86% || 90% || 94% || 100% |
| − | |- align="center" | + | {{NRing|Null}} |
| − | | PP Cost || 120% || 119% || 118% || 117% || 116% || 115% || 114% || 113% || 112% || 111% || 110% || 109% || 108% || 107% || 106% || 105% || 104% || 103% || 102% || 100% | + | {{NRing|Body|R|3|PanicGuard|R/Panic Guard|R/パニックガード|Panic Guard |
| | + | Grants resistance to the "Panic" Status.||||||Harkotan}} |
| | + | {{NRing|Stat|Resistance}} || 50% || 51% || 52% || 53% || 54% || 56% || 58% || 60% || 62% || 64% || 66% || 68% || 70% || 74% || 78% || 82% || 86% || 90% || 94% || 100% |
| | + | {{NRing|Null}} |
| | + | {{NRing|Body|R|3|PoisonGuard|R/Poison Guard|R/ポイズンガード|Poison Guard |
| | + | Grants resistance to the "Poison" Status.||||||Amduscia}} |
| | + | {{NRing|Stat|Resistance}} || 50% || 51% || 52% || 53% || 54% || 56% || 58% || 60% || 62% || 64% || 66% || 68% || 70% || 74% || 78% || 82% || 86% || 90% || 94% || 100% |
| | |} | | |} |
| − | ===R/J Reversal PP Gain===
| |
| − | {| class="wikitable"
| |
| − | |-
| |
| − | ! width="120px" |
| |
| − | ! colspan="4" | JP Name
| |
| − | ! colspan="10" | Description
| |
| − | ! colspan="4" | Materials
| |
| − | ! colspan="2" | Class Restriction
| |
| − | |-
| |
| − | |
| |
| − | | colspan="4" | R/JリバーサルPPゲイン
| |
| − | | colspan="10" | Restores PP when using a Just Reversal.
| |
| − | | colspan="4" | [[Amduscia Rock]] x3<br>[[V. Caverns Garnet]] x1
| |
| − | | colspan="2" | {{icons|Bouncer}} [[Bouncer]]
| |
| − | |-
| |
| − | ! Ring Level !! width="50px" | 1 !! width="50px" | 2 !! width="50px" | 3 !! width="50px" | 4 !! width="50px" | 5 !! width="50px" | 6 !! width="50px" | 7 !! width="50px" | 8 !! width="50px" | 9 !! width="50px" | 10 !! width="50px" | 11 !! width="50px" | 12 !! width="50px" | 13 !! width="50px" | 14 !! width="50px" | 15 !! width="50px" | 16 !! width="50px" | 17 !! width="50px" | 18 !! width="50px" | 19 !! width="50px" | 20
| |
| − | |- align="center"
| |
| − | | PP Recovery || 1% || 2% || 3% || 4% || 5% || 6% || 7% || 8% || 9% || 10% || 11% || 12% || 13% || 14% || 15% || 16% || 17% || 18% || 19% || 20%
| |
| | |} | | |} |
| − | ===R/Healing Guard===
| + | {{NRing|Head|Other}} |
| − | {| class="wikitable" | + | {{NRing|Body|R|4|BoostSlayer|R/Boost Slayer|R/ブーストスレイヤー|Boost Slayer |
| − | |- | + | Increase damage dealt to Boosted enemies and reduce damage taken from them.||||||Opal}} |
| − | ! width="120px" |
| + | {{NRing|Stat|Power}} || colspan="5" | 101% || colspan="5" | 102% || colspan="10" | 103% |
| − | ! colspan="4" | JP Name
| + | {{NRing|Stat|Damage Received}} || 99% || 98% || 97% || 96% || 95% || 94% || 93% || 92% || 91% || 90% || 89% || 88% || 87% || 86% || 85% || 84% || 83% || 82% || 81% || 80% |
| − | ! colspan="10" | Description
| + | {{NRing|Null}} |
| − | ! colspan="4" | Materials
| + | {{NRing|Body|R|3|WeakHitPPGain|R/Weak Hit PP Gain|R/ウィークヒットPPゲイン|Weak Hit PP Gain |
| − | ! colspan="2" | Class Restriction
| + | Increase active PP restoration when attacking a weak point.||||||Lapis Lazuli}} |
| − | |- | + | {{NRing|Stat|Active PP Recovery}} || 101% || 102% || 103% || 104% || 105% || 106% || 107% || 108% || 109% || 110% || 111% || 112% || 113% || 114% || 115% || 116% || 117% || 118% || 119% || 120% |
| − | | | + | {{NRing|Null}} |
| − | | colspan="4" | R/ヒーリングガード | + | {{NRing|Body|R|3|FriendsProtection|R/Friends Protection|R/フレンズプロテクション|Friends Protection |
| − | | colspan="10" | Just Guards heals the player and all other players in close range. | + | A Ring of friendship between Itsuki, RINA, and friends.<br>Reduces damage taken.<br>'''Cannot be traded.'''||||||}} |
| − | | colspan="4" | [[Naberius Rock]] x3<br>[[Tundra Amber]] x1 | + | {{NRing|Stat|Damage Received}} || colspan="20" | 95% |
| − | | colspan="2" | {{icons|Hunter}} [[Hunter]] | |
| − | |- | |
| − | ! Ring Level !! width="50px" | 1 !! width="50px" | 2 !! width="50px" | 3 !! width="50px" | 4 !! width="50px" | 5 !! width="50px" | 6 !! width="50px" | 7 !! width="50px" | 8 !! width="50px" | 9 !! width="50px" | 10 !! width="50px" | 11 !! width="50px" | 12 !! width="50px" | 13 !! width="50px" | 14 !! width="50px" | 15 !! width="50px" | 16 !! width="50px" | 17 !! width="50px" | 18 !! width="50px" | 19 !! width="50px" | 20
| |
| − | |- align="center" | |
| − | | HP Recovery || 1% || 1.2% || 1.4% || 1.6% || 1.8% || 2.2% || 2.4% || 2.6% || 2.8% || 3% || 3.2% || 3.4% || 3.6% || 3.8% || 4% || 4.2% || 4.4% || 4.6% || 4.8% || 5% | |
| | |} | | |} |
| − | ===R/Tech Arts JA PP Save===
| |
| − | {| class="wikitable"
| |
| − | |-
| |
| − | ! width="120px" |
| |
| − | ! colspan="4" | JP Name
| |
| − | ! colspan="10" | Description
| |
| − | ! colspan="4" | Materials
| |
| − | ! colspan="2" | Class Restriction
| |
| − | |-
| |
| − | | [[File:TAJAPPSaveRingIcon.png|120px]]
| |
| − | | colspan="4" | R/テックアーツJAPPS
| |
| − | | colspan="10" | Reduces the PP cost of Techs and Photon Arts when chaining together successive different PAs or Techniques via Just Attack.
| |
| − | | colspan="4" | [[Lilipa Rock]] x3<br>[[Sub Tunnels Peridot]] x1
| |
| − | | colspan="2" | {{icons|Fighter}} [[Fighter]]
| |
| − | |-
| |
| − | ! Ring Level !! width="50px" | 1 !! width="50px" | 2 !! width="50px" | 3 !! width="50px" | 4 !! width="50px" | 5 !! width="50px" | 6 !! width="50px" | 7 !! width="50px" | 8 !! width="50px" | 9 !! width="50px" | 10 !! width="50px" | 11 !! width="50px" | 12 !! width="50px" | 13 !! width="50px" | 14 !! width="50px" | 15 !! width="50px" | 16 !! width="50px" | 17 !! width="50px" | 18 !! width="50px" | 19 !! width="50px" | 20
| |
| − | |- align="center"
| |
| − | | PP Cost || 95% || colspan="3'" |94% || 93% || colspan="3" |92% || 91% || colspan="3" |90% || 89% || colspan="3" |88% || 87% || colspan="2" |86% || 85%
| |
| | |} | | |} |
| − | ===R/Effort Symbol===
| |
| | | | |
| − | '''Notes:'''
| + | ===Combined Skill Rings=== |
| − | * There is one of these rings for each class.
| + | {{NRing|Head|Combination}} |
| − | * These rings always have 100% grind success rate.
| + | {{NRing|Body|R|4|CStrike|R/C-Strike|R/Cストライク|Critical Strike |
| − | * The '''[Class] Material''' items are only required for grinding starting from Lv10 grind level. Before that, only {{icons|Tool}} [[Grinder|Grinders]] are required.
| + | Increases critical damage and critical hit rate percentage.|Fi|||||}} |
| − | * The {{icons|Ticket}} '''Ace of [Class]''' sticker is only necessary for the Lv20 grind level.
| + | {{NRing|Stat|Critical Power}} || colspan="20" | 103% |
| − | | + | {{NRing|Stat|Critical Rate Increase}} || colspan="20" | 20% |
| − | {| class="wikitable"
| + | {{NRing|Null}} |
| − | |- | + | {{NRing|Body|R|4|PKeeper|R/P-Keeper|R/Pキーパー|Perfect Keeper |
| − | ! colspan="3" |
| + | Increases damage when HP is above a certain value.|Gu|||||}} |
| − | ! colspan="4" | JP Name
| + | {{NRing|Stat|Power}} || colspan="20" | 103% |
| − | ! colspan="10" | Description
| + | {{NRing|Stat|Minimum Activation HP}} || colspan="20" | 75% |
| − | ! colspan="4" | Materials
| + | |} |
| − | ! colspan="2" | Class Restriction
| |
| − | |- | |
| − | | [[File:EffortSymbolHuIcon.png|60px]]||[[File:CriticalStrikeRRingIcon.png|60px]]||[[File:EffortSymbolRaIcon.png|60px]]
| |
| − | | colspan="4" rowspan="3" | R/エフォートシンボルHu<br>R/エフォートシンボルFi<br>R/エフォートシンボルRa<br>R/エフォートシンボルGu<br>R/エフォートシンボルFo<br>R/エフォートシンボルTe<br>R/エフォートシンボルBr<br>R/エフォートシンボルBo<br>R/エフォートシンボルSu
| |
| − | | colspan="10" rowspan="3" | Raises damage and crit rate, and reduces damage received. Also produces a unique visual effect depicting the ring's class on the character's right wrist when worn.
| |
| − | | colspan="4" rowspan="3" | [[Hu Material]] x5<br>[[Fi Material]] x5<br>[[Ra Material]] x5<br>[[Gu Material]] x5<br>[[Fo Material]] x5<br>[[Te Material]] x5<br>[[Br Material]] x5<br>[[Bo Material]] x5<br>[[Su Material]] x5<br>{{icons|Ticket}} [[Ace of Hunter]] x1<br>{{icons|Ticket}} [[Ace of Fighter]] x1<br>{{icons|Ticket}} [[Ace of Ranger]] x1<br>{{icons|Ticket}} [[Ace of Gunner]] x1<br>{{icons|Ticket}} [[Ace of Force]] x1<br>{{icons|Ticket}} [[Ace of Techer]] x1<br>{{icons|Ticket}} [[Ace of Braver]] x1<br>{{icons|Ticket}} [[Ace of Bouncer]] x1<br>{{icons|Ticket}} [[Ace of Summoner]] x1 | |
| − | | colspan="2" rowspan="3" | N/A | |
| − | |- | |
| − | |[[File:PerfectKeeperSRingIcon.png|60px]]||[[File:PhotonFlareRingIcon.png|60px]]||[[File:WideSupportRingIcon.png|60px]] | |
| − | |-
| |
| − | |[[File:EffortSymbolBrIcon.png|60px]]||[[File:EffortSymbolBoIcon.png|60px]]||[[File:EffortSymbolSuIcon.png|60px]]
| |
| − | |- | |
| − | ! colspan="3" |Ring Level !! width="50px" | 1 !! width="50px" | 2 !! width="50px" | 3 !! width="50px" | 4 !! width="50px" | 5 !! width="50px" | 6 !! width="50px" | 7 !! width="50px" | 8 !! width="50px" | 9 !! width="50px" | 10 !! width="50px" | 11 !! width="50px" | 12 !! width="50px" | 13 !! width="50px" | 14 !! width="50px" | 15 !! width="50px" | 16 !! width="50px" | 17 !! width="50px" | 18 !! width="50px" | 19 !! width="50px" | 20
| |
| − | |- align="center" | |
| − | | colspan="3" |Damage increase|| colspan="3" | 100.1%|| colspan="2" |100.2%|| colspan="2" |100.3%|| colspan="2" |100.4%|| colspan="2" |100.5%|| colspan="2" |100.6%|| colspan="2" |100.7%|| colspan="2" |100.8%|| colspan="2" |100.9%||101% | |
| − | |- align="center"
| |
| − | | colspan="3" |Critical chance increase|| 0.5% || 1% || 1.5% || 2% || 2.5% || 3% || 3.5% || 4% || 4.5% || 5% || 5.5% || 6% || 6.5% || 7% || 7.5% || 8% || 8.5% || 9% || 9.5% || 10% | |
| − | |- align="center" | |
| − | | colspan="3" |Damage received|| colspan="10" |99%|| colspan="5" |98%|| colspan="5" |97% | |
| | |} | | |} |


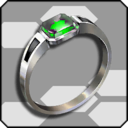


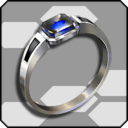


