Difference between revisions of "Special Enemies"
| (6 intermediate revisions by the same user not shown) | |||
| Line 174: | Line 174: | ||
{{EnemyRow|darkemperappy|[[File:UIEnemyDarkEmperappy.png|128px|link=]]|Dark Emperappy||Main Quest EP5-4-1||{{icons|Light}}|||The powered up form of denizen of Apprentice Aika's Rappy. Its hugs inflict massive damage.<br>Qualifies as a normal Emperappy for purposes of enemy elimination.}} | {{EnemyRow|darkemperappy|[[File:UIEnemyDarkEmperappy.png|128px|link=]]|Dark Emperappy||Main Quest EP5-4-1||{{icons|Light}}|||The powered up form of denizen of Apprentice Aika's Rappy. Its hugs inflict massive damage.<br>Qualifies as a normal Emperappy for purposes of enemy elimination.}} | ||
| + | |||
| + | |} | ||
==Nyau== | ==Nyau== | ||
| − | {| | + | {{EnemyHeader}} |
| − | + | ||
| − | + | {{EnemyRow|nyau|[[File:NyauIcon.png|128px]]|Nyau|ニャウ|Anywhere||{{icons|Dark}}||Sword|Highly resistant to direct damage, but its weapon can be destroyed after it drops it for a quick victory.<br>Will often summon a boss after being defeated.}} | |
| − | + | ||
| − | + | {{EnemyRow|ceremonyau|[[File:CeremoNyauIcon.png|128px]]|Ceremo Nyau|セレモ・ニャウ|Anywhere (Halloween)||{{icons|Dark}}||Weapon|Holiday variant of Nyau. Appears during the Halloween season.}} | |
| − | + | ||
| − | + | {{EnemyRow|noiyanyau|[[File:NoiyaNyauIcon.png|128px]]|Noiya Nyau|ノイヤ・ニャウ|Anywhere (Christmas)||{{icons|Dark}}||Weapon|Holiday variant of Nyau. Appears during the Christmas season.}} | |
| − | + | ||
| − | + | {{EnemyRow|torokuronyau|[[File:ToroKuroNyauIcon.png|128px]]|Toro Kuro Nyau|トロクロ・ニャウ|Anywhere (Event)||{{icons|Dark}}||Weapon|Special variant of Nyau. Appears during a certain collaboration.}} | |
| − | | | + | |
| + | {{EnemyRow|sakuranyau|[[File:SakuraNyauIcon.png|128px]]|Sakura Nyau|サクラ・ニャウ|Anywhere (Spring)||{{icons|Dark}}||Weapon|Holiday variant of Nyau. Appears during the Spring season.}} | ||
| + | |||
| + | {{EnemyRow|sonicnyau|[[File:SonicNyauIcon.png|128px]]|Sonic Nyau|ソニック・ニャウ|Anywhere (Sonic)||{{icons|Dark}}||Weapon|Nyau dressed up as SEGA's mascot, Sonic the Hedgehog. Appears to celebrate Sonic the Hedgehog's birthday.}} | ||
| + | |||
| + | {{EnemyRow|summernyau|[[File:SummerNyauIcon.png|128px]]|Summer Nyau|サマー・ニャウ|Anywhere (Summer)||{{icons|Dark}}||Weapon|Holiday variant of Nyau. Appears during the Summer season.}} | ||
| − | + | {{EnemyRow|lunanyau|[[File:LunaNyauIcon.png|128px]]|Luna Nyau|ルーナ・ニャウ|Anywhere (Moon Viewing)||{{icons|Dark}}||Weapon|Holiday variant of Nyau. Appears during the Moon Viewing season.}} | |
| − | |||
| − | |||
| − | |||
| − | |||
| − | |||
| − | |||
| − | |||
| − | |||
| − | |||
| − | |||
| − | |||
| − | |||
| − | |||
| − | |||
| − | |||
| − | |||
| − | |||
| − | |||
| − | |||
| − | |||
| − | |||
| − | |||
| − | |||
| − | |||
| − | |||
| − | |||
| − | |||
| − | |||
| − | |||
| − | |||
| − | |||
| − | |||
| − | |||
| − | |||
| − | |||
| − | |||
| − | |||
| − | |||
| − | |||
| − | |||
| − | |||
| − | |||
| − | |||
| − | |||
| − | |||
| − | |||
| − | |||
| − | |||
| − | |||
| − | |||
| − | |||
| − | |||
| − | |||
| − | |||
| − | |||
| − | |||
| − | |||
| − | |||
| − | |||
| − | |||
| − | |||
| − | |||
| − | |||
| − | |||
| − | |||
| − | |||
| − | |||
| − | |||
| − | |||
| − | |||
| − | |||
| − | |||
|} | |} | ||
==Lillipa== | ==Lillipa== | ||
| − | { | + | {{EnemyHeader}} |
| − | |||
| − | |||
| − | |||
| − | |||
| − | |||
| − | |||
| − | |||
| − | |||
| − | |||
| − | + | {{EnemyRow|barbarillipan|[[File:BarbarillipanIcon.png|128px]]|Barbarillipan|バルバリリーパ|Lillipa|Lv. 1+ | |
| − | |||
| − | |||
| − | |||
| − | |||
| − | |||
| − | |||
| − | |||
* {{Props|Lilli Soul}} | * {{Props|Lilli Soul}} | ||
| − | * {{Rarity|7}}{{icons|Weapon Camo}}{{icons|Rods}} [[*Lilli Shaft]] | + | * {{Rarity|7}} {{icons|Weapon Camo}} {{icons|Rods}} [[*Lilli Shaft]] |
Lv. 31+ | Lv. 31+ | ||
| − | * {{Rarity|8}}{{icons|Partizans}} [[Spardion]] | + | * {{Rarity|8}} {{icons|Partizans}} [[Spardion]] |
| − | * {{Rarity|8}}{{icons|Gunslashes}} [[Signo Braver]] | + | * {{Rarity|8}} {{icons|Gunslashes}} [[Signo Braver]] |
| − | * {{Rarity|8}}{{icons|Twin Machine Guns}} [[Sparmachinegun]] | + | * {{Rarity|8}} {{icons|Twin Machine Guns}} [[Sparmachinegun]] |
| − | * {{Rarity|8}}{{icons|Wands}} [[Guarditorch]] | + | * {{Rarity|8}} {{icons|Wands}} [[Guarditorch]] |
Lv. 41+ | Lv. 41+ | ||
| − | * {{Rarity|10}}{{icons|Rods}} [[Toralli Shaft]] | + | * {{Rarity|10}} {{icons|Rods}} [[Toralli Shaft]] |
Lv. 51+ | Lv. 51+ | ||
| − | * {{Rarity|10}}{{icons|Assault Rifles}} [[Signo Head Gun]] | + | * {{Rarity|10}} {{icons|Assault Rifles}} [[Signo Head Gun]] |
| − | * {{Rarity|10}}{{icons|Launchers}} [[Signo Head Launcher]] | + | * {{Rarity|10}} {{icons|Launchers}} [[Signo Head Launcher]] |
Lv. 61+ | Lv. 61+ | ||
| − | * {{Rarity|12}}{{icons|Double Sabers}} [[Lili Piece]] | + | * {{Rarity|12}} {{icons|Double Sabers}} [[Lili Piece]] |
| − | * {{Rarity|12}}{{icons|Katanas}} [[ | + | * {{Rarity|12}} {{icons|Katanas}} [[Sakus Piece]] |
| − | * {{Rarity|12}}{{icons|Rods}} [[Canaropp]] | + | * {{Rarity|12}} {{icons|Rods}} [[Canaropp]]|{{icons|Lightning}}||Head|A giant, mutated Lillipan. Throws items from the container on its back, each with differing effects.<br>Resilient to damage dealt from behind.}} |
| − | + | ||
| − | |||
| − | |||
| − | |||
| − | |||
|} | |} | ||
| − | == | + | ==Collaboration== |
| − | { | + | {{EnemyHeader}} |
| − | |||
| − | |||
| − | |||
| − | |||
| − | |||
| − | |||
| − | |||
| − | |||
| − | |||
| − | + | {{EnemyRow|cougarnx|[[File:CougarNXIcon.png|128px]]|Cougar NX|クーガーNX|Anywhere||{{icons|Lightning}}||Arms<br>Legs<br>Satellite Bunker|An Assault-type Blast Runner outfitted with Cougar NX series parts. Wields several weapons, including the "D92 Janus" submachine guns and the "SW-Teardowner" greatsword.<br>Respawns after taking a certain amount of damage, becoming more aggressive in the process.<br>Summons the "Satellite Bunker" BU weapon at low health. Deal enough damage to the weapon or breakable parts to incapacitate Cougar NX temporarily.<br>Vulnerable to the Shock status.}} | |
| − | |||
| − | |||
| − | |||
| − | |||
| − | |||
| − | |||
| − | < | ||
| − | |||
| − | |||
| − | |||
| − | Summons | ||
| − | |||
| − | |||
| − | < | ||
| − | |||
| − | |||
| − | |||
| − | |||
| − | |||
| − | |||
| − | |||
| − | |||
| − | |||
| − | + | {{EnemyRow|cougarnxace|[[File:CougarNXACEIcon.png|128px]]|Cougar NX ACE|クーガーNX・ACE|Anywhere||{{icons|Lightning}}||Arms<br>Legs<br>Satellite Bunker|Rare variant of Cougar NX.}} | |
| − | {| | ||
| − | |||
| − | |||
| − | |||
| − | |||
| − | |||
| − | |||
| − | |||
| − | |||
| − | | | ||
| − | + | {{EnemyRow|knightgear|[[File:KnightGearIcon.png|128px]]|Knight Gear|ナイトギア|Anywhere||{{icons|Fire}}{{icons|Lightning}}|Sword<br>Shield||}} | |
| − | |||
| − | |||
| − | |||
| − | |||
| − | |||
| − | |||
| − | |||
| − | |||
| − | |||
| − | |||
| − | |||
| − | |||
| − | |||
| − | |||
| − | |||
| − | |||
| − | |||
| − | |||
| − | + | {{EnemyRow|magiknightgear|[[File:MagiKnightGearIcon.png|128px]]|Magi-Knight Gear|魔導騎士ナイトギア|Anywhere||{{icons|Fire}}{{icons|Lightning}}|Sword<br>Shield||Rare variant of Knight Gear.}} | |
| − | {| | ||
| − | |||
| − | |||
| − | |||
| − | |||
| − | |||
| − | |||
| − | |||
| − | |||
| − | | | ||
| − | + | {{EnemyRow|odin|[[File:OdinIcon.png|128px]]|Odin|オーディン|Anywhere<br>Parallel Area|Lv. 1+ | |
| − | + | * {{Rarity|8}} {{icons|Weapon Camo}}{{icons|Swords}}{{icons|Partizans}}{{icons|Double Sabers}} [[*Zantetsuken]] | |
| − | |||
| − | |||
| − | |||
| − | |||
| − | * {{Rarity|8}}{{icons|Weapon Camo}}{{icons|Swords}}{{icons|Partizans}}{{icons|Double Sabers}} [[*Zantetsuken]] | ||
* {{icons|Mag Device}} [[Evo. Device / Odin]] | * {{icons|Mag Device}} [[Evo. Device / Odin]] | ||
* {{icons|Ticket}} [[Odin Hjalmr]] | * {{icons|Ticket}} [[Odin Hjalmr]] | ||
| Line 402: | Line 242: | ||
* {{props|Ability III}} | * {{props|Ability III}} | ||
Lv. 41+ | Lv. 41+ | ||
| − | * {{rarity|10}}{{icons|Swords}} [[Dio Aristin]] | + | * {{rarity|10}} {{icons|Swords}} [[Dio Aristin]] |
| − | * {{rarity|10}}{{icons|Wired Lances}} [[Dio Hyperion]] | + | * {{rarity|10}} {{icons|Wired Lances}} [[Dio Hyperion]] |
| − | * {{rarity|10}}{{icons|Partizans}} [[Dio Patty Lumeria]] | + | * {{rarity|10}} {{icons|Partizans}} [[Dio Patty Lumeria]] |
| − | * {{rarity|10}}{{icons|Dual Blades}} [[Dio Twizzler]] | + | * {{rarity|10}} {{icons|Dual Blades}} [[Dio Twizzler]] |
| − | * {{rarity|10}}{{icons|Gunslashes}} [[Dio Lextear]] | + | * {{rarity|10}} {{icons|Gunslashes}} [[Dio Lextear]] |
| − | * {{rarity|10}}{{icons|Jet Boots}} [[Dio Arestice]] | + | * {{rarity|10}} {{icons|Jet Boots}} [[Dio Arestice]] |
Lv. 71+ | Lv. 71+ | ||
| − | * {{rarity|13}}{{icons|Wired Lances}} [[Aura Dellwogg]] | + | * {{rarity|13}} {{icons|Wired Lances}} [[Aura Dellwogg]] |
| − | * {{rarity|13}}{{icons|Knuckles}} [[Aura Megawoga]] | + | * {{rarity|13}} {{icons|Knuckles}} [[Aura Megawoga]] |
| − | * {{rarity|13}}{{icons|Katanas}} [[Aura Zanshou]] | + | * {{rarity|13}} {{icons|Katanas}} [[Aura Zanshou]] |
| − | * {{rarity|13}}{{icons|Dual Blades}} [[Aura Vulzzarg]] | + | * {{rarity|13}} {{icons|Dual Blades}} [[Aura Vulzzarg]] |
| − | * {{rarity|13}}{{icons|Assault Rifles}} [[Aura Regalus]] | + | * {{rarity|13}} {{icons|Assault Rifles}} [[Aura Regalus]] |
| − | * {{rarity|13}}{{icons|Twin Machine Guns}} [[Aura Diazuth]] | + | * {{rarity|13}} {{icons|Twin Machine Guns}} [[Aura Diazuth]] |
| − | * {{rarity|13}}{{icons|Rods}} [[Aura Estour]] | + | * {{rarity|13}} {{icons|Rods}} [[Aura Estour]] |
| − | * {{rarity|13}}{{icons|Wands}} [[Aura Verhaar]] | + | * {{rarity|13}} {{icons|Wands}} [[Aura Verhaar]] |
| − | * {{Rarity|13}}{{icons|Candy}} [[Pet_Candy#daredevilparfait|Daredevil Parfait]] | + | * {{Rarity|13}} {{icons|Candy}} [[Pet_Candy#daredevilparfait|Daredevil Parfait]] |
| − | * {{icons|Tool}} [[Lambda Grinder]] | + | * {{icons|Tool}} [[Lambda Grinder]]|{{icons|Lightning}}|||When spawning outside of the Parallel Area, Odin will have the head of a generic PSO2 character (of any race and gender) instead of a helmet.<br><br>All attacks other than basic sword slashes will show aoe indicators.<br><br>The horse's head is not affected by headshots.<br><br>The thunder strikes can cause Freeze, and the wide circle aoe that pushes everyone away cam cause an unique ailment that works similarly to Poison, but has no icon in the HUD, and is indicated by a slightly purple coloring on the affected character (while this attack can be Just Guarded or dodged, it will push everyone in range away anyway).<br><br>When he summons 3 spears that stick to the ground, causing a red field to appear on the whole area, the ground starts to constantly damage anyone not in the air until all the spears are broken ''(this attack can only be done in the Parallel Area)''.<br><br>When under a certain amount of HP, will start charging Shin Zantetsuken, indicated by him holding the sword upwards, and the sword starting to glow. If he is not killed before this attack is done charging, it will instantly kill anyone in the map, causing the e trial to fail, and Odin to leave. This attack cannot be avoided in any way, as it ignores Just Guard and iframes of any kind. Because Odin leaves instantly after pulling off this attack, revival items will do no good after the attack is done.<br><br>The amount of damage needed to be done in order to prevent Shin Zantetsuken from happening scales with difficulty and with the amount of players in the map when he spawns.}} |
| − | + | ||
| − | |||
| − | |||
| − | |||
| − | |||
|} | |} | ||
==Other== | ==Other== | ||
| − | {| | + | {{EnemyHeader}} |
| − | + | ||
| − | + | {{EnemyRow|mrumblla|[[File:MrUmbllaIcon.png|128px]]|Mr. Umblla|Mr.アンブラ|Anywhere|Lv. 41+ | |
| − | + | * {{rarity|10}} {{icons|Rods}} [[Umblla Stick]]||||After spawning, will spin a few times, and then swing his cane. Anyone hit by this attack will receive a +100% Rare Drop Rate boost.}} | |
| − | + | ||
| − | + | {{EnemyRow|stumblla|[[File:StUmbllaIcon.png|128px]]|St. Umblla|セント・アンブラ|Anywhere (Christmas)|||||Christmas variant of Mr. Umblla.}} | |
| − | + | ||
| − | + | {{EnemyRow|mesetan|[[File:MesetanIcon.png|128px]]|Mesetan|メセタン|Anywhere|||||Mysterious creature hiding in a Meseta-shaped shell. Drops Meseta when hit.<br>Defeating it will cause it to become angry and spawn massive amounts of Meseta before disappearing.}} | |
| − | + | ||
| − | |- | + | {{EnemyRow|mrboing|[[File:MrBoingIcon.png|128px]]|Mr. Boing|Mr.ボワン|Anywhere|||||Magical genie that hides in a bottle-shaped lamp.<br>Attack it repeatedly to fill the E-Trial gauge. If the gauge is full, Mr. Boing will bestow a +300% RDR bonus.<br>If the gauge is not filled in the time limit, Mr. Boing will bestow a weaker RDR bonus.}} |
| − | + | {{EnemyRow|tagamikazuchi|[[File:TagamiKazuchiIcon.png|128px]]|Tagami Kazuchi|タガミカヅチ|Anywhere|Lv. 1+ | |
| − | + | * {{Rarity|7}} {{icons|Weapon Camo}}{{icons|Double Sabers}} [[*Shijinoou]] | |
| − | + | * {{Rarity|7}} {{icons|Weapon Camo}}{{icons|Bullet Bows}} [[*Gyokumaizuru]] | |
| − | + | * {{Rarity|7}} {{icons|Weapon Camo}}{{icons|Talis}} [[*Shirojiraobana]] | |
| − | |||
| − | |||
| − | |||
| − | |||
| − | |||
| − | |||
| − | |||
| − | |||
| − | |||
| − | |||
| − | |||
| − | |||
| − | |||
| − | |||
| − | |||
| − | |||
| − | |||
| − | |||
| − | |||
| − | |||
| − | |||
| − | |||
| − | |||
| − | |||
| − | |||
| − | |||
| − | |||
| − | |||
| − | |||
| − | |||
| − | |||
| − | |||
| − | |||
| − | |||
| − | |||
| − | |||
| − | |||
| − | |||
| − | |||
| − | |||
| − | |||
| − | * {{Rarity|7}}{{icons|Weapon Camo}}{{icons|Double Sabers}} [[*Shijinoou]] | ||
| − | * {{Rarity|7}}{{icons|Weapon Camo}}{{icons|Bullet Bows}} [[*Gyokumaizuru]] | ||
| − | * {{Rarity|7}}{{icons|Weapon Camo}}{{icons|Talis}} [[*Shirojiraobana]] | ||
* {{props|Tagami Kazuchi Soul}} | * {{props|Tagami Kazuchi Soul}} | ||
* {{props|Ability III}} | * {{props|Ability III}} | ||
| − | Lv. 1 | + | Lv. 1~21 |
| − | * {{Rarity|9}}{{icons|Rear}} [[Rear / Blitz Symbol]] | + | * {{Rarity|9}} {{icons|Rear}} [[Rear / Blitz Symbol]] |
| − | * {{Rarity|9}}{{icons|Arm}} [[Arm / Blitz Sign]] | + | * {{Rarity|9}} {{icons|Arm}} [[Arm / Blitz Sign]] |
| − | Lv. 21 | + | Lv. 21~45 |
| − | * {{Rarity|7}}{{icons|Rear}} [[Rear / Eleguile]] | + | * {{Rarity|7}} {{icons|Rear}} [[Rear / Eleguile]] |
| − | * {{Rarity|7}}{{icons|Arm}} [[Arm / Elegirack]] | + | * {{Rarity|7}} {{icons|Arm}} [[Arm / Elegirack]] |
| − | * {{Rarity|7}}{{icons|Leg}} [[Leg / Eledial]] | + | * {{Rarity|7}} {{icons|Leg}} [[Leg / Eledial]] |
| − | Lv. 41 | + | Lv. 41~61 |
| − | * {{Rarity|7}}{{icons|Rear}} [[Rear / Elegaixa]] | + | * {{Rarity|7}} {{icons|Rear}} [[Rear / Elegaixa]] |
| − | * {{Rarity|7}}{{icons|Arm}} [[Arm / Elegister]] | + | * {{Rarity|7}} {{icons|Arm}} [[Arm / Elegister]] |
| − | * {{Rarity|7}}{{icons|Leg}} [[Leg / Elegosk]] | + | * {{Rarity|7}} {{icons|Leg}} [[Leg / Elegosk]] |
| − | Lv. 61+ | + | Lv. 61+ |
| − | * {{Rarity|10}}{{icons|Rear}} [[Rear / Elegahate]] | + | * {{Rarity|10}} {{icons|Rear}} [[Rear / Elegahate]] |
| − | * {{Rarity|10}}{{icons|Arm}} [[Arm / Elegiwatt]] | + | * {{Rarity|10}} {{icons|Arm}} [[Arm / Elegiwatt]] |
| − | * {{Rarity|10}}{{icons|Leg}} [[Leg / Elegalga]] | + | * {{Rarity|10}} {{icons|Leg}} [[Leg / Elegalga]] |
| − | * {{Rarity|11}}{{icons|Rear}} [[Rear / Thunder Tagaishi]] | + | * {{Rarity|11}} {{icons|Rear}} [[Rear / Thunder Tagaishi]] |
| − | * {{Rarity|11}}{{icons|Arm}} [[Arm / Thunder Tagashiki]] | + | * {{Rarity|11}} {{icons|Arm}} [[Arm / Thunder Tagashiki]] |
| − | * {{Rarity|11}}{{icons|Leg}} [[Leg / Thunder Tagatsuchi]] | + | * {{Rarity|11}} {{icons|Leg}} [[Leg / Thunder Tagatsuchi]] |
| − | Lv. 71+ | + | Lv. 71+ |
| − | * {{Rarity|13}}{{icons|Knuckles}} [[Thunder Bite Tagamikouga]] | + | * {{Rarity|13}} {{icons|Knuckles}} [[Thunder Bite Tagamikouga]] |
| − | * {{Rarity|13}}{{icons|Katanas}} [[Thunder Crack Tagamikouga]] | + | * {{Rarity|13}} {{icons|Katanas}} [[Thunder Crack Tagamikouga]] |
| − | * {{Rarity|13}}{{icons|Twin Machine Guns}} [[Thunder Gun Tagamikouga]] | + | * {{Rarity|13}} {{icons|Twin Machine Guns}} [[Thunder Gun Tagamikouga]] |
| − | * {{Rarity|13}}{{icons|Jet Boots}} [[Thunder Claw Tagamikouga]] | + | * {{Rarity|13}} {{icons|Jet Boots}} [[Thunder Claw Tagamikouga]]|{{icons|Dark}}|Orbs||Resistant to damage on its body. Break the orbs on its head to remove its resistance and stun it briefly.<br>Worth a massive amount of EXP.}} |
| − | + | ||
| − | + | {{EnemyRow|izanekazuchi|[[File:UIEnemyIzaneKazuchi.png|128px|link=]]|Izane Kazuchi|イザネカヅチ|Anywhere||{{icons|Dark}}|Orbs||Highly resistant to damage until orbs are broken. Breaking the orbs stuns it briefly.<br>Drops material that can be sold for 50,000 Meseta.}} | |
| − | + | ||
| − | < | + | {{EnemyRow|galgryphon|[[File:GalGryphonIcon.png|128px]]|Gal Gryphon|ガル・グリフォン|Anywhere|Lv. 1+ |
| − | |||
| − | |||
| − | |||
| − | |||
| − | |||
| − | |||
| − | |||
| − | |||
| − | |||
| − | |||
| − | < | ||
| − | |||
| − | |||
| − | |||
| − | |||
| − | |||
| − | |||
| − | |||
| − | |||
| − | Lv. 1+ | ||
* {{props|Gryphon Soul}} | * {{props|Gryphon Soul}} | ||
* {{props|Ability III}} | * {{props|Ability III}} | ||
* {{props|All Resist III}} | * {{props|All Resist III}} | ||
| − | Lv. 36 | + | Lv. 36~50 |
| − | * {{Rarity|9}}{{icons|Rear}} [[Rear / Luxe Aile]] | + | * {{Rarity|9}} {{icons|Rear}} [[Rear / Luxe Aile]] |
| − | * {{Rarity|9}}{{icons|Arm}} [[Arm / Luxe Fin]] | + | * {{Rarity|9}} {{icons|Arm}} [[Arm / Luxe Fin]] |
| − | * {{Rarity|9}}{{icons|Leg}} [[Leg / Luxe Near]] | + | * {{Rarity|9}} {{icons|Leg}} [[Leg / Luxe Near]] |
| − | Lv. 51 | + | Lv. 51~65 |
| − | * {{Rarity|9}}{{icons|Rear}} [[Rear / Luxe Soir]] | + | * {{Rarity|9}} {{icons|Rear}} [[Rear / Luxe Soir]] |
| − | * {{Rarity|9}}{{icons|Arm}} [[Arm / Luxe Ende]] | + | * {{Rarity|9}} {{icons|Arm}} [[Arm / Luxe Ende]] |
| − | * {{Rarity|9}}{{icons|Leg}} [[Leg / Luxe Nero]] | + | * {{Rarity|9}} {{icons|Leg}} [[Leg / Luxe Nero]] |
| − | Lv. 51+ | + | Lv. 51+ |
| − | * {{Rarity|10}}{{icons|Swords}} [[Dio Aristin]] | + | * {{Rarity|10}} {{icons|Swords}} [[Dio Aristin]] |
| − | * {{Rarity|10}}{{icons|Wired Lances}} [[Dio Hyperion]] | + | * {{Rarity|10}} {{icons|Wired Lances}} [[Dio Hyperion]] |
| − | * {{Rarity|10}}{{icons|Partizans}} [[Dio Patty Lumeria]] | + | * {{Rarity|10}} {{icons|Partizans}} [[Dio Patty Lumeria]] |
| − | * {{Rarity|10}}{{icons|Dual Blades}} [[Dio Lextear]] | + | * {{Rarity|10}} {{icons|Dual Blades}} [[Dio Lextear]] |
| − | * {{Rarity|10}}{{icons|Gunslashes}} [[Dio Twizzler]] | + | * {{Rarity|10}} {{icons|Gunslashes}} [[Dio Twizzler]] |
| − | * {{Rarity|10}}{{icons|Talis}} [[Mahu]] | + | * {{Rarity|10}} {{icons|Talis}} [[Mahu]] |
| − | * {{Rarity|10}}{{icons|Jet Boots}} [[Dio Aristin]] | + | * {{Rarity|10}} {{icons|Jet Boots}} [[Dio Aristin]] |
| − | * {{Rarity|12}}{{icons|Talis}} [[Gal Wind]] | + | * {{Rarity|12}} {{icons|Talis}} [[Gal Wind]] |
| − | Lv. 66+ | + | Lv. 66+ |
| − | * {{Rarity|10}}{{icons|Rear}} [[Rear / Luxe Calm]] | + | * {{Rarity|10}} {{icons|Rear}} [[Rear / Luxe Calm]] |
| − | * {{Rarity|10}}{{icons|Arm}} [[Arm / Luxe Sully]] | + | * {{Rarity|10}} {{icons|Arm}} [[Arm / Luxe Sully]] |
| − | * {{Rarity|10}}{{icons|Leg}} [[Leg / Luxe Pal]] | + | * {{Rarity|10}} {{icons|Leg}} [[Leg / Luxe Pal]] |
| − | Lv. 71+ | + | Lv. 71+ |
| − | * {{Rarity|13}}{{icons|Wired Lances}} [[Eldetoros]] | + | * {{Rarity|13}} {{icons|Wired Lances}} [[Eldetoros]] |
| − | * {{Rarity|13}}{{icons|Double Sabers}} [[Gale Vishner]] | + | * {{Rarity|13}} {{icons|Double Sabers}} [[Gale Vishner]] |
| − | * {{Rarity|13}}{{icons|Assault Rifles}} [[Refalse]] | + | * {{Rarity|13}} {{icons|Assault Rifles}} [[Refalse]] |
| − | * {{Rarity|13}}{{icons|Twin Machine Guns}} [[Lasahadis]] | + | * {{Rarity|13}} {{icons|Twin Machine Guns}} [[Lasahadis]] |
| − | * {{Rarity|13}}{{icons|Bullet Bows}} [[Glayrow]] | + | * {{Rarity|13}} {{icons|Bullet Bows}} [[Glayrow]] |
| − | * {{Rarity|13}}{{icons|Rods}} [[Shallist]] | + | * {{Rarity|13}} {{icons|Rods}} [[Shallist]] |
| − | * {{Rarity|13}}{{icons|Wands}} [[Fianis]] | + | * {{Rarity|13}} {{icons|Wands}} [[Fianis]] |
| − | * {{Rarity|13}}{{icons|Jet Boots}} [[Lizgrips]] | + | * {{Rarity|13}} {{icons|Jet Boots}} [[Lizgrips]] |
* {{icons|Tool}} [[Lambda Grinder]] | * {{icons|Tool}} [[Lambda Grinder]] | ||
* [[Pure Photon]] | * [[Pure Photon]] | ||
Lv. 76+ | Lv. 76+ | ||
| − | * {{Rarity|13}}{{icons|Wired Lances}} [[Keimostross]] | + | * {{Rarity|13}} {{icons|Wired Lances}} [[Keimostross]] |
| − | * {{Rarity|13}}{{icons|Double Sabers}} [[Gale Febris]] | + | * {{Rarity|13}} {{icons|Double Sabers}} [[Gale Febris]] |
| − | * {{Rarity|13}}{{icons|Assault Rifles}} [[Secfalse]] | + | * {{Rarity|13}} {{icons|Assault Rifles}} [[Secfalse]] |
| − | * {{Rarity|13}}{{icons|Twin Machine Guns}} [[Monarchadis]] | + | * {{Rarity|13}} {{icons|Twin Machine Guns}} [[Monarchadis]] |
| − | * {{Rarity|13}}{{icons|Bullet Bows}} [[Glay Jadaku]] | + | * {{Rarity|13}} {{icons|Bullet Bows}} [[Glay Jadaku]] |
| − | * {{Rarity|13}}{{icons|Rods}} [[Aluminum Swift]] | + | * {{Rarity|13}} {{icons|Rods}} [[Aluminum Swift]] |
| − | * {{Rarity|13}}{{icons|Wands}} [[Stradanis]] | + | * {{Rarity|13}} {{icons|Wands}} [[Stradanis]] |
| − | * {{Rarity|13}}{{icons|Jet Boots}} [[Resangrips]] | + | * {{Rarity|13}} {{icons|Jet Boots}} [[Resangrips]]|{{icons|Lightning}}{{icons|Wind}}|Horns<br>Legs<br>Wings|Head|Flying wyvern native to Ragol. Utilizes a variety of lightning and wind-based attacks.<br>Break its legs to incapacitate it for a short period of time.<br>Stunned by the Shock status.}} |
| − | + | ||
| − | + | {{EnemyRow|gryphongels|[[File:GryphonGeilsIcon.png|128px]]|Gryphon Gels|グリフォン・ゲルス|Anywhere<br>[[Solo Training: Heaven and Hell]]||{{icons|Lightning}}{{icons|Wind}}|Horns<br>Legs<br>Wings|Head|Rare variant of Gal Gryphon.}} | |
| − | + | ||
| − | + | {{EnemyRow|arksclone|[[File:NoPic.png|128px]]|ARKS Clone|アークス模倣体|Free Field<br>Advance Quest|||||Clone of a player who cleared Darkers Den.<br>Possesses similar attributes to a Friend Partner, being able to access all equipped weapons, Photon Arts, and Skills at time of Darkers Den clear.<br>Defeating a Clone of a player on your Friends List will raise the drop rate of Photon Spheres.}} | |
| − | + | ||
| − | < | + | {{EnemyRow|arksabyss|[[File:NoPic.png|128px]]|ARKS Abyss|アークス・アビス|Omnibus Quest EP2|||||Comes in Hunter, Ranger, and Force varieties, with varying Weaknesses for each.}} |
| − | + | ||
| − | + | {{EnemyRow|ohza|[[File:NoPic.png|128px]]|Ohza|オーザ|Omnibus Quest EP2|||||Hunter Master Ohza, corrupted by the Abyssal Order. Wields a Partizan in combat.}} | |
| − | + | ||
| − | + | {{EnemyRow|lisa|[[File:NoPic.png|128px]]|Lisa|リサ|Omnibus Quest EP2|||||Ranger Master Lisa, corrupted by the Abyssal Order. Wields an Assault Rifle in combat.}} | |
| − | + | ||
| − | + | {{EnemyRow|fourier|[[File:NoPic.png|128px]]|Fourier|フーリエ|Omnibus Quest EP2|||||Lillipan linguist Fourier, corrupted by the Abyssal Order. Wields a Launcher in combat.}} | |
| − | + | ||
| − | + | {{EnemyRow|marlu|[[File:NoPic.png|128px]]|Marlu|マールー|Omnibus Quest EP2|||||Force Master Marlu, corrupted by the Abyssal Order. Wields a Rod in combat and prioritizes Light Techniques.}} | |
| − | + | ||
| − | + | {{EnemyRow|regius|[[File:NoPic.png|128px]]|Regius|レギアス|Omnibus Quest EP2<br>[[Solo Training: Heaven and Hell]]|||||Number 1 of the Council of Six and original member of the Three Heroes. Wields a Sword in combat.<br>Regius will power up when his health drops below a certain threshold.}} | |
| − | + | ||
| − | + | {{EnemyRow|casra|[[File:NoPic.png|128px]]|Casra|カスラ|Omnibus Quest EP2<br>[[Solo Training: Heaven and Hell]]|||||Number 3 of the Council of Six and original member of the Three Heroes. Wields a Talis in combat and prioritizes Wind Techniques.<br>Casra will power up when his health drops below a certain threshold.}} | |
| − | + | ||
| − | + | {{EnemyRow|klariskrays|[[File:NoPic.png|128px]]|Klariskrays|クラリスクレイス|Omnibus Quest EP2<br>[[Solo Training: Heaven and Hell]]|||||Number 5 of the Council of Six and the second successor to the original Klariskrays, one of the original members of the Three Heroes. Wields a Rod and prioritizes Fire Techniques in combat.<br>Klariskrays will power up when her health drops below a certain threshold.}} | |
| − | < | + | |
| − | + | {{EnemyRow|huey|[[File:NoPic.png|128px]]|Huey|ヒューイ|Omnibus Quest EP1<br>[[Solo Training: Heaven and Hell]]|||||Number 6 of the Council of Six. Wields a Wired Lance in combat, and has a knack for chaining Arts together.<br>Huey will power up when his HP drops below a certain threshold.}} | |
| − | + | ||
| − | + | {{EnemyRow|clonekk|[[File:NoPic.png|128px]]|Clone Klariskrays| クローンKK|Omnibus Quest EP2|||||Mass-produced clones of Klariskrays III manufactured by Luther. Will attempt to use Rafoie on the player when they draw near.}} | |
| − | + | ||
| − | + | {{EnemyRow|theodore|[[File:NoPic.png|128px]]|Theodore|テオドール|Omnibus Quest EP2|||||Theodore, transformed into a Deuman and driven mad by Luther's influence. Wields a Genesis Weapon that can use Sword and Partizan Photon Arts as well as Dark Techniques in combination.}} | |
| − | + | ||
| − | + | {{EnemyRow|gettemhart|[[File:NoPic.png|128px]]|Gettemhart|ゲッテムハルト|Omnibus Quest EP1|||||A battle-hungry ARKS who lusts only for the thrill of the fight. Wields Knuckles in combat.}} | |
| − | + | ||
| − | + | {{EnemyRow|elderdoppelganger|[[File:NoPic.png|128px]]|Elder Doppelganger|【巨躯】複製体|Omnibus Quest EP1|||||The humanoid form of Dark Falz Elder. Uses powered up versions of Knuckle Photon Arts to battle.}} | |
| − | + | ||
| − | + | {{EnemyRow|luther|[[File:NoPic.png|128px]]|Luther|ルーサー|Omnibus Quest EP2|||||A Photoner who wishes for omniscience. Uses gravity-based attacks, indicated by an AOE marker. When approached, will teleport; upon doing so a third time, will become vulnerable for a brief period of time.}} | |
| − | + | ||
| − | + | {{EnemyRow|aratron|[[File:NoPic.png|128px]]|Aratron, Apostle of Earth|土の使徒 アラトロン|Story Quest 4-8|||||Mother Cluster's Apostle of Earth.<br>Impervious to damage until his hammer is destroyed at least once, which will stun him briefly. His hammer will recover, but he will no longer be immune to attacks.}} | |
| − | + | ||
| − | + | {{EnemyRow|bethor|[[File:NoPic.png|128px]]|Bethor|ベトール|Story Quest 4-2|||||Mother Cluster's Apostle of Earth.<br>Will summon various Tokyo Phantoms alongside a variety of props that have adverse effects. Upon defeating all mobs, will teleport into the arena and attack directly.}} | |
| − | + | ||
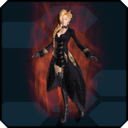
| − | + | {{EnemyRow|phaleg|[[File:UIEnemyPhaleg.png|128px|link=]]|Phaleg|ファレグ|Story Quest 4-3<br>Emergency Quest|||||Mother Cluster's Apostle of Fire.<br>Possesses very high damage resistance and quick speed.}} | |
| − | + | ||
| − | + | {{EnemyRow|demonphaleg|[[File:UIEnemyDemonPhaleg.png|128px|link=]]|Demon Phaleg|魔人・ファレグ|Story Quest EP4<br>[[Solo Training: Phanatical Phantoms]]|||||Phaleg Ives at her full strength.}} | |
| − | + | ||
| − | + | {{EnemyRow|och|[[File:NoPic.png|128px]]|Och, Apostle of Sun|日の使徒 オークゥ|Story Quest EP4|||||Mother Cluster's Apostle of Sun.<br>Impervious to damage until Laplace's Demon is defeated. Fights primarily with melee attacks.}} | |
| − | + | ||
| − | + | {{EnemyRow|ophiel|[[File:NoPic.png|128px]]|Ophiel, Apostle of Water|水の使徒 オフィエル|Story Quest 4-10|||||Mother Cluster's Apostle of Water.<br>Battles by throwing scalpels and teleporting in an extremely confined area.}} | |
| − | + | ||
| − | + | {{EnemyRow|phul|[[File:NoPic.png|128px]]|Phul, Apostle of Moon|月の使徒 フル|Story Quest EP4|||||Mother Cluster's Apostle of Moon.<br>Fights primarily with ranged attacks while supporting her allies.}} | |
| − | + | ||
| − | + | {{EnemyRow|kohri|[[File:NoPic.png|128px]]|Kohri Washinomiya|鷲宮コオリ|Story Quest EP4|||||Kohri Wagashimiya, brainwashed by Ophiel.<br>Fights by using powered up variants of Sword Photon Arts.}} | |
| − | + | ||
| − | + | {{EnemyRow|mother|[[File:NoPic.png|128px]]|Mother|マザー|Story Quest 4-7|||||The leader of Mother Cluster.}} | |
| − | + | ||
| − | + | {{EnemyRow|ardem|[[File:NoPic.png|128px]]|Sir Ardem S|サー・アーデム・S|Story Quest 4-10|||||The leader of the Earth Guides.<br>Battles with a rapier and uses a wide range of attacks.}} | |
| − | + | ||
| − | + | {{EnemyRow|sorokingd|[[File:NoPic.png|128px]]|SOROKING D|SOROKING・D|Main Quest EP5-4-2|||||A giant apparition of SORO (from ''PHANTASY STAR ONLINE 2 THE ANIMATION'') summoned by the denizen of Apprentice, Solitary Rina Izumi.<br>Fights with the Launcher "Illegal Negro".}} | |
| − | + | ||
| − | |||
| − | |||
| − | |||
| − | |||
| − | |||
| − | |||
| − | |||
| − | |||
| − | |||
| − | |||
| − | |||
| − | |||
| − | |||
| − | |||
| − | |||
| − | |||
| − | |||
| − | |||
| − | |||
| − | |||
| − | |||
| − | |||
| − | |||
| − | |||
| − | |||
| − | |||
| − | |||
| − | |||
| − | |||
| − | |||
| − | |||
| − | |||
| − | |||
| − | |||
| − | |||
| − | |||
| − | |||
| − | < | ||
| − | |||
| − | |||
| − | |||
| − | < | ||
| − | |||
| − | |||
| − | |||
| − | |||
| − | |||
| − | |||
| − | |||
| − | |||
| − | |||
| − | |||
| − | |||
| − | |||
| − | |||
| − | |||
| − | |||
| − | |||
| − | |||
| − | |||
| − | | | ||
| − | |||
| − | |||
| − | |||
| − | |||
| − | |||
| − | |||
| − | |||
| − | |||
| − | |||
| − | |||
| − | |||
| − | |||
| − | |||
| − | |||
| − | |||
| − | |||
| − | |||
| − | | | ||
| − | |||
| − | |||
| − | |||
| − | |||
| − | |||
| − | |||
| − | |||
| − | |||
| − | |||
| − | |||
| − | |||
| − | |||
| − | < | ||
| − | |||
| − | |||
| − | |||
| − | |||
| − | |||
| − | |||
| − | |||
| − | |||
| − | |||
| − | |||
| − | |||
| − | |||
| − | |||
| − | |||
| − | |||
| − | |||
| − | |||
| − | |||
| − | |||
| − | |||
| − | |||
| − | |||
| − | | | ||
| − | |||
| − | |||
| − | |||
| − | |||
| − | |||
| − | |||
| − | |||
| − | |||
| − | |- | ||
| − | |||
| − | |||
| − | |||
| − | |||
| − | |||
| − | |||
| − | |||
| − | < | ||
| − | |||
| − | |||
| − | |||
| − | |||
| − | |||
| − | |||
| − | |||
| − | |||
| − | |||
| − | |||
| − | |||
| − | |||
| − | |||
| − | |||
| − | |||
| − | |||
| − | |||
| − | |||
| − | |||
| − | |||
| − | |||
| − | |||
| − | |||
| − | |||
| − | |||
| − | |||
| − | |||
| − | |||
| − | |||
| − | |||
| − | |||
| − | |||
| − | |||
| − | |||
| − | |||
| − | |||
| − | |||
| − | |||
| − | |||
| − | |||
| − | |||
| − | |||
| − | |||
| − | |||
| − | |||
| − | |||
| − | |||
| − | |||
| − | |||
| − | |||
| − | |||
| − | |||
| − | |||
| − | |||
| − | |||
|} | |} | ||
[[Category:Enemies]] | [[Category:Enemies]] | ||
Revision as of 20:21, 13 August 2018
| Aberrations | Darkers | Dragonkin | Mechs | Natives | Oceanids | Phantoms | Special Enemies | Titans | Demons |
Rappies
| Enemy | Area | Drop List | Breakpoints | Weakness | Notes |
|---|---|---|---|---|---|
 Rappy ラッピー |
|
Lv. 26+
Lv. 31+
|
Weak to:
Weakspots: |
When defeated, will pass out for a few seconds. After that, will look around and then start running. Hitting it while it runs yields more drops. | |
 Summer Rappy サマー・ラッピー |
|
Lv. 1+
Lv. 41+ Lv. 61+ Lv. 71+
|
Weak to:
Weakspots: |
When defeated, will pass out for a few seconds. After that, will look around and then start running. Hitting it while it runs yields more drops. | |
 Latan Rappy ラタン・ラッピー |
|
Lv. 1+
Lv. 21+ Lv. 41+ Lv. 51+ Lv. 61+ Lv. 71+
|
Weak to:
Weakspots: |
When defeated, will pass out for a few seconds. After that, will look around and then start running. Hitting it while it runs yields more drops. | |
 St. Rappy セント・ラッピー |
|
Lv. 1+
Lv. 31+ Lv. 41+ Lv. 61+ |
Weak to:
Weakspots: |
When defeated, will pass out for a few seconds. After that, will look around and then start running. Hitting it while it runs yields more drops. | |
 Love Rappy ラブ・ラッピー |
|
Lv. 1+
Lv. 31+ Lv. 41+ Lv. 61+ Lv. 71+ |
Weak to:
Weakspots: |
When defeated, will pass out for a few seconds. After that, will look around and then start running. Hitting it while it runs yields more drops. | |
 Lovey Rappy ラヴィ・ラッピー |
|
Lv. 1+
Lv. 31+ Lv. 41+ Lv. 61+ |
Weak to:
Weakspots: |
When defeated, will pass out for a few seconds. After that, will look around and then start running. Hitting it while it runs yields more drops. | |
 Egg Rappy エグ・ラッピー |
|
Lv. 1+
Lv. 21+ Lv. 41+ Lv. 61+ |
Weak to:
Weakspots: |
When defeated, will pass out for a few seconds. After that, will look around and then start running. Hitting it while it runs yields more drops. | |
 Frog Rappy フログ・ラッピー |
|
Lv. 1+
Lv. 21+ Lv. 41+ Lv. 61+ |
Weak to:
Weakspots: |
When defeated, will pass out for a few seconds. After that, will look around and then start running. Hitting it while it runs yields more drops. | |
 Emperappy エンペ・ラッピー |
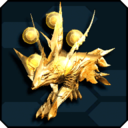
|
Lv. 1+
Lv. 41+
Lv. 76+
|
Weak to:
Weakspots: |
||
| 128px Latan Emperappy ラタン・エンペラッピー |
|
Lv. 1+
Lv. 71+ |
Weak to:
Weakspots: |
Halloween variant of Emperappy. Shares its drop table below Lv. 76+. | |
| 128px Love Emperappy ラタン・エンペラッピー |
|
Lv. 1+
Lv. 71+ |
Weak to:
Weakspots: |
Valentine's variant of Emperappy. Shares its drop table below Lv. 76+. | |
| 128px Dark Emperappy |
|
Weak to:
Weakspots: |
The powered up form of denizen of Apprentice Aika's Rappy. Its hugs inflict massive damage. Qualifies as a normal Emperappy for purposes of enemy elimination. |
Nyau
| Enemy | Area | Drop List | Breakpoints | Weakness | Notes |
|---|---|---|---|---|---|
 Nyau ニャウ |
|
Sword | Weak to:
Weakspots: |
Highly resistant to direct damage, but its weapon can be destroyed after it drops it for a quick victory. Will often summon a boss after being defeated. | |
 Ceremo Nyau セレモ・ニャウ |
|
Weapon | Weak to:
Weakspots: |
Holiday variant of Nyau. Appears during the Halloween season. | |
 Noiya Nyau ノイヤ・ニャウ |
|
Weapon | Weak to:
Weakspots: |
Holiday variant of Nyau. Appears during the Christmas season. | |
 Toro Kuro Nyau トロクロ・ニャウ |
|
Weapon | Weak to:
Weakspots: |
Special variant of Nyau. Appears during a certain collaboration. | |
 Sakura Nyau サクラ・ニャウ |
|
Weapon | Weak to:
Weakspots: |
Holiday variant of Nyau. Appears during the Spring season. | |
 Sonic Nyau ソニック・ニャウ |
|
Weapon | Weak to:
Weakspots: |
Nyau dressed up as SEGA's mascot, Sonic the Hedgehog. Appears to celebrate Sonic the Hedgehog's birthday. | |
| 128px Summer Nyau サマー・ニャウ |
|
Weapon | Weak to:
Weakspots: |
Holiday variant of Nyau. Appears during the Summer season. | |
| 128px Luna Nyau ルーナ・ニャウ |
|
Weapon | Weak to:
Weakspots: |
Holiday variant of Nyau. Appears during the Moon Viewing season. |
Lillipa
| Enemy | Area | Drop List | Breakpoints | Weakness | Notes |
|---|---|---|---|---|---|
 Barbarillipan バルバリリーパ |
|
Lv. 1+
Lv. 31+ Lv. 41+ Lv. 51+ Lv. 61+ |
Head | Weak to:
Weakspots: |
A giant, mutated Lillipan. Throws items from the container on its back, each with differing effects. Resilient to damage dealt from behind. |
Collaboration
| Enemy | Area | Drop List | Breakpoints | Weakness | Notes |
|---|---|---|---|---|---|
 Cougar NX クーガーNX |
|
Arms Legs Satellite Bunker |
Weak to:
Weakspots: |
An Assault-type Blast Runner outfitted with Cougar NX series parts. Wields several weapons, including the "D92 Janus" submachine guns and the "SW-Teardowner" greatsword. Respawns after taking a certain amount of damage, becoming more aggressive in the process. Summons the "Satellite Bunker" BU weapon at low health. Deal enough damage to the weapon or breakable parts to incapacitate Cougar NX temporarily. Vulnerable to the Shock status. | |
 Cougar NX ACE クーガーNX・ACE |
|
Arms Legs Satellite Bunker |
Weak to:
Weakspots: |
Rare variant of Cougar NX. | |
 Knight Gear ナイトギア |
|
Weak to:
Weakspots:
|
|||
 Magi-Knight Gear 魔導騎士ナイトギア |
|
Weak to:
Weakspots:
|
Rare variant of Knight Gear. | ||
 Odin オーディン |
|
Lv. 1+
Lv. 41+ Lv. 71+ |
Weak to:
Weakspots: |
When spawning outside of the Parallel Area, Odin will have the head of a generic PSO2 character (of any race and gender) instead of a helmet. All attacks other than basic sword slashes will show aoe indicators. The horse's head is not affected by headshots. The thunder strikes can cause Freeze, and the wide circle aoe that pushes everyone away cam cause an unique ailment that works similarly to Poison, but has no icon in the HUD, and is indicated by a slightly purple coloring on the affected character (while this attack can be Just Guarded or dodged, it will push everyone in range away anyway). When he summons 3 spears that stick to the ground, causing a red field to appear on the whole area, the ground starts to constantly damage anyone not in the air until all the spears are broken (this attack can only be done in the Parallel Area). When under a certain amount of HP, will start charging Shin Zantetsuken, indicated by him holding the sword upwards, and the sword starting to glow. If he is not killed before this attack is done charging, it will instantly kill anyone in the map, causing the e trial to fail, and Odin to leave. This attack cannot be avoided in any way, as it ignores Just Guard and iframes of any kind. Because Odin leaves instantly after pulling off this attack, revival items will do no good after the attack is done. The amount of damage needed to be done in order to prevent Shin Zantetsuken from happening scales with difficulty and with the amount of players in the map when he spawns. |
Other
| Enemy | Area | Drop List | Breakpoints | Weakness | Notes |
|---|---|---|---|---|---|
 Mr. Umblla Mr.アンブラ |
|
Lv. 41+ | Weak to:
Weakspots: |
After spawning, will spin a few times, and then swing his cane. Anyone hit by this attack will receive a +100% Rare Drop Rate boost. | |
 St. Umblla セント・アンブラ |
|
Weak to:
Weakspots: |
Christmas variant of Mr. Umblla. | ||
 Mesetan メセタン |
|
Weak to:
Weakspots: |
Mysterious creature hiding in a Meseta-shaped shell. Drops Meseta when hit. Defeating it will cause it to become angry and spawn massive amounts of Meseta before disappearing. | ||
 Mr. Boing Mr.ボワン |
|
Weak to:
Weakspots: |
Magical genie that hides in a bottle-shaped lamp. Attack it repeatedly to fill the E-Trial gauge. If the gauge is full, Mr. Boing will bestow a +300% RDR bonus. If the gauge is not filled in the time limit, Mr. Boing will bestow a weaker RDR bonus. | ||
 Tagami Kazuchi タガミカヅチ |
|
Lv. 1+
Lv. 1~21 Lv. 21~45 Lv. 41~61 Lv. 61+
Lv. 71+ |
Weak to:
Weakspots:
|
Resistant to damage on its body. Break the orbs on its head to remove its resistance and stun it briefly. Worth a massive amount of EXP. | |
 Izane Kazuchi イザネカヅチ |
|
Weak to:
Weakspots:
|
Highly resistant to damage until orbs are broken. Breaking the orbs stuns it briefly. Drops material that can be sold for 50,000 Meseta. | ||
 Gal Gryphon ガル・グリフォン |
|
Lv. 1+
Lv. 36~50 Lv. 51~65 Lv. 51+ Lv. 66+ Lv. 71+
Lv. 76+ |
Head | Weak to:
Weakspots:
|
Flying wyvern native to Ragol. Utilizes a variety of lightning and wind-based attacks. Break its legs to incapacitate it for a short period of time. Stunned by the Shock status. |
 Gryphon Gels グリフォン・ゲルス |
|
Head | Weak to:
Weakspots:
|
Rare variant of Gal Gryphon. | |
| 128px ARKS Clone アークス模倣体 |
|
Weak to:
Weakspots: |
Clone of a player who cleared Darkers Den. Possesses similar attributes to a Friend Partner, being able to access all equipped weapons, Photon Arts, and Skills at time of Darkers Den clear. Defeating a Clone of a player on your Friends List will raise the drop rate of Photon Spheres. | ||
| 128px ARKS Abyss アークス・アビス |
|
Weak to:
Weakspots: |
Comes in Hunter, Ranger, and Force varieties, with varying Weaknesses for each. | ||
| 128px Ohza オーザ |
|
Weak to:
Weakspots: |
Hunter Master Ohza, corrupted by the Abyssal Order. Wields a Partizan in combat. | ||
| 128px Lisa リサ |
|
Weak to:
Weakspots: |
Ranger Master Lisa, corrupted by the Abyssal Order. Wields an Assault Rifle in combat. | ||
| 128px Fourier フーリエ |
|
Weak to:
Weakspots: |
Lillipan linguist Fourier, corrupted by the Abyssal Order. Wields a Launcher in combat. | ||
| 128px Marlu マールー |
|
Weak to:
Weakspots: |
Force Master Marlu, corrupted by the Abyssal Order. Wields a Rod in combat and prioritizes Light Techniques. | ||
| 128px Regius レギアス |
|
Weak to:
Weakspots: |
Number 1 of the Council of Six and original member of the Three Heroes. Wields a Sword in combat. Regius will power up when his health drops below a certain threshold. | ||
| 128px Casra カスラ |
|
Weak to:
Weakspots: |
Number 3 of the Council of Six and original member of the Three Heroes. Wields a Talis in combat and prioritizes Wind Techniques. Casra will power up when his health drops below a certain threshold. | ||
| 128px Klariskrays クラリスクレイス |
|
Weak to:
Weakspots: |
Number 5 of the Council of Six and the second successor to the original Klariskrays, one of the original members of the Three Heroes. Wields a Rod and prioritizes Fire Techniques in combat. Klariskrays will power up when her health drops below a certain threshold. | ||
| 128px Huey ヒューイ |
|
Weak to:
Weakspots: |
Number 6 of the Council of Six. Wields a Wired Lance in combat, and has a knack for chaining Arts together. Huey will power up when his HP drops below a certain threshold. | ||
| 128px Clone Klariskrays クローンKK |
|
Weak to:
Weakspots: |
Mass-produced clones of Klariskrays III manufactured by Luther. Will attempt to use Rafoie on the player when they draw near. | ||
| 128px Theodore テオドール |
|
Weak to:
Weakspots: |
Theodore, transformed into a Deuman and driven mad by Luther's influence. Wields a Genesis Weapon that can use Sword and Partizan Photon Arts as well as Dark Techniques in combination. | ||
| 128px Gettemhart ゲッテムハルト |
|
Weak to:
Weakspots: |
A battle-hungry ARKS who lusts only for the thrill of the fight. Wields Knuckles in combat. | ||
| 128px Elder Doppelganger 【巨躯】複製体 |
|
Weak to:
Weakspots: |
The humanoid form of Dark Falz Elder. Uses powered up versions of Knuckle Photon Arts to battle. | ||
| 128px Luther ルーサー |
|
Weak to:
Weakspots: |
A Photoner who wishes for omniscience. Uses gravity-based attacks, indicated by an AOE marker. When approached, will teleport; upon doing so a third time, will become vulnerable for a brief period of time. | ||
| 128px Aratron, Apostle of Earth 土の使徒 アラトロン |
|
Weak to:
Weakspots: |
Mother Cluster's Apostle of Earth. Impervious to damage until his hammer is destroyed at least once, which will stun him briefly. His hammer will recover, but he will no longer be immune to attacks. | ||
| 128px Bethor ベトール |
|
Weak to:
Weakspots: |
Mother Cluster's Apostle of Earth. Will summon various Tokyo Phantoms alongside a variety of props that have adverse effects. Upon defeating all mobs, will teleport into the arena and attack directly. | ||
| 128px Phaleg ファレグ |
|
Weak to:
Weakspots: |
Mother Cluster's Apostle of Fire. Possesses very high damage resistance and quick speed. | ||
 Demon Phaleg 魔人・ファレグ |
|
Weak to:
Weakspots: |
Phaleg Ives at her full strength. | ||
| 128px Och, Apostle of Sun 日の使徒 オークゥ |
|
Weak to:
Weakspots: |
Mother Cluster's Apostle of Sun. Impervious to damage until Laplace's Demon is defeated. Fights primarily with melee attacks. | ||
| 128px Ophiel, Apostle of Water 水の使徒 オフィエル |
|
Weak to:
Weakspots: |
Mother Cluster's Apostle of Water. Battles by throwing scalpels and teleporting in an extremely confined area. | ||
| 128px Phul, Apostle of Moon 月の使徒 フル |
|
Weak to:
Weakspots: |
Mother Cluster's Apostle of Moon. Fights primarily with ranged attacks while supporting her allies. | ||
| 128px Kohri Washinomiya 鷲宮コオリ |
|
Weak to:
Weakspots: |
Kohri Wagashimiya, brainwashed by Ophiel. Fights by using powered up variants of Sword Photon Arts. | ||
| 128px Mother マザー |
|
Weak to:
Weakspots: |
The leader of Mother Cluster. | ||
| 128px Sir Ardem S サー・アーデム・S |
|
Weak to:
Weakspots: |
The leader of the Earth Guides. Battles with a rapier and uses a wide range of attacks. | ||
| 128px SOROKING D SOROKING・D |
|
Weak to:
Weakspots: |
A giant apparition of SORO (from PHANTASY STAR ONLINE 2 THE ANIMATION) summoned by the denizen of Apprentice, Solitary Rina Izumi. Fights with the Launcher "Illegal Negro". |