Difference between revisions of "Skill Rings (PSO2)"
| Line 26: | Line 26: | ||
==L Rings== | ==L Rings== | ||
===Class Rings=== | ===Class Rings=== | ||
| − | {{NRing|Head|Hunter}} | + | {{NRing|Head|{{NUI|UIClassHu}} Hunter}} |
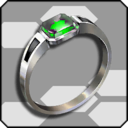
| − | {{NRing|Body|L|4|HunterGearSave|L/Hunter Gear Save|L/ハンターギアセイブ|Hunter Gear Save | + | {{NRing|Body|L|4|HunterGearSave|L/Hunter Gear Save|L/ハンターギアセイブ|Hunter Gear Save |
| + | While Hunter Gear Boost is active, decrease the Rate of Gear Drain and Consumption.|3|SATK|RATK|DEX||Emerald}} | ||
{{NRing|Stat|Gear Consumption Rate}} || 75% || 74% || 73% || 72% || 71% || 70% || 69% || 68% || 67% || 66% || 65%|| 64% || 63% || 62% || 61% || 60% || 59% || 58% || 55% || 50% | {{NRing|Stat|Gear Consumption Rate}} || 75% || 74% || 73% || 72% || 71% || 70% || 69% || 68% || 67% || 66% || 65%|| 64% || 63% || 62% || 61% || 60% || 59% || 58% || 55% || 50% | ||
{{NRing|Stat|Gear Drain Rate}} || 75% || 74% || 73% || 72% || 71% || 70% || 69% || 68% || 67% || 66% || 65%|| 64% || 63% || 62% || 61% || 60% || 59% || 58% || 55% || 50% | {{NRing|Stat|Gear Drain Rate}} || 75% || 74% || 73% || 72% || 71% || 70% || 69% || 68% || 67% || 66% || 65%|| 64% || 63% || 62% || 61% || 60% || 59% || 58% || 55% || 50% | ||
{{NRing|Null}} | {{NRing|Null}} | ||
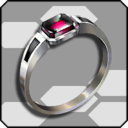
| − | {{NRing|Body|L|4|JGSonicArrow|L/JG Sonic Arrow|L/JGソニックアロウ|Just Guard Sonic Arrow | + | {{NRing|Body|L|4|JGSonicArrow|L/JG Sonic Arrow|L/JGソニックアロウ|Just Guard Sonic Arrow |
| + | Sword Just Guards will execute Sonic Arrow.|3|SATK|RATK|DEX||Amethyst}} | ||
{{NRing|Stat|Power}} || 175% || 176% || 177% || 178% || 180% || 182% || 184% || 186% || 188% || 190% || 192% || 194% || 196% || 198% || 200% || 204% || 208% || 212% || 216% || 220% | {{NRing|Stat|Power}} || 175% || 176% || 177% || 178% || 180% || 182% || 184% || 186% || 188% || 190% || 192% || 194% || 196% || 198% || 200% || 204% || 208% || 212% || 216% || 220% | ||
{{NRing|Stat|PP Consumption}} || 20 || 19 || 18 || 17 || 16 || 15 || 14 || 13 || 12 || 11 || 10 || 9 || 8 || 7 || 6 || 5 || 4 || 3 || 2 || 0 | {{NRing|Stat|PP Consumption}} || 20 || 19 || 18 || 17 || 16 || 15 || 14 || 13 || 12 || 11 || 10 || 9 || 8 || 7 || 6 || 5 || 4 || 3 || 2 || 0 | ||
{{NRing|Null}} | {{NRing|Null}} | ||
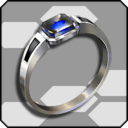
| − | {{NRing|Body|L|4|JGHeavenlyF|L/JG Heavenly F|L/JGヘブンリーF|Just Guard Heavenly Fall | + | {{NRing|Body|L|4|JGHeavenlyF|L/JG Heavenly F|L/JGヘブンリーF|Just Guard Heavenly Fall |
| + | Wired Lance Just Guards will execute Heavenly Fall.|3|SATK|RATK|DEX||Sapphire}} | ||
{{NRing|Stat|Power}} || 175% || 176% || 177% || 178% || 180% || 182% || 184% || 186% || 188% || 190% || 192% || 194% || 196% || 198% || 200% || 204% || 208% || 212% || 216% || 220% | {{NRing|Stat|Power}} || 175% || 176% || 177% || 178% || 180% || 182% || 184% || 186% || 188% || 190% || 192% || 194% || 196% || 198% || 200% || 204% || 208% || 212% || 216% || 220% | ||
{{NRing|Stat|PP Consumption}} || 20 || 19 || 18 || 17 || 16 || 15 || 14 || 13 || 12 || 11 || 10 || 9 || 8 || 7 || 6 || 5 || 4 || 3 || 2 || 0 | {{NRing|Stat|PP Consumption}} || 20 || 19 || 18 || 17 || 16 || 15 || 14 || 13 || 12 || 11 || 10 || 9 || 8 || 7 || 6 || 5 || 4 || 3 || 2 || 0 | ||
{{NRing|Null}} | {{NRing|Null}} | ||
| − | {{NRing|Body|L|4|JGRisingF|L/JG Rising F|L/JGライシングF|Just Guard Rising Flag | + | {{NRing|Body|L|4|JGRisingF|L/JG Rising F|L/JGライシングF|Just Guard Rising Flag |
| + | Partizan Just Guards will execute Rising Flag.|3|SATK|RATK|DEX||Opal}} | ||
{{NRing|Stat|Power}} || 175% || 176% || 177% || 178% || 180% || 182% || 184% || 186% || 188% || 190% || 192% || 194% || 196% || 198% || 200% || 204% || 208% || 212% || 216% || 220% | {{NRing|Stat|Power}} || 175% || 176% || 177% || 178% || 180% || 182% || 184% || 186% || 188% || 190% || 192% || 194% || 196% || 198% || 200% || 204% || 208% || 212% || 216% || 220% | ||
{{NRing|Stat|PP Consumption}} || 20 || 19 || 18 || 17 || 16 || 15 || 14 || 13 || 12 || 11 || 10 || 9 || 8 || 7 || 6 || 5 || 4 || 3 || 2 || 0 | {{NRing|Stat|PP Consumption}} || 20 || 19 || 18 || 17 || 16 || 15 || 14 || 13 || 12 || 11 || 10 || 9 || 8 || 7 || 6 || 5 || 4 || 3 || 2 || 0 | ||
|} | |} | ||
|} | |} | ||
| − | {{NRing|Head|Fighter}} | + | {{NRing|Head|{{NUI|UIClassFi}} Fighter}} |
| − | {{NRing|Body|L|3|SlowFiAction|L/Slow Fi Action|L/スローFiアクション|Slow Fighter Action | + | {{NRing|Body|L|3|SlowFiAction|L/Slow Fi Action|L/スローFiアクション|Slow Fighter Action |
| − | {{NRing|Stat|N/A}} || colspan=" | + | Decrease the Speed of Weapon Actions executed with Fighter Weapons.|2|SATK|SDEF|||Moonstone}} |
| + | {{NRing|Stat|N/A}} || colspan="20" | N/A | ||
{{NRing|Null}} | {{NRing|Null}} | ||
| − | {{NRing|Body|L|3|TDAirChase|L/TD Air Chase|L/TDエアチェイス|Twin Dagger Air Chase | + | {{NRing|Body|L|3|TDAirChase|L/TD Air Chase|L/TDエアチェイス|Twin Dagger Air Chase |
| − | <BR><BR>INCLUDED Photon Arts: Facet Folia, Fall Nocturne, Scar Fugue|3| | + | Twin Dagger Normal Attacks and Photon Arts executed in the air will Chase a Locked-On Target. |
| − | {{NRing|Stat|N/A}} || colspan=" | + | <BR><BR>INCLUDED Photon Arts: Facet Folia, Fall Nocturne, Scar Fugue|3|SATK|TATK|DEX||Emerald}} |
| + | {{NRing|Stat|N/A}} || colspan="20" | N/A | ||
{{NRing|Null}} | {{NRing|Null}} | ||
| − | {{NRing|Body|L|4|DSKamaitachi|L/DS Kamaitachi|L/DSカマイタチ|Double Saber Kamaitachi | + | {{NRing|Body|L|4|DSKamaitachi|L/DS Kamaitachi|L/DSカマイタチ|Double Saber Kamaitachi |
| − | <BR><BR>EXCLUDED Photon Arts: Chaos Riser, Hurricane Sender|3| | + | Double Saber Photon Arts can activate Kamaitachi without Gear Consumption. |
| − | {{NRing|Stat|Power}} || colspan=" | + | <BR><BR>EXCLUDED Photon Arts: Chaos Riser, Hurricane Sender|3|SATK|TATK|DEX||Opal}} |
| + | {{NRing|Stat|Power}} || colspan="20" | 100% | ||
{{NRing|Stat|Activation Rate}} || 5% || 10% || 15% || 20% || 25% || 30% || 35% || 40% || 45% || 50% || 55% || 60% || 65% || 70% || 75% || 80% || 85% || 90% || 95% || 100% | {{NRing|Stat|Activation Rate}} || 5% || 10% || 15% || 20% || 25% || 30% || 35% || 40% || 45% || 50% || 55% || 60% || 65% || 70% || 75% || 80% || 85% || 90% || 95% || 100% | ||
{{NRing|Null}} | {{NRing|Null}} | ||
| − | {{NRing|Body|L|3|KnuckleChase|L/Knuckle Chase|L/ナックルチェイス|Knuckle Chase | + | {{NRing|Body|L|3|KnuckleChase|L/Knuckle Chase|L/ナックルチェイス|Knuckle Chase |
| + | Knuckle Normal Attacks and Photon Arts executed on the ground will Chase a Locked-On Target. | ||
<BR><BR>EXCLUDED Photon Arts: Heartless Impact, Meteor Fist, Straight Charge (+ Type-0) | <BR><BR>EXCLUDED Photon Arts: Heartless Impact, Meteor Fist, Straight Charge (+ Type-0) | ||
| − | <BR>SPECIAL Cases: Step Attack (+ in air), Quake Howling (only in air)|3| | + | <BR>SPECIAL Cases: Step Attack (+ in air), Quake Howling (only in air)|3|SATK|TATK|DEX||Amethyst}} |
| − | {{NRing|Stat|N/A}} || colspan=" | + | {{NRing|Stat|N/A}} || colspan="20" | N/A |
|} | |} | ||
|} | |} | ||
| − | {{NRing|Head|Ranger}} | + | {{NRing|Head|{{NUI|UIClassBo}} Bouncer}} |
| − | {{NRing|Body|L|3|StandingSign|L/Standing Sign|L/スタンディングサイン|Standing Sign | + | {{NRing|Body|L|3|DBSnatch|L/DB Snatch|L/DBスナッチ|Dual Blade Snatch|3|SATK|DEX|SDEF||Sapphire}} |
| − | {{NRing|Stat|N/A}} || colspan=" | + | {{NRing|Stat|Power}} || 400% || 500% || 600% || 700% || 800% || 900% || 1000% || 1100% || 1200% || 1300% || 1350% || 1400% || 1450% || 1500% || 1550% || 1600% || 1650% || 1700% || 1750% || 1800% |
| + | {{NRing|Null}} | ||
| + | {{NRing|Body|L|5|PBHoming|L/PB Homing|L/PBホーミング|Photon Blade Homing | ||
| + | Adds a Homing Property to a Dual Blades' Photon Blade on Weapon Action.|2|SATK|SDEF|||Peridot}} | ||
| + | {{NRing|Stat|Power}} || colspan="3" | 101% || colspan="3" | 102% || colspan="3" | 103% || colspan="3" | 104% || colspan="3" | 105% || colspan="2" | 106% || colspan="2" | 107% || 108% | ||
| + | {{NRing|Stat|Turn Rate}} || 30° || 35° || 40° || 45° || 50° || 55° || 60° || 65° || 70° || 75° || 80° || 85° || 90° || 95° || 100° || 110° || 120° || 130° || 140° || 150° | ||
| + | {{NRing|Stat|Turn Period}} || colspan="5" | 2.00s || colspan="5" | 3.00s || colspan="5" | 4.00s || colspan="5"| 5.00s | ||
| + | {{NRing|Null}} | ||
| + | {{NRing|Body|L|3|JBElementalKeep|L/JB Elemental Keep|L/JBエレメンタルキープ|Jet Boots Elemental Keep|3|SATK|TATK|TDEF||Diamond}} | ||
| + | {{NRing|Stat|N/A}} || colspan="20" | N/A | ||
| + | {{NRing|Null}} | ||
| + | {{NRing|Body|L|3|JBTechArtsSC|L/JB Tech Arts SC|L/JBテックアーツSC|Jet Boots Tech Arts Short Charge|3|TATK|SATK|TDEF||Amber}} | ||
| + | {{NRing|Stat|Charge Time}} || 90% || 88% || 86% || 84% || 82% || 80% || 78% || 76% || 74% || 72% || 70% || 68% || 66% || 64% || 62% || 60% || 58% || 56% || 54% || 50% | ||
| + | |} | ||
| + | |} | ||
| + | {{NRing|Head|{{NUI|UIClassRa}} Ranger}} | ||
| + | {{NRing|Body|L|3|StandingSign|L/Standing Sign|L/スタンディングサイン|Standing Sign|3|TATK|TDEF|DEX||Tourmaline}} | ||
| + | {{NRing|Stat|N/A}} || colspan="20" | N/A | ||
{{NRing|Null}} | {{NRing|Null}} | ||
| − | {{NRing|Body|L|3|PWeakBullet|L/P Weak Bullet|L/Pウィークバレット|Point | + | {{NRing|Body|L|3|PWeakBullet|L/P Weak Bullet|L/Pウィークバレット|Point Weak Bullet|3|RATK|RDEF|DEX||Hematite}} |
| − | {{NRing|Stat|N/A}} || colspan=" | + | {{NRing|Stat|N/A}} || colspan="20" | N/A |
{{NRing|Null}} | {{NRing|Null}} | ||
| − | {{NRing|Body|L|4|ALauncherMode|L/A Launcher Mode|L/Aランチャーモード|Alternate Launcher Mode | + | {{NRing|Body|L|4|ALauncherMode|L/A Launcher Mode|L/Aランチャーモード|Alternate Launcher Mode|4|RATK|SDEF|RDEF|TDEF|Zircon}} |
{{NRing|Stat|Power}} || 101% || 101% || 102% || 102% || 103% || 103% || 104% || 104% || 105% || 105% || 106% || 106% || 107% || 107% || 108% || 108% || 109% || 109% || 110% || 110% | {{NRing|Stat|Power}} || 101% || 101% || 102% || 102% || 103% || 103% || 104% || 104% || 105% || 105% || 106% || 106% || 107% || 107% || 108% || 108% || 109% || 109% || 110% || 110% | ||
{{NRing|Stat|Explosion Range}} || 102.5% || 105% || 107.5% || 110% || 112.5% || 115% || 117.5% || 120% || 122.5% || 125% || 127.5% || 130% || 132.5% || 135% || 137.5% || 140% || 142.5% || 145% || 147.5% || 150% | {{NRing|Stat|Explosion Range}} || 102.5% || 105% || 107.5% || 110% || 112.5% || 115% || 117.5% || 120% || 122.5% || 125% || 127.5% || 130% || 132.5% || 135% || 137.5% || 140% || 142.5% || 145% || 147.5% || 150% | ||
{{NRing|Null}} | {{NRing|Null}} | ||
| − | {{NRing|Body|L|3|LNonWeakBonus|L/L Non Weak Bonus|L/Lノンウィークボーナス|Launcher Non Weak Bonus | + | {{NRing|Body|L|3|LNonWeakBonus|L/L Non Weak Bonus|L/Lノンウィークボーナス|Launcher Non Weak Bonus|3|SDEF|RDEF|TDEF||Amber}} |
{{NRing|Stat|Power}} || 50% || 51% || 52% || 53% || 54% || 55% || 56% || 57% || 58% || 60% || 64% || 68% || 72% || 76% || 80% || 84% || 88% || 92% || 96% || 100% | {{NRing|Stat|Power}} || 50% || 51% || 52% || 53% || 54% || 55% || 56% || 57% || 58% || 60% || 64% || 68% || 72% || 76% || 80% || 84% || 88% || 92% || 96% || 100% | ||
|} | |} | ||
|} | |} | ||
| − | {{NRing|Head|Gunner}} | + | {{NRing|Head|{{NUI|UIClassGu}} Gunner}} |
| − | {{NRing|Body|L|3|FrontSRoll|L/Front S Roll|L/フロントSロール|Front Stylish Roll | + | {{NRing|Body|L|3|FrontSRoll|L/Front S Roll|L/フロントSロール|Front Stylish Roll|2|RATK|RDEF|||Emerald}} |
{{NRing|Stat|Power}} || 101% || 102% || 103% || 104% || 105% || 106% || 107% || 108% || 109% || 110% || 111% || 112% || 113% || 114% || 115% || 116% || 117% || 118% || 119% || 120% | {{NRing|Stat|Power}} || 101% || 102% || 103% || 104% || 105% || 106% || 107% || 108% || 109% || 110% || 111% || 112% || 113% || 114% || 115% || 116% || 117% || 118% || 119% || 120% | ||
{{NRing|Null}} | {{NRing|Null}} | ||
| − | {{NRing|Body|L|3|HighTimeKeep|L/High Time Keep|L/ハイタイムキープ|High Time Keep | + | {{NRing|Body|L|3|HighTimeKeep|L/High Time Keep|L/ハイタイムキープ|High Time Keep|2|RATK|RDEF|||Amethyst}} |
{{NRing|Stat|Activation Rate}} || 5% || 10% || 15% || 20% || 25% || 30% || 35% || 40% || 45% || 50% || 55% || 60% || 65% || 70% || 75% || 80% || 85% || 90% || 95% || 100% | {{NRing|Stat|Activation Rate}} || 5% || 10% || 15% || 20% || 25% || 30% || 35% || 40% || 45% || 50% || 55% || 60% || 65% || 70% || 75% || 80% || 85% || 90% || 95% || 100% | ||
{{NRing|Null}} | {{NRing|Null}} | ||
| − | {{NRing|Body|L|4|TMachineGunSUp|L/T Machine Gun S Up|L/TマシンガンSアップ|Twin Machine Gun Stance Up | + | {{NRing|Body|L|4|TMachineGunSUp|L/T Machine Gun S Up|L/TマシンガンSアップ|Twin Machine Gun Stance Up|3|RATK|RDEF|TDEF||Zircon}} |
| − | {{NRing|Stat|Power ( | + | {{NRing|Stat|Power (Power Type)}} || colspan="11" | 100% || 101% || 102% || 103% || 104% || 105% || 106% || 107% || 108% || 110% |
| − | {{NRing|Stat|Power (Shoot)}} || 120% || 121% || 122% || 123% || 124% || 125% || 126% || 127% || 128% || 129% || colspan="10" | 130% | + | {{NRing|Stat|Power (Shoot Type)}} || 120% || 121% || 122% || 123% || 124% || 125% || 126% || 127% || 128% || 129% || colspan="10" | 130% |
|} | |} | ||
|} | |} | ||
| − | {{NRing|Head| | + | {{NRing|Head|{{NUI|UIClassBr}} Braver}} |
| − | + | {{NRing|Body|L|4|KatanaGearGuardR|L/Katana Gear Guard R|L/カタナギアガードR|Katana Gear Guard Release|2|RDEF|TDEF|||Sapphire|}} | |
| − | |||
| − | |||
| − | |||
| − | |||
| − | {{ | ||
| − | |||
| − | |||
| − | |||
| − | |||
| − | |||
| − | |||
| − | |||
| − | |||
| − | {{NRing|Body|L|4|KatanaGearGuardR|L/Katana Gear Guard R|L/カタナギアガードR|Katana Gear Guard Release | ||
{{NRing|Stat|Gear Drain Rate}} || 290% || 280% || 270% || 260% || 240% || 220% || 200% || 180% || 160% || colspan="11" | 150% | {{NRing|Stat|Gear Drain Rate}} || 290% || 280% || 270% || 260% || 240% || 220% || 200% || 180% || 160% || colspan="11" | 150% | ||
{{NRing|Stat|Gear Gain Rate}} || colspan="10" | 0% || 5% || 10% || 15% || 20% || 25% || 30% || 35% || 40% || 45% || 50% | {{NRing|Stat|Gear Gain Rate}} || colspan="10" | 0% || 5% || 10% || 15% || 20% || 25% || 30% || 35% || 40% || 45% || 50% | ||
{{NRing|Null}} | {{NRing|Null}} | ||
| − | {{NRing|Body|L|3|ShortCombat|L/Short Combat|L/ショートコンバット|Short Combat | + | {{NRing|Body|L|3|ShortCombat|L/Short Combat|L/ショートコンバット|Short Combat|3|SDEF|RDEF|TDEF||Amethyst}} |
| − | {{NRing|Stat|N/A}} || colspan=" | + | {{NRing|Stat|N/A}} || colspan="20" | N/A |
{{NRing|Null}} | {{NRing|Null}} | ||
| − | {{NRing|Body|L|3|KatanaCCountUp|L/Katana C Count Up|L/カタナCカウントアップ|Katana Combat Count Up|2| | + | {{NRing|Body|L|3|KatanaCCountUp|L/Katana C Count Up|L/カタナCカウントアップ|Katana Combat Count Up|2|SATK|DEX|||Zircon}} |
{{NRing|Stat|Hit Count Rate}} || 105% || 110% || 115% || 120% || 125% || 130% || 135% || 140% || 145% || 150% || 155% || 160% || 165% || 170% || 175% || 180% || 185% || 190% || 195% || 200% | {{NRing|Stat|Hit Count Rate}} || 105% || 110% || 115% || 120% || 125% || 130% || 135% || 140% || 145% || 150% || 155% || 160% || 165% || 170% || 175% || 180% || 185% || 190% || 195% || 200% | ||
{{NRing|Null}} | {{NRing|Null}} | ||
| − | {{NRing|Body|L|4|BulletBowHoming|L/Bullet Bow Homing|L/バレットボウホーミング|Bullet Bow Homing | + | {{NRing|Body|L|4|BulletBowHoming|L/Bullet Bow Homing|L/バレットボウホーミング|Bullet Bow Homing |
| + | Adds a Homing Property to a Bullet Bow's Charged Normal Attack.|3|RATK|TATK|DEX||Tourmaline}} | ||
{{NRing|Stat|Turn Rate}} || 30° || 35° || 40° || 45° || 50° || 55° || 60° || 65° || 70° || 75° || 80° || 85° || 90° || 95° || 100° || 110° || 120° || 130° || 140° || 150° | {{NRing|Stat|Turn Rate}} || 30° || 35° || 40° || 45° || 50° || 55° || 60° || 65° || 70° || 75° || 80° || 85° || 90° || 95° || 100° || 110° || 120° || 130° || 140° || 150° | ||
{{NRing|Stat|Turn Period}} || 0.10s || 0.20s || 0.30s || 0.40s || 0.50s || 0.60s || 0.70s || 0.80s || 0.90s || colspan="11" | 1.00s | {{NRing|Stat|Turn Period}} || 0.10s || 0.20s || 0.30s || 0.40s || 0.50s || 0.60s || 0.70s || 0.80s || 0.90s || colspan="11" | 1.00s | ||
|} | |} | ||
|} | |} | ||
| − | {{NRing|Head| | + | {{NRing|Head|{{NUI|UIClassFo}} Force}} |
| − | {{NRing|Body|L| | + | {{NRing|Body|L|4|ARodShootMode|L/A Rod Shoot Mode|L/Aロッドシュートモード|Alternate Rod Shoot Mode|3|TATK|TDEF|DEX||Fluorite}} |
| − | {{NRing|Stat| | + | {{NRing|Stat|Power}} || 50% || 55% || 60% || 65% || 70% || 75% || 80% || 85% || 90% || 95% || 100% || 101% || 102% || 103% || 104% || 105% || 106% || 107% || 108% || 110% |
| + | {{NRing|Stat|Explosion Range}} || 100% || 102%|| 104% || 106% || 108% || 110% || 112% || 114% || 116% || 118% || 120% || 122% || 124% || 126% || 128% || 132% || 136% || 140% || 144% || 150% | ||
| + | |} | ||
| + | |} | ||
| + | {{NRing|Head|{{NUI|UIClassTe}} Techer}} | ||
| + | {{NRing|Body|L|3|WandEChange|L/Wand E Change|L/ウォンドEチェンジ|Wand Element Change|2|SATK|TATK|||Lapis Lazuli}} | ||
| + | {{NRing|Stat|Element Conversion Rate}} || 80% || 81% || 82% || 83% || 84% || 85% || 86% || 87% || 88% || 89% || 90% || 91% || 92% || 93% || 94% || 95% || 96% || 97% || 98% || 100% | ||
{{NRing|Null}} | {{NRing|Null}} | ||
| − | {{NRing|Body|L| | + | {{NRing|Body|L|3|RRField|L/R R Field|L/RRフィールド|Recast Reverser Field|4|SATK|RATK|TATK|DEX|Opal}} |
| − | + | {{NRing|Stat|Cooldown Time}} || 70% || 69% || 68% || 67% || 66% || 65% || 64% || 63% || 62% || 61% || 60% || 59% || 58% || 57% || 56% || 55% || 54% || 53% || 52% || 50% | |
| − | |||
| − | |||
| − | |||
| − | |||
| − | |||
| − | |||
| − | |||
| − | {{NRing|Stat| | ||
|} | |} | ||
|} | |} | ||
| − | {{NRing|Head|Summoner}} | + | {{NRing|Head|{{NUI|UIClassSu}} Summoner}} |
| − | {{NRing|Body|L|3|NearAutoTarget|L/Near Auto Target|L/ニアオートターゲット|Near Auto Target | + | {{NRing|Body|L|3|NearAutoTarget|L/Near Auto Target|L/ニアオートターゲット|Near Auto Target|3|SATK|RATK|TATK||Peridot}} |
| − | {{NRing|Stat|N/A}} || colspan=" | + | {{NRing|Stat|N/A}} || colspan="20" | N/A |
|} | |} | ||
|} | |} | ||
| Line 144: | Line 154: | ||
===Utility Rings=== | ===Utility Rings=== | ||
{{NRing|Head|Movement}} | {{NRing|Head|Movement}} | ||
| − | {{NRing|Body|L|3|StepJump|L/Step Jump|L/ステップジャンプ|Step Jump | + | {{NRing|Body|L|3|StepJump|L/Step Jump|L/ステップジャンプ|Step Jump|3|SATK|RATK|TATK||Garnet}} |
| − | {{NRing|Stat|N/A}} || colspan=" | + | {{NRing|Stat|N/A}} || colspan="20" | N/A |
{{NRing|Null}} | {{NRing|Null}} | ||
| − | {{NRing|Body|L|3|StepJACombo|L/Step JA Combo|L/ステップJAコンボ|Step Just Attack Combo | + | {{NRing|Body|L|3|StepJACombo|L/Step JA Combo|L/ステップJAコンボ|Step Just Attack Combo|3|SATK|SDEF|DEX||Tanzanite}} |
| − | {{NRing|Stat|N/A}} || colspan=" | + | {{NRing|Stat|N/A}} || colspan="20" | N/A |
{{NRing|Null}} | {{NRing|Null}} | ||
| − | {{NRing|Body|L|3|SlowDiveRoll|L/Slow Dive Roll|L/スローダイブロール|Slow Dive Roll | + | {{NRing|Body|L|3|SlowDiveRoll|L/Slow Dive Roll|L/スローダイブロール|Slow Dive Roll|3|RATK|RDEF|DEX||Garnet}} |
{{NRing|Stat|Duration}} || 0.30s || 0.32s || 0.34s || 0.36s || 0.38s || 0.40s || 0.42s || 0.44s || 0.46s || 0.48s || 0.50s || 0.52s || 0.54s || 0.56s || 0.58s || 0.62s || 0.66s || 0.70s || 0.74s || 0.80s | {{NRing|Stat|Duration}} || 0.30s || 0.32s || 0.34s || 0.36s || 0.38s || 0.40s || 0.42s || 0.44s || 0.46s || 0.48s || 0.50s || 0.52s || 0.54s || 0.56s || 0.58s || 0.62s || 0.66s || 0.70s || 0.74s || 0.80s | ||
{{NRing|Null}} | {{NRing|Null}} | ||
| − | {{NRing|Body|L|3|ShortMirage|L/Short Mirage|L/ショートミラージュ|Short Mirage | + | {{NRing|Body|L|3|ShortMirage|L/Short Mirage|L/ショートミラージュ|Short Mirage|2|TATK|TDEF|||Tourmaline}} |
| − | {{NRing|Stat|N/A}} || colspan=" | + | {{NRing|Stat|N/A}} || colspan="20" | N/A |
{{NRing|Null}} | {{NRing|Null}} | ||
| − | {{NRing|Body|L|3|AirReversal|L/Air Reversal|L/エアリバーサル|Air Reversal | + | {{NRing|Body|L|3|AirReversal|L/Air Reversal|L/エアリバーサル|Air Reversal|2|SATK|DEX|||Garnet}} |
| − | {{NRing|Stat|N/A}} || colspan=" | + | {{NRing|Stat|N/A}} || colspan="20" | N/A |
{{NRing|Null}} | {{NRing|Null}} | ||
| − | {{NRing|Body|L|3|JReversalJACombo|L/J Reversal JA Combo|L/JリバーサルJAコンボ|Just Reversal Just Attack Combo | + | {{NRing|Body|L|3|JReversalJACombo|L/J Reversal JA Combo|L/JリバーサルJAコンボ|Just Reversal Just Attack Combo|4|SDEF|RDEF|TDEF|DEX|Amber}} |
| − | {{NRing|Stat|N/A}} || colspan=" | + | {{NRing|Stat|N/A}} || colspan="20" | N/A |
{{NRing|Null}} | {{NRing|Null}} | ||
| − | {{NRing|Body|L|4|JustReversalB|L/Just Reversal B|L/ジャストリバーサルB|Just Reversal Blast | + | {{NRing|Body|L|4|JustReversalB|L/Just Reversal B|L/ジャストリバーサルB|Just Reversal Blast|3|SDEF|RDEF|TDEF||Fluorite}} |
{{NRing|Stat|Power}} || 100% || 120% || 140% || 160% || 180% || 200% || 220% || 240% || 260% || 300% || 350% || 400% || 450% || 500% || 550% || 600% || 650% || 700% || 750% || 800% | {{NRing|Stat|Power}} || 100% || 120% || 140% || 160% || 180% || 200% || 220% || 240% || 260% || 300% || 350% || 400% || 450% || 500% || 550% || 600% || 650% || 700% || 750% || 800% | ||
{{NRing|Stat|Stun Range}} || 100% || 105% || 110% || 115% || 120% || 125% || 130% || 135% || 140% || 145% || 150% || 155% || 160% || 165% || 170% || 175% || 180% || 185% || 190% || 200% | {{NRing|Stat|Stun Range}} || 100% || 105% || 110% || 115% || 120% || 125% || 130% || 135% || 140% || 145% || 150% || 155% || 160% || 165% || 170% || 175% || 180% || 185% || 190% || 200% | ||
{{NRing|Null}} | {{NRing|Null}} | ||
| − | {{NRing|Body|L|3|JumpingDodge|L/Jumping Dodge|L/ジャンピングドッジ|Jumping Dodge | + | {{NRing|Body|L|3|JumpingDodge|L/Jumping Dodge|L/ジャンピングドッジ|Jumping Dodge|3|SDEF|RDEF|TDEF||Moonstone}} |
{{NRing|Stat|Cooldown Time}} || 100s || 95s || 90s || 85s || 80s || 75s || 70s || 65s || 60s || 55s || 50s || 45s || 40s || 35s || 30s || 25s || 20s || 15s || 10s || 5s | {{NRing|Stat|Cooldown Time}} || 100s || 95s || 90s || 85s || 80s || 75s || 70s || 65s || 60s || 55s || 50s || 45s || 40s || 35s || 30s || 25s || 20s || 15s || 10s || 5s | ||
|} | |} | ||
|} | |} | ||
{{NRing|Head|Technique}} | {{NRing|Head|Technique}} | ||
| − | {{NRing|Body|L|3|TechCParrying|L/Tech C Parrying|L/テックCパリング|Tech Charge Parrying | + | {{NRing|Body|L|3|TechCParrying|L/Tech C Parrying|L/テックCパリング|Tech Charge Parrying|3|SATK|TATK|DEX||Emerald}} |
{{NRing|Stat|Duration}} || 0.03s || 0.06s || 0.09s || 0.12s || 0.15s || 0.18s || 0.21s || 0.24s || 0.27s || 0.30s || 0.33s || 0.36s || 0.39s || 0.42s || 0.45s || 0.48s || 0.51s || 0.54s || 0.57s || 0.60s | {{NRing|Stat|Duration}} || 0.03s || 0.06s || 0.09s || 0.12s || 0.15s || 0.18s || 0.21s || 0.24s || 0.27s || 0.30s || 0.33s || 0.36s || 0.39s || 0.42s || 0.45s || 0.48s || 0.51s || 0.54s || 0.57s || 0.60s | ||
{{NRing|Null}} | {{NRing|Null}} | ||
| − | {{NRing|Body|L|3|PeaceZondeel|L/Peace Zondeel|L/ピースゾンディール|Peace | + | {{NRing|Body|L|3|PeaceZondeel|L/Peace Zondeel|L/ピースゾンディール|Peace Zondeel|2|TATK|TDEF|||Moonstone}} |
| − | {{NRing|Stat|N/A}} || colspan=" | + | {{NRing|Stat|N/A}} || colspan="20" | N/A |
|} | |} | ||
|} | |} | ||
{{NRing|Head|Item}} | {{NRing|Head|Item}} | ||
| − | {{NRing|Body|L|4|MateLovers|L/Mate Lovers|L/メイトラバーズ|Mate Lovers | + | {{NRing|Body|L|4|MateLovers|L/Mate Lovers|L/メイトラバーズ|Mate Lovers|3|SDEF|RDEF|TDEF||Topaz}} |
{{NRing|Stat|Recovery Rate}} || colspan="11" | 100% || 102% || 104% || 106% || 108% || 110% || 112% || 114% || 116% || 120% | {{NRing|Stat|Recovery Rate}} || colspan="11" | 100% || 102% || 104% || 106% || 108% || 110% || 112% || 114% || 116% || 120% | ||
{{NRing|Stat|Action Speed}} || 110% || 115% || 120% || 125% || 130% || 135% || 140% || 145% || 150% || 155% || colspan="10" | 160% | {{NRing|Stat|Action Speed}} || 110% || 115% || 120% || 125% || 130% || 135% || 140% || 145% || 150% || 155% || colspan="10" | 160% | ||
{{NRing|Null}} | {{NRing|Null}} | ||
| − | {{NRing|Body|L|4|AtomizerLovers|L/Atomizer Lovers|L/アトマイザーラバーズ|Atomizer Lovers | + | {{NRing|Body|L|4|AtomizerLovers|L/Atomizer Lovers|L/アトマイザーラバーズ|Atomizer Lovers|3|SDEF|RDEF|TDEF||Hematite}} |
{{NRing|Stat|Recovery Rate}} || 101% || 102% || 103% || 104% || 105% || 106% || 107% || 108% || 109% || 110% || 115% || 120% || 125% || 130% || 135% || 140% || 145% || 150% || 155% || 160% | {{NRing|Stat|Recovery Rate}} || 101% || 102% || 103% || 104% || 105% || 106% || 107% || 108% || 109% || 110% || 115% || 120% || 125% || 130% || 135% || 140% || 145% || 150% || 155% || 160% | ||
| − | {{NRing|Stat|Action Speed}} || colspan=" | + | {{NRing|Stat|Action Speed}} || colspan="20" | 200% |
|} | |} | ||
|} | |} | ||
{{NRing|Head|Mag}} | {{NRing|Head|Mag}} | ||
| − | {{NRing|Body|L|4|MagExcite|L/Mag Excite|L/マグエキサイト|Mag Excite | + | {{NRing|Body|L|4|MagExcite|L/Mag Excite|L/マグエキサイト|Mag Excite|3|SATK|RATK|TATK||Tanzanite}} |
{{NRing|Stat|Power}} || 150% || 155% || 160% || 165% || 170% || 175% || 180% || 185% || 190% || 200% || 210% || 220% || 230% || 240% || 250% || 260% || 270% || 280% || 290% || 300% | {{NRing|Stat|Power}} || 150% || 155% || 160% || 165% || 170% || 175% || 180% || 185% || 190% || 200% || 210% || 220% || 230% || 240% || 250% || 260% || 270% || 280% || 290% || 300% | ||
{{NRing|Stat|Attack Interval}} || 80% || 78% || 76% || 74% || 72% || 70% || 68% || 66% || 64% || 62% || 60% || 58% || 56% || 54% || 52% || 50% || 48% || 46% || 44% || 40% | {{NRing|Stat|Attack Interval}} || 80% || 78% || 76% || 74% || 72% || 70% || 68% || 66% || 64% || 62% || 60% || 58% || 56% || 54% || 52% || 50% || 48% || 46% || 44% || 40% | ||
| Line 195: | Line 205: | ||
|} | |} | ||
{{NRing|Head|A.I.S}} | {{NRing|Head|A.I.S}} | ||
| − | {{NRing|Body|L|4|QuickBlaster|L/Quick Blaster|L/クイックブラスター|Quick Blaster | + | {{NRing|Body|L|4|QuickBlaster|L/Quick Blaster|L/クイックブラスター|Quick Blaster|3|SDEF|RDEF|TDEF||Lapis Lazuli}} |
| − | {{NRing|Stat|Fire Rate}} || colspan=" | + | {{NRing|Stat|Fire Rate}} || colspan="20" | 200% |
| − | {{NRing|Stat|Turn Rate}} || colspan=" | + | {{NRing|Stat|Turn Rate}} || colspan="20" | -40% |
{{NRing|Null}} | {{NRing|Null}} | ||
| − | {{NRing|Body|L|3|WideAreaHeal|L/Wide Area Heal|L/ワイドエリアヒール|Wide Area Heal | + | {{NRing|Body|L|3|WideAreaHeal|L/Wide Area Heal|L/ワイドエリアヒール|Wide Area Heal|4|SATK|RATK|TATK|DEX|Topaz}} |
| − | {{NRing|Stat|Heal Range}} || colspan=" | + | {{NRing|Stat|Heal Range}} || colspan="20" | 300% |
{{NRing|Null}} | {{NRing|Null}} | ||
| − | {{NRing|Body|L|4| | + | {{NRing|Body|L|4|LighArmor|L/Light Armor|L/ライトアーマー|Light Armor|4|SATK|RATK|TATK|DEX|Lapis Lazuli}} |
| − | {{NRing|Stat|PP Consumption}} || colspan=" | + | {{NRing|Stat|PP Consumption}} || colspan="20" | 10 |
| − | {{NRing|Stat|Damage Taken}} || colspan=" | + | {{NRing|Stat|Damage Taken}} || colspan="20" | 110% |
{{NRing|Null}} | {{NRing|Null}} | ||
| − | {{NRing|Body|L|3|EarlyRise|L/Early Rise|L/アーリィライズ|Early Rise | + | {{NRing|Body|L|3|EarlyRise|L/Early Rise|L/アーリィライズ|Early Rise|3|SDEF|RDEF|TDEF||Topaz}} |
| − | {{NRing|Stat|Respawn Time}} || colspan=" | + | {{NRing|Stat|Respawn Time}} || colspan="20" | 1.00s |
|} | |} | ||
|} | |} | ||
| Line 213: | Line 223: | ||
==R Rings== | ==R Rings== | ||
===Class Rings=== | ===Class Rings=== | ||
| − | {{NRing|Head|Hunter}} | + | {{NRing|Head|{{NUI|UIClassHu}} Hunter}} |
| − | {{NRing|Body|R|5|MassiveHunter|R/Massive Hunter|R/マッシブハンター|Massive Hunter| | + | {{NRing|Body|R|5|MassiveHunter|R/Massive Hunter|R/マッシブハンター|Massive Hunter|Hu|||||Sapphire}} |
{{NRing|Stat|Damage Taken}} || colspan="10" | 99% || 95% || 94% || 93% || 92% || 91% || colspan="5" | 90% | {{NRing|Stat|Damage Taken}} || colspan="10" | 99% || 95% || 94% || 93% || 92% || 91% || colspan="5" | 90% | ||
{{NRing|Stat|Duration}} || colspan="5" | 15s || 16s || 17s || 18s || 19s || colspan="6" | 20s || 21s || 22s || 23s || 24s || 25s | {{NRing|Stat|Duration}} || colspan="5" | 15s || 16s || 17s || 18s || 19s || colspan="6" | 20s || 21s || 22s || 23s || 24s || 25s | ||
{{NRing|Stat|Cooldown Time}} || 120s || 118s || 116s || 114s || 112s || colspan="10" | 100s || 95s || 94s || 93s || 92s || 90s | {{NRing|Stat|Cooldown Time}} || 120s || 118s || 116s || 114s || 112s || colspan="10" | 100s || 95s || 94s || 93s || 92s || 90s | ||
{{NRing|Null}} | {{NRing|Null}} | ||
| − | {{NRing|Body|R|3|HealingGuard|R/Healing Guard|R/ヒーリングガード|Healing Guard| | + | {{NRing|Body|R|3|HealingGuard|R/Healing Guard|R/ヒーリングガード|Healing Guard|Hu|||||Amber}} |
{{NRing|Stat|HP Recovered}} || 1.00% || 1.20% || 1.40% || 1.60% || 1.80% || 2.20% || 2.40% || 2.60% || 2.80% || 3.00% || 3.20% || 3.40% || 3.60% || 3.80% || 4.00% || 4.20% || 4.40% || 4.60% || 4.80% || 5.00% | {{NRing|Stat|HP Recovered}} || 1.00% || 1.20% || 1.40% || 1.60% || 1.80% || 2.20% || 2.40% || 2.60% || 2.80% || 3.00% || 3.20% || 3.40% || 3.60% || 3.80% || 4.00% || 4.20% || 4.40% || 4.60% || 4.80% || 5.00% | ||
|} | |} | ||
|} | |} | ||
| − | {{NRing|Head|Fighter}} | + | {{NRing|Head|{{NUI|UIClassFi}} Fighter}} |
| − | {{NRing|Body|R|4| | + | {{NRing|Body|R|4|CStrikeStrike|R/C Strike S|R/Cストライク打撃|Critical Strike (Strike Type)|Fi|||||Opal}} |
{{NRing|Stat|Critical Power}} || colspan="5" | 100% || colspan="5" | 101% || colspan="9" | 102% || 103% | {{NRing|Stat|Critical Power}} || colspan="5" | 100% || colspan="5" | 101% || colspan="9" | 102% || 103% | ||
{{NRing|Stat|Critical Rate Increase}} || 1% || 2% || 3% || 4% || 5% || 6% || 7% || 8% || 9% || 10% || 11% || 12% || 13% || 14% || 15% || 16% || 17% || 18% || 19% || 20% | {{NRing|Stat|Critical Rate Increase}} || 1% || 2% || 3% || 4% || 5% || 6% || 7% || 8% || 9% || 10% || 11% || 12% || 13% || 14% || 15% || 16% || 17% || 18% || 19% || 20% | ||
{{NRing|Null}} | {{NRing|Null}} | ||
| − | {{NRing|Body|R|4| | + | {{NRing|Body|R|4|CStrikeShoot|R/C Strike R|R/Cストライク射撃|Critical Strike (Shoot Type)|Fi|||||Sapphire}} |
{{NRing|Stat|Critical Power}} || colspan="5" | 100% || colspan="5" | 101% || colspan="9" | 102% || 103% | {{NRing|Stat|Critical Power}} || colspan="5" | 100% || colspan="5" | 101% || colspan="9" | 102% || 103% | ||
{{NRing|Stat|Critical Rate Increase}} || 1% || 2% || 3% || 4% || 5% || 6% || 7% || 8% || 9% || 10% || 11% || 12% || 13% || 14% || 15% || 16% || 17% || 18% || 19% || 20% | {{NRing|Stat|Critical Rate Increase}} || 1% || 2% || 3% || 4% || 5% || 6% || 7% || 8% || 9% || 10% || 11% || 12% || 13% || 14% || 15% || 16% || 17% || 18% || 19% || 20% | ||
{{NRing|Null}} | {{NRing|Null}} | ||
| − | {{NRing|Body|R|4| | + | {{NRing|Body|R|4|CStrikeTech|R/C Strike T|R/Cストライク法撃|Critical Strike (Tech Type)|Fi|||||Amethyst}} |
{{NRing|Stat|Critical Power}} || colspan="5" | 100% || colspan="5" | 101% || colspan="9" | 102% || 103% | {{NRing|Stat|Critical Power}} || colspan="5" | 100% || colspan="5" | 101% || colspan="9" | 102% || 103% | ||
{{NRing|Stat|Critical Rate Increase}} || 1% || 2% || 3% || 4% || 5% || 6% || 7% || 8% || 9% || 10% || 11% || 12% || 13% || 14% || 15% || 16% || 17% || 18% || 19% || 20% | {{NRing|Stat|Critical Rate Increase}} || 1% || 2% || 3% || 4% || 5% || 6% || 7% || 8% || 9% || 10% || 11% || 12% || 13% || 14% || 15% || 16% || 17% || 18% || 19% || 20% | ||
{{NRing|Null}} | {{NRing|Null}} | ||
| − | {{NRing|Body|R|3|TechArtsJAPPS|R/Tech Arts JAPPS|R/テックアーツJAPPS|Tech Arts Just Attack PP Save| | + | {{NRing|Body|R|3|TechArtsJAPPS|R/Tech Arts JAPPS|R/テックアーツJAPPS|Tech Arts Just Attack PP Save|Fi|||||Peridot}} |
{{NRing|Stat|PP Consumption}} || 95% || colspan="3" |94% || 93% || colspan="3" |92% || 91% || colspan="3" |90% || 89% || colspan="3" |88% || 87% || colspan="2" |86% || 85% | {{NRing|Stat|PP Consumption}} || 95% || colspan="3" |94% || 93% || colspan="3" |92% || 91% || colspan="3" |90% || 89% || colspan="3" |88% || 87% || colspan="2" |86% || 85% | ||
{{NRing|Null}} | {{NRing|Null}} | ||
| − | {{NRing|Body|R|3|Adrenaline|R/Adrenaline|R/アドレナリン|Adrenaline| | + | {{NRing|Body|R|3|Adrenaline|R/Adrenaline|R/アドレナリン|Adrenaline|Fi|||||Tourmaline}} |
{{NRing|Stat|Duration}} || +10s || +11s || +12s || +13s || +14s || +15s || +16s || +17s || +18s || +19s || +20s || +21s || +22s || +23s || +24s || +25s || +26s || +27s || +28s || +30s | {{NRing|Stat|Duration}} || +10s || +11s || +12s || +13s || +14s || +15s || +16s || +17s || +18s || +19s || +20s || +21s || +22s || +23s || +24s || +25s || +26s || +27s || +28s || +30s | ||
|} | |} | ||
|} | |} | ||
| − | {{NRing|Head|Ranger}} | + | {{NRing|Head|{{NUI|UIClassBo}} Bouncer}} |
| − | {{NRing|Body|R|3|KillingBonus|R/Killing Bonus|R/キリングボーナス|Killing Bonus| | + | {{NRing|Body|R|5|CriticalField|R/Critical Field|R/クリティカルフィールド|Critical Field|Bo|||||Tanzanite}} |
| + | {{NRing|Stat|Critical Rate Increase}} || 10% || 11% || 12% || 13% || 14% || 15% || 16% || 17% || 18% || 19% || 20% || 21% || 22% || 23% || 24% || 25% || 26% || 27% || 28% || 30% | ||
| + | {{NRing|Stat|Duration}} || colspan="5" | 20s || 25s || 26s || 27s || 28s || 29s || colspan="5" | 30s || 35s || 36s || 37s || 38s || 40s | ||
| + | {{NRing|Stat|Cooldown Time}} || 120s || 118s || 116s || 114s || 112s || colspan="10" | 100s || 90s || 88s || 86s || 84s || 80s | ||
| + | {{NRing|Null}} | ||
| + | {{NRing|Body|R|5|EPPRField|R/EPPR Field|R/EPPRフィルド|Elemental PP Recovery Field|Bo|||||Opal}} | ||
| + | {{NRing|Stat|Active PP Recovery}} || colspan="10" | +1.00 || +1.20 || +1.40 || +1.60 || +1.80 || +2.00 || +2.20 || +2.40 || +2.60 || +2.80 || +3.00 | ||
| + | {{NRing|Stat|Duration}} || colspan="5" | 20s || 25s || 26s || 27s || 28s || 29s || colspan="5" | 30s || 35s || 36s || 37s || 38s || 40s | ||
| + | {{NRing|Stat|Cooldown Time}} || 120s || 118s || 116s || 114s || 112s || colspan="10" | 100s || 90s || 88s || 86s || 84s || 80s | ||
| + | {{NRing|Null}} | ||
| + | {{NRing|Body|R|3|HealShare|R/Heal Share|R/ヒールシェア|Heal Share|Bo|||||Diamond}} | ||
| + | {{NRing|Stat|HP Recovered Shared}} || 1% || 2% || 3% || 4% || 5% || 6% || 7% || 8% || 9% || 10% || 11% || 12% || 13% || 14% || 15% || 16% || 17% || 18% || 19% || 20% | ||
| + | {{NRing|Null}} | ||
| + | {{NRing|Body|R|3|JReversalPPGain|R/J Reversal PP Gain|R/JリバーサルPPゲイン|Just Reversal PP Gain|Bo|||||Garnet}} | ||
| + | {{NRing|Stat|PP Recovered}} || 1% || 2% || 3% || 4% || 5% || 6% || 7% || 8% || 9% || 10% || 11% || 12% || 13% || 14% || 15% || 16% || 17% || 18% || 19% || 20% | ||
| + | |} | ||
| + | |} | ||
| + | {{NRing|Head|{{NUI|UIClassRa}} Ranger}} | ||
| + | {{NRing|Body|R|3|KillingBonus|R/Killing Bonus|R/キリングボーナス|Killing Bonus|Ra|||||Opal}} | ||
{{NRing|Stat|PP Recovered}} || 1.00 || 1.20 || 1.40 || 1.60 || 1.80 || 2.00 || 2.20 || 2.40 || 2.60 || 2.80 || 3.00 || 3.20 || 3.40 || 3.60 || 3.80 || 4.00 || 4.20 || 4.40 || 4.60 || 5.00 | {{NRing|Stat|PP Recovered}} || 1.00 || 1.20 || 1.40 || 1.60 || 1.80 || 2.00 || 2.20 || 2.40 || 2.60 || 2.80 || 3.00 || 3.20 || 3.40 || 3.60 || 3.80 || 4.00 || 4.20 || 4.40 || 4.60 || 5.00 | ||
|} | |} | ||
|} | |} | ||
| − | {{NRing|Head|Gunner}} | + | {{NRing|Head|{{NUI|UIClassGu}} Gunner}} |
| − | {{NRing|Body|R|4| | + | {{NRing|Body|R|4|PKeeperStrike|R/P Keeper Strike|R/Pキーパー打撃|Perfect Keeper (Strike Type)|Gu|||||Amethyst}} |
{{NRing|Stat|Power}} || colspan="5" | 100% || colspan="5" | 101% || colspan="9" | 102% || 103% | {{NRing|Stat|Power}} || colspan="5" | 100% || colspan="5" | 101% || colspan="9" | 102% || 103% | ||
{{NRing|Stat|Minimum Activation HP}} || 100% || 99% || 98% || 97% || colspan="2" | 96% || 95% || 94% || 93% || colspan="2" | 92% || 90% || 88% || 86% || 84% || 82% || 80% || 78% || 76% || 75% | {{NRing|Stat|Minimum Activation HP}} || 100% || 99% || 98% || 97% || colspan="2" | 96% || 95% || 94% || 93% || colspan="2" | 92% || 90% || 88% || 86% || 84% || 82% || 80% || 78% || 76% || 75% | ||
{{NRing|Null}} | {{NRing|Null}} | ||
| − | {{NRing|Body|R|4| | + | {{NRing|Body|R|4|PKeeperShoot|R/P Keeper Shoot|R/Pキーパー射撃|Perfect Keeper (Shoot Type)|Gu|||||Opal}} |
{{NRing|Stat|Power}} || colspan="5" | 100% || colspan="5" | 101% || colspan="9" | 102% || 103% | {{NRing|Stat|Power}} || colspan="5" | 100% || colspan="5" | 101% || colspan="9" | 102% || 103% | ||
{{NRing|Stat|Minimum Activation HP}} || 100% || 99% || 98% || 97% || colspan="2" | 96% || 95% || 94% || 93% || colspan="2" | 92% || 90% || 88% || 86% || 84% || 82% || 80% || 78% || 76% || 75% | {{NRing|Stat|Minimum Activation HP}} || 100% || 99% || 98% || 97% || colspan="2" | 96% || 95% || 94% || 93% || colspan="2" | 92% || 90% || 88% || 86% || 84% || 82% || 80% || 78% || 76% || 75% | ||
{{NRing|Null}} | {{NRing|Null}} | ||
| − | {{NRing|Body|R|4| | + | {{NRing|Body|R|4|PKeeperTech|R/P Keeper Tech|R/Pキーパー法撃|Perfect Keeper (Tech Type)|Gu|||||Emerald}} |
{{NRing|Stat|Power}} || colspan="5" | 100% || colspan="5" | 101% || colspan="9" | 102% || 103% | {{NRing|Stat|Power}} || colspan="5" | 100% || colspan="5" | 101% || colspan="9" | 102% || 103% | ||
{{NRing|Stat|Minimum Activation HP}} || 100% || 99% || 98% || 97% || colspan="2" | 96% || 95% || 94% || 93% || colspan="2" | 92% || 90% || 88% || 86% || 84% || 82% || 80% || 78% || 76% || 75% | {{NRing|Stat|Minimum Activation HP}} || 100% || 99% || 98% || 97% || colspan="2" | 96% || 95% || 94% || 93% || colspan="2" | 92% || 90% || 88% || 86% || 84% || 82% || 80% || 78% || 76% || 75% | ||
|} | |} | ||
|} | |} | ||
| − | {{NRing|Head|Force}} | + | {{NRing|Head|{{NUI|UIClassBr}} Braver}} |
| − | {{NRing|Body|R|5|PhotonFlare|R/Photon Flare|R/フォトンフレア|Photon Flare| | + | {{NRing|Body|R|3|AttackAdvance|R/Attack Advance|R/アタックアドバンス|Attack Advance|Br|||||Emerald}} |
| + | {{NRing|Stat|Power}} || 101% || 102% || 103% || 104% || 105% || 106% || 107% || 108% || 109% || 110% || 111% || 112% || 113% || 114% || 115% || 116% || 117% || 118% || 119% || 120% | ||
| + | {{NRing|Null}} | ||
| + | {{NRing|Body|R|4|QuickMate|R/Quick Mate|R/クイックメイト|Quick Mate|Br|||||Diamond}} | ||
| + | {{NRing|Stat|Action Speed}} || 102% || 104% || 106% || 108% || 110% || 112% || 114% || 116% || 118% || 120% || 124% || 128% || 132% || 136% || 140% || 144% || 148% || 152% || 156% || 160% | ||
| + | {{NRing|Null}} | ||
| + | {{NRing|Body|R|3|JReversalCover|R/J Reversal Cover|R/Jリバーサルカバー|Just Reversal Cover|Br|||||Diamond}} | ||
| + | {{NRing|Stat|HP Recovered}} || 5.00% || 5.50% || 6.00% || 6.50% || 7.00% || 7.50% || 8.00% || 8.50% || 9.00% || 9.50% || 10.00% || 10.50% || 11.00% || 11.50% || 12.00% || 12.50% || 13.00% || 13.50% || 14.00% || 15.00% | ||
| + | |} | ||
| + | |} | ||
| + | {{NRing|Head|{{NUI|UIClassFo}} Force}} | ||
| + | {{NRing|Body|R|5|PhotonFlare|R/Photon Flare|R/フォトンフレア|Photon Flare|Fo|||||Sapphire}} | ||
{{NRing|Stat|T-ATK}} || colspan="10" | +150 || +155 || +160 || +165 || +170 || +175 || +180 || +185 || +190 || +195 || +200 | {{NRing|Stat|T-ATK}} || colspan="10" | +150 || +155 || +160 || +165 || +170 || +175 || +180 || +185 || +190 || +195 || +200 | ||
{{NRing|Stat|Duration}} || colspan="5" | 20s || 21s || 22s || 23s || 24s || colspan="6" | 25s || 26s || 27s || 28s || 29s || 30s | {{NRing|Stat|Duration}} || colspan="5" | 20s || 21s || 22s || 23s || 24s || colspan="6" | 25s || 26s || 27s || 28s || 29s || 30s | ||
{{NRing|Stat|Cooldown Time}} || 100s || 95s || 90s || 85s || colspan="11" | 80s || 74s || 73s || 72s || 71s || 70s | {{NRing|Stat|Cooldown Time}} || 100s || 95s || 90s || 85s || colspan="11" | 80s || 74s || 73s || 72s || 71s || 70s | ||
| + | {{NRing|Null}} | ||
| + | {{NRing|Body|R|3|FlameTSCharge|R/Flame T S Charge|R/フレイムTSチャージ|Flame Technique Short Charge|Fo|||||Zircon}} | ||
| + | {{NRing|Stat|Charge Time}} || 90% || 88% || 86% || 84% || 82% || 80% || 78% || 76% || 74% || 72% || 70% || 68% || 66% || 64% || 62% || 60% || 56% || 54% || 50% | ||
|} | |} | ||
|} | |} | ||
| − | {{NRing|Head|Techer}} | + | {{NRing|Head|{{NUI|UIClassTe}} Techer}} |
| − | {{NRing|Body|R|6|PPConvert|R/PP Convert|R/コンバート|PP Convert| | + | {{NRing|Body|R|6|PPConvert|R/PP Convert|R/コンバート|PP Convert|Te|||||Sapphire}} |
{{NRing|Stat|Passive PP Recovery}} || colspan="10" | +1.00 || +1.10 || +1.20 || +1.30 || +1.40 || +1.50 || +1.60 || +1.70 || +1.80 || 1.90 || +2.00 | {{NRing|Stat|Passive PP Recovery}} || colspan="10" | +1.00 || +1.10 || +1.20 || +1.30 || +1.40 || +1.50 || +1.60 || +1.70 || +1.80 || 1.90 || +2.00 | ||
{{NRing|Stat|Max HP}} || colspan="10" | 75% || 74% || 73% || 72% || 71% || colspan="6" | 70% | {{NRing|Stat|Max HP}} || colspan="10" | 75% || 74% || 73% || 72% || 71% || colspan="6" | 70% | ||
| Line 276: | Line 318: | ||
{{NRing|Stat|Cooldown Time}} || 130s || 128s || 126s || 124s || 122s || 120s || colspan="9" | 120s || 118s || 116s || 114s || 112s || 110s | {{NRing|Stat|Cooldown Time}} || 130s || 128s || 126s || 124s || 122s || 120s || colspan="9" | 120s || 118s || 116s || 114s || 112s || 110s | ||
{{NRing|Null}} | {{NRing|Null}} | ||
| − | {{NRing|Body|R|3|WideSupport|R/Wide Support|R/ワイドサポート|Wide Support| | + | {{NRing|Body|R|3|WideSupport|R/Wide Support|R/ワイドサポート|Wide Support|Te|||||Amber}} |
{{NRing|Stat|PP Consumption Rate}} || 120% || 119% || 118% || 117% || 116% || 115% || 114% || 113% || 112% || 111% || 110% || 109% || 108% || 107% || 106% || 105% || 104% || 103% || 102% || 100% | {{NRing|Stat|PP Consumption Rate}} || 120% || 119% || 118% || 117% || 116% || 115% || 114% || 113% || 112% || 111% || 110% || 109% || 108% || 107% || 106% || 105% || 104% || 103% || 102% || 100% | ||
|} | |} | ||
|} | |} | ||
| − | {{NRing|Head| | + | {{NRing|Head|{{NUI|UIClassSu}} Summoner}} |
| − | {{NRing|Body|R| | + | {{NRing|Body|R|5|HPRestorate|R/HP Restorate|R/HPリストレイト|HP Restorate|Su|||||Hematite}} |
| − | {{NRing|Stat| | + | {{NRing|Stat|Recovery Rate}} || colspan="15" | 5.00% || 5.50% || 6.00% || 6.50% || 7.00% || 7.50% |
| − | {{NRing| | + | {{NRing|Stat|Recovery Interval}} || colspan="11" | 10s || 9s || 8s || 7s || 6s || colspan="5" | 5s |
| − | + | {{NRing|Stat|Maximum Activation HP}} || 50% || 55% || 60% || 65% || 70% || 75% || 80% || 85% || 90% || 95% || colspan="10" | 100% | |
| − | {{NRing|Stat|HP | ||
|} | |} | ||
|} | |} | ||
| − | {{NRing|Head| | + | ===Utility Rings=== |
| − | {{NRing|Body|R|5| | + | {{NRing|Head|Effort Symbol}} |
| − | + | {{NRing|Body|R|5|[[File:UIItemEffortSymbolHu.png|42px|link=]][[File:UIItemEffortSymbolFi.png|42px|link=]][[File:UIItemEffortSymbolBo.png|42px|link=]]<BR>[[File:UIItemEffortSymbolRa.png|42px|link=]][[File:UIItemEffortSymbolGu.png|42px|link=]][[File:UIItemEffortSymbolBr.png|42px|link=]]<BR>[[File:UIItemEffortSymbolFo.png|42px|link=]][[File:UIItemEffortSymbolTe.png|42px|link=]][[File:UIItemEffortSymbolSu.png|42px|link=]]<BR>[[File:UIItemEffortSymbolHr.png|42px|link=]]|R/Effort Symbol|R/エフォートシンボル|Effort Symbol||||||Effort}} | |
| − | {{NRing|Stat| | + | {{NRing|Stat|Power}} || colspan="3" | 100.10% || colspan="2" | 100.20% || colspan="2" | 100.30% || colspan="2" | 100.40% || colspan="2" | 100.5% || colspan="2" | 100.60% || colspan="2" | 100.70% || colspan="2" | 100.80% || colspan="2" | 100.90% || 100.10% |
| − | + | {{NRing|Stat|Critical Rate Increase}} || 0.50% || 1.00% || 1.50% || 2.00% || 2.50% || 3.00% || 3.50% || 4.00% || 4.50% || 5.00% || 5.50% || 6.00% || 6.50% || 7.00% || 7.50% || 8.00% || 8.50% || 9.00% || 9.50% || 10.00% | |
| − | + | {{NRing|Stat|Damage Taken}} || colspan="10" | 99% || colspan="5" | 98% || colspan="5" | 97% | |
| − | |||
| − | {{NRing|Stat| | ||
| − | |||
| − | |||
| − | {{NRing|Stat| | ||
|} | |} | ||
|} | |} | ||
| − | + | {{NRing|Head|Guard}} | |
| − | + | {{NRing|Body|R|3|BurnGuard|R/Burn Guard|R/バーンガード|Burn Guard||||||Naberius}} | |
| − | {{NRing|Head| | + | {{NRing|Stat|Resistance}} || 50% || 51% || 52% || 53% || 54% || 56% || 58% || 60% || 62% || 64% || 66% || 68% || 70% || 74% || 78% || 82% || 86% || 90% || 94% || 100% |
| − | {{NRing|Body| | ||
| − | |||
| − | |||
| − | |||
| − | {{NRing|Stat| | ||
{{NRing|Null}} | {{NRing|Null}} | ||
| − | {{NRing|Body| | + | {{NRing|Body|R|3|FreezeGuard|R/Freeze Guard|R/フリーズガード|Freeze Guard||||||Vopar}} |
| − | {{NRing|Stat| | + | {{NRing|Stat|Resistance}} || 50% || 51% || 52% || 53% || 54% || 56% || 58% || 60% || 62% || 64% || 66% || 68% || 70% || 74% || 78% || 82% || 86% || 90% || 94% || 100% |
{{NRing|Null}} | {{NRing|Null}} | ||
| − | {{NRing|Body| | + | {{NRing|Body|R|3|ShockGuard|R/Shock Guard|R/ショックガード|Shock Guard||||||Lillipa}} |
| − | {{NRing|Stat| | + | {{NRing|Stat|Resistance}} || 50% || 51% || 52% || 53% || 54% || 56% || 58% || 60% || 62% || 64% || 66% || 68% || 70% || 74% || 78% || 82% || 86% || 90% || 94% || 100% |
{{NRing|Null}} | {{NRing|Null}} | ||
| − | {{NRing|Body| | + | {{NRing|Body|R|3|MirageGuard|R/Mirage Guard|R/ミラージュガード|Mirage Guard||||||Earth}} |
| − | {{NRing|Stat| | + | {{NRing|Stat|Resistance}} || 50% || 51% || 52% || 53% || 54% || 56% || 58% || 60% || 62% || 64% || 66% || 68% || 70% || 74% || 78% || 82% || 86% || 90% || 94% || 100% |
{{NRing|Null}} | {{NRing|Null}} | ||
| − | {{NRing|Body| | + | {{NRing|Body|R|3|PanicGuard|R/Panic Guard|R/パニックガード|Panic Guard||||||Harkotan}} |
| − | {{NRing|Stat| | + | {{NRing|Stat|Resistance}} || 50% || 51% || 52% || 53% || 54% || 56% || 58% || 60% || 62% || 64% || 66% || 68% || 70% || 74% || 78% || 82% || 86% || 90% || 94% || 100% |
| − | |||
| − | |||
| − | |||
| − | |||
| − | |||
| − | |||
{{NRing|Null}} | {{NRing|Null}} | ||
| − | {{NRing|Body| | + | {{NRing|Body|R|3|PoisonGuard|R/Poison Guard|R/ポイズンガード|Poison Guard||||||Amduscia}} |
| − | {{NRing|Stat| | + | {{NRing|Stat|Resistance}} || 50% || 51% || 52% || 53% || 54% || 56% || 58% || 60% || 62% || 64% || 66% || 68% || 70% || 74% || 78% || 82% || 86% || 90% || 94% || 100% |
| − | | | ||
|} | |} | ||
| − | |||
| − | |||
| − | |||
| − | |||
| − | |||
| − | |||
| − | |||
| − | |||
| − | |||
| − | |||
| − | |||
| − | |||
| − | |||
| − | |||
| − | |||
| − | |||
| − | |||
| − | |||
| − | |||
| − | |||
| − | |||
| − | |||
| − | |||
| − | |||
| − | |||
| − | |||
| − | |||
| − | |||
| − | |||
| − | |||
| − | |||
| − | |||
| − | |||
| − | |||
| − | |||
| − | |||
| − | |||
| − | |||
| − | |||
| − | |||
| − | |||
|} | |} | ||
Revision as of 02:53, 18 August 2017

|
NOTICE This Page is Currently Undergoing Replacement. Stable (Old) Ring Page |
About Skill Rings
Skill Rings are equip items that augment the player's abilities in unique ways, much in the way of Skills do, hence the name. There are two types of Rings: Left Rings and Right Rings. Left Rings produce unique effects that allow players to manipulate their playstyle, while Right Rings typically emulate the effects of pre-existing Skills, with some exceptions.
To create a Skill Ring, you must acquire the requisite items by Mining them in Free Fields via the Gathering system. Once you have acquired the items, you may either take them to the Gathering console in the Campship or the Ring Shop in Franka's Cafe to create the Ring. Almost all Rings are also tradeable and may be purchased off the Player Shop.
Once you have a Skill Ring, you may equip it from the Armor Equip menu. You may equip one Left Ring and one Right Ring each. While they may typically only be changed via this menu, you may use chat commands to switch equipped Rings on the fly.
While a Skill Ring is being worn, 5% of any accrued EXP is added to the Ring. This increases an EXP gauge on the Ring, and when it reaches 100%, the Ring "levels up". Upon a successful level up, the Grind Cap of the Ring increases, enabling you to advance its Grind Level. To Grind a Ring, the Ring must be taken to Dudu or Monica, who will also request a set of Gathering Materials in addition to Grinders. Left Rings can also add +1 to an available stat to upgrade alongside the Grind Level. Grinding Rings typically has an 80% success rate with the exception of the R/Effort Symbol Ring. Many Rings will gain boosted effectiveness when Grinded.
The Grind process for most Rings is as follows:
- +1~+5: Grinders and Rocks are required.
- +6~+10: Grinders, Rocks, and a Gem are required.
- +11~+20: Lambda Grinders, Rocks, and a Gem are required.
- A flat 30,000 Meseta is also required as the Grind fee.
L Rings
Class Rings
| ||||||||||||||||||||||||||||||||||||||||||||||||||||||||||||||||||||||||||||||||||||||||||||||||||||||||||||||||||||||||||||||||||||||||||||||||||||||||||||||||||||||||||||||||||||||||||||||||||||||||||||||||||||||||||||||||||||||||||||||||||||||||||||||||||||||||||||||||||||||||||||||||||||||||||||||||||||||||||||||||||||||||||||||||||||||||||||||||||||||||||||||||||||||||||||||||||||||||||||||||||||||||||||||||||||||||||||||||||||||||||||||||||||||||||||||||||||||||||||||||||||||||||||||


| |||||||||||||||||||||||||||||||||||||||||||||||||||||||||||||||||||||||||||||||||||||||||||||||||||||||||||||||||||||||||||||||||||||||||||||||||||||||||||||||||||||||||||||||||||||||||||||||||||||||||||||||||||||||||||||||||||||||||||||||||||||||||||||||||||||||||||||||||||||||||||||||||||||||||||||||||||||||||||||||||||||||||||||||||||||||||||||||||||||||||||||||||||||||||||||||||||||||||||||||||||||||||||||||||||||||||||||||


| ||||||||||||||||||||||||||||||||||||||||||||||||||||||||||||||||||||||||||||||||||||||||||||||||||||||||||||||||||||||||||||||||||||||||||||||||||||||||||||||||||||||||||||||||||||||||||||||||||||||||||||||||||||||||||||||||||||||||||||||||||||||||||||||||||||||||||||||||||||||||||||||||||||||||||||||||||||||||||||||||||||||||||||||||||||||||||||||||||||||||||||||||||||||||||||||||||||||||||||||||||||||||||||||||||||||||||||||||||||||||||||||||||||


| |||||||||||||||||||||||||||||||||||||||||||||||||||||||||||||||||||||||||||||||||||||||||||||||||||||||||||||||||||||||||||||||||||||||||||||||||||||||||||||||||||||||||||||||||||||||||||||||||||||||||||||||||||||||||||||||||||||||||||||||||||||||||||||||||||||||||||||||||||||||||||||||||||||||||||||||||||||||||||||||||||||||||||||||||||||||||||||||||||||||||||||||||||||||||||||||||||||||||||||||||||||||||||||||||||||||||||||||


| |||||||||||||||||||||||||||||||||||||||||||||||||||||||||||||||||||||||||||||||||||||||||||||||||||||||||||||||||||||||||||||||||||||||||||||||||||||||||||||||||||||||||||||||||||||||||||||||||||||||||||||||||||||||||||||||||||||||||||||||||||||||||||||||||||||||||||||||||||||||||||||||||||||||||||||||||||||||||||||||||||

| ||||||||||||||||||||||||||||||||||||||||||||||||||||||||||||||||||||||||||||||||||||||||||||||||||||||||||||||||||||||||||||||||||||||||||||||||||||||||||||||||||||||||||||||||||||||||||||||||||||||||||||||||||||||||||||||||||||||||||||||||||||||||||||||||||||||||||||||||||||||||||||||||||||||||||||||||||||||||||||||||||||||||||||||||||||||||||||||||||||||||||||||||||||||||||||||||||||||||||||||||||||||||||||||||||||||||||||||||||||||||||||||||||||


| |||||||||||||||||||||||||||||||||||||||||||||||||||||||||||||||||||||||||||||||||||||||||||||||||||||||||||

| ||||||||||||||||||||||||||||||||||||||||||||||||||||||||||||||||||||||||||||||||||||||||||||||||||||||||||||||||||||||||||||||||||||||||||||||||||||||||||||||||||||||||||||||||||||||||||||||||||


| ||||||||||||||||||||||||||||||||||||||||||||||||||||||||||||||||||||||||||||||||||||||

Utility Rings
| |||||||||||||||||||||||||||||||||||||||||||||||||||||||||||||||||||||||||||||||||||||||||||||||||||||||||||||||||||||||||||||||||||||||||||||||||||||||||||||||||||||||||||||||||||||||||||||||||||||||||||||||||||||||||||||||||||||||||||||||||||||||||||||||||||||||||||||||||||||||||||||||||||||||||||||||||||||||||||||||||||||||||||||||||||||||||||||||||||||||||||||||||||||||||||||||||||||||||||||||||||||||||||||||||||||||||||||||||||||||||||||||||||||||||||||||||||||||||||||||||||||||||||||||||||||||||||||||||||||||||||||||||||||||||||||||||||||||||||||||||||||||||||||||||||||||||||||||||||||||||||||||||||||||||||||||||||||||||||||||||||||||||||||||||||||||||||||||||||||||||||||||||||||||||||||||||||||||||||||||||||||||||||||||||||||||||||||||||||||||||||||||||||||||||||||||||||||||||||||||||||||||||||||||||||||||||||||||||||||||||||||||||||||||||||||||


| ||||||||||||||||||||||||||||||||||||||||||||||||||||||||||||||||||||||||||||||||||||||||||||||||||||||||||||||||||||||||||||||||||||||||||||||||||||||||||||||||||||||||||||||||||||||||||||||||||

| ||||||||||||||||||||||||||||||||||||||||||||||||||||||||||||||||||||||||||||||||||||||||||||||||||||||||||||||||||||||||||||||||||||||||||||||||||||||||||||||||||||||||||||||||||||||||||||||||||||||||||||||||||||||||||||||||||||||||||||

| |||||||||||||||||||||||||||||||||||||||||||||||||||||||||||||||||||||||||||||||||||||||||||||||||||||||||||

| ||||||||||||||||||||||||||||||||||||||||||||||||||||||||||||||||||||||||||||||||||||||||||||||||||||||||||||||||||||||||||||||||||||||||||||||||||||||||||||||||||||||||||||||||||||||||||||||||||||||||||||||||||||||||||||||||||||||||||||||||||||||||||||||||||||||||||||||||||||||||||||||||||||||||||||||||||||||||||||||||||||||||||||||||||||||||||||||||||||||||||||||||||||||||||||||||||||||||||||||||||||||||||||||||||||||||||||||||||||||||||||||||||||


R Rings
Class Rings
| ||||||||||||||||||||||||||||||||||||||||||||||||||||||||||||||||||||||||||||||||||||||||||||||||||||||||||||||||||||||||||||||||||||||||||||||||||||||||||||||||||||||||||||||||||||||||||||||||||||||||||||||||||||||||||||||||||||||||||||
| |||||||||||||||||||||||||||||||||||||||||||||||||||||||||||||||||||||||||||||||||||||||||||||||||||||||||||||||||||||||||||||||||||||||||||||||||||||||||||||||||||||||||||||||||||||||||||||||||||||||||||||||||||||||||||||||||||||||||||||||||||||||||||||||||||||||||||||||||||||||||||||||||||||||||||||||||||||||||||||||||||||||||||||||||||||||||||||||||||||||||||||||||||||||||||||||||||||||||||||||||||||||||||||||||||||||||||||||||||||||||||||||||||||||||||||||||||||||||||||||||||||||||||||||||||||||||||||||||||||||||||||||||||||||||||||||||||||||||||||||||||||||||||||||||||||


| ||||||||||||||||||||||||||||||||||||||||||||||||||||||||||||||||||||||||||||||||||||||||||||||||||||||||||||||||||||||||||||||||||||||||||||||||||||||||||||||||||||||||||||||||||||||||||||||||||||||||||||||||||||||||||||||||||||||||||||||||||||||||||||||||||||||||||||||||||||||||||||||||||||||||||||||||||||||||||||||||||||||||||||||||||||||||||||||||||||||||||||||||||||||||||||||||||||||||||||||||||||||||||||||||||||||||||||||||||||||||||||||||||||||||||||||||||||||||||||||||||||||||||||||

| ||||||||||||||||||||||||||||||||||||||||||||||||||||||||||||||||||||||||||||||||||||||
| |||||||||||||||||||||||||||||||||||||||||||||||||||||||||||||||||||||||||||||||||||||||||||||||||||||||||||||||||||||||||||||||||||||||||||||||||||||||||||||||||||||||||||||||||||||||||||||||||||||||||||||||||||||||||||||||||||||||||||||||||||||||||||||||||||||||||||||||||||||||||||||||||||||||||||||||||||||||||||||||||||||||||||||||||||||||||||||||||||||||||||||

| ||||||||||||||||||||||||||||||||||||||||||||||||||||||||||||||||||||||||||||||||||||||||||||||||||||||||||||||||||||||||||||||||||||||||||||||||||||||||||||||||||||||||||||||||||||||||||||||||||||||||||||||||||||||||||||||||||||||||||||||||||||||||||||||||||||||||||||||||||||||||||||||||||||||||||||||
| |||||||||||||||||||||||||||||||||||||||||||||||||||||||||||||||||||||||||||||||||||||||||||||||||||||||||||||||||||||||||||||||||||||||||||||||||||||||||||||||||||||||||||||||||||||||||||||||||||||||||||||||||||||||||||||||||||||||||||


| |||||||||||||||||||||||||||||||||||||||||||||||||||||||||||||||||||||||||||||||||||||||||||||||||||||||||||||||||||||||||||||||||||||||||||||||||||||||||||||||||||||||||||||||||||||||||||||||||||||||||||||||||||||||||||||||||||||||||||||||||||||||||||||||||

| ||||||||||||||||||||||||||||||||||||||||||||||||||||||||||||||||||||||||||||||||||||||||||||||||||||||||||||||||||||||||||||||||
Utility Rings
| ||||||||||||||||||||||||||||||||||||||||||||||||||||||||||||||||||||||||||||||||||||||||||||||||||||||||||||||||||||||||||||||||
| ||||||||||||||||||||||||||||||||||||||||||||||||||||||||||||||||||||||||||||||||||||||||||||||||||||||||||||||||||||||||||||||||||||||||||||||||||||||||||||||||||||||||||||||||||||||||||||||||||||||||||||||||||||||||||||||||||||||||||||||||||||||||||||||||||||||||||||||||||||||||||||||||||||||||||||||||||||||||||||||||||||||||||||||||||||||||||||||||||||||||||||||||||||||||||||||||||||||||||||||||||||||||||||||||||||||||||||||||||||||||||||||||||||||||||||||||||||||||||||||||||||||||||||||||||||||||||||||||||||||||||||||||||||||||||||||||||||||||||||||||||||||||||||||||||||||||||||||||||||||||||||||||||||||||||||||||||