Main Page
Ship Infiltration: Large Enemy Battleship
Jump to navigation
Jump to search
Ship Infiltration: Large Enemy Battleship is an Ultimate Quest Quest.
Overview
| Quest Type | Ultimate Quest |
|---|---|
| Quest Goal | Head for the Final Area! |
| Single/Multi Party | Multi |
| Clearing Conditions | - |
| Failing Conditions | - |
| Quest Time Limit | N/A |
Notes
- This Quest has a maximum player capacity of four.
- You must have a Main Class and Sub Class of Lv. 85 to access this Quest, or a Successor class of Lv. 85.
- The quest will immediately end if party members are incapacitated a total of 15 times. All party members will be teleported to the loot crystal room.
Ranking
- This Quest has special ranking requirements. The ranking requirements are on a per-player basis. Ranking affects drops.
| Defeat Enemies | 800 pts |
|---|---|
| Damage Taken | 300 pts (-1 pt for each point of damage taken above 10,000) |
| Incapacitations | 300 pts (-50 pts for each incapacitation) |
| Quest Completion | 100 pts (awarded for fully clearing the quest) |
| Max Score | 1500 pts |
| Ranks | S - 1500 pts A - 1200~1499 pts B - 800~1199 pts C - 0~799pt |
Healing Reduction
- All healing in the quest is reduced by 50%
- Healing from Megiverse is further reduced by 90%
Enemy HP Scaling
- The HP of enemies in this quest scale to the number of players present in the quest.
- 1P - 50% Enemy HP
- 2P - 70% Enemy HP
- 3P - 90% Enemy HP
- 4P - 100% Enemy HP (no scaling)
Auto-Revive
- If you are incapacitated in the quest, you will automatically revive after 5 seconds.
Enemies
- Luminmechs
- DA Aberrations
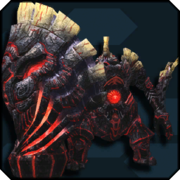


- Bosses

Map
Area 1

- Yellow lines indicate areas with trip lasers
- Red lines are barriers that will open when the preceding enemies are defeated.
- When the quest starts you will be dropped off at C8.
- 3x Bareel (stationary) are present behind a combination of static horizontal trip lasers and vertical trip lasers that move horizontally across the hallway at A.
- At B, there are 2x Elscoude accompanied by either 2x Zolura or a Cyclonehda Yuga and Kuklonahda Yuga.
- At C, there are 4x Yugadicahda in a room where a set of trip lasers cycles continually towards the entrance. Either lure the Yugadicahdas to the preceding room where you fought the Elscoudes, or to the very end next to the barrier to avoid the trip lasers.
- At D, 4x Havalussa will appear.
- 2x Heud Azure will be accompanied by 2x Bareel (stationary), 2x Yugada Sorcerer, or 2x Yuguldrahda at E.
- After clearing enemy group E, there will be two sets of trip lasers which rotate like a fan, each with three layers of fan blades. Time your approach carefully and you can simply run through the gaps.
- At F, a Dissolsaber and 4x Zolura or a Cyclonehda Yuga and 4x Dagan Yuga will appear in a formation with some explosive barrels. Detonate the barrels by attacking them to quickly eliminate the enemies.
- At G, 2x Dissolsaber and a Ga Wonda Yuga, or alternatively 2x Orkabah will appear behind a series of trip laser walls that move toward you along a hallway. There are explosive barrels in the hallway. Either lure the enemies towards you and detonate the barrels, or quickly traverse the hallway and face the enemies behind the trip laser walls.
- At H, the boss of the first area, a Dral Veluge, will spawn along with 3x Saber Diggle. The Dral Veluge may have a shield barrier. Defeat them to proceed to area 2.
Area 2

- Yellow lines indicate areas with trip lasers
- Red lines are barriers that will open when the preceding enemies are defeated.
- Area 2 presents the party with a large gate (marked in Pink) which is sealed by four bulkhead locks, and is guarded by 2x Heud Azure, 2x Havalussa, a Cyclonehda Yuga, a Kuklonahda Yuga, 2x Yugadicahda, and multiple Dagan Yuga.
- Defeat the enemies in the central area (C5), then take the teleporters at the left (B5) and the right (D5) of the main room.
- Defeat the enemies in each room and activate the device at the center to release one of the bulkhead locks
- There are 6 different rooms. Each time the quest is taken, a random selection of four rooms will be available, always two per side.
- Upper Left Room (A2) : a Yuguldrahda + 3x Dagan Yuga, or a Radilugo + 3 x Zolura in a room with multple explosive barrels.
- Mid Left Room (A3) : 3x Yugadicahda, or Orkabah + 2x Zolura in a room with vertical trip lasers.
- Lower Left Room (A4) : 3x Bareel (stationary, shielded) on top of pillars + a Yugadicahda or a Havalussa. The Bareels are shielded against attacks from long range.
- Upper Right Room (E2) : 3x Yuguldrahda, or a Dissolsaber + 2x Havalussa in a room with damaging laser fences.
- Mid Right Room (E3) : a Kuklonahda Yuga + 2x Dagan Yuga, or a Radilugo + 2x Bareel in a room with vertical trip lasers.
- Lower Right Room (E4) : a Yugada Sorcerer + 2x Dagan Yuga, or a Havalussa + 2x Zolura in a room with multiple laser turrets.
- The party may choose to split up and tackle each room individually, or clear the rooms in sequence as a group.
- After the large gate opens, proceed forward through the large hallway filled with trip lasers (C3 & C4). It is possible to fly over all the lasers at a certain height. This can be achieved by all classes by using the jumping dodge ring with double jump afterwards, then moving forward using the Gunslash PA Regenschlag.
- At the end of the hallway the boss of the second area will spawn - an Ultralized Darker Boss accompanied by its corresponding Darker Aberration enemies. The Ultralized Darker Boss may have a shield barrier. Defeat all the enemies to proceed to area 3.
- Grana Gwanahda + a mix of Yuguldrahda, Yugadicahda, and Dagan Yuga
- Rafaga Ringahda + 2x Yugada Sorcerer
- Golshrayda + Cyclonehda Yuga + Kuklonahda Yuga
Area 3

- Yellow lines indicate areas with trip lasers
- Red lines are barriers that will open when the preceding enemies are defeated.
- Immediately after arriving in B9, turrets will begin firing on you. In the long linear hallway, there are three groups of enemies. Defeat each group to proceed.
- First Group (B8): Dissolsaber + 2x Havalussa + 2x Bareel backed by 2x Fractal Cannon turrets
- Second Group (B7): Elscoude + 2x Heud Azure + 2x Bareel
- Third Group (B6): Dissolsaber + 2x Radilugo + 2x Zolura backed by 2x Fractal Cannon turrets
- Activating any of the Trip Lasers in B8 or B7 will add additional Darker Aberration enemies to the enemy groups, as well as adding 2 Laser turrets at the end of the hallway.
- There is a teleporter at the end of the hallway at B5. The party will be transported to the final (boss) room shortly after it is activated.
- The boss of Area 3 is Veiled Fordruss, accompanied by different enemies according to the total Alert Level (see below). The Veiled Fordruss may have a shield barrier.
- Defeating the Veiled Fordruss causes a cutscene to play, completing the quest, regardless if any of the additional enemies accompanying it are still alive.
Strategy
Alert Level
- Alert Level is a mechanic unique to this quest.
- Throughout the quest, there will be a number of yellow trip lasers. If a player comes into contact with one of the trip lasers, the trip laser will turn white and a number of autoturrets will appear nearby and begin to attack the player.
- In addition to the above, the total number of times you are detected by a trip laser will affect the final (boss) room of the quest:
- Alert Level 1 (Detected 0-2 Times): A Dral Veluge will spawn alongside the boss
- Alert Level 2 (Detected 3-6 Times): A Dral Gurudy will spawn alongside the boss
- Alert Level 3 (Detected 7-9 Times): A Dral Gurudy will spawn alongside the boss, and 5 turrets will spawn in the arena
- Alert Level 4 (Detected 10+ Times): In addition to the effects of Level 3, a Saber Diggle, 2 Elscoudes, and 2 Heud Azures will spawn in the boos room. These additional enemies have the "ND" (No Drops) suffix
- You can still be detected by a trip laser even if you are in a state of invulnerability, such as invulnerability frames from a Photon Art, class skill, or mag action.
General Strategy
- Given the lack of time limit restriction and the requirements for S-ranking, this quest rewards a slower, more cautious and methodical approach.
- Damage taken while in Dark Blast does not count towards the overall damage taken for the purposes of determining ranking.
- For an unknown reason, enemies will continue attacking you and you can still take damage during the cutscene after Veiled Fordruss is defeated. Luckily, any further damage taken or incapacitations incurred at this point will not count for the purposes of determining quest ranking, which is determined the moment Veiled Fordruss dies.
- Inflicting the Stun status is highly effective at stopping Luminmech enemies such as Bareel and Heud Azure, allowing you to easily hit their weak points.
Drops
| Type | Item Name | Notes |
|---|---|---|
| Weapons |
|
In addition to the boss-specific |
| Units | ||
| Special Abilies |
|
|
|
|
From shielded boss enemies at the end of each area | |
| S-class Special Ability |
|
On |
|
|
On | |
|
|
On | |
| Others | ||