MISSION: Cataclysm
| MISSION: Cataclysm MISSION:激震 | |
|---|---|
| |
| Quest Type | Challenge Quests |
| Difficulty | |
| Normal | Level 80+ |
| Quest Details | |
| Location | VR Space |
| Single/Multi-Party | Multi-Party |
| Party Invitation | Allowed |
| Ally Assistance | Not Allowed |
| Conditions For Acceptance | |
| Normal | None |
| Restrictions | |
| Time Limit | None |
| Damage Limit | None |
| Ability Adjust | None |
MISSION: Cataclysm is a Challenge Quest.
Overview
MISSION: Cataclysm is a Challenge Quest with a total of five stages and two Interval Areas. Compared to other Challenge Quests, the rules are slightly different:
- VR Energy does not deplete over time. VR Energy only depletes on death, but there is much less VR Energy to be found compared to other Challenge Quests.
- Start with a preset loadout. At the start of the Quest, you are able to choose from one of twelve loadouts. Unlike other Challenge Quests, you do not pick up equipment or Disks randomly dropped on the field. Enemies do not drop anything.
- Enemy spawns change on current VR Energy. The enemies that spawn in a given room are determined by how much VR Energy the party has upon entering.
Bonus Enemies
In the first four stages, a Rappy will spawn somewhere on the map. Defeating it unlocks the yellow fence at the end of each map, granting bonus rewards such as Grinders and Challenge Dolls. However, Rappies despawn if left alone too long, so they must be defeated at the first possible opportunity.
Unlock Switches
In the first four stages, an Unlock Switch will be present somewhere on the map. Like the Bonus Enemy, Unlock Switches deactivate one of the fences at the end of the stage and grant additional rewards. Unlike the Bonus Enemy, Unlock Switches do not go away, but are more out of the way, are not indicated on the map, and may require higher-than-usual jump power to reach. Unlock Switches are also typically located in close vicinity to the Bonus Enemy.
Class Set
At the start of the Quest, you may choose from one of twelve Class Sets, split into four roles. A player's current role is denoted by the ring surrounding the character. The four roles are as follows:
Attack sets focus on dishing out high amounts of damage in a short period of time, making them valuable for pushing through waves of enemies. Their defense and range is somewhat lacking, however.
Rush sets have the ability to double jump and use Complex Photon Arts, giving them a unique jack-of-all-trades role that is useful for managing field gimmicks and carrying the team.
Support sets use Techniques and have the ability to buff and heal allies, making them invaluable assets in a Quest where healing is otherwise rare. Access to Compound Techniques additionally allows them to push massive burst damage in a pinch.
Unique sets are Successor Classes with high power, mobility, and coverage that allow them to fulfill multiple roles at once. Unlike other sets, Unique sets start at Level 55 and cannot use non-Main Class weapons like the Challenger Class.
Class Set Skill
Attack
| Fighter | |||
|---|---|---|---|
| Skill Icon | Skill Name | Skill Level | |
| Brave Stance Lv.10 | Front Multiplier 140% | ||
| Rear Multiplier 135% | |||
| Brave Critical Lv.5 | Critical 25% | ||
| Fury Stance Lv.10 | Strike Multiplier 120% | ||
| Ranged Multiplier 110% | |||
| Striking Damaged Received Multiplier 100% | |||
| Fury Critical Lv.5 | Critical 25% | ||
| Limit Break Lv.1 | Max Hp 25% | ||
| Striking Damage 104% | |||
| Duration 10s | |||
| Cooldown 60s | |||
| Adrenaline Lv.1 | Duration 30s | ||
| Critical Strike Lv.5 | Critical Damage 115% | ||
| Critical Rate 30% | |||
| Deadline Slayer Lv.10 | All-Atk +150 | ||
| Crazy Heart Lv.5 | Passive PP Regen 200% | ||
| Active PP Regen 200% | |||
| Attack PP Restore Lv.10 | Restore Rate 200% | ||
| Double Saber Gear Lv.1 | 1/3 Gear, Number of Hit 8, Damage Per Hit 55% | ||
| 2/3 Gear, Number of Hit 8, Damage Per Hit 82.5% | |||
| 3/3 Gear, Number of Hit 8, Damage Per Hit 110% | |||
| Twin Dagger Gear Lv.1 | 1/3 Gear, Damage 100% | ||
| 2/3 Gear, Damage 120% | |||
| 3/3 Gear, Damage 150% | |||
| Knuckle Gear Lv.1 | Increase Attace and PA speed and Raise specific PAs Damage. Reset when stop attack or jump. | ||
| Double Saber Wind Parry Lv.1 | Allows Just Guard frames when activating Double Saber Gear. Requires at least 1/3 Gear to activate. | ||
| Twin Dagger Spin Move Lv.1 | Allows you to move horizontally while performing the Weapon Action. Distance covered is small (about half the distance of Step), and it does not change the direction you are facing. | ||
| Knuckle Gear Boost Lv.1 | Doubles the amount of Gear generated per attack, requiring only 2 attacks to max it. | ||
| HP Boost 1 | HP increase +50 | ||
| HP Boost 2 | HP increase +75 | ||
| HP Boost 3 | HP increase +100 | ||
| All Attack Bonus 1 Lv.5 | Increase Damage 110% | ||
| First Art JA addition Lv.1 | Your first attack in a combo will become a Just Attack. Has no effect on Techniques. | ||
| Step Lv.1 | Press the Dodge key to do a fast step that has invincibility. Can be used in any direction. | ||
| Step Advance Lv.4 | Invincibility Duration Increase 0.13s | ||
| Step JA Combo Lv.1 | Enable JA ring after Step | ||
| Step Jump Lv.1 | Press the Jump button right after a Step to reach running speed instantly. | ||
| Step Attack Lv.1 | Enable Attack After Step | ||
| icon | Air Reversal Lv.1 | Enable Just Reversal in Air | |
| Just Reversal Lv.1 | When knocked down, press the Jump key at the moment you hit the ground to get up instantly. | ||
| Gunner | |||
|---|---|---|---|
| Skill Icon | Skill Name | Skill Details | |
| Chain Trigger Lv.10 | Duration 30s | ||
| Cooldown 45s | |||
| Chain Finish Lv.10 | Increase the Damage of Chain Finish 250% | ||
| Chain Finish Bonus Lv.1 | Decrease Cooldown of Chain Trigger according to accumulate chain, 0.25 * chain count | ||
| Twice Chain Lv.1 | Twin Machineguns increase the Chain counter by 2 per hit. | ||
| Attack PP Restore Lv.10 | Restore Rate 200% | ||
| Twin Machinegun Gear Lv.1 | 1/3Gear, Damage 105% | ||
| 2/3 Gear, Damage 110% | |||
| Full Fear, Damage 130% | |||
| Twin Machinegun Mastery Lv.5 | Critical Damage 105% | ||
| PP gain +1 | |||
| Zero Range Advance 1 Lv.10 | Shooting Damage 115% | ||
| Perfect Keeper Lv.4 | Damage 108% | ||
| HP Threshold 75% | |||
| All Attack Bonus 1 Lv.5 | Increase Damage 110% | ||
| First Art JA addition Lv.1 | Your first attack in a combo will become a Just Attack. Has no effect on Techniques. | ||
| Dive Roll Lv.1 | Roll in a desired direction to dodge attacks. | ||
| Dive Roll Advance Lv.6 | Invincibility Duration Increase 0.15s | ||
| Step JA Combo Lv.1 | Enable JA ring after Step | ||
| Step Jump Lv.1 | Press the Jump button right after a Step to reach running speed instantly. | ||
| Dive Roll Shoot Lv.1 | Enable Attack after Dive Roll | ||
| icon | Air Reversal Lv.1 | Enable Just Reversal in Air | |
| Just Reversal Lv.1 | When knocked down, press the Jump key at the moment you hit the ground to get up instantly. | ||
| Braver | |||
|---|---|---|---|
| Skill Icon | Skill Name | Skill Details | |
| [[File: |link=|38px]] | Average Stance Lv.10 | Striking Power 115% | |
| Shooting Power 115% | |||
| Technique Power 115% | |||
| [[File: |link=|38px]] | Average Stance Boost Lv.5 | Power 110% | |
| [[File: |link=|38px]] | Katana Combat Lv.4 | Duration 20s | |
| Cooldown 120 | |||
| [[File: |link=|38px]] | Combat Escape Lv.1 | Become invulnerable for a brief period of time while Katana Combat is active. | |
| [[File: |link=|38px]] | Combat JA Bonus Lv.1 | Power Incerese when Katana Combat is Active 115% | |
| [[File: |link=|38px]] | Combat Finish Lv.1 | Grant a Damage to Katana Combat Finish 200% | |
| [[File: |link=|38px]] | Rapid Shot Lv.1 | Attack Interval 0.2s | |
| Power 25% | |||
| Duration 60s | |||
| Cooldown 110s | |||
| Attack PP Restore Lv.10 | Restore Rate 200% | ||
| [[File: |link=|38px]] | Katana Gear Lv.1 | Enables Katana Gear. Attacking with a Katana fills the Katana Gear Gauge. Successfully perform a Just Guard to activate Katana Gear. While active, Katana Gear boosts your S-ATK and Critical Hit Rate. | |
| [[File: |link=|38px]] | Counter Edge Lv.1 | Enable Counter when JG, Power 200% | |
| [[File: |link=|38px]] | Counter Bonus Lv.1 | Gain a Bonus when Counter | |
| Power 700% | |||
| PP recover Amount +5 | |||
| Edge Power 300% | |||
| Edge PP Recovery Amount +10 | |||
| [[File: |link=|38px]] | Attack Advance Lv.3 | Power 125% | |
| [[File: |link=|38px]] | Bullet Bow Charge Bonus Lv.1 | Charge Time 80% | |
| [[File: |link=|38px]] | Braver Combination Lv.1 | Switching to a Bullet Bow while Katana Gear is active retains Katana Gear and applies the effect of Katana Gear to Bullet Bow. Critical Rate 50% | |
| All Attack Bonus 1 Lv.5 | Increase Damage 110% | ||
| First Art JA addition Lv.1 | Your first attack in a combo will become a Just Attack. Has no effect on Techniques. | ||
| Step Lv.1 | Starting skill. Press the Dodge key to do a fast step that has invincibility. Can be used in any direction. | ||
| Step Advance Lv.3 | Invincibility Duration Increase 0.11s | ||
| Step JA Combo Lv.1 | Enable JA ring after Step | ||
| Step Jump Lv.1 | Press the Jump button right after a Step to reach running speed instantly. | ||
| Step Attack Lv.1 | Enable Attack After Step | ||
| icon | Air Reversal Lv.1 | Enable Just Reversal in Air | |
| Just Reversal Lv.1 | When knocked down, press the Jump key at the moment you hit the ground to get up instantly. | ||
Rush
| Bouncer | |||
|---|---|---|---|
| Skill Icon | Skill Name | Skill Details | |
| Ranger | |||
|---|---|---|---|
| Skill Icon | Skill Name | Skill Details | Skill Level |
| icon | My name+Lv | Effect | Lv |
| 1b | 2b | 3b | 4b |
| Hunter | |||
|---|---|---|---|
| Skill Icon | Skill Name | Skill Details | Skill Level |
| icon | My name+Lv | Effect | Lv |
| 1b | 2b | 3b | 4b |
Support
| Force | |||
|---|---|---|---|
| Skill Icon | Skill Name | Skill Details | Skill Level |
| icon | My name+Lv | Effect | Lv |
| 1b | 2b | 3b | 4b |
| Techer | |||
|---|---|---|---|
| Skill Icon | Skill Name | Skill Details | Skill Level |
| icon | My name+Lv | Effect | Lv |
| 1b | 2b | 3b | 4b |
Unique
| Hero | |||
|---|---|---|---|
| Skill Icon | Skill Name | Skill Details | Skill Level |
| icon | My name+Lv | Effect | Lv |
| 1b | 2b | 3b | 4b |
| Phantom | |||
|---|---|---|---|
| Skill Icon | Skill Name | Skill Details | Skill Level |
| icon | My name+Lv | Effect | Lv |
| 1b | 2b | 3b | 4b |
| Etoile | |||
|---|---|---|---|
| Skill Icon | Skill Name | Skill Details | Skill Level |
| icon | My name+Lv | Effect | Lv |
| 1b | 2b | 3b | 4b |
| Luster | |||
|---|---|---|---|
| Skill Icon | Skill Name | Skill Details | Skill Level |
| icon | My name+Lv | Effect | Lv |
| 1b | 2b | 3b | 4b |
Interval Areas
Walkthrough
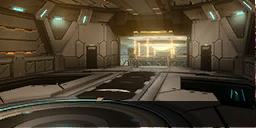
MISSION 1
| Area | Map |
|---|
- Bonus Enemy: C6. Located right behind the Codotta Idetta. Extremely difficult to miss.
- Unlock Switch: C6. "Hidden" behind a wall in the room beyond the Rappy. Not very well hidden as the top of the device can be seen from behind its hiding spot. If you are targeting the Rappy, grab the Unlock Switch before regrouping with the party.
MISSION 2
| Area | Map |
|---|---|
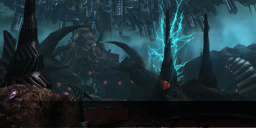 |
- Bonus Enemy: B2. Upon entering the Falz Arm's spawn area, take an immediate left to the room adjacent to it. The Rappy can be found on a steel platform in the back right of the room.
- Unlock Switch: B2. Located directly opposite the Rappy in the same room. Can be grabbed first before the Rappy if you're confident, otherwise get the Rappy before the device.
MISSION 3
| Area | Map |
|---|---|
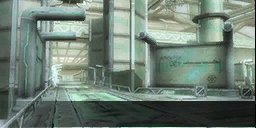 |
- Bonus Enemy: B3. Upon entering the area, ignore the enemies and head north to find the Rappy. Defeating this Rappy is highly recommened as it is guarding a Challenge Doll at the end of the stage.
- Unlock Switch: B3. Hidden behind a stack of containers on the left side of the area. Requires a double jump or otherwise enhanced method of elevation to reach.
MISSION 4
| Area | Map |
|---|---|
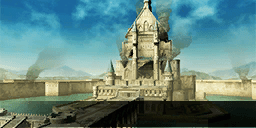 |
- Bonus Enemy: F4. Upon entering the Citadel's first stratum via catapult, the Rappy will spawn in the upper right corner of the arena. Ignore the enemies and take it out first before rejoining the party.
- Unlock Switch: D4. After taking the second catapult to the second stratum, immediately turn to your left. The Unlock Switch is waiting in the bottom left corner of the arena.
Based on the stage for the Emergency Quest The Crimson Castle Crusher. After exiting the waiting area, a timed E-Trial will start. 21 out of the 22 enemies in the area must be defeated within the time limit to claim an additional prize set at the end of the stage.
As in the Emergency Quest, progress forward on the ground level is impeded by barriers that require defeating three consecutive waves of enemies: a Fang Banther/Rockbear, a wave of Krabahdas/Dragonkin and a Zeshrydha/Quartz Dragon, and a Gigur Gunnegam/Guar Zigmorde. Simply push through the waves as fast as possible to claim two Grinder boxes and some Miles. A VR Capsule is also present right before the catapult.
Upon entering the first stratum, a wave of Jarmagles/Ventazaur and a Plosiorgles/Box Duvals. Take the opportunity to defeat the Rappy while in the room. Defeat this wave to unlock the second catapult as well as additional Grinders and Miles.
Entering the second stratum will spawn two Dark Emperappies/Emperappies and an Evolion Dragon/Vol Dragon. It is strongly recommended that at least one player pulls away the Emperappies from the Dragon, as its rolling attack is dangerously lethal and can one-shot players. Defeating all three foes enables access to an additional prize cache with Grinders and Miles while also spawning the 22nd enemy, a Gunne Kazuchi, which is not necessary to defeat but rewards a large sum of additional experience if defeated. Once all the E-Trial has ended and rewards are claimed, take the Telepipe to proceed to Interval Area 2.
MISSION 5
| Area | Map |
|---|---|
 |
Based on the Primordial Darkness Sodam arena in Primordial Glare from the Void. Like previous stages, the boss/bosses that can spawn here are based on the player's remaining VR Energy. However, special bosses can also appear under certain conditions.
Possible Bosses
| Enemy | Appearance Condition | Notes |
|---|---|---|
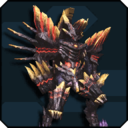  Frenzied: Omega Hunar Frenzied: Falz Hunar |
High VR Energy | Field: Ice. |
 Maximum Drive: Primordial Darkness Sodam Normal Ver. |
Medium VR Energy | Field: Variable. Identical behavior to its Divide Quest counterpart. Uses elemental weaknesses and the modified stun mechanic. |
Maximum Drive: Primordial Darkness Sodam True Ver. |
Unknown Time-based Condition (?) | Field: Variable. Identical behavior to its Emergency Quest counterpart. Uses weapon weaknesses. Transforms into its fused form when low on health. |
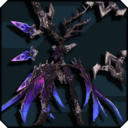
 Frenzied: Anga Fundarge |
Low VR Energy | Field: Standard. Does not use its weapon resistance barrier mechanic. |
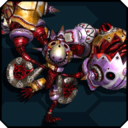  Frenzied: Omega Dourumble Frenzied: Dourumble Clone |
Very Low VR Energy | Field: ? Does not bestow a Title upon defeat. |
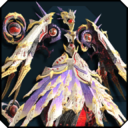
 Maximum Drive: Omega Masquerade |
Solo Only, High VR Energy | Field: Fire/Ice. |
Titles
| Title Name | Requirement | Reward |
|---|---|---|
| 『激震』ビギナー | Clear MISSION: Cataclysm one time. | |
| 『激震』マスター | Clear MISSION: Cataclysm ten times. | |
| 激震の踏破者 | Clear MISSION 5 in MISSION: Cataclysm. | |
| 激震の闇を制し者 | Defeat the Primordial Darkness in MISSION: Cataclysm. | |
| 激震の冥眼を制し者 | Defeat Primordial Darkness Sodam in MISSION: Cataclysm. | |
| 激震の虚影を制し者 | Defeat Omega Masquerade in MISSION: Cataclysm. | |
| 激震の魔帝を制し者 | Defeat Omega Hunar in MISSION: Cataclysm. | |
| 激震の歪精を制し者 | Defeat Anga Fundarge in MISSION: Cataclysm. |