MISSION: Cataclysm
| MISSION: Cataclysm MISSION:激震 | |
|---|---|
| |
| Quest Type | Challenge Quests |
| Difficulty | |
| Normal | Level 80+ |
| Quest Details | |
| Location | VR Space |
| Single/Multi-Party | Multi-Party |
| Party Invitation | Allowed |
| Ally Assistance | Not Allowed |
| Conditions For Acceptance | |
| Normal | None |
| Restrictions | |
| Time Limit | None |
| Damage Limit | None |
| Ability Adjust | None |
MISSION: Cataclysm consists of 5 Missions and is a part of the Challenge Quest trio of MISSION: Cataclysm, MISSION: Decision and MISSION: Start.
Overview
MISSION: Cataclysm is a Challenge Quest with a total of five stages and two Interval Areas. Compared to other Challenge Quests, the rules are slightly different:
- VR Energy does not deplete over time. VR Energy only depletes on death, but there is much less VR Energy to be found compared to other Challenge Quests.
- Start with a preset loadout. At the start of the Quest, you are able to choose from one of twelve loadouts. Unlike other Challenge Quests, you do not pick up equipment or Disks randomly dropped on the field. Enemies do not drop anything.
- Enemy spawns on stages change on current VR Energy. The enemies that spawn in a given stage are determined by how much VR Energy the party has upon entering.
Bonus Enemies
In the first four stages, a Rappy will spawn somewhere on the map. Defeating it unlocks the yellow fence at the end of each map, granting bonus rewards such as Grinders and Challenge Dolls. However, Rappies despawn if left alone too long, so they must be defeated at the first possible opportunity.
Unlock Switches
In the first four stages, an Unlock Switch will be present somewhere on the map. Like the Bonus Enemy, Unlock Switches deactivate one of the fences at the end of the stage and grant additional rewards. Unlike the Bonus Enemy, Unlock Switches do not go away, but are more out of the way, are not indicated on the map, and may require higher-than-usual jump power to reach. Unlock Switches are also typically located in close vicinity to the Bonus Enemy.
Class Set
At the start of the Quest, the initial set class is Fighter, which must be changed at the Class Terminal for the player's choice. You may choose from one of twelve Class Sets, split into four roles. A player's current role is denoted by the ring surrounding the character. The four roles are as follows:
Attack sets focus on dishing out high amounts of damage in a short period of time, making them valuable for pushing through waves of enemies. Their defense and range is somewhat lacking, however. This set features 3 classes, Fighter, Gunner and Braver.
Rush sets have the ability to double jump and use Complex Photon Arts, giving them a unique jack-of-all-trades role that is useful for managing field gimmicks and carrying the team. This set features 3 classes, Bouncer, Ranger and Hunter.
Support sets use Techniques and have the ability to buff and heal allies, making them invaluable assets in a Quest where healing is otherwise rare. Access to Compound Techniques additionally allows them to push massive burst damage in a pinch. This set features 2 classes, Force and Techer.
Unique sets are Successor Classes with high power, mobility, and coverage that allow them to fulfill multiple roles at once. Unlike other sets, Unique sets start at Level 55 and cannot use non-Main Class weapons like the Challenger Class. This set features 4 classes, Hero, Phantom, Etoile and Luster.
Class Set Skills
Attack
| Fighter | |||
|---|---|---|---|
| Skill Icon | Skill Name | Skill Level | |
| Brave Stance Lv.10 | Front Multiplier 140% | ||
| Rear Multiplier 135% | |||
| Brave Critical Lv.5 | Critical 25% | ||
| Fury Stance Lv.10 | Strike Multiplier 120% | ||
| Ranged Multiplier 110% | |||
| Striking Damaged Received Multiplier 100% | |||
| Fury Critical Lv.5 | Critical 25% | ||
| Limit Break Lv.1 | Max Hp 25% | ||
| Striking Damage 104% | |||
| Duration 10s | |||
| Cooldown 60s | |||
| Adrenaline Lv.1 | Duration 30s | ||
| Critical Strike Lv.5 | Critical Damage 115% | ||
| Critical Rate 30% | |||
| Deadline Slayer Lv.10 | All-Atk +150 | ||
| Crazy Heart Lv.5 | Passive PP Regen 200% | ||
| Active PP Regen 200% | |||
| Attack PP Restore Lv.10 | Restore Rate 200% | ||
| Double Saber Gear Lv.1 | 1/3 Gear, Number of Hit 8, Damage Per Hit 55% | ||
| 2/3 Gear, Number of Hit 8, Damage Per Hit 82.5% | |||
| 3/3 Gear, Number of Hit 8, Damage Per Hit 110% | |||
| Twin Dagger Gear Lv.1 | 1/3 Gear, Damage 100% | ||
| 2/3 Gear, Damage 120% | |||
| 3/3 Gear, Damage 150% | |||
| Knuckle Gear Lv.1 | Increase Attace and PA speed and Raise specific PAs Damage. Reset when stop attack or jump. | ||
| Double Saber Wind Parry Lv.1 | Allows Just Guard frames when activating Double Saber Gear. Requires at least 1/3 Gear to activate. | ||
| Twin Dagger Spin Move Lv.1 | Allows you to move horizontally while performing the Weapon Action. Distance covered is small (about half the distance of Step), and it does not change the direction you are facing. | ||
| Knuckle Gear Boost Lv.1 | Doubles the amount of Gear generated per attack, requiring only 2 attacks to max it. | ||
| HP Boost 1 | HP increase +50 | ||
| HP Boost 2 | HP increase +75 | ||
| HP Boost 3 | HP increase +100 | ||
| All Attack Bonus 1 Lv.5 | Increase Damage 110% | ||
| First Art JA addition Lv.1 | Your first attack in a combo will become a Just Attack. Has no effect on Techniques. | ||
| Step Lv.1 | Press the Dodge key to do a fast step that has invincibility. Can be used in any direction. | ||
| Step Advance Lv.4 | Invincibility Duration Increase 0.13s | ||
| Step JA Combo Lv.1 | Enable JA ring after Step | ||
| Step Jump Lv.1 | Press the Jump button right after a Step to reach running speed instantly. | ||
| Step Attack Lv.1 | Enable Attack After Step | ||
| icon | Air Reversal Lv.1 | Enable Just Reversal in Air | |
| Just Reversal Lv.1 | When knocked down, press the Jump key at the moment you hit the ground to get up instantly. | ||
| Gunner | |||
|---|---|---|---|
| Skill Icon | Skill Name | Skill Details | |
| Chain Trigger Lv.10 | Duration 30s | ||
| Cooldown 45s | |||
| Chain Finish Lv.10 | Increase the Damage of Chain Finish 250% | ||
| Chain Finish Bonus Lv.1 | Decrease Cooldown of Chain Trigger according to accumulate chain, 0.25 * chain count | ||
| Twice Chain Lv.1 | Twin Machineguns increase the Chain counter by 2 per hit. | ||
| Attack PP Restore Lv.10 | Restore Rate 200% | ||
| Twin Machinegun Gear Lv.1 | 1/3Gear, Damage 105% | ||
| 2/3 Gear, Damage 110% | |||
| Full Fear, Damage 130% | |||
| Twin Machinegun Mastery Lv.5 | Critical Damage 105% | ||
| PP gain +1 | |||
| Zero Range Advance 1 Lv.10 | Shooting Damage 115% | ||
| Perfect Keeper Lv.4 | Damage 108% | ||
| HP Threshold 75% | |||
| All Attack Bonus 1 Lv.5 | Increase Damage 110% | ||
| First Art JA addition Lv.1 | Your first attack in a combo will become a Just Attack. Has no effect on Techniques. | ||
| Dive Roll Lv.1 | Roll in a desired direction to dodge attacks. | ||
| Dive Roll Advance Lv.6 | Invincibility Duration Increase 0.15s | ||
| Step JA Combo Lv.1 | Enable JA ring after Step | ||
| Step Jump Lv.1 | Press the Jump button right after a Step to reach running speed instantly. | ||
| Dive Roll Shoot Lv.1 | Enable Attack after Dive Roll | ||
| icon | Air Reversal Lv.1 | Enable Just Reversal in Air | |
| Just Reversal Lv.1 | When knocked down, press the Jump key at the moment you hit the ground to get up instantly. | ||
| Braver | |||
|---|---|---|---|
| Skill Icon | Skill Name | Skill Details | |
| [[File: |link=|38px]] | Average Stance Lv.10 | Striking Power 115% | |
| Shooting Power 115% | |||
| Technique Power 115% | |||
| [[File: |link=|38px]] | Average Stance Boost Lv.5 | Power 110% | |
| [[File: |link=|38px]] | Katana Combat Lv.4 | Duration 20s | |
| Cooldown 120 | |||
| [[File: |link=|38px]] | Combat Escape Lv.1 | Become invulnerable for a brief period of time while Katana Combat is active. | |
| [[File: |link=|38px]] | Combat JA Bonus Lv.1 | Power Incerese when Katana Combat is Active 115% | |
| [[File: |link=|38px]] | Combat Finish Lv.1 | Grant a Damage to Katana Combat Finish 200% | |
| [[File: |link=|38px]] | Rapid Shot Lv.1 | Attack Interval 0.2s | |
| Power 25% | |||
| Duration 60s | |||
| Cooldown 110s | |||
| Attack PP Restore Lv.10 | Restore Rate 200% | ||
| [[File: |link=|38px]] | Katana Gear Lv.1 | Enables Katana Gear. Attacking with a Katana fills the Katana Gear Gauge. Successfully perform a Just Guard to activate Katana Gear. While active, Katana Gear boosts your S-ATK and Critical Hit Rate. | |
| [[File: |link=|38px]] | Counter Edge Lv.1 | Enable Counter when JG, Power 200% | |
| [[File: |link=|38px]] | Counter Bonus Lv.1 | Gain a Bonus when Counter | |
| Power 700% | |||
| PP recover Amount +5 | |||
| Edge Power 300% | |||
| Edge PP Recovery Amount +10 | |||
| [[File: |link=|38px]] | Attack Advance Lv.3 | Power 125% | |
| [[File: |link=|38px]] | Bullet Bow Charge Bonus Lv.1 | Charge Time 80% | |
| [[File: |link=|38px]] | Braver Combination Lv.1 | Switching to a Bullet Bow while Katana Gear is active retains Katana Gear and applies the effect of Katana Gear to Bullet Bow. Critical Rate 50% | |
| All Attack Bonus 1 Lv.5 | Increase Damage 110% | ||
| First Art JA addition Lv.1 | Your first attack in a combo will become a Just Attack. Has no effect on Techniques. | ||
| Step Lv.1 | Starting skill. Press the Dodge key to do a fast step that has invincibility. Can be used in any direction. | ||
| Step Advance Lv.3 | Invincibility Duration Increase 0.11s | ||
| Step JA Combo Lv.1 | Enable JA ring after Step | ||
| Step Jump Lv.1 | Press the Jump button right after a Step to reach running speed instantly. | ||
| Step Attack Lv.1 | Enable Attack After Step | ||
| icon | Air Reversal Lv.1 | Enable Just Reversal in Air | |
| Just Reversal Lv.1 | When knocked down, press the Jump key at the moment you hit the ground to get up instantly. | ||
Rush
| Bouncer | |||
|---|---|---|---|
| Skill Icon | Skill Name | Skill Details | |
| Ranger | |||
|---|---|---|---|
| Skill Icon | Skill Name | Skill Details | Skill Level |
| icon | My name+Lv | Effect | Lv |
| 1b | 2b | 3b | 4b |
| Hunter | |||
|---|---|---|---|
| Skill Icon | Skill Name | Skill Details | Skill Level |
| icon | My name+Lv | Effect | Lv |
| 1b | 2b | 3b | 4b |
Support
| Force | |||
|---|---|---|---|
| Skill Icon | Skill Name | Skill Details | Skill Level |
| icon | My name+Lv | Effect | Lv |
| 1b | 2b | 3b | 4b |
| Techer | |||
|---|---|---|---|
| Skill Icon | Skill Name | Skill Details | Skill Level |
| icon | My name+Lv | Effect | Lv |
| 1b | 2b | 3b | 4b |
Unique
| Hero | |||
|---|---|---|---|
| Skill Icon | Skill Name | Skill Details | Skill Level |
| icon | My name+Lv | Effect | Lv |
| 1b | 2b | 3b | 4b |
| Phantom | |||
|---|---|---|---|
| Skill Icon | Skill Name | Skill Details | Skill Level |
| icon | My name+Lv | Effect | Lv |
| 1b | 2b | 3b | 4b |
| Etoile | |||
|---|---|---|---|
| Skill Icon | Skill Name | Skill Details | Skill Level |
| icon | My name+Lv | Effect | Lv |
| 1b | 2b | 3b | 4b |
- Etoile starts out with a Dual Blade and can obtain Wand and presumably Double Saber as a drop early on. A Wand can also be obtained early on by communicating with a Techer at the start. They also have access to Overdrive, their main means of recovery/party recovery in 180 second intervals.
- Notably, Etoile HP Restorate is missing, and Damage Balancer is capped at Lv.6 (50% Damage Reduction instead of 70% Damage Reduction).
- Dual Blades
- Radiant Sting does a leap attack that summons blades at the leap point, which is fairly useful early on for knocking up small mobs and causing damage in a wide area.
- Pressing attack will move you closer to a locked on part, similar to Katana Combat, which can be useful to reach high enemy points as there is no double jump in this quest.
- Pressing shift activates the parry function that can be used throughout all attack/photon art motions and even in abnormal states such as frozen to summon an aura that parries damage.
- Pressing the shift button after stepping does the Step Edge attack, which fires a blade much like Bouncer Dual Blade's Photon Blades. Doing Step Edge a second time activates an attack called "Connect". Doing Step Edge three times in a row with full Dual Blade gear activates "Full Connect" which does tremendous damage, but also leaves one open to receiving attacks if not parried.
- Using Radiant Sting with 100 PP, one from the top of the staircase where the Codetta was can reach the hidden area behind the wall with the omega mobs with the trap disable switch, though this is a fairly large waste of PP compared to leaving it to other classes.
- Wand
- Has access to all arts except Luminous Flare (wand beam). Black Hole Rupture is a fairly useful mob gathering tool on certain stages, though Zandi Style Lusters have the same function through their held (extend) normal attack action.
- Pressing the weapon action after a photon art is pressed while the white circle appears activates a short cast variant of the photon art that does concentrated burst damage.
| Luster | |||
|---|---|---|---|
| Skill Icon | Skill Name | Skill Details | Skill Level |
| icon | My name+Lv | Effect | Lv |
| 1b | 2b | 3b | 4b |
- Luster has access to Brand Extension, Slug Scatter and Hollow Point, and starts out with a Non-element gunslash. The non element style is unique in that it has a held down shift action that fires a volley stream of bullets that is fairly ineffective.
- Notably, Flechette is missing, and Luster in this variation has no access to any Techniques, meaning no Zanverse, Megiverse, Shifta, Deband and Anti will activate on slash actions, on reaching 100 and 500 Voltage etc. Movement can be done through Step Slide (double tap step) in place of Flechette though this will consume 10 PP out of the 100 PP. Luster is also missing its free recovery options such as Killing Restorate and Voltage Reset Heal.
- Initially, move (held direction) Slug Scatter is a fairly effective choice for the first areas with the non-elemental gunslash, as it is able to hit weak spots while being airborne. On obtaining a style at the first interval area, the style's unique Photon Art usability that makes certain Photon Arts including Slug Scatter more effective as well as weapon action Quick Shoot class skill ability (hold or press shift at the right timing for each style, e.g. after counters and the 5th normal attack for baran style) come into effect.
- Luster's Normal Attacks, Weapon Actions, Shift Actions and Photon Arts differ based on style, whether a move is used with a direction held or with no direction held, and whether the move is held down.
- By holding down the Photon Art button, you will consume a Luster gear gauge and perform a stronger enhance art after the photon art. This enhance art's after delay can be cancelled into another enhance art by releasing and holding down the photon art button again, although this is fairly ineffective for the 100 PP setup.
- Using Luster Time with a Voltage of 500 or more (referred to as a "High Voltage" state) will result in a halved cooldown of 120s instead of 240s. Hitting an enemy with the shockwave from activating Luster Time will recover some PP and all gear gauges. Luster Time Finish has absolute iframes, thus it can be used during what would normally be an avoidance time for a boss's move.
- Luster is able to gain height with Slash Rise with a direction held and pressing jump after a normal attack to reach high areas, as well as warp strike with Quick Slash by pressing normal attack with a direction held when the the shine occurs after moves such as Photon Arts or Slash Rise.
Interval Areas
Interval Area 1
- Here you can exchange for an Ideal weapon using a junk weapon. Junk weapons include the one you start with and the extra bonus weapon you obtain from the box after Phantom Ragne.
- Luster's initial No Element Gunslash is unique in that it cannot be exchanged, so exchange the obtained bonus weapon for a element style gunslash of choice and then equip it over the weapon pallete. Presumably this is to enable Lusters to have the Purged Style always accessible with the gunslash whenever for whatever reason, even though they do have access to Style Purge (double tap shift) to activate the state with the elemental gunslashes.
- Also has consumables which are the sole exchange/use for grinders.
Interval Area 2
- Has the same consumable list which are the sole exchange/use for grinders.
Walkthrough
Mission 1
| Area | Map |
|---|
- Bonus Enemy: C6. Located right behind the Codotta Idetta. Extremely difficult to miss.
- Unlock Switch: C6. "Hidden" behind a wall in the room beyond the Rappy. Not very well hidden as the top of the device can be seen from behind its hiding spot. If you are targeting the Rappy, grab the Unlock Switch before regrouping with the party.
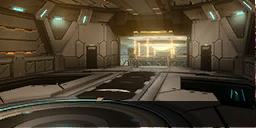
A straightforward room with few gimmicks. Very useful for building Complex PA Gauge for future rooms.
Proceed through the wave of Yedes/King Yedes by defeating the King Yedis from the back first as their weak point retracts when Yedes are killed, and pass through the moving spike pillars to reach a wave of Oceanids. Defeat the Oceanids, retaining andusing the headless Vid Gilos as PP batteries by striking them, while avoiding the Wulffs to proceed to the next segment with two Ganna-gams and two Ban Ogaki-baru. Ranged classes or classes with elevation are particularly effective against the Ganna-gams while classes with counters are effective against the Ban Ogaki-baru. Defeating the Kuronians opens a miniboss segment with a Codotta Idetta. While one person heads for the rappy and unlock switch, open its weak point with high DPS (using Freeze to lock it in place is particularly effective) and burst it down quickly to unlock the next section.
Upon entering the next segment, a large wave of Demons will spawn, consisting of multiple Omega Goblins, Skull Soldiers, a Minotargus, an Omega Salamander, and a Resta Golem. This section is guarded by lasers that travel horizontally across the field, which will spawn Predicahdas in the next section if triggered. A player with a double jump or the ability to scale a high wall can activate a switch at the opposite end of the room (guarded by an Orc Bomber) to deactivate the lasers and the beams in the next section (a VR Capsule is also available here). Maneuver carefully to defeat all enemies while avoiding the lasers.
The next section features a Ga Wonda, a Gu Wonda, and two Breeahdas. Two Predicahdas will also spawn if a laser in the previous segment was tripped, and the entire area will be guarded by a wall of rotating beams if the switch in the previous segment isn't activated. The Breeahdas will attempt to fire projectiles from a distance, which can be interrupted by players targeting them directly. The back retreat dodge action of a Luster while locked on is capable of causing stun. A VR Capsule can be picked up here in the middle of the pathway.
The boss segment summons an ESC-A Ragnus. Classes that can target the core directly are highly recommended, especially a Ranger set with Weak Bullet as well as Successors. Prioritizing the core is recommended as the legs are guarded and do not cause down unless all are broken. Beware its ability to create walls, as the wall is difficult to climb over and running around it can waste time and render yourself vulnerable to its binding projectiles. Classes such as Luster can warp to the core by using the forward tilt quick action after a Photon Art. Defeating this boss unlocks a fence containing Grinders and a random ![]() Ideal weapon (Gunslashes excluded), while defeating the Rappy earlier unlocks a fence containing Grinders and a Challenge Doll.
Ideal weapon (Gunslashes excluded), while defeating the Rappy earlier unlocks a fence containing Grinders and a Challenge Doll.
Mission 2
| Area | Map |
|---|---|
 |
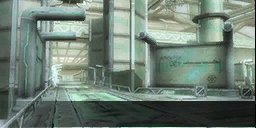
- Bonus Enemy: B2. Upon entering the Falz Arm's spawn area, take an immediate left to the room adjacent to it. The Rappy can be found on a steel platform in the back right of the room.
- Unlock Switch: B2. Located directly opposite the Rappy in the same room. Can be grabbed first before the Rappy if you're confident, otherwise get the Rappy before the device.
Mission 3
| Area | Map |
|---|---|
 |
- Bonus Enemy: B3. Upon entering the area, ignore the enemies and head north to find the Rappy. Defeating this Rappy is highly recommened as it is guarding a Challenge Doll at the end of the stage.
- Unlock Switch: B3. Hidden behind a stack of containers on the left side of the area. Requires a double jump or otherwise enhanced method of elevation to reach.
Mission 4
| Area | Map |
|---|---|
 |
- Bonus Enemy: F4. Upon entering the Citadel's first stratum via catapult, the Rappy will spawn in the upper right corner of the arena. Ignore the enemies and take it out first before rejoining the party.
- Unlock Switch: D4. After taking the second catapult to the second stratum, immediately turn to your left. The Unlock Switch is waiting in the bottom left corner of the arena.
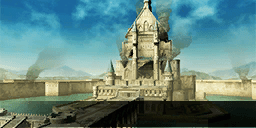
Based on the stage for the Emergency Quest The Crimson Castle Crusher. After exiting the waiting area, a timed E-Trial will start. 21 out of the 22 enemies in the area must be defeated within the time limit to claim an additional prize set at the end of the stage.
As in the Emergency Quest, progress forward on the ground level is impeded by barriers that require defeating three consecutive waves of enemies: a Fang Banther/Rockbear, a wave of Krabahdas/Dragonkin and a Zeshrydha/Quartz Dragon, and a Gigur Gunnegam/Guar Zigmorde. Simply push through the waves as fast as possible to claim two Grinder boxes and some Miles. A VR Capsule is also present right before the catapult.
Upon entering the first stratum, a wave of Jarmagles/Ventazaur and a Plosiorgles/Box Duvals. Take the opportunity to defeat the Rappy while in the room. Defeat this wave to unlock the second catapult as well as additional Grinders and Miles.
Entering the second stratum will spawn two Dark Emperappies/Emperappies and an Evolion Dragon/Vol Dragon. It is strongly recommended that at least one player pulls away the Emperappies from the Dragon, as its rolling attack is dangerously lethal and can one-shot players. Defeating all three foes enables access to an additional prize cache with Grinders and Miles while also spawning the 22nd enemy, a Gunne Kazuchi, which is not necessary to defeat but rewards a large sum of additional experience if defeated. The Gunne Kazuchi is unique in that it takes 1 damage no matter what you do, so using Luster's Style Purge and weapon action is ideal here. Once all the E-Trial has ended and rewards are claimed, take the Telepipe to proceed to Interval Area 2.
Mission 5
| Area | Map |
|---|---|
 |
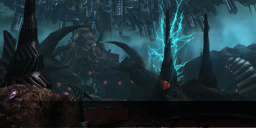
Based on the Primordial Darkness Sodam arena in Primordial Glare from the Void. Like previous stages, the boss/bosses that can spawn here are based on the player's remaining VR Energy. However, special bosses can also appear under certain conditions.
Possible Bosses
| Enemies | Appearance Condition | Notes |
|---|---|---|
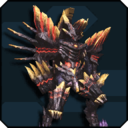  Frenzied: Omega Hunar Frenzied: Falz Hunar |
Reach Mission 5 with 80% ~ 100% VR Energy. OR All players are "Unique" Type. |
Field: Ice. Starts a "Resonance" E-Trial, causing the remaining Hunar to power up if one of them is defeated. By keeping Hunar in a corner, you can cause his ultimate ground pound move's shockwaves that circulate around him to collide with the field wall and dissipate, although one must also avoid being sandwiched between the move and the wall. |
 Maximum Drive: Primordial Darkness Sodam Normal Ver. |
Reach Mission 5 with 30% ~ 80% VR Energy. | Field: Variable. Identical behavior to its Divide Quest counterpart. Uses elemental weaknesses and the modified stun/down mechanic where it is stunned by merely dealing damage rather than by attacking with its weaknesses. |
Maximum Drive: Primordial Darkness Sodam True Ver. |
Reach Mission 5 with 100% VR Energy. AND Reach Interval Area 2 in 15 minutes or less. |
Field: Variable. Identical behavior to its Emergency Quest counterpart. Uses weapon weaknesses. Transforms into its fused Sodam-Gommoroth form when low on health, which does not have any rings to break. |
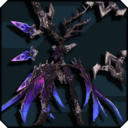
 Frenzied: Anga Fundarge |
Reach Mission 5 with 5% ~ 30% VR Energy. | Field: Standard. Does not use its weapon resistance barrier mechanic. |
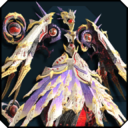
 Frenzied: Omega Angel |
All players are "Rush" Type. | Field: Wind. |
 Frenzied: Omega Appregina |
All players are "Attack" Type. | Field: Ice. |
  Frenzied: Omega Dourumble Frenzied: Dourumble Clone |
Reach Mission 5 with less than 100% VR Energy AND Reach Interval Area 2 in 15 minutes or less. |
Field: Wind. |
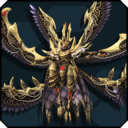
 Frenzied: Grav Execour |
All players are "Support" Type. | Field: Fire. |
 Maximum Drive: Omega Masquerade |
Must be single-player AND Reach Mission 5 with 30% ~ 80% VR Energy. |
Field: Fire/Ice. |
Ranking
The minimum to rank appears to be to clear all Missions. You can achieve a score of 6,840 even if you don't fully clear the Cuent stage.
| Rank | Min. Requirements
(Based on Latest/Previous) |
Reward |
|---|---|---|
| 1st | Mission 5 (100%)
7,368 CM |
1,000 FUN Ticket x1
100 SG Ticket x1 Gold Trophy |
| 2nd-10th | Mission 5 (100%)?
7,324 CM? |
1,000 FUN Ticket x1
50 SG Ticket x1 Silver Trophy |
| 11th-50th | Mission 5 (100%)? (>Mission 2 (30%))
6,830 CM? (>110 CM) |
1,000 FUN Ticket x1
30 SG Ticket x1 Bronze Trophy |
| Rank | Min. Requirements
(Based on Latest/Previous) |
Reward |
|---|---|---|
| 1st | Mission 5 (100%)?
7,368 CM? |
1,000 FUN Ticket x1
100 SG Ticket x1 Gold Trophy |
| 2nd-10th | Mission 5 (>70%) (15th Place)?
>5,296 CM? |
1,000 FUN Ticket x1
50 SG Ticket x1 Silver Trophy |
| 11th-50th | Mission 1 (24.54%)?
12 CM? |
1,000 FUN Ticket x1
30 SG Ticket x1 Bronze Trophy |
Titles
| Title Name | Requirement | Reward |
|---|---|---|
| 『激震』ビギナー "Cataclysm" Beginner |
Clear MISSION: Cataclysm one time. | |
| 『激震』マスター "Cataclysm" Master |
Clear MISSION: Cataclysm ten times. | |
| 激震の踏破者 | Clear MISSION 5 in MISSION: Cataclysm. | |
| 激震の闇を制し者 Cataclysmic Darkness Suppressor |
Defeat the Primordial Darkness in MISSION: Cataclysm. | |
| 激震の冥眼を制し者 Cataclysmic Eyes Suppressor |
Defeat Primordial Darkness Sodam in MISSION: Cataclysm. | |
| 激震の虚影を制し者 Cataclysmic Shadow Suppressor |
Defeat Omega Masquerade in MISSION: Cataclysm. | |
| 激震の魔帝を制し者 Cataclysmic Overlord Suppressor |
Defeat Omega Hunar in MISSION: Cataclysm. | |
| 激震の歪精を制し者 Cataclysmic Aberrant Suppressor |
Defeat Anga Fundarge in MISSION: Cataclysm. |