Difference between revisions of "Darkers"
m (test image anchor) |
m (Reverted edits by Nanaha (talk) to last revision by ZephyrValgale) |
||
| Line 11: | Line 11: | ||
|- | |- | ||
| − | |||
<!--Image-->| [[File:Damoth.png]] | <!--Image-->| [[File:Damoth.png]] | ||
<!--Name-->| ダモス<br>Damoth | <!--Name-->| ダモス<br>Damoth | ||
| Line 21: | Line 20: | ||
<!--Notes-->| Once a certain number of Damoths have gathered around a tower, they will begin to explode, greatly damaging the tower. | <!--Notes-->| Once a certain number of Damoths have gathered around a tower, they will begin to explode, greatly damaging the tower. | ||
|- | |- | ||
| − | + | ||
<!--Image-->| [[File:Krahda.png]] | <!--Image-->| [[File:Krahda.png]] | ||
<!--Name-->| クラーダ<br>Krahda | <!--Name-->| クラーダ<br>Krahda | ||
| Line 37: | Line 36: | ||
<!--Notes-->| The core is on the underside, but it has so little HP that there's no point in trying to hit the core. Any PA will kill it. | <!--Notes-->| The core is on the underside, but it has so little HP that there's no point in trying to hit the core. Any PA will kill it. | ||
|- | |- | ||
| − | + | ||
<!--Image-->| [[File:Vidoluda.png]] | <!--Image-->| [[File:Vidoluda.png]] | ||
<!--Name-->| ヴィドルーダ<br>Vidoluda | <!--Name-->| ヴィドルーダ<br>Vidoluda | ||
| Line 51: | Line 50: | ||
<!--Notes-->| Cannot lock on to the core, so manual aim is required to hit it. | <!--Notes-->| Cannot lock on to the core, so manual aim is required to hit it. | ||
|- | |- | ||
| − | + | ||
<!--Image-->| [[File:Dagan.png]] | <!--Image-->| [[File:Dagan.png]] | ||
<!--Name-->| ダガン<br>Dagan | <!--Name-->| ダガン<br>Dagan | ||
| Line 67: | Line 66: | ||
|- | |- | ||
| − | <!--Image-->| | + | <!--Image-->| [[File:ElDagan.png]] |
| − | <!--Name-->| エル・ダガン<br> | + | <!--Name-->| エル・ダガン<br>El Dagan |
<!--Area-->| Forest<br>Volcano<br>Desert<br>Tunnels<br>City | <!--Area-->| Forest<br>Volcano<br>Desert<br>Tunnels<br>City | ||
<!--Drop List-->| | <!--Drop List-->| | ||
| Line 81: | Line 80: | ||
<!--Notes-->| Spawns only after a Dagan Egg hits the ground. Destroying the Egg stops the spawn.<br><br>If one does spawn, treat it like you would any other Dagan. | <!--Notes-->| Spawns only after a Dagan Egg hits the ground. Destroying the Egg stops the spawn.<br><br>If one does spawn, treat it like you would any other Dagan. | ||
|- | |- | ||
| − | + | ||
<!--Image-->| [[File:DaganNero.png]] | <!--Image-->| [[File:DaganNero.png]] | ||
<!--Name-->| ダガン・ネロ<br>Dagan Nero | <!--Name-->| ダガン・ネロ<br>Dagan Nero | ||
| Line 93: | Line 92: | ||
<!--Notes-->| This enemy is a rare version of El Dagan, and counts as one for enemy extermination orders.<br><br>Also drops items from the El Dagan drop list. | <!--Notes-->| This enemy is a rare version of El Dagan, and counts as one for enemy extermination orders.<br><br>Also drops items from the El Dagan drop list. | ||
|- | |- | ||
| − | + | ||
<!--Image-->| [[File:Dicahda.png]] | <!--Image-->| [[File:Dicahda.png]] | ||
<!--Name-->| ディカーダ<br>Dicahda | <!--Name-->| ディカーダ<br>Dicahda | ||
| Line 111: | Line 110: | ||
<!--Notes-->| Can teleport behind you, and hits hard.<br><br>Relentless attacks keep them from teleporting. | <!--Notes-->| Can teleport behind you, and hits hard.<br><br>Relentless attacks keep them from teleporting. | ||
|- | |- | ||
| − | + | ||
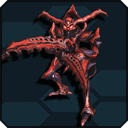
<!--Image-->| [[File:Predicahda.png]] | <!--Image-->| [[File:Predicahda.png]] | ||
<!--Name-->| プレディカーダ<br>Predicahda | <!--Name-->| プレディカーダ<br>Predicahda | ||
| Line 121: | Line 120: | ||
<!--Notes-->| Can teleport behind you, and hits hard.<br>Their arms can be broken, usually with Just Guards - this lowers their damage.<br><br>Relentless attacks keep them from teleporting. | <!--Notes-->| Can teleport behind you, and hits hard.<br>Their arms can be broken, usually with Just Guards - this lowers their damage.<br><br>Relentless attacks keep them from teleporting. | ||
|- | |- | ||
| − | + | ||
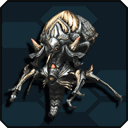
<!--Image-->| [[File:PredicahdaNero.png]] | <!--Image-->| [[File:PredicahdaNero.png]] | ||
<!--Name-->| プレディカーダ・ネロ<br>Predicahda Nero | <!--Name-->| プレディカーダ・ネロ<br>Predicahda Nero | ||
| Line 131: | Line 130: | ||
<!--Notes-->| This enemy is a rare version of Predicahda, and counts as one for enemy extermination orders.<br><br>Also drops items from the Predicada drop list. | <!--Notes-->| This enemy is a rare version of Predicahda, and counts as one for enemy extermination orders.<br><br>Also drops items from the Predicada drop list. | ||
|- | |- | ||
| − | + | ||
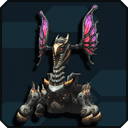
<!--Image-->| [[File:Breeahda.png]] | <!--Image-->| [[File:Breeahda.png]] | ||
<!--Name-->| ブリアーダ<br>Breeahda | <!--Name-->| ブリアーダ<br>Breeahda | ||
| Line 141: | Line 140: | ||
<!--Notes-->| Spawns Dagan Eggs, which hatch into El Dagans.<br><br>Weakpoint is on its back. | <!--Notes-->| Spawns Dagan Eggs, which hatch into El Dagans.<br><br>Weakpoint is on its back. | ||
|- | |- | ||
| − | + | ||
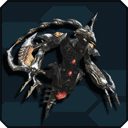
<!--Image-->| [[File:Kartargot.png]] | <!--Image-->| [[File:Kartargot.png]] | ||
<!--Name-->| カルターゴ<br>Kartargot | <!--Name-->| カルターゴ<br>Kartargot | ||
| Line 151: | Line 150: | ||
<!--Notes-->| Near completely impervious to all forms of damage, except when attacking the weakpoint on its back. | <!--Notes-->| Near completely impervious to all forms of damage, except when attacking the weakpoint on its back. | ||
|- | |- | ||
| − | + | ||
<!--Image-->| [[File:ElAhda.png]] | <!--Image-->| [[File:ElAhda.png]] | ||
<!--Name-->| エル・アーダ<br>El Ahda | <!--Name-->| エル・アーダ<br>El Ahda | ||
| Line 161: | Line 160: | ||
<!--Notes-->| Launching them leaves their weakpoint wide open.<br>Will attack immediately when they get back up, so it's best to kill them quickly. | <!--Notes-->| Launching them leaves their weakpoint wide open.<br>Will attack immediately when they get back up, so it's best to kill them quickly. | ||
|- | |- | ||
| − | + | ||
<!--Image-->| [[File:Goldrahda.png]] | <!--Image-->| [[File:Goldrahda.png]] | ||
<!--Name-->| ゴルドラーダ<br>Goldrahda | <!--Name-->| ゴルドラーダ<br>Goldrahda | ||
| Line 171: | Line 170: | ||
<!--Notes-->| Destroying this enemy without breaking its back first will allow it to self destruct. It is advised to destroy the back, then hit the core on the front to defeat it. They are also vulnerable to the freeze effect, which encases its legs in ice, halting movement. | <!--Notes-->| Destroying this enemy without breaking its back first will allow it to self destruct. It is advised to destroy the back, then hit the core on the front to defeat it. They are also vulnerable to the freeze effect, which encases its legs in ice, halting movement. | ||
|- | |- | ||
| − | + | ||
<!--Image-->| [[File:Rinze Drahda.png]] | <!--Image-->| [[File:Rinze Drahda.png]] | ||
<!--Name-->| リンゼ・ドラーダ<br>Rinze Drahda | <!--Name-->| リンゼ・ドラーダ<br>Rinze Drahda | ||
| Line 181: | Line 180: | ||
<!--Notes-->| This enemy is a rare version of Goldrahda, and counts as one for enemy extermination orders.<br><br>Also drops items from the Goldrahda drop list. | <!--Notes-->| This enemy is a rare version of Goldrahda, and counts as one for enemy extermination orders.<br><br>Also drops items from the Goldrahda drop list. | ||
|- | |- | ||
| − | + | ||
<!--Image-->| [[File:SorzaBrahda.png]] | <!--Image-->| [[File:SorzaBrahda.png]] | ||
<!--Name-->| ソルザ・ブラーダ<br>Sorza Brahda | <!--Name-->| ソルザ・ブラーダ<br>Sorza Brahda | ||
| Line 191: | Line 190: | ||
<!--Notes-->| Infects Defense Sockets, which then become Darker Particle Cannons. Also powers up other Darkers.<br>Needless to say, these are priority number one when they appear. | <!--Notes-->| Infects Defense Sockets, which then become Darker Particle Cannons. Also powers up other Darkers.<br>Needless to say, these are priority number one when they appear. | ||
|- | |- | ||
| − | + | ||
<!--Image-->| [[File:Gwanahada.png]] | <!--Image-->| [[File:Gwanahada.png]] | ||
<!--Name-->| グワナーダ<br>Gwanahda | <!--Name-->| グワナーダ<br>Gwanahda | ||
| Line 201: | Line 200: | ||
<!--Notes-->| Destroying all of the Gwanahada Bits will temporarily stun the Gwanahada, revealing the red core weakpoint on it's belly. | <!--Notes-->| Destroying all of the Gwanahada Bits will temporarily stun the Gwanahada, revealing the red core weakpoint on it's belly. | ||
|- | |- | ||
| − | + | ||
<!--Image-->| [[File:GwanahadaBit.png]] | <!--Image-->| [[File:GwanahadaBit.png]] | ||
<!--Name-->| グワナーダ・ビット<br>Gwanahda Bit | <!--Name-->| グワナーダ・ビット<br>Gwanahda Bit | ||
| Line 211: | Line 210: | ||
<!--Notes-->| Only present when a Gwanahada is around, when there all 2 Gwanahadas, they will spawn 2 sets of Gwanahada Bits. Destroying all from one set will stun one of the Gwanahadas. | <!--Notes-->| Only present when a Gwanahada is around, when there all 2 Gwanahadas, they will spawn 2 sets of Gwanahada Bits. Destroying all from one set will stun one of the Gwanahadas. | ||
|- | |- | ||
| − | + | ||
<!--Image-->| [[File:GwanahadaNero.png]] | <!--Image-->| [[File:GwanahadaNero.png]] | ||
<!--Name-->| グワナーダ・ネロ<br>Gwanahda Nero | <!--Name-->| グワナーダ・ネロ<br>Gwanahda Nero | ||
| Line 221: | Line 220: | ||
<!--Notes-->| This enemy is a rare version of Gwanahda, and counts as one for enemy extermination orders.<br><br>Also drops items from the Gwanahda drop list. | <!--Notes-->| This enemy is a rare version of Gwanahda, and counts as one for enemy extermination orders.<br><br>Also drops items from the Gwanahda drop list. | ||
|- | |- | ||
| − | + | ||
<!--Image-->| [[File:GwanahadaBitNero.png]] | <!--Image-->| [[File:GwanahadaBitNero.png]] | ||
<!--Name-->| グワナーダ・ビット・ネロ<br>Gwanahda Bit Nero | <!--Name-->| グワナーダ・ビット・ネロ<br>Gwanahda Bit Nero | ||
| Line 231: | Line 230: | ||
<!--Notes-->| This enemy is a rare version of Gwanahda Bit, only spawned by Gwanahda Nero.<br><br>Would also drop items from the Gwanahda Bit drop list, except neither Gwanahda Bit nor Gwanahda Bit Nero have drop lists. | <!--Notes-->| This enemy is a rare version of Gwanahda Bit, only spawned by Gwanahda Nero.<br><br>Would also drop items from the Gwanahda Bit drop list, except neither Gwanahda Bit nor Gwanahda Bit Nero have drop lists. | ||
|- | |- | ||
| − | + | ||
<!--Image-->| [[File:DarkRagne.png]] | <!--Image-->| [[File:DarkRagne.png]] | ||
<!--Name-->| ダーク・ラグネ<br>Dark Ragne | <!--Name-->| ダーク・ラグネ<br>Dark Ragne | ||
| Line 241: | Line 240: | ||
<!--Notes-->| Breaking a leg will force it to fall over, exposing the weakpoint.<br><br>Alternatively, certain classes can attack the weakpoint directly. | <!--Notes-->| Breaking a leg will force it to fall over, exposing the weakpoint.<br><br>Alternatively, certain classes can attack the weakpoint directly. | ||
|- | |- | ||
| − | + | ||
<!--Image-->| [[File:DarkAragni.png]] | <!--Image-->| [[File:DarkAragni.png]] | ||
<!--Name-->| ダーク・アグラニ<br>Dark Agrani | <!--Name-->| ダーク・アグラニ<br>Dark Agrani | ||
| Line 251: | Line 250: | ||
<!--Notes-->| This enemy is a rare version of Dark Ragne, and counts as one for enemy extermination orders.<br><br>Also drops items from the Dark Ragne drop list. | <!--Notes-->| This enemy is a rare version of Dark Ragne, and counts as one for enemy extermination orders.<br><br>Also drops items from the Dark Ragne drop list. | ||
|- | |- | ||
| − | + | ||
<!--Image-->| [[File:DarkVibrace.png]] | <!--Image-->| [[File:DarkVibrace.png]] | ||
<!--Name-->| ダーク・ビブラス<br>Dark Vibrace | <!--Name-->| ダーク・ビブラス<br>Dark Vibrace | ||
| Line 261: | Line 260: | ||
<!--Notes-->| Breaking the wings exposes the abdomen to attack.<br>Damaging the legs will knock it down for a few seconds.<br>Immobilized for a few seconds by Panic.<br><br>At low HP, will launch a bomb at a tower. If it isn't destroyed before detonation, it will annihilate the tower and anyone standing next to it. | <!--Notes-->| Breaking the wings exposes the abdomen to attack.<br>Damaging the legs will knock it down for a few seconds.<br>Immobilized for a few seconds by Panic.<br><br>At low HP, will launch a bomb at a tower. If it isn't destroyed before detonation, it will annihilate the tower and anyone standing next to it. | ||
|- | |- | ||
| − | + | ||
<!--Image-->| [[File:DarkRinzece.png]] | <!--Image-->| [[File:DarkRinzece.png]] | ||
<!--Name-->| ダーク・リンゼス<br>Dark Rinzece | <!--Name-->| ダーク・リンゼス<br>Dark Rinzece | ||
| Line 271: | Line 270: | ||
<!--Notes-->| This enemy is a rare version of Dark Vibrace, and counts as one for enemy extermination orders.<br><br>Also drops items from the Dark Vibrace drop list. | <!--Notes-->| This enemy is a rare version of Dark Vibrace, and counts as one for enemy extermination orders.<br><br>Also drops items from the Dark Vibrace drop list. | ||
|- | |- | ||
| − | + | ||
<!--Image-->| [[File:DarkVibraceYuga.png]] | <!--Image-->| [[File:DarkVibraceYuga.png]] | ||
<!--Name-->| ダーク・ビブラス・ユガ<br>Dark Vibrace Yuga | <!--Name-->| ダーク・ビブラス・ユガ<br>Dark Vibrace Yuga | ||
| Line 281: | Line 280: | ||
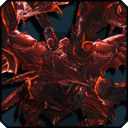
<!--Notes-->| Same weaknesses as Dark Vibrace.<br><br>Launches two bombs, instead of one - one on spawn, and another at low HP.<br><br>Treated as a Darker, not a DA-Aberration, for the purposes of Nemesis and Ultimate Buster. | <!--Notes-->| Same weaknesses as Dark Vibrace.<br><br>Launches two bombs, instead of one - one on spawn, and another at low HP.<br><br>Treated as a Darker, not a DA-Aberration, for the purposes of Nemesis and Ultimate Buster. | ||
|- | |- | ||
| − | + | ||
<!--Image-->| [[File:DarkRinzexeYuga.png]] | <!--Image-->| [[File:DarkRinzexeYuga.png]] | ||
<!--Name-->| ダーク・リンゼス・ユガ<br>Dark Rinzece Yuga | <!--Name-->| ダーク・リンゼス・ユガ<br>Dark Rinzece Yuga | ||
| Line 292: | Line 291: | ||
|- | |- | ||
|} | |} | ||
| − | + | ||
==Aquatic Darkers== | ==Aquatic Darkers== | ||
{|class="wikitable sortable" style="text-align:left;" | {|class="wikitable sortable" style="text-align:left;" | ||
| Line 304: | Line 303: | ||
! style="width: 170px;" | Notes | ! style="width: 170px;" | Notes | ||
|- | |- | ||
| − | + | ||
<!--Image-->| [[File:Micda.png]] | <!--Image-->| [[File:Micda.png]] | ||
<!--Name-->| ミクダ<br>Micda | <!--Name-->| ミクダ<br>Micda | ||
| Line 314: | Line 313: | ||
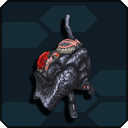
<!--Notes-->| This enemy is almost immune to damage unless the weak point is hit. | <!--Notes-->| This enemy is almost immune to damage unless the weak point is hit. | ||
|- | |- | ||
| − | + | ||
<!--Image-->| [[File:OlMicda.png]] | <!--Image-->| [[File:OlMicda.png]] | ||
<!--Name-->| オル・ミクダ<br>Ol Micda | <!--Name-->| オル・ミクダ<br>Ol Micda | ||
| Line 324: | Line 323: | ||
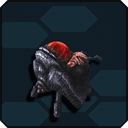
<!--Notes-->| Same Strategy as Micda | <!--Notes-->| Same Strategy as Micda | ||
|- | |- | ||
| − | + | ||
<!--Image-->| [[File:Mi Micda.png]] | <!--Image-->| [[File:Mi Micda.png]] | ||
<!--Name-->| ミ・ミクダ<br>Mi Micda | <!--Name-->| ミ・ミクダ<br>Mi Micda | ||
| Line 334: | Line 333: | ||
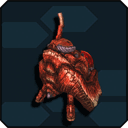
<!--Notes-->| This enemy is a rare version of Micda & Ol Micda and counts as one when completing enemy extermination orders.<br><br>Also drops items from the Micda and Ol Micda drop lists. | <!--Notes-->| This enemy is a rare version of Micda & Ol Micda and counts as one when completing enemy extermination orders.<br><br>Also drops items from the Micda and Ol Micda drop lists. | ||
|- | |- | ||
| − | + | ||
<!--Image-->| [[File:Dagacha.png]] | <!--Image-->| [[File:Dagacha.png]] | ||
<!--Name-->| ダガッチャ<br>Dagacha | <!--Name-->| ダガッチャ<br>Dagacha | ||
| Line 344: | Line 343: | ||
<!--Notes-->| Attack the core when it opens its mouth. | <!--Notes-->| Attack the core when it opens its mouth. | ||
|- | |- | ||
| − | + | ||
<!--Image-->| [[File:Dahgash.png]] | <!--Image-->| [[File:Dahgash.png]] | ||
<!--Name-->| ダーガッシュ<br>Dahgash | <!--Name-->| ダーガッシュ<br>Dahgash | ||
| Line 354: | Line 353: | ||
<!--Notes-->| Attack the core when it opens its mouth. Leads Dagachas. Killing it stuns all nearby Dagachas. | <!--Notes-->| Attack the core when it opens its mouth. Leads Dagachas. Killing it stuns all nearby Dagachas. | ||
|- | |- | ||
| − | + | ||
<!--Image-->| [[File:DahgashNero.png]] | <!--Image-->| [[File:DahgashNero.png]] | ||
<!--Name-->| ダーガッシュ・ネロ<br>Dahgash Nero | <!--Name-->| ダーガッシュ・ネロ<br>Dahgash Nero | ||
| Line 364: | Line 363: | ||
<!--Notes-->| This enemy is a rare version of Dahgash, and counts as one when completing enemy extermination orders.<br><br>Also drops items from the Dahgash drop list. | <!--Notes-->| This enemy is a rare version of Dahgash, and counts as one when completing enemy extermination orders.<br><br>Also drops items from the Dahgash drop list. | ||
|- | |- | ||
| − | + | ||
<!--Image-->| [[File:GaWanda.png]] | <!--Image-->| [[File:GaWanda.png]] | ||
<!--Name-->| ガウォンダ<br>Ga Wonda | <!--Name-->| ガウォンダ<br>Ga Wonda | ||
| Line 374: | Line 373: | ||
<!--Notes-->| The shield is impervious to all damage. Circle around behind it to access the Weakpoint. | <!--Notes-->| The shield is impervious to all damage. Circle around behind it to access the Weakpoint. | ||
|- | |- | ||
| − | + | ||
<!--Image-->| [[File:GuWanda.png]] | <!--Image-->| [[File:GuWanda.png]] | ||
<!--Name-->| グウォンダ<br>Gu Wonda | <!--Name-->| グウォンダ<br>Gu Wonda | ||
| Line 384: | Line 383: | ||
<!--Notes-->| The shield is impervious to all damage. Circle around behind it to access the Weakpoint. | <!--Notes-->| The shield is impervious to all damage. Circle around behind it to access the Weakpoint. | ||
|- | |- | ||
| − | + | ||
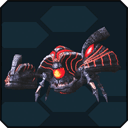
<!--Image-->| [[File:Krabahda.png]] | <!--Image-->| [[File:Krabahda.png]] | ||
<!--Name-->| クラバーダ<br>Krabahda | <!--Name-->| クラバーダ<br>Krabahda | ||
| Line 394: | Line 393: | ||
<!--Notes-->| When low on HP, will cover its weakpoint to reduce all damage taken. | <!--Notes-->| When low on HP, will cover its weakpoint to reduce all damage taken. | ||
|- | |- | ||
| − | + | ||
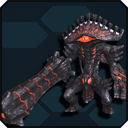
<!--Image-->| [[File:Kuklonahda.png]] | <!--Image-->| [[File:Kuklonahda.png]] | ||
<!--Name-->| キュクロナーダ<br>Kuklonahda | <!--Name-->| キュクロナーダ<br>Kuklonahda | ||
| Line 404: | Line 403: | ||
<!--Notes-->| Core only becomes accessible after Crotch Guard is broken.<br><br>When its Eye breaks, it starts flailing its arm wildly - keep your distance until it stops. | <!--Notes-->| Core only becomes accessible after Crotch Guard is broken.<br><br>When its Eye breaks, it starts flailing its arm wildly - keep your distance until it stops. | ||
|- | |- | ||
| − | + | ||
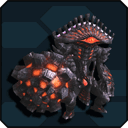
<!--Image-->| [[File:Cyclonehda.png]] | <!--Image-->| [[File:Cyclonehda.png]] | ||
<!--Name-->| サイクロネーダ<br>Cyclonehda | <!--Name-->| サイクロネーダ<br>Cyclonehda | ||
| Line 414: | Line 413: | ||
<!--Notes-->| Core only becomes accessible after Crotch Guard is broken.<br><br>When its Eye breaks, it starts flailing its mace wildly - which, unlike Kuklonahda's arm, actually has range. Do not break the eye. | <!--Notes-->| Core only becomes accessible after Crotch Guard is broken.<br><br>When its Eye breaks, it starts flailing its mace wildly - which, unlike Kuklonahda's arm, actually has range. Do not break the eye. | ||
|- | |- | ||
| − | + | ||
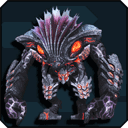
<!--Image-->| [[File:Wolgahda.png]] | <!--Image-->| [[File:Wolgahda.png]] | ||
<!--Name-->| ウォルガーダ<br>Wolgahda | <!--Name-->| ウォルガーダ<br>Wolgahda | ||
| Line 424: | Line 423: | ||
<!--Notes-->| The weakpoints are located on the shoulders.<br>Since only the belly and head can be locked on to, you'll have to aim manually to hit the weakpoints.<br><br>At low HP, its attacks intensify, last longer, and it speeds up overall. | <!--Notes-->| The weakpoints are located on the shoulders.<br>Since only the belly and head can be locked on to, you'll have to aim manually to hit the weakpoints.<br><br>At low HP, its attacks intensify, last longer, and it speeds up overall. | ||
|- | |- | ||
| − | + | ||
<!--Image-->| [[File:Alongahda.png]] | <!--Image-->| [[File:Alongahda.png]] | ||
<!--Name-->| アロナガーダ<br>Alongahda | <!--Name-->| アロナガーダ<br>Alongahda | ||
| Line 434: | Line 433: | ||
<!--Notes-->| This enemy is a Rare Version of Wolgahda, and counts as one for enemy extermination orders.<br><br>Also drops items from the Wolgahda drop list. | <!--Notes-->| This enemy is a Rare Version of Wolgahda, and counts as one for enemy extermination orders.<br><br>Also drops items from the Wolgahda drop list. | ||
|- | |- | ||
| − | + | ||
<!--Image-->| [[File:Zeshrayda.png]] | <!--Image-->| [[File:Zeshrayda.png]] | ||
<!--Name-->| ゼッシュレイダ<br>Zeshrayda | <!--Name-->| ゼッシュレイダ<br>Zeshrayda | ||
| Line 444: | Line 443: | ||
<!--Notes-->| Has two cores - one on its head, one on its chest.<br>The chest core is only vulnerable when it's knocked down.<br><br>Can be knocked down by either breaking a leg and dealing additional damage, or waiting for it to pop its head out after it retreats into its shell. | <!--Notes-->| Has two cores - one on its head, one on its chest.<br>The chest core is only vulnerable when it's knocked down.<br><br>Can be knocked down by either breaking a leg and dealing additional damage, or waiting for it to pop its head out after it retreats into its shell. | ||
|- | |- | ||
| − | + | ||
<!--Image-->| [[File:Rigshrayda.png]] | <!--Image-->| [[File:Rigshrayda.png]] | ||
<!--Name-->| リグシュレイダ<br>Rigshrayda | <!--Name-->| リグシュレイダ<br>Rigshrayda | ||
| Line 455: | Line 454: | ||
|- | |- | ||
|} | |} | ||
| − | + | ||
==Winged Darkers== | ==Winged Darkers== | ||
{|class="wikitable sortable" style="text-align:left;" | {|class="wikitable sortable" style="text-align:left;" | ||
| Line 467: | Line 466: | ||
! style="width: 170px;" | Notes | ! style="width: 170px;" | Notes | ||
|- | |- | ||
| − | + | ||
<!--Image-->| [[File:Strahda.png]] | <!--Image-->| [[File:Strahda.png]] | ||
<!--Name-->| シュトゥラーダ<br>Strahda | <!--Name-->| シュトゥラーダ<br>Strahda | ||
| Line 477: | Line 476: | ||
<!--Notes-->| | <!--Notes-->| | ||
|- | |- | ||
| − | + | ||
<!--Image-->| [[File:Tyraluda.png]] | <!--Image-->| [[File:Tyraluda.png]] | ||
<!--Name-->| ティラルーダ<br>Tyraluda | <!--Name-->| ティラルーダ<br>Tyraluda | ||
| Line 487: | Line 486: | ||
<!--Notes-->| | <!--Notes-->| | ||
|- | |- | ||
| − | + | ||
<!--Image-->| [[File:BalStrahda.png]] | <!--Image-->| [[File:BalStrahda.png]] | ||
<!--Name-->| バル・シュトゥラーダ<br>Bal Strahda | <!--Name-->| バル・シュトゥラーダ<br>Bal Strahda | ||
| Line 497: | Line 496: | ||
<!--Notes-->| This enemy is a rare version of Strahda and counts as one when completing enemy extermination orders.<br><br>Also drops items from the Strahda drop list. | <!--Notes-->| This enemy is a rare version of Strahda and counts as one when completing enemy extermination orders.<br><br>Also drops items from the Strahda drop list. | ||
|- | |- | ||
| − | + | ||
<!--Image-->| [[File:Doluahda.png]] | <!--Image-->| [[File:Doluahda.png]] | ||
<!--Name-->| ドリュアーダ<br>Doluahda | <!--Name-->| ドリュアーダ<br>Doluahda | ||
| Line 507: | Line 506: | ||
<!--Notes-->| Capable of boosting the attack power of nearby darkers. Be careful of the ring as it returns like a boomerang. | <!--Notes-->| Capable of boosting the attack power of nearby darkers. Be careful of the ring as it returns like a boomerang. | ||
|- | |- | ||
| − | + | ||
<!--Image-->| [[File:Doublune.png]] | <!--Image-->| [[File:Doublune.png]] | ||
<!--Name-->| ダブリューネ<br>Doublune | <!--Name-->| ダブリューネ<br>Doublune | ||
| Line 530: | Line 529: | ||
<!--Notes-->| This enemy is a rare version of Doublune and counts as one when completing enemy extermination orders.<br><br>Also drops items from the Doublune drop list. | <!--Notes-->| This enemy is a rare version of Doublune and counts as one when completing enemy extermination orders.<br><br>Also drops items from the Doublune drop list. | ||
|- | |- | ||
| − | + | ||
<!--Image-->| [[File:Doublunda.png]] | <!--Image-->| [[File:Doublunda.png]] | ||
<!--Name-->| ダブリュンダ<br>Doublunda | <!--Name-->| ダブリュンダ<br>Doublunda | ||
| Line 540: | Line 539: | ||
<!--Notes-->| | <!--Notes-->| | ||
|- | |- | ||
| − | + | ||
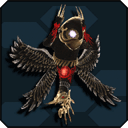
<!--Image-->| [[File:Blundarl.png]] | <!--Image-->| [[File:Blundarl.png]] | ||
<!--Name-->| ブリュンダール<br>Blundarl | <!--Name-->| ブリュンダール<br>Blundarl | ||
| Line 550: | Line 549: | ||
<!--Notes-->| You can launch them into the air to make them fall to the ground and immobilize them. Once on the ground, it will use a special attack to get up move quick before it does. | <!--Notes-->| You can launch them into the air to make them fall to the ground and immobilize them. Once on the ground, it will use a special attack to get up move quick before it does. | ||
|- | |- | ||
| − | + | ||
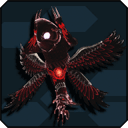
<!--Image-->| [[File:BalBlundarl.png]] | <!--Image-->| [[File:BalBlundarl.png]] | ||
<!--Name-->| バル・ブリュンダール<br>Bal Blundarl | <!--Name-->| バル・ブリュンダール<br>Bal Blundarl | ||
| Line 560: | Line 559: | ||
<!--Notes-->| This enemy is a rare version of Bal Blundarl and counts as one when completing enemy extermination orders.<br><br>Also drops items from the Bal Blundarl drop list. | <!--Notes-->| This enemy is a rare version of Bal Blundarl and counts as one when completing enemy extermination orders.<br><br>Also drops items from the Bal Blundarl drop list. | ||
|- | |- | ||
| − | + | ||
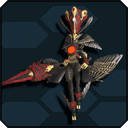
<!--Image-->| [[File:SoldaKapita.png]] | <!--Image-->| [[File:SoldaKapita.png]] | ||
<!--Name-->| ソルダ・カピタ<br>Solda Kapita | <!--Name-->| ソルダ・カピタ<br>Solda Kapita | ||
| Line 570: | Line 569: | ||
<!--Notes-->| Wields a Partizan and uses dark Photon Arts similar to Assault Buster. Accompanied by a Gul Solda and a Deue Solda. | <!--Notes-->| Wields a Partizan and uses dark Photon Arts similar to Assault Buster. Accompanied by a Gul Solda and a Deue Solda. | ||
|- | |- | ||
| − | + | ||
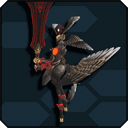
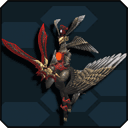
<!--Image-->| [[File:GulSolda.png]] | <!--Image-->| [[File:GulSolda.png]] | ||
<!--Name-->| グル・ソルダ<br>Gul Solda | <!--Name-->| グル・ソルダ<br>Gul Solda | ||
| Line 580: | Line 579: | ||
<!--Notes-->| Wields a Sword and uses dark Photon Arts similar to Twister Fall. | <!--Notes-->| Wields a Sword and uses dark Photon Arts similar to Twister Fall. | ||
|- | |- | ||
| − | + | ||
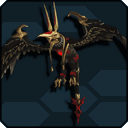
<!--Image-->| [[File:DeueSolda.png]] | <!--Image-->| [[File:DeueSolda.png]] | ||
<!--Name-->| ドゥエ・ソルダ<br>Deue Solda | <!--Name-->| ドゥエ・ソルダ<br>Deue Solda | ||
| Line 590: | Line 589: | ||
<!--Notes-->| Wields Twin Daggers and uses dark Photon Arts similar to Raging Waltz. | <!--Notes-->| Wields Twin Daggers and uses dark Photon Arts similar to Raging Waltz. | ||
|- | |- | ||
| − | + | ||
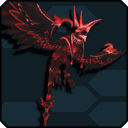
<!--Image-->| [[File:LanzVareda.png]] | <!--Image-->| [[File:LanzVareda.png]] | ||
<!--Name-->| ランズ・ヴァレーダ<br>Lanz Vareda | <!--Name-->| ランズ・ヴァレーダ<br>Lanz Vareda | ||
| Line 600: | Line 599: | ||
<!--Notes-->| | <!--Notes-->| | ||
|- | |- | ||
| − | + | ||
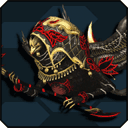
<!--Image-->| [[File:VadaLanzune.png]] | <!--Image-->| [[File:VadaLanzune.png]] | ||
<!--Name-->| ヴァダ・ランズーネ<br>Vada Lanzune | <!--Name-->| ヴァダ・ランズーネ<br>Vada Lanzune | ||
| Line 610: | Line 609: | ||
<!--Notes-->| This enemy is a rare version of Lanz Vareda and counts as one when completing enemy extermination orders.<br><br>Also drops items from the Lanz Vareda drop list. | <!--Notes-->| This enemy is a rare version of Lanz Vareda and counts as one when completing enemy extermination orders.<br><br>Also drops items from the Lanz Vareda drop list. | ||
|- | |- | ||
| − | + | ||
<!--Image-->| [[File:LudaSorcerer.png]] | <!--Image-->| [[File:LudaSorcerer.png]] | ||
<!--Name-->| リューダソーサラー<br>Luda Sorcerer | <!--Name-->| リューダソーサラー<br>Luda Sorcerer | ||
| Line 620: | Line 619: | ||
<!--Notes-->| Break the tail to prevent use of its barrier attack. Break the wings to temporarily knock them to the ground. Break both wings to permanently prevent teleporting. | <!--Notes-->| Break the tail to prevent use of its barrier attack. Break the wings to temporarily knock them to the ground. Break both wings to permanently prevent teleporting. | ||
|- | |- | ||
| − | + | ||
<!--Image-->| [[File:DecolMalluda.png]] | <!--Image-->| [[File:DecolMalluda.png]] | ||
<!--Name-->| デコル・マリューダ<br>Decol Malluda | <!--Name-->| デコル・マリューダ<br>Decol Malluda | ||
| Line 630: | Line 629: | ||
<!--Notes-->| Destroy the segmented body parts to make it collapse and fall down. Vulnerable to Mirage status effect which will temporarily immobilize him. | <!--Notes-->| Destroy the segmented body parts to make it collapse and fall down. Vulnerable to Mirage status effect which will temporarily immobilize him. | ||
|- | |- | ||
| − | + | ||
<!--Image-->| [[File:NoveMaillidarl.png]] | <!--Image-->| [[File:NoveMaillidarl.png]] | ||
<!--Name-->| ノーヴ・マリダール<br>Nove Maillidarl | <!--Name-->| ノーヴ・マリダール<br>Nove Maillidarl | ||
| Line 640: | Line 639: | ||
<!--Notes-->| This enemy is a rare version of Decol Malluda and counts as one when completing enemy extermination orders.<br><br>Also drops items from the Decol Malluda drop list. | <!--Notes-->| This enemy is a rare version of Decol Malluda and counts as one when completing enemy extermination orders.<br><br>Also drops items from the Decol Malluda drop list. | ||
|- | |- | ||
| − | + | ||
<!--Image-->| [[File:BluRingahda.png]] | <!--Image-->| [[File:BluRingahda.png]] | ||
<!--Name-->| ブリュー・リンガーダ<br>Blu Ringahda | <!--Name-->| ブリュー・リンガーダ<br>Blu Ringahda | ||
| Line 650: | Line 649: | ||
<!--Notes-->| Break both rings to temporarily knock him down and expose the core. The rings respawn after some time and the core will be hidden again. | <!--Notes-->| Break both rings to temporarily knock him down and expose the core. The rings respawn after some time and the core will be hidden again. | ||
|- | |- | ||
| − | + | ||
<!--Image-->| [[File:NoveRingadarl.png]] | <!--Image-->| [[File:NoveRingadarl.png]] | ||
<!--Name-->| ノーヴ・リンガダール<br>Nove Ringadarl | <!--Name-->| ノーヴ・リンガダール<br>Nove Ringadarl | ||
| Line 661: | Line 660: | ||
|- | |- | ||
|} | |} | ||
| − | + | ||
==Toy Darkers== | ==Toy Darkers== | ||
{|class="wikitable sortable" style="text-align:left;" | {|class="wikitable sortable" style="text-align:left;" | ||
| Line 673: | Line 672: | ||
! style="width: 170px;" | Notes | ! style="width: 170px;" | Notes | ||
|- | |- | ||
| − | + | ||
<!--Image-->| [[File:PittaWadda.png]] | <!--Image-->| [[File:PittaWadda.png]] | ||
<!--Name-->| ピッタ・ワッダ<br>Pitta Wadda | <!--Name-->| ピッタ・ワッダ<br>Pitta Wadda | ||
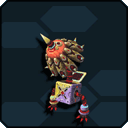
| Line 683: | Line 682: | ||
<!--Notes-->| | <!--Notes-->| | ||
|- | |- | ||
| − | + | ||
<!--Image-->| [[File:ParataPicoda.png]] | <!--Image-->| [[File:ParataPicoda.png]] | ||
<!--Name-->| パラタ・ピコーダ<br>Parata Picoda | <!--Name-->| パラタ・ピコーダ<br>Parata Picoda | ||
| Line 693: | Line 692: | ||
<!--Notes-->| | <!--Notes-->| | ||
|- | |- | ||
| − | + | ||
<!--Image-->| [[File:BontaBakuta.png]] | <!--Image-->| [[File:BontaBakuta.png]] | ||
<!--Name-->| ボンタ・バクタ<br>Bonta Bakuta | <!--Name-->| ボンタ・バクタ<br>Bonta Bakuta | ||
| Line 703: | Line 702: | ||
<!--Notes-->| | <!--Notes-->| | ||
|- | |- | ||
| − | + | ||
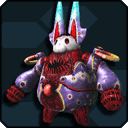
<!--Image-->| [[File:BontaBearadda.png]] | <!--Image-->| [[File:BontaBearadda.png]] | ||
<!--Name-->| ボンタ・ベアッダ<br>Bonta Bearadda | <!--Name-->| ボンタ・ベアッダ<br>Bonta Bearadda | ||
| Line 713: | Line 712: | ||
<!--Notes-->| | <!--Notes-->| | ||
|- | |- | ||
| − | + | ||
<!--Image-->| [[File:BikudaRabitta.png]] | <!--Image-->| [[File:BikudaRabitta.png]] | ||
<!--Name-->| ビクダ・ラビッタ<br>Bikuda Rabitta | <!--Name-->| ビクダ・ラビッタ<br>Bikuda Rabitta | ||
| Line 724: | Line 723: | ||
|- | |- | ||
| − | + | ||
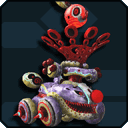
<!--Image-->| [[File:MardaTocatta.png]] | <!--Image-->| [[File:MardaTocatta.png]] | ||
<!--Name-->| マーダ・トカッタ<br>Marda Tocatta | <!--Name-->| マーダ・トカッタ<br>Marda Tocatta | ||
| Line 734: | Line 733: | ||
<!--Notes-->| | <!--Notes-->| | ||
|- | |- | ||
| − | + | ||
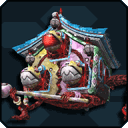
<!--Image-->| [[File:OrotaBiketta.png]] | <!--Image-->| [[File:OrotaBiketta.png]] | ||
<!--Name-->| オロタ・ビケッタ<br>Orota Biketta | <!--Name-->| オロタ・ビケッタ<br>Orota Biketta | ||
| Line 744: | Line 743: | ||
<!--Notes-->| | <!--Notes-->| | ||
|- | |- | ||
| − | + | ||
<!--Image-->| [[File:RotaBiroketta.png]] | <!--Image-->| [[File:RotaBiroketta.png]] | ||
<!--Name-->| ロタ・ビロケッタ<br>Rota Biroketta | <!--Name-->| ロタ・ビロケッタ<br>Rota Biroketta | ||
| Line 754: | Line 753: | ||
<!--Notes-->| This enemy is a rare version of Orota Biketta and counts as one when completing enemy extermination orders.<br><br>Also drops items from the Orota Biketta drop list | <!--Notes-->| This enemy is a rare version of Orota Biketta and counts as one when completing enemy extermination orders.<br><br>Also drops items from the Orota Biketta drop list | ||
|- | |- | ||
| − | + | ||
<!--Image-->| [[File:CodottaIdetta.png]] | <!--Image-->| [[File:CodottaIdetta.png]] | ||
<!--Name-->| コドッタ・イーデッタ<br>Codotta Idetta | <!--Name-->| コドッタ・イーデッタ<br>Codotta Idetta | ||
| Line 764: | Line 763: | ||
<!--Notes-->| | <!--Notes-->| | ||
|- | |- | ||
| − | + | ||
<!--Image-->| [[File:BarettaIdetta.png]] | <!--Image-->| [[File:BarettaIdetta.png]] | ||
<!--Name-->| バレッタ・イーデッタ<br>Baretta Idetta | <!--Name-->| バレッタ・イーデッタ<br>Baretta Idetta | ||
| Line 787: | Line 786: | ||
! style="width: 170px;" | Notes | ! style="width: 170px;" | Notes | ||
|- | |- | ||
| − | |||
<!--Image-->| [[File:AISExoda.PNG]] | <!--Image-->| [[File:AISExoda.PNG]] | ||
<!--Name-->| A.I.Sエクソーダ<br>A.I.S. Exoda | <!--Name-->| A.I.Sエクソーダ<br>A.I.S. Exoda | ||
| Line 810: | Line 808: | ||
! style="width: 170px;" | Notes | ! style="width: 170px;" | Notes | ||
|- | |- | ||
| − | + | ||
<!--Image-->| [[File:NoPic.png]] | <!--Image-->| [[File:NoPic.png]] | ||
<!--Name-->| 【若人】複製体<br>[Apprentice] Doppelganger | <!--Name-->| 【若人】複製体<br>[Apprentice] Doppelganger | ||
| Line 820: | Line 818: | ||
<!--Notes-->| At low HP, enters a rage mode and summons Predicahdas. | <!--Notes-->| At low HP, enters a rage mode and summons Predicahdas. | ||
|- | |- | ||
| − | + | ||
<!--Image-->| [[File:DarkFalzApprenticeGia.PNG]] | <!--Image-->| [[File:DarkFalzApprenticeGia.PNG]] | ||
<!--Name-->| DFアプレンティス・ジア<br>DF Apprentice Zea | <!--Name-->| DFアプレンティス・ジア<br>DF Apprentice Zea | ||
| Line 840: | Line 838: | ||
<!--Notes-->| | <!--Notes-->| | ||
|- | |- | ||
| − | |||
<!--Image-->| [[File:FalzHunar.png]] | <!--Image-->| [[File:FalzHunar.png]] | ||
<!--Name-->| ファルス・ヒューナル<br>Falz Hunar | <!--Name-->| ファルス・ヒューナル<br>Falz Hunar | ||
| Line 850: | Line 847: | ||
<!--Notes-->| Breaking Elder Pain lowers the damage of Hunar's sword-based attacks, and gives it a drop chance.<br>The core is right on Hunar's chest, and is easy to hit.<br><br>At low HP, all of his attacks get an HP Debuff effect. | <!--Notes-->| Breaking Elder Pain lowers the damage of Hunar's sword-based attacks, and gives it a drop chance.<br>The core is right on Hunar's chest, and is easy to hit.<br><br>At low HP, all of his attacks get an HP Debuff effect. | ||
|- | |- | ||
| − | + | ||
<!--Image-->| [[File:FalzArm.png]] | <!--Image-->| [[File:FalzArm.png]] | ||
<!--Name-->| ファルス・アーム<br>Falz Arm | <!--Name-->| ファルス・アーム<br>Falz Arm | ||
| Line 860: | Line 857: | ||
<!--Notes-->| Immobilized by Shock.<br>Breaking the fingers makes them into weakpoints. | <!--Notes-->| Immobilized by Shock.<br>Breaking the fingers makes them into weakpoints. | ||
|- | |- | ||
| − | + | ||
<!--Image-->| [[File:DarkFalzElder.png]] | <!--Image-->| [[File:DarkFalzElder.png]] | ||
<!--Name-->| ダークファルス・エルダー<br>Dark Falz Elder | <!--Name-->| ダークファルス・エルダー<br>Dark Falz Elder | ||
| Line 880: | Line 877: | ||
<!--Notes-->| | <!--Notes-->| | ||
|- | |- | ||
| − | + | ||
<!--Image-->| [[File:FalzAngel.png]] | <!--Image-->| [[File:FalzAngel.png]] | ||
<!--Name-->| ファルス・ヒューナル<br>Falz Angel | <!--Name-->| ファルス・ヒューナル<br>Falz Angel | ||
| Line 890: | Line 887: | ||
<!--Notes-->| Break the wings for a brief stun.<br>Don't worry about hitting the core, the hitbox on it is absurdly small.<br><br>At low HP, he'll draw you in, drain all of your PP, then make is attacks more dangerous. | <!--Notes-->| Break the wings for a brief stun.<br>Don't worry about hitting the core, the hitbox on it is absurdly small.<br><br>At low HP, he'll draw you in, drain all of your PP, then make is attacks more dangerous. | ||
|- | |- | ||
| − | + | ||
<!--Image-->| [[File:AposDorios.png]] | <!--Image-->| [[File:AposDorios.png]] | ||
<!--Name-->| アポス・ドリオス<br>Apos Dorios | <!--Name-->| アポス・ドリオス<br>Apos Dorios | ||
| Line 900: | Line 897: | ||
<!--Notes-->| Stunned by Panic.<br>Picks from either Fire, Ice, or Lightning on spawn - this determines its attack pattern.<br><br>At low HP, creates four pillars. If these aren't broken in time, the party will wipe. if they are, Apos Dorios lies prone, leaving its Abdomen free to be broken. | <!--Notes-->| Stunned by Panic.<br>Picks from either Fire, Ice, or Lightning on spawn - this determines its attack pattern.<br><br>At low HP, creates four pillars. If these aren't broken in time, the party will wipe. if they are, Apos Dorios lies prone, leaving its Abdomen free to be broken. | ||
|- | |- | ||
| − | + | ||
<!--Image-->| [[File:ApostleDritzer.png]] | <!--Image-->| [[File:ApostleDritzer.png]] | ||
<!--Name-->| アポストル・トリッツァー<br>Apostle Dritzer | <!--Name-->| アポストル・トリッツァー<br>Apostle Dritzer | ||
| Line 910: | Line 907: | ||
<!--Notes-->| This enemy is a rare version of Apos Dorios, and counts as one for enemy extermination orders.<br><br>Also drops items from the Apos Dorios drop list. | <!--Notes-->| This enemy is a rare version of Apos Dorios, and counts as one for enemy extermination orders.<br><br>Also drops items from the Apos Dorios drop list. | ||
|- | |- | ||
| − | + | ||
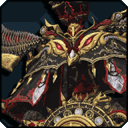
<!--Image-->| [[File:DarkFalzLoserFake.png]] | <!--Image-->| [[File:DarkFalzLoserFake.png]] | ||
<!--Name-->| ダークファルス・ルーサー<br>Dark Falz Loser (Fake) | <!--Name-->| ダークファルス・ルーサー<br>Dark Falz Loser (Fake) | ||
| Line 920: | Line 917: | ||
<!--Notes-->| This version of Loser only spawns if the ship fails to kill enough Apos Dorios to reach 100% during the EQ period.<br>Stunned by Mirage.<br><br>On SH and below, inflict Mirage and break the clock.<br>On XH, break the Bracers and Shoulders first, so you can actually hit the weakpoint.<br><br>Breaking the beak interrupts the current attack pattern, and exposes the Chin Core.<br><br>At low HP, and again at near death, will create four giant knives and stop time.<br>Move to break free of the time stop, or use invincibility time to avoid it outright.<br>If a knife hits you, you will die. If no knives are destroyed, the party will wipe. | <!--Notes-->| This version of Loser only spawns if the ship fails to kill enough Apos Dorios to reach 100% during the EQ period.<br>Stunned by Mirage.<br><br>On SH and below, inflict Mirage and break the clock.<br>On XH, break the Bracers and Shoulders first, so you can actually hit the weakpoint.<br><br>Breaking the beak interrupts the current attack pattern, and exposes the Chin Core.<br><br>At low HP, and again at near death, will create four giant knives and stop time.<br>Move to break free of the time stop, or use invincibility time to avoid it outright.<br>If a knife hits you, you will die. If no knives are destroyed, the party will wipe. | ||
|- | |- | ||
| − | + | ||
<!--Image-->| [[File:DarkFalzLoser.png]] | <!--Image-->| [[File:DarkFalzLoser.png]] | ||
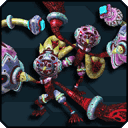
<!--Name-->| ダークファルス・ルーサー<br>Dark Falz Loser | <!--Name-->| ダークファルス・ルーサー<br>Dark Falz Loser | ||
| Line 930: | Line 927: | ||
<!--Notes-->| This version of Loser spawns if you manage to kill enough Apos Dorios to reach 100% during the EQ period.<br><br>Strategy is the exact same as the Fake Dark Falz Loser.<br><br>Also drops items from the Dark Falz Loser (Fake) drop list. | <!--Notes-->| This version of Loser spawns if you manage to kill enough Apos Dorios to reach 100% during the EQ period.<br><br>Strategy is the exact same as the Fake Dark Falz Loser.<br><br>Also drops items from the Dark Falz Loser (Fake) drop list. | ||
|- | |- | ||
| − | + | ||
<!--Image-->| [[File:FalzDouble.png]] | <!--Image-->| [[File:FalzDouble.png]] | ||
<!--Name-->| ファルス・ダラン<br>Falz Douran | <!--Name-->| ファルス・ダラン<br>Falz Douran | ||
| Line 960: | Line 957: | ||
<!--Notes-->| The fusion of Falz Douran, and Falz Dourill.<br>Break the arm to reveal the weakpoint.<br><br>Broken arms on Dourill and Douran remain broken on Dourumble. | <!--Notes-->| The fusion of Falz Douran, and Falz Dourill.<br>Break the arm to reveal the weakpoint.<br><br>Broken arms on Dourill and Douran remain broken on Dourumble. | ||
|- | |- | ||
| − | + | ||
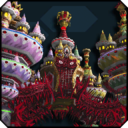
<!--Image-->| [[File:DarkFalzDouble.png|128px]] | <!--Image-->| [[File:DarkFalzDouble.png|128px]] | ||
<!--Name-->| ダークファルス・ダブル<br>Dark Falz Double | <!--Name-->| ダークファルス・ダブル<br>Dark Falz Double | ||
| Line 970: | Line 967: | ||
<!--Notes-->| The only place where this Dark Falz Double can be damaged is on the red cores of one of its many legs. Successfully breaking the cores will cause it to fall, revealing its central core. Many of it's attacks are scripted, but powerful. Failing to dodge may end with your death. | <!--Notes-->| The only place where this Dark Falz Double can be damaged is on the red cores of one of its many legs. Successfully breaking the cores will cause it to fall, revealing its central core. Many of it's attacks are scripted, but powerful. Failing to dodge may end with your death. | ||
|- | |- | ||
| − | + | ||
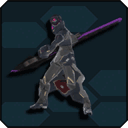
<!--Image-->| [[File:PersonaSword.png]] | <!--Image-->| [[File:PersonaSword.png]] | ||
<!--Name-->| [仮面]<br>Persona (Sword) | <!--Name-->| [仮面]<br>Persona (Sword) | ||
| Line 981: | Line 978: | ||
|- | |- | ||
| − | |||
<!--Image-->| [[File:PersonaDoubleSaber.png]] | <!--Image-->| [[File:PersonaDoubleSaber.png]] | ||
<!--Name-->| [仮面]<br>Persona (Double Saber) | <!--Name-->| [仮面]<br>Persona (Double Saber) | ||
Revision as of 22:34, 14 February 2016
Insect Darkers
| Image | Name | Area | Drop List | Weakness | Breakpoints | Weakpoints | Notes |
|---|---|---|---|---|---|---|---|
|
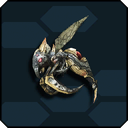
ダモス Damoth |
Mining Base | File:Fire.pngFile:Light.png | Red Core | Once a certain number of Damoths have gathered around a tower, they will begin to explode, greatly damaging the tower. | ||
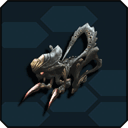
|
クラーダ Krahda |
Volcano Desert Tunnels City |
7Star |
File:Fire.pngFile:Light.png | Red Core | The core is on the underside, but it has so little HP that there's no point in trying to hit the core. Any PA will kill it. | |
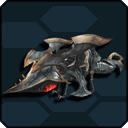
|
ヴィドルーダ Vidoluda |
Mining Base |
8Star |
File:Fire.pngFile:Light.png | Red Core | Cannot lock on to the core, so manual aim is required to hit it. | |
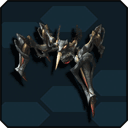
|
ダガン Dagan |
Forest Volcano Desert Tunnels City |
7Star |
File:Fire.pngFile:Light.png | Red Core | See Krahda. | |
|
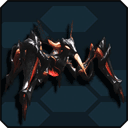
エル・ダガン El Dagan |
Forest Volcano Desert Tunnels City |
7Star |
File:Fire.png | Red Core | Spawns only after a Dagan Egg hits the ground. Destroying the Egg stops the spawn. If one does spawn, treat it like you would any other Dagan. | |
|
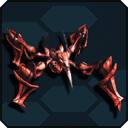
ダガン・ネロ Dagan Nero |
Forest Volcano Desert Tunnels City |
|
File:Fire.png | Red Core | This enemy is a rare version of El Dagan, and counts as one for enemy extermination orders. Also drops items from the El Dagan drop list. | |
|
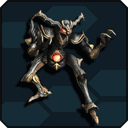
ディカーダ Dicahda |
Skyscape Ruins Sanctum |
8Star |
File:Fire.pngFile:Light.png | Red Core | Can teleport behind you, and hits hard. Relentless attacks keep them from teleporting. | |
|
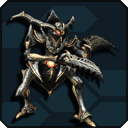
プレディカーダ Predicahda |
Skyscape Ruins Sanctum |
File:Fire.pngFile:Light.png | Arms | Red Core | Can teleport behind you, and hits hard. Their arms can be broken, usually with Just Guards - this lowers their damage. Relentless attacks keep them from teleporting. | |
|
プレディカーダ・ネロ Predicahda Nero |
Skyscape Ruins Sanctum |
File:Fire.png | Red Core | This enemy is a rare version of Predicahda, and counts as one for enemy extermination orders. Also drops items from the Predicada drop list. | ||
|
ブリアーダ Breeahda |
Forest Volcano Desert Tunnels City |
File:Fire.pngFile:Light.png | Red Core | Spawns Dagan Eggs, which hatch into El Dagans. Weakpoint is on its back. | ||
|
カルターゴ Kartargot |
Volcano Desert Tunnels City |
File:Fire.pngFile:Light.png | Red Core | Near completely impervious to all forms of damage, except when attacking the weakpoint on its back. | ||
|
エル・アーダ El Ahda |
Forest Volcano Desert Tunnels City |
File:Fire.pngFile:Light.png | Red Core | Launching them leaves their weakpoint wide open. Will attack immediately when they get back up, so it's best to kill them quickly. | ||
|
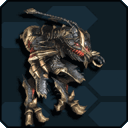
ゴルドラーダ Goldrahda |
Mining Base | File:Fire.pngFile:Light.png | Back | Red Core | Destroying this enemy without breaking its back first will allow it to self destruct. It is advised to destroy the back, then hit the core on the front to defeat it. They are also vulnerable to the freeze effect, which encases its legs in ice, halting movement. | |
|
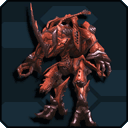
リンゼ・ドラーダ Rinze Drahda |
Mining Base | File:Fire.pngFile:Light.png | Red Core | This enemy is a rare version of Goldrahda, and counts as one for enemy extermination orders. Also drops items from the Goldrahda drop list. | ||
|
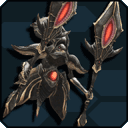
ソルザ・ブラーダ Sorza Brahda |
Mining Base | File:Fire.pngFile:Light.png | Red Core | Infects Defense Sockets, which then become Darker Particle Cannons. Also powers up other Darkers. Needless to say, these are priority number one when they appear. | ||
|
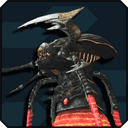
グワナーダ Gwanahda |
Desert City |
File:Fire.pngFile:Light.png | Red Core | Destroying all of the Gwanahada Bits will temporarily stun the Gwanahada, revealing the red core weakpoint on it's belly. | ||
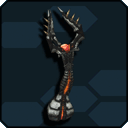
|
グワナーダ・ビット Gwanahda Bit |
Desert City |
File:Fire.pngFile:Light.png | Red Core | Only present when a Gwanahada is around, when there all 2 Gwanahadas, they will spawn 2 sets of Gwanahada Bits. Destroying all from one set will stun one of the Gwanahadas. | ||
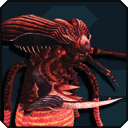
|
グワナーダ・ネロ Gwanahda Nero |
Desert City |
File:Fire.png | Red Core | This enemy is a rare version of Gwanahda, and counts as one for enemy extermination orders. Also drops items from the Gwanahda drop list. | ||
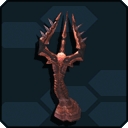
|
グワナーダ・ビット・ネロ Gwanahda Bit Nero |
Desert City |
File:Fire.png | Red Core | This enemy is a rare version of Gwanahda Bit, only spawned by Gwanahda Nero. Would also drop items from the Gwanahda Bit drop list, except neither Gwanahda Bit nor Gwanahda Bit Nero have drop lists. | ||
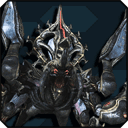
|
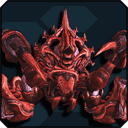
ダーク・ラグネ Dark Ragne |
Anywhere | File:Fire.pngFile:Light.png | Legs | Red Core | Breaking a leg will force it to fall over, exposing the weakpoint. Alternatively, certain classes can attack the weakpoint directly. | |
|
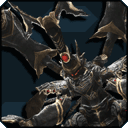
ダーク・アグラニ Dark Agrani |
Anywhere | File:Fire.png | Legs | Red Core | This enemy is a rare version of Dark Ragne, and counts as one for enemy extermination orders. Also drops items from the Dark Ragne drop list. | |
|
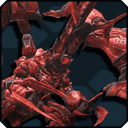
ダーク・ビブラス Dark Vibrace |
Mining Base | File:Fire.pngFile:Light.png | Horn Arm Claws Wings |
Arm Cores Abdomen Horn Core |
Breaking the wings exposes the abdomen to attack. Damaging the legs will knock it down for a few seconds. Immobilized for a few seconds by Panic. At low HP, will launch a bomb at a tower. If it isn't destroyed before detonation, it will annihilate the tower and anyone standing next to it. | |
|
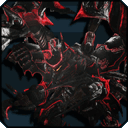
ダーク・リンゼス Dark Rinzece |
Mining Base | File:Fire.pngFile:Light.png | Horn Arm Claws Wings |
Arm Cores Abdomen Horn Core |
This enemy is a rare version of Dark Vibrace, and counts as one for enemy extermination orders. Also drops items from the Dark Vibrace drop list. | |
|
ダーク・ビブラス・ユガ Dark Vibrace Yuga |
Mining Base | File:Fire.pngFile:Light.png | Horn Arm Claws Wings |
Arm Cores Abdomen Horn Core |
Same weaknesses as Dark Vibrace. Launches two bombs, instead of one - one on spawn, and another at low HP. Treated as a Darker, not a DA-Aberration, for the purposes of Nemesis and Ultimate Buster. | |
|
ダーク・リンゼス・ユガ Dark Rinzece Yuga |
Mining Base | File:Fire.pngFile:Light.png | Horn Arm Claws Wings |
Arm Cores Abdomen Horn Core |
This enemy is a rare version of Dark Vibrace Yuga, and counts as one for the purposes of enemy extermination orders. Also drops items from the Dark Vibrace Yuga drop list. |
Aquatic Darkers
| Image | Name | Area | Drop List | Weakness | Breakpoints | Weakpoints | Notes |
|---|---|---|---|---|---|---|---|
|
ミクダ Micda |
Tundra Skyscape Ruins |
Red Core | This enemy is almost immune to damage unless the weak point is hit. | |||
|
オル・ミクダ Ol Micda |
Skyscape Ruins |
Red Core | Same Strategy as Micda | |||
|
ミ・ミクダ Mi Micda |
Tundra Skyscape Ruins |
Red Core | This enemy is a rare version of Micda & Ol Micda and counts as one when completing enemy extermination orders. Also drops items from the Micda and Ol Micda drop lists. | |||
|
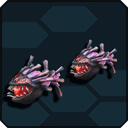
ダガッチャ Dagacha |
Skyscape Ruins |
Red Core | Attack the core when it opens its mouth. | |||
|
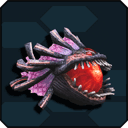
ダーガッシュ Dahgash |
Skyscape Ruins |
Red Core | Attack the core when it opens its mouth. Leads Dagachas. Killing it stuns all nearby Dagachas. | |||

|
ダーガッシュ・ネロ Dahgash Nero |
Skyscape Ruins |
Red Core | This enemy is a rare version of Dahgash, and counts as one when completing enemy extermination orders. Also drops items from the Dahgash drop list. | |||
|
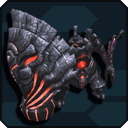
ガウォンダ Ga Wonda |
Tundra Skyscape Ruins |
Red Core | The shield is impervious to all damage. Circle around behind it to access the Weakpoint. | |||
|
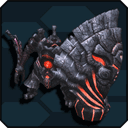
グウォンダ Gu Wonda |
Skyscape Ruins |
Red Core | The shield is impervious to all damage. Circle around behind it to access the Weakpoint. | |||
|
クラバーダ Krabahda |
Ruins | Red Core | When low on HP, will cover its weakpoint to reduce all damage taken. | |||
|
キュクロナーダ Kuklonahda |
Ruins | Eye Crotch |
Eye Red Core |
Core only becomes accessible after Crotch Guard is broken. When its Eye breaks, it starts flailing its arm wildly - keep your distance until it stops. | ||
|
サイクロネーダ Cyclonehda |
Ruins | Eye Crotch |
Eye Red Core |
Core only becomes accessible after Crotch Guard is broken. When its Eye breaks, it starts flailing its mace wildly - which, unlike Kuklonahda's arm, actually has range. Do not break the eye. | ||
|
ウォルガーダ Wolgahda |
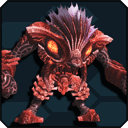
Ruins | Red Core | The weakpoints are located on the shoulders. Since only the belly and head can be locked on to, you'll have to aim manually to hit the weakpoints. At low HP, its attacks intensify, last longer, and it speeds up overall. | |||
|
アロナガーダ Alongahda |
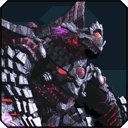
Ruins | Red Core | This enemy is a Rare Version of Wolgahda, and counts as one for enemy extermination orders. Also drops items from the Wolgahda drop list. | |||
|
ゼッシュレイダ Zeshrayda |
Ruins | Turrets Blades Legs |
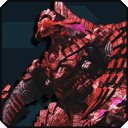
Red Cores | Has two cores - one on its head, one on its chest. The chest core is only vulnerable when it's knocked down. Can be knocked down by either breaking a leg and dealing additional damage, or waiting for it to pop its head out after it retreats into its shell. | ||
|
リグシュレイダ Rigshrayda |
Ruins | Turrets Blades Legs |
Red Cores | This enemy is a rare version of Zeshrayda, and counts as one when completing enemy extermination orders. Also drops items from the Zeshrayda drop list. |
Winged Darkers
| Image | Name | Area | Drop List | Weakness | Breakpoints | Weakpoints | Notes |
|---|---|---|---|---|---|---|---|

|
シュトゥラーダ Strahda |
Coast Quarry |
None | Red Core | |||

|
ティラルーダ Tyraluda |
Coast Quarry |
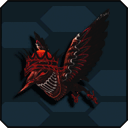
None | Red Core | |||
|
バル・シュトゥラーダ Bal Strahda |
Coast Quarry |
None | Red Core | This enemy is a rare version of Strahda and counts as one when completing enemy extermination orders. Also drops items from the Strahda drop list. | ||
|
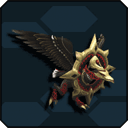
ドリュアーダ Doluahda |
Seabed | None | Red Core | Capable of boosting the attack power of nearby darkers. Be careful of the ring as it returns like a boomerang. | ||
|
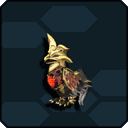
ダブリューネ Doublune |
Facility |
9Star |
None | Red Core | ||
|
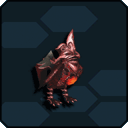
バル・ダブリューネ Bal Doublune |
Facility |
10Star |
None | Red Core | This enemy is a rare version of Doublune and counts as one when completing enemy extermination orders. Also drops items from the Doublune drop list. | |
|
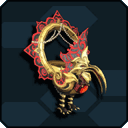
ダブリュンダ Doublunda |
Facility | None | Red Core | |||
|
ブリュンダール Blundarl |
Coast Quarry Facility |
None | Red Core | You can launch them into the air to make them fall to the ground and immobilize them. Once on the ground, it will use a special attack to get up move quick before it does. | ||
|
バル・ブリュンダール Bal Blundarl |
Coast Quarry Facility |
None | Red Core | This enemy is a rare version of Bal Blundarl and counts as one when completing enemy extermination orders. Also drops items from the Bal Blundarl drop list. | ||
|
ソルダ・カピタ Solda Kapita |
Seabed Facility |
None | Red Core | Wields a Partizan and uses dark Photon Arts similar to Assault Buster. Accompanied by a Gul Solda and a Deue Solda. | ||
|
グル・ソルダ Gul Solda |
Seabed Facility |
None | Red Core | Wields a Sword and uses dark Photon Arts similar to Twister Fall. | ||
|
ドゥエ・ソルダ Deue Solda |
Seabed Facility |
None | Red Core | Wields Twin Daggers and uses dark Photon Arts similar to Raging Waltz. | ||
|
ランズ・ヴァレーダ Lanz Vareda |
Facility | None | Red Core | |||
|
ヴァダ・ランズーネ Vada Lanzune |
Facility | None | Red Core | This enemy is a rare version of Lanz Vareda and counts as one when completing enemy extermination orders. Also drops items from the Lanz Vareda drop list. | ||
|
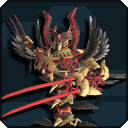
リューダソーサラー Luda Sorcerer |
Coast Quarry Facility |
Left Wing Right Wing Tail |
Red Core | Break the tail to prevent use of its barrier attack. Break the wings to temporarily knock them to the ground. Break both wings to permanently prevent teleporting. | ||
|
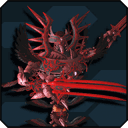
デコル・マリューダ Decol Malluda |
Coast Quarry Seabed Facility |
Left Claw Right Claw Upper Segment Mid Segment Lower Segment |
Red Core Head Broken Claws Broken Segments |
Destroy the segmented body parts to make it collapse and fall down. Vulnerable to Mirage status effect which will temporarily immobilize him. | ||
|
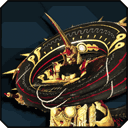
ノーヴ・マリダール Nove Maillidarl |
Coast Quarry Seabed Facility |
Left Claw Right Claw Upper Segment Mid Segment Lower Segment |
Red Core Head Broken Claws Broken Segments |
This enemy is a rare version of Decol Malluda and counts as one when completing enemy extermination orders. Also drops items from the Decol Malluda drop list. | ||
|
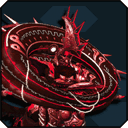
ブリュー・リンガーダ Blu Ringahda |
Coast Quarry Seabed Facility |
Left Wing Right Wing Left Spear Right Spear Rings |
Red Core | Break both rings to temporarily knock him down and expose the core. The rings respawn after some time and the core will be hidden again. | ||
|
ノーヴ・リンガダール Nove Ringadarl |
Coast Quarry Seabed Facility |
Left Wing Right Wing Left Spear Right Spear Rings |
Red Core | This enemy is a rare version of Blu Ringahda and counts as one when completing enemy extermination orders. Also drops items from the Blu Ringahda drop list. |
Toy Darkers
| Image | Name | Area | Drop List | Weakness | Breakpoints | Weakpoints | Notes |
|---|---|---|---|---|---|---|---|

|
ピッタ・ワッダ Pitta Wadda |
Kuron Shironia |
Red Core | ||||
|
パラタ・ピコーダ Parata Picoda |
Shironia | Red Core | ||||

|
ボンタ・バクタ Bonta Bakuta |
Kuron | Red Core | ||||

|
ボンタ・ベアッダ Bonta Bearadda |
Shironia | Red Core | ||||
|
ビクダ・ラビッタ Bikuda Rabitta |
Kuron | Red Core | ||||
|
マーダ・トカッタ Marda Tocatta |
Kuron | Red Core | ||||
|
オロタ・ビケッタ Orota Biketta |
Kuron | Red Core | ||||
|
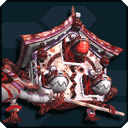
ロタ・ビロケッタ Rota Biroketta |
Kuron | Red Core | This enemy is a rare version of Orota Biketta and counts as one when completing enemy extermination orders. Also drops items from the Orota Biketta drop list | |||
|
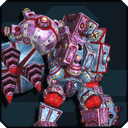
コドッタ・イーデッタ Codotta Idetta |
Kuron | Red Core | ||||
|
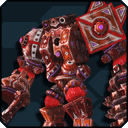
バレッタ・イーデッタ Baretta Idetta |
Kuron | Red Core | This enemy is a rare version of Codotta Idetta and counts as one when completing enemy extermination orders. Also drops items from the Codotta Idetta drop list. |
Darker Weapon
| Image | Name | Area | Drop List | Weakness | Breakpoints | Weakpoints | Notes |
|---|---|---|---|---|---|---|---|
|
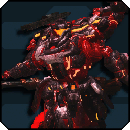
A.I.Sエクソーダ A.I.S. Exoda |
Mining Base Defense: Demise | File:Fire.pngFile:Light.png | Gun Feet x2 |
Red Core | The gun will only appear when A.I.S begins to charge its laser. Destroy the gun immediately or break both feet to prevent the laser from being shot. If possible, break the feet as this will cause it to kneel over, revealing its red core. Choosing to break the gun, while faster, will however let the AIS regain mobility and attacking capabilities. |
Profound Darkness
| Image | Name | Area | Drop List | Weakness | Breakpoints | Weakpoints | Notes |
|---|---|---|---|---|---|---|---|
| File:NoPic.png | 【若人】複製体 [Apprentice] Doppelganger |
Any AQ Solo Training: Heaven and Hell stage 7 |
File:Fire.pngFile:Light.png | At low HP, enters a rage mode and summons Predicahdas. | |||
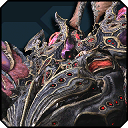
|
DFアプレンティス・ジア DF Apprentice Zea |
Mining Base Defense: Demise | File:Fire.pngFile:Light.png | Red Cores Tongue |
Turns the lower area of the map into acid on spawn. At low HP, extends a tongue that, after a few seconds, will fire a laser that destroys all towers. The only way to stop tis is to deal enough damage to the tongue to stun her. Stunned by Burn. | ||
| File:NoPic.png | 【巨躯】複製体 [Elder] Doppelganger |
Matterboard 3-5 Story Quest Solo Training: Heaven and Hell stage 7 |
File:Light.png | ||||
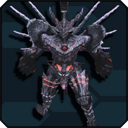
|
ファルス・ヒューナル Falz Hunar |
Anywhere | Elder Pain | Red Core | Breaking Elder Pain lowers the damage of Hunar's sword-based attacks, and gives it a drop chance. The core is right on Hunar's chest, and is easy to hit. At low HP, all of his attacks get an HP Debuff effect. | ||
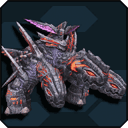
|
ファルス・アーム Falz Arm |
Anywhere | Fingers | Red Core Fingers(After Break) |
Immobilized by Shock. Breaking the fingers makes them into weakpoints. | ||
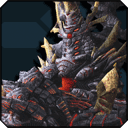
|
ダークファルス・エルダー Dark Falz Elder |
ARKS Ship Wreckage | Wrists | Forehead Core Chest Core Wrists |
Immobilized by Shock. After breaking the first four wrists, and at low HP, he'll back off and throw Ice Boulders. When he gets close for his large laser, there's a blind spot right in front of the forehead core. | ||
| File:NoPic.png | 【敗者】複製体 [Loser] Doppelganger |
Matterboard 3-3, 3-5 Story Quest Solo Training: Heaven and Hell stage 7 |
|||||
|
ファルス・ヒューナル Falz Angel |
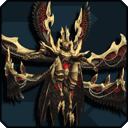
Anywhere | Wings | Red Core | Break the wings for a brief stun. Don't worry about hitting the core, the hitbox on it is absurdly small. At low HP, he'll draw you in, drain all of your PP, then make is attacks more dangerous. | ||
|
アポス・ドリオス Apos Dorios |
Mothership | Pauldrons Bracelets Abdomen Tail |
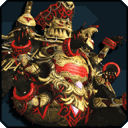
Red Core | Stunned by Panic. Picks from either Fire, Ice, or Lightning on spawn - this determines its attack pattern. At low HP, creates four pillars. If these aren't broken in time, the party will wipe. if they are, Apos Dorios lies prone, leaving its Abdomen free to be broken. | ||
|
アポストル・トリッツァー Apostle Dritzer |
Mothership | Pauldrons Bracelets Abdomen Tail |
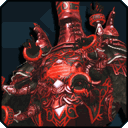
Red Core | This enemy is a rare version of Apos Dorios, and counts as one for enemy extermination orders. Also drops items from the Apos Dorios drop list. | ||
|
ダークファルス・ルーサー Dark Falz Loser (Fake) |
Mothership | Bracers Shoulders Clock Beak |
Clock(Broken) Chin Core |
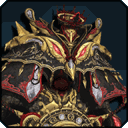
This version of Loser only spawns if the ship fails to kill enough Apos Dorios to reach 100% during the EQ period. Stunned by Mirage. On SH and below, inflict Mirage and break the clock. On XH, break the Bracers and Shoulders first, so you can actually hit the weakpoint. Breaking the beak interrupts the current attack pattern, and exposes the Chin Core. At low HP, and again at near death, will create four giant knives and stop time. Move to break free of the time stop, or use invincibility time to avoid it outright. If a knife hits you, you will die. If no knives are destroyed, the party will wipe. | ||
|
ダークファルス・ルーサー Dark Falz Loser |
Mothership | Bracers Shoulders Clock Beak |
Clock(Broken) Chin Core |
This version of Loser spawns if you manage to kill enough Apos Dorios to reach 100% during the EQ period. Strategy is the exact same as the Fake Dark Falz Loser. Also drops items from the Dark Falz Loser (Fake) drop list. | ||
|
ファルス・ダラン Falz Douran |
Anywhere | Arm | Broken Arm | Break the arm to reveal the weakpoint. At low HP, fuses with Falz Dourill. | ||

|
ファルス・ダリル Falz Dourill |
Anywhere | Arm | Broken Arm | Break the arm to reveal the weakpoint. At low HP, fuses with Falz Douran. | ||

|
ファルス・ダランブル Falz Dourumble |
Anywhere | Arm | Broken Arm | The fusion of Falz Douran, and Falz Dourill. Break the arm to reveal the weakpoint. Broken arms on Dourill and Douran remain broken on Dourumble. | ||
|
ダークファルス・ダブル Dark Falz Double |
Above the Planet Naberius | Red Core | Red Core | The only place where this Dark Falz Double can be damaged is on the red cores of one of its many legs. Successfully breaking the cores will cause it to fall, revealing its central core. Many of it's attacks are scripted, but powerful. Failing to dodge may end with your death. | ||
|
[仮面] Persona (Sword) |
Anywhere | File:Light.png | ||||

|
[仮面] Persona (Double Saber) |
Anywhere | File:Light.png | ||||
| File:NoPic.png | マトイ・ヴィエル Matoi Viel |
Matterboard 3-7 Story Solo Training: Heaven and Hell stage 9 |
File:Light.png |